In most apartments, balconies require additional insulation, on which the comfort in the whole apartment directly depends. With basic finishing in summer time very hot on the balcony winter period- cold. To prevent this from happening, you need to know how to insulate the balcony with your own hands. step by step photo and the video from this article will help you properly conduct insulation at minimal cost.
Where to start warming the balcony
The method of insulation and the type of materials directly depends on the location of the apartment. If the apartment is located on the top floor, the roof often overheats in summer, creating a strong the greenhouse effect, which contributes to overheating of the balcony.
If the balcony was made of low-quality slabs, they crack and let moisture through.
In any case, the balcony is insulated if it faces the north or south side. The south side provokes heat on the balcony, and the north side does not warm up in winter.

During thermal insulation, the balcony further improves the quality of sound and moisture protection.
Qualitatively insulated balcony makes it possible to use it at your discretion. There are practically no disadvantages of such thermal insulation, and the advantages are noticeable immediately.

Balcony floor insulation scheme
Before insulating the balcony from the inside, the surfaces are prepared with their own hands.

Photo of a balcony with foam insulation
Before warming the balcony must be glazed. The best option for glazing the balcony there is a double-glazed window with argon filling. At severe frosts, it is better to install three-chamber double-glazed windows.
Step-by-step instructions for warming a balcony
Loggia insulation is divided into several steps:
Step 1. After installing the windows, all the cracks are filled with sealant, foam for installation. If there are large potholes and gaps, they need to be repaired.
Step 2 Roofing material is used for waterproofing balcony surfaces, bituminous mastic, liquid formulations deep penetration.
Step 3. The insulation material is fixed, and then the vapor barrier.
Step 4. Do-it-yourself balcony decoration.
Step 5. The floor covering is installed.

How to insulate a loggia with penoplex
Penoplex insulation allows you to protect the balcony from cold and dampness. This material is mechanically resistant. The side part can be ribbed or smooth. The first option allows you to more effectively fix the plates together.

Photo of foam insulation
If the average annual temperature is low, material up to 7.5 centimeters thick is used. If in winter time the temperature does not fall below -25 degrees, a material 4 centimeters thick is required.
Penoplex fastening methods depend on further finishing. When finishing from drywall, lining, fastening is done on dowels-mushrooms. If the surface is plastered, then the foam is glued.

To carry out the insulation of the balcony with penoplex, follow these steps:
- Plates are fixed on the primed surface.
- Penoplex is fastened in a tongue-and-groove or butt-to-butt manner.
- On top of the plate are fixed with special dowels.
- The joints are sealed with adhesive tape.
- The joints are filled with mounting foam (composition without toluene).
- From above there is a vapor barrier, crate and surface finish.
- Insulation with foam plastic can be done after the installation of the crate.
- Insulation is placed between the bars.
An interesting article: how to insulate a cottage with your own hands
Do-it-yourself insulation of the balcony with polystyrene foam
Penoplex is durable, but if this indicator does not play an important role, then you can use standard foam to insulate a balcony or loggia.

Photo of foam insulation
Styrofoam for insulation is produced in the form of sheets with a thickness of 5 to 15 centimeters.
To insulate the balcony from the inside, sheets 10 centimeters thick are used.
How to insulate a balcony with a clapboard with your own hands
Clapboard insulation cannot be of high quality if the balcony does not have sufficient heating. If there is no heating, then a base insulation material is placed under the lining.

Photo lining on the balcony
To install the lining, a wooden crate is required, which is mounted horizontally. Styrofoam or foam plastic is fixed in between. A lining is installed on top of the insulation. It is fixed on the crate. Such insulation can be carried out on a durable, reliable balcony.
Mineral wool for balcony insulation
Thermal insulation of the balcony with mineral wool makes it easier to design. This material allows you to protect the surface from cold, heat and moisture. Poor installation worsens the properties of the insulation by almost half.

Photo of mineral wool
A crate is stuffed onto the surface covered with a waterproofing composition. The plates are fixed with special glue and dowels. In the corners, fixing is done with extreme care. The insulated surface is closed with a vapor barrier.

Balcony insulation scheme
Then the surface is ready for finishing. When installing any insulation material, compliance with certain rules guarantees high-quality insulation of the balcony. Before starting work, carefully study the features of the selected material and how to properly lay it. Remember that the heat in your apartment or country house directly depends on the insulation.
How to insulate a balcony with your own hands now you know and can choose suitable material for thermal insulation work. step by step photo – good helper during a DIY repair. If you learn how to insulate the loggia with high quality at home, then you will have a new profession that is in demand today.
We will send the material to you by e-mail
The process of warming the room itself is very important, since with the help of such repairs drafts and cold are removed, and the space of the connected room is also expanded. But it’s not enough just to put double-glazed windows and cover up cracks and holes mounting foam. It needs to be warmed up. To save money in your wallet, it is better to insulate the loggia with your own hands, step by step photo instruction presented in the article will help to get the job done.
Amazing balcony with ecological materials
Initially, you need to select building materials. It is important to remember that not only thermal performance, but also may depend on the selected components. If the building material is too thick, it will steal the usable area.
Note! Any material for heat preservation must be environmentally friendly, as well as comply with thermal and steam characteristics.
The room can be insulated with the following materials:
- Penofol . An excellent substitute for mineral wool. It has a multi-layer coating, which also has a reflective effect.
- polyurethane foam . Perfect for balconies. Very poorly ignited, made of eco-friendly materials. Installation is done by pouring.


- Styrofoam . A fairly economical choice of material and also very effective for a balcony.

- Isover . Issued in the form of sheets. Made from mineral wool, with glass fiber particles.

As a rule, expanded polystyrene is mounted on the walls and ceiling. It is good to use it, because its properties have a high coefficient of thermal conductivity, as well as a small thickness. It cuts great kitchen knife. An alternative option is foam. For cold winter 10 cm thick sheets are suitable, for mild weather it is better to use 5 cm.
Related article:
Calculator for calculating the necessary insulation of a loggia or balcony
The problem of lack of square meters is very relevant for residents of typical high-rise buildings. One way out of the situation is to insulate the balcony from the inside and turn it into a living room.
A warm balcony opens up ample opportunities for a more efficient layout of the interior space of the apartment. However, in order to turn your balcony into a full-fledged room, you should make whole line insulation work.
This step-by-step instruction do-it-yourself balcony insulation is designed to answer all the questions that arise in this case, minimize the cost of time, effort and financial resources, and warn you against meeting all possible "pitfalls".
Possibilities of using the insulated loggia
A warm loggia, being part of the interior space of the apartment, can be used in several ways. The possibility of using each of them depends on the features interior layout apartments and from the needs of the owners of the dwelling. Here are some of them:
- How independent room. Here you can place a study, a rest room, a home workshop, etc. In this case, the balcony entrance group is preserved, which now acts as a partition between the hall (kitchen) and the new room.
- Combination with the living room or hall. It makes it possible to significantly increase their size by adding additional space due to warm loggia. The connection of the two rooms is due to the dismantling of the glazing and the door entrance group. In some cases, the partition located under the windows is also dismantled.
- Combining with the kitchen or transferring this room to the loggia. This allows you to leave the functions of the only dining area behind the former kitchen, and place the stove and cooking tables on the loggia. For this, the balcony entrance group, located from the side of the kitchen, is also being dismantled.
How to legalize the association of the loggia with the interior
 Before redevelopment get everything necessary permissions
Walkthrough on the question of how to insulate a balcony with your own hands, it is necessary not only for the correct phased work, but also in order to avoid violations of building and administrative standards.
Often, when insulating a balcony room, the apartment owners aim to combine it with the rest of the rooms by dismantling the entrance group and the balcony wall. At the same time, it should be borne in mind that the rules for the operation of residential premises in apartment buildings It is strictly forbidden to make unauthorized changes to their layout.
Unauthorized demolition of partitions, and even more so of load-bearing walls (which are external walls overlooking the balcony) is fraught with a serious conflict with the managing organization.
 In order to avoid such problems, before insulating the loggia with your own hands, it is always recommended to start work by obtaining all the necessary permits. To do this, it is necessary to draw up a project plan for the upcoming work and submit it to the relevant supervisory authorities- Architectural Committee and Ministry of Emergency Situations.
After receiving their approval, the upcoming redevelopment should be agreed with specialists management company. Only after the “go-ahead” is received from all organizations, it will be possible to calmly get to work, without fear of any administrative and legal claims.
Stages of work on insulation
 Step-by-step instructions for warming the loggia with your own hands, first of all, provide for the entire complex necessary work Only in this case can one speak of effective insulation premises. Neglecting any of the stages of complex insulation can eventually nullify all the work done.
Phased warming of the loggia provides for the following work:
- balcony facade glazing;
- sealing joints of the structure;
- waterproofing device;
- installation of a heater;
- decorative interior decoration.
 Balcony glazing is one of the main works, without which it is impossible to create an internal thermal circuit in the room. In this regard, it is necessary to approach the glazing with all responsibility. Balcony glazing performs a number of important functions:
- thermal insulation;
- moisture insulation;
- soundproofing;
- providing access to sunlight inside the room.
 Modern version glazing - with aluminum or PVC frames
 When glazing, loggias can be used as a classic version of the design with wooden frames, as well as more modern windows made of aluminum or plastic profile with multi-chamber double-glazed windows.
To create and maintain inside comfortable temperature recommended to choose window structures with multi-chamber double-glazed windows. Depending on the climatic conditions region, the number of cameras can vary from two to six.
Window groups using double-glazed windows can have enough big weight, so you need to make sure that the loggia parapet can support their weight.
 Strengthen the balcony structure if you are not sure of its strength
 In case of the slightest doubt about the ability of the fence to withstand the load, it would be best to play it safe and further strengthen it. To do this, you can use the construction of metal corners or channels.
At the same time, one should not overdo it too much in the quantity and thickness of the metal - an excessive load on the balcony slab is not at all provided for by the construction project of the building.
 Leave your glazing to the professionals
 When choosing window groups, it is better to give preference to designs that have proven themselves in this market. The installation of windows should also be entrusted to professionals. The fact is that you are unlikely to succeed in installing a window group with high quality without experience. Moreover, in the case of self-installation, you may lose the warranty service of the manufacturer.
In order to avoid the accumulation of excessive dampness and condensation on the balcony, it is best to install plastic windows with built-in valves for air exchange.
Preliminary cleaning and puttying of surfaces
 Level the walls and remove all bubbles, roughness and peeling paint
 Instructions for warming the balcony pays special attention to the preliminary preparation of internal surfaces. If you are going to install heat-insulating material using any adhesives or on a cement (polymer) basis, you should thoroughly clean everything internal surfaces from the old finish.
In this case, special attention should be paid to flaking, bubbling or crumbling fragments of whitewash, paint or plaster.
Surfaces painted with glossy paint should also be cleaned with coarse sandpaper or a grinder to improve their adhesion (coupling) with the adhesive composition.
 All cracks and crevices at the joints of balcony structures must be carefully puttied. Large gaps, for example, between a wall (parapet, ceiling) and glazing, can be sealed with mounting foam.
If even the smallest cracks are left unsealed, it will inevitably penetrate into the interior space through them. cold air and dampness, which will lead to condensation and dampness.
 Balcony floor can be covered with rolled insulating material
 To do this, you can use any suitable material for this. On the modern market of finishing materials, there is a large selection of various mastics and sealants based on polymer and bitumen, as well as rolled waterproofing materials.
For maximum effectiveness, the mastic should be used according to the instructions for use.
 All joints of balcony structures should be treated with liquid moisture-repellent compounds. In order to prevent the formation of condensation and dampness, all internal surfaces of the loggia can be covered with mastic.
Rolled material (roofing material, isospan, etc.) covers the walls, floor and ceiling of the loggia. Sheets cut to the desired size are attached to the surfaces of the loggia using building glue, mastic, or pressed with a slatted frame.
For greater efficiency, the joints of the sheets should overlap and be glued with sealant or adhesive tape.
The choice of insulation
 Thermal insulation should reliably protect the balcony from the cold
 After the internal surfaces are puttied and waterproofed, you can proceed directly to the insulation of the balcony. The choice of material depends on many factors: on the place of its installation, the minimum winter temperatures in your area, cost, etc.
Thermal insulation should, first of all, qualitatively fulfill its main purpose - to protect the interior from the outside cold. In order to choose the right heat-insulating material, you should carefully familiarize yourself with its features of operation, pluses and minuses.
 Penoplex or extruded polystyrene foam is a modern heat-insulating material. Do-it-yourself insulation of a balcony with penoplex has a number of advantages. It has excellent performance characteristics - it retains heat well, is not afraid of dampness, has a low mass, but is quite dense.
 Penoplex is easily cut into sheets of the desired size with an ordinary knife and can be used to insulate any surface.
Insulation of the loggia floor with foam plastic does not require the installation of an additional frame. Due to its high density, it can support a lot of weight without deforming or breaking.
 Styrofoam insulation has the same advantages as the previous option - it is lightweight and has good heat-insulating properties. But unlike penoplex, it is less dense.
Therefore, it is possible to use it for warming the floors of the loggia only as a frame filler. It is not recommended to cover the floors with them directly under the finish coating: under the weight of people and furniture, it can crumble quite quickly and become unusable. For information on how to quickly glue foam, see this video:
 This insulation is made from various mineral substances (glass, stone, slag) by melting and foaming with compressed air in a centrifuge. As a result, fibers are obtained, from which insulation is pressed. It has a low density and is available in the form of rolls or tiles.
Mineral wool has good thermal insulation properties, is economical, but it also has a number of serious disadvantages.
When working with it, particles of stone or glass dust rise into the air and settle in the respiratory tract, on the skin, mucous membranes, causing itching and irritation. Another disadvantage of the material is hydrophobicity. She is afraid of dampness and, when wet, loses her thermal insulation properties. How to insulate a balcony, see this video:
Work with mineral wool should be strictly in protective suits, gloves and goggles.
foil materials
 Penofol
 Relatively recently, a new generation of heaters appeared on our market, the surface of which is covered with thin metallized foil. The most common among them is penofol - a foamed polymer, pasted over on one or two sides with foil.
Its main feature is its excellent thermal insulation qualities. With a thickness of only 3 - 5 mm, it is equivalent in this indicator mineral plate 100 mm thick. This is achieved thanks to the special structure of polyethylene foam, consisting of a large number closed pores with air bubbles.
The surface glued with foil tends to reflect back up to 95% of thermal radiation. This makes penofol and other foil materials extremely effective. To learn how to insulate a balcony with penofol, see this video:
During installation, the penofol should be laid with the foil side inside the room. Also, do not compress the material, because this significantly deteriorates its thermal insulation properties.
 Before proceeding with the insulation of the balcony from the inside with your own hands, a frame should be mounted on the walls, ceiling and floor. It can be made from wooden blocks or a metal profile.
We will need it for fastening decorative finishes- drywall, PVC or chipboard panels, etc. After installing the frame, we proceed to filling its cells with insulation.
 Insulation plates can be fixed with special glue
 Features of work on the installation of insulation directly depend on the type of material you have chosen. You can use either special adhesives or fasteners for its fastening.
Sufficiently dense materials are attached with adhesive compositions, for example, polystyrene foam or polystyrene. With the help of fasteners, less dense heaters - minplita, penofol. But with the help of dowels, foam plastic with foam plastic can also be attached.
It is best to use plastic mushroom dowels with wide caps with a diameter of 50 mm for installation. For installation in this way, we cut out sheets of insulation of the required size and insert them into the frame cells. In several places, using a perforator, we drill holes through the insulation in concrete slab or wall, into which we insert the “fungi” and fix it by hammering plastic nails into them (included). About the qualities of ecowool insulation, see this video:
Subsequent finishing
 Lining is one of the most environmentally friendly finishing materials.
After installing all sheets (plates) of insulation in the frame cells, all the gaps between them and the frame profile are carefully sealed with sealant, putty or mounting foam.
After that, you can proceed to sheathing the frame with finishing materials - sheets of plasterboard, chipboard, MDF, PVC panels, flooring, etc. On the floors on top of a dense insulation such as foam, you can make cement-sand screed or flooded floors, on top of which lay tiles.
As you can see, with the help of instructions for warming the balcony, it will not be difficult to do all the work with your own hands. To do this, it is necessary to strictly follow the recommendations of the manufacturer of materials and comply with the requirements of building codes in the production of work.
Most apartment owners use the balcony as a place to store rarely used things. If you want to get additional living space and turn it into a place for relaxation, a flower garden or an office, you can do it without involving specialists. We will describe in detail how to reliably insulate the balcony from the inside with your own hands.
What is the best thermal insulator to use?
Read also: How to insulate a private house with your own hands: roof, walls and foundation, description of thermal insulation materials offered on the market (Photo & Video) + Reviews

To finish the balcony, you can use both rolled and tiled materials that provide reliable thermal insulation:
- Styrofoam: an inexpensive tiled material with sufficiently high thermal insulation properties has two significant drawbacks; the first - a large thickness of the sheets, when using it, the already small area of \u200b\u200bthe balcony will be significantly reduced; the second disadvantage is high fire hazard; to ignite it, a lit cigarette accidentally thrown from the top floor is sufficient; therefore, for cladding a balcony, purchase class G2 material that does not support self-combustion
- penoplex(extruded polystyrene foam): in composition, this material is similar to polystyrene, but due to a special production method with equal thermal insulation properties, it has a smaller thickness, greater mechanical strength; however, the cost of penoplex is higher; since the material has a low water absorption coefficient, in order to avoid condensation, the balcony will need to be regularly ventilated; about how to insulate the balcony with penoplex from the inside, we will tell a little lower
- "Penofol": foamed polyethylene, protected on both sides with aluminum foil, which serves as both wind and moisture protection; a significant plus is the minimum thickness, for insulation it is enough to use a material several millimeters thick; Izolon, Penolon, Teplofol, Energofol have similar composition and properties; disadvantage - high price
- mineral wool(glass, slag or basalt wool): the undoubted advantage of all these materials is high heat-insulating properties; some experts believe that the increased moisture permeability of the material in the case of balcony insulation is only a plus - absorbing excess moisture well, the material will protect the room from condensation on windows and walls; however, over time, mold can form in mineral wool, so it must be reliably protected from moisture penetration from both sides with the help of hydro and vapor barrier
It is undesirable to use heat-insulating materials having a significant mass (for example, brick) for insulating balconies. After all, the bearing capacity of the balcony slab is limited. With excessive load, such a design simply may not withstand the additional weight.
The use of expanded clay for floor screed is also not recommended. Its main disadvantage is the ability to absorb moisture. As a result, its mass increases significantly.
Required Materials
Read also: Secrets of soundproofing walls in an apartment: we use modern materials and technologies (25+ Photos & Videos) + Reviews
The use of penoplex
To finish the balcony you will need the following materials:
- gas silicate blocks 80-100 mm wide for erecting a parapet
- glue based on cement for their laying
- slab or roll insulation
- wooden slats for the manufacture of lathing and installation of a rolled heat insulator; their thickness is selected so that it is equal to the width of the heat insulator
- self-tapping screws for mounting lathing with a diameter of 3.5-4.8 mm
- using sheet material(foam or polystyrene) as a heater, special glue for their fastening
- polyethylene film or membrane material to create hydro- and vapor barrier
- polyurethane foam, mastic (for example, "Germabutil", "Germaflex" rubber-based) or silicone sealant for sealing joints, cracks
Where to begin? Inspection and repair of balcony slabs
Read also: Self-leveling floor: device, recommendations and step-by-step instructions on how to do it yourself (50 Photos & Videos) + Reviews

The condition of balcony slabs is not always satisfactory - over time, they can partially collapse. Therefore, before proceeding with the insulation of the balcony, you should check how strong and reliable its base is.
Minor and medium repairs are allowed to be carried out independently. If significant cracks appear, or even more so if reinforcement is exposed, fragments of the slab collapse or move away from the wall, specialists should be called.
Remember that major or emergency repairs should only be done by qualified installers from the management company. If the reinforcement is severely corroded, it may be necessary to reinforce it with steel beams. In case of severe destruction, the balcony slab can be completely cut off.
To repair damaged concrete sections:
- All unnecessary is removed from the balcony, and all debris is completely removed, as well as the remnants of loose concrete
- If the reinforcement is exposed, it is cleaned of rust. A reinforcing mesh is laid on top. So that it does not rust over time, it must be completely drowned in concrete. To do this, it is necessary to leave a gap between it and the plate.
- Formwork is placed along the perimeter of the balcony slab
- After pouring the concrete solution, the screed is ironed - sprinkled with dry cement, then rubbed into the dry mortar
- To protect against moisture from below, the balcony slab is primed and then plastered. On the sides, a galvanized steel outflow is mounted
Read also: [Instruction] Do-it-yourself laminate on a wooden floor: a complete description of the process. Laying schemes, what materials should be used (Photo & Video) + Reviews
Filling the floor screed on the balcony
After the reconstruction of the slab, it is desirable to waterproof it.. For these purposes, roll materials or bitumen are used. Modern waterproofing materials include penetrating impregnation of the Penotron type. It is better to apply it in 2 layers.
Repair may also require a balcony railing. New structural elements in the form of shaped pipes are attached to the anchor or by welding.
The choice of glazing methods
Read also: What to do if plastic windows in a house or apartment sweat? Causes of condensation. Ways to solve this problem (Photo & Video) + Reviews

If your balcony has conventional 1-chamber double-glazed windows, they should be replaced. Otherwise, you will waste a significant part of the energy resources spent on heating the room. A warm balcony requires 2- or 3-chamber double-glazed windows. In the conditions of the Far North, they can be 5-chamber.
Balcony glazing is more difficult than the usual installation of double-glazed windows in windows. In this case, the installation of additional components is required. Therefore, be sure to invite proven masters of high qualification.
It is undesirable to use wooden double-glazed windows for glazing. Due to the accumulated condensate, over time they will begin to rot. Plus, the weight of such structures saturated with water will be significant. If for some reason you decide to stay on wooden products, do not forget to treat them regularly with an antiseptic and paint.
Reduce heat loss by 30% using the latest technologies– glazing using I- or K-glasses. The first option - I-glass with a multilayer coating, which includes a small percentage of silver - can reflect up to 90% of the outgoing heat. Since such surfaces can be easily scratched, they are installed with a coating inside the room.
Non-ferrous metal oxide is applied to K-glass, due to which heat is reflected from the batteries into the room. Such a coating is less afraid of damage. Although the prices for both glass options are the same, the degree of heat reflection in K-glasses is less and amounts to 30%.
Read also: Plastic windows in a wooden house: a description of the main characteristics, how to install it yourself, photo and video instructions

Poor quality profile may turn yellow over time, so pay special attention to certificates of its quality. Choose profile systems from trusted manufacturers. If you want double-glazed windows to last longer, do not save on fittings either.
A more economical way of sealing windows is ordinary polyurethane foam. But it will be better if all the cracks are sealed with a sealant that has water-repellent properties. You should not refuse to install flashings - they not only look decorative, but also protect the room from drafts.
You can order blinds for balcony windows or cover with a special opaque film. It will protect the premises from prying eyes.
Balcony insulation step by step
Read also: Foundation: description of the device, types, complete step-by-step instructions for bookmarking with your own hands (Photo & Video) + Reviews

It is necessary to sheathe with a heat insulator not only the walls, but also the floor and ceiling, otherwise the insulation will simply lose its meaning. After all reinforced concrete slabs during the cold season they freeze strongly.
Preparatory work
Read also: Making and laying paving slabs with your own hands: step by step instructions for dry and wet mix. Making a mold, vibrating table (Photo & Video) + Reviews

Before starting work, carefully inspect the balcony for cracks. If they are found, carefully fill them with sealant or mounting foam. Their excess must be cut off. After all, when installing the skin, they will interfere with its alignment.
So that at the end of the repair you do not have to wash dusty, dirty windows, attach a plastic film to them. If you plan to lay communications on the balcony (wiring, sockets, tubes for air conditioners), it is more convenient to do this in advance.
Read also: The blind area around the house: views, device, schematic drawings, instructions on how to do it yourself (30 Photos & Videos) + Reviews

Both foam and aerated concrete are able to reliably store heat, so they are often used to insulate balconies or loggias. However, since aerated concrete is able to absorb water, it is better to focus on foam blocks. Their air cells are completely closed from moisture penetration.
When using aerated concrete, additional finishing will be required to protect against rain and snow.
- If there are significant differences in height or potholes on the concrete slab, it is leveled with cement mortar
- Work on laying foam blocks is started a week after concrete has been set of sufficient strength.
- If the free area allows, it is better not to remove the metal fence. You can win 15-20 cm of usable area if you strengthen the masonry with reinforcement with thick metal bars
- With the help of fittings, the parapet must also be additionally attached to the walls of the house. She is walled up between rows of foam blocks
- It is better to lay the masonry not with an ordinary concrete solution, but with a special adhesive designed for cellular blocks. It will help reduce the thickness of the seam to 3 mm, protect against the loss of the solution and the appearance of cold bridges. Its cost is fully compensated by reducing the thickness of the seams
- To lay out the first row, the glue must be diluted a little thicker - so that the spatula installed in it does not fall on its side
- The place for masonry is marked in such a way that the center of the bricks falls on the attachment points of the window frame, that is, the distance from it to the edge of the balcony slab is 5 cm
- To save space at the docking points with the parapet, the blocks are sawn
- The wall must be strictly vertical. Therefore, the location of each row must be verified by the building level
When laying window frames on foam blocks, double-glazed windows must be additionally fixed to the walls of the building using a channel. Otherwise, with a strong wind load, the double-glazed windows may fall down.
Wall and ceiling insulation
Read also: [Instructions] How to make beautiful and unusual wall shelves with your own hands: for flowers, books, TV, kitchen or garage (100+ Photo Ideas & Videos) + Reviews
How to properly insulate a regular or brick balcony?
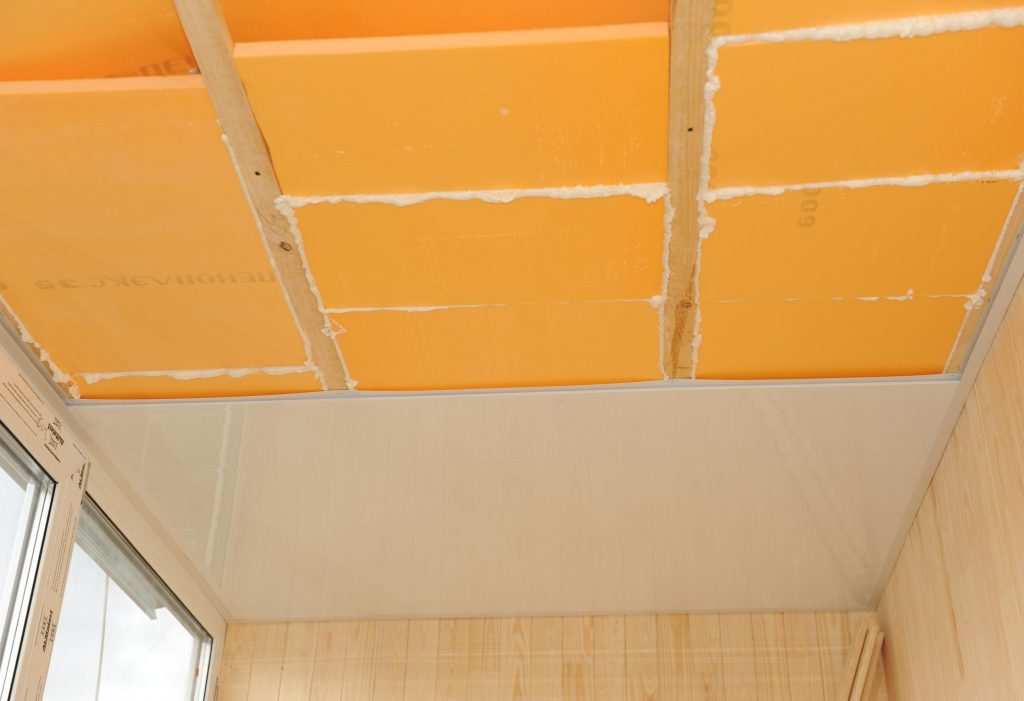
Installation of insulation is better to start from above, from the ceiling:
- First, a waterproofing film is laid in such a way that overlaps form. It is necessary to fasten the strips together with construction tape or a stapler. It is also necessary to make an overlap of 15 cm on the walls
- When laying rolled heat insulators, a preliminary installation of a wooden crate will be required. Sheet insulation can be mounted directly on the glue
- Since the main load will fall on the crate (it must withstand the weight of the insulation, as well as facing material), wooden bars should be fixed to the ceiling with self-tapping screws of sufficient length
- So that the laths of the crate do not deform during temperature changes, leave a gap of 5-10 mm between them and the walls. It is mounted to the ceiling with self-tapping screws. For this, holes are pre-prepared in it.
- Plates or rolled material must be laid tightly, without gaps. The pitch of the crate should be slightly larger (10 millimeters) than the size of the insulation sheets. Otherwise, you will not be able to lay the material evenly.
- A more reliable option is to combine penoplex with penofol with an air gap between them 2 cm in size
- All gaps between the insulation boards are filled with foam
- The next layer is a vapor barrier polyethylene film or special membrane materials. It is not necessary to use it only if foil materials are used for insulation.
- Next, a second layer of 10 mm crate is laid, on which it will be attached finishing material. Such a gap will serve as additional protection against the accumulation of condensate.
- Even moisture-resistant drywall on the balcony can warp over time. Therefore, use gypsum boards for sheathing. Moreover, they cost no more than drywall. You can also sheathe a balcony from the inside with plywood or clapboard
- Laying insulation on the walls differs little from installing insulation on the ceiling
Floor insulation
Read also:

Since insulation under the screed significantly increases the weight of the structure, the most common way to insulate the floor is to insulate the joists.
So, a detailed step-by-step instruction:
- After the installation of the waterproofing layer, a wooden beam is attached to the concrete floor (its section size is 50x50 mm). The width of the bars is selected depending on the thickness of the insulation
- The tree is pre-treated with a primer with an antiseptic or coated with drying oil
- The logs are placed across the balcony in such a way that a distance of 50-70 mm remains from the walls. Such a technological gap will not allow the bars to warp during temperature changes and changes in linear dimensions.
- To ensure normal water flow, the balcony slab is always made at a slight slope. . Therefore, the lags must first be aligned. To do this, thin wooden bars or pieces of plywood are placed under them. To obtain a strictly horizontal surface, the floors are leveled with a building level.
- alignment concrete screed having a significant mass, in the case of a balcony it is highly not recommended . After all, this will require a significant amount of solution
- A layer of heat insulator is tightly laid between the lags. When using foil materials, they are placed with the foil down.
- The next layer is vapor barrier. She is spread with an overlap on the walls
- When laying warm floors a small layer of cement screed is poured over the film
- If warm floors are not provided, a layer of chipboard is laid on the floor in a checkerboard pattern (with offset seams), and then flooring, eg, ceramic tile, laminate or linoleum. It is better not to lay plywood on the floor, as over time such a floor will begin to creak strongly

At the end of the article, I would like to give a few the most important tips professionals.
- Do not try to bring central heating radiators to the balcony. This is strictly prohibited. If such a violation is detected, you will be forced to dismantle them. Use only for heating electrical devices: oil, infrared heaters or underfloor heating with electric heating
- It’s not always worth listening to the advice of programs like “Repair Schools”. When combining a balcony with a warm room, disagreements with regulatory organizations may arise. If they consider that in this way you have worsened the heat supply of your neighbors, you can be forced to bring the apartment back to its previous form, as well as pay a hefty fine.
- Legally demolished balcony door, the window unit is considered a redevelopment, therefore it requires special permission. But, since the interpretation of the law in this case is ambiguous, in some cases it is still possible to obtain such permission with high-quality insulation of the balcony
- fashionable last years frameless glazing outwardly looks very decorative, but it is not suitable for warm balconies, loggias. Use thermally insulated double or triple glazing or tilt-and-slide windows for insulation
- Close the joints carefully before insulating walls, ceilings, floors, as well as gaps with mounting foam or polyurethane sealant
- Be sure to treat any wooden cladding elements with antiseptics and materials that protect them from moisture
- Installation of insulation start from the ceiling, then proceed to the insulation of walls, floors
- The ideal option for thermal insulation is a two-layer cake with an air gap. Use materials of small thickness for this (foam or penofol)
- Polyurethane foam under the influence of ultraviolet light quickly darkens, becoming unusable. Therefore, protect its outer layer with sealant, putty or paint.
- Gypsum putty is afraid of moisture, therefore it is not used for sealing seams
- To protect the room from the formation of condensate, take care of reliable waterproofing. In its absence, fungus and mold will certainly appear in the skin.
- To demolish a balcony door, you will need a special permit.
And in the end, we invite you to watch a video about complex insulation balcony
PHOTO GALLERY
8.3 Total Score
Balcony insulation from the inside
For us it is very important Feedback with our readers. If you do not agree with these ratings, leave your rating in the comments with the reasoning for your choice. Thank you for your participation. Your opinion will be useful to other users.
Ease of implementation
Convenience
This will interest you:


Chicken in kefir - recipes for marinated, stewed and baked poultry for every taste!
Simple Chicken Recipe in English (Fried) Recipes in English with translation
Chicken hearts with potatoes: cooking recipes How to cook delicious chicken hearts with potatoes
Recipes for dough and fillings for jellied pies with mushrooms
Stuffed eggplant with chicken and mushrooms baked in the oven with cheese crust Cooking eggplant stuffed with chicken