By insulating the balcony, we create a buffer zone on the path of cold air into the living quarters, adding a little square meters to create a pantry, or even a small room - but this is only if you connect a heater. In our step by step instructions we will tell you how to properly insulate a balcony with your own hands and what materials are used for this.
Insulating a balcony begins with checking the supporting structures. To do this, it is advisable to look at the balcony slab from the balcony of the neighbors below: if the beginning of destruction is visible to the naked eye, then you can strengthen the concrete and reinforcement layer as shown in the figure. If you doubt the strength of the slab and the ability to carry an increased load of glazing, insulation, or flooring, it is better to seek an expert examination. Although, as practice shows, balconies can easily withstand increased loads and collapse - this, fortunately, is an extremely rare exception to the rule.
 a - concrete is knocked off in damaged areas. b - the surface is cleaned and repair compounds are applied: 1 - contact layer; 2 - anti-corrosion protection; 3 — repair solution; 4 - leveling putty
Before starting work you need to remove old finishing and frames (if any), clean all surfaces from collapsing elements, if necessary, make a small concrete screed or seal the cracks in the slab with concrete mortar.
Insulation work can be divided into:
- external cladding;
- glazing;
- internal insulation;
- finishing.
Outside parapet siding
The easiest way to make the outer cladding of a balcony is vinyl siding.
Outside the parapet, vertical sheathing is assembled so that it forms a single, flat area (test with a stretched thread). The bars or metal profile of the sheathing are fixed at a distance of about 40 cm from each other. Next, siding guides (closing profile) are installed along the lower and upper perimeter, and the corners are decorated with a special vinyl profile - “outer corner”.

The siding starting strip is attached with its long side to the bottom guide using self-tapping screws. It’s better to start from the side wall - the panel is shorter and less visible from the street - you can practice. You can immediately lay soft mineral wool slabs between the siding and the balcony grille. A drainage system must be installed at the top of the parapet.

A very short video about the main stages of cladding:
Glazing is a mandatory stage of insulating a balcony. In this case, you can make your own frames from wood, aluminum or steel profile(corner, profile pipe) and glaze, or you can purchase ready-made double-glazed windows. The first option will be cheaper, but it is more labor-intensive and, most importantly, will only slightly raise the temperature on the balcony in winter. You are unlikely to get sealed windows without the use of double-glazed windows; you will have to insulate them for the winter or not insulate them and leave the balcony basically cold, which will only reduce the wind load. So it is better to order ready-made double-glazed windows for glazing.
If the balcony was not glazed and you are not insulating the loggia, then the parapet for installing the frames is most likely missing or insufficient. You can create a retaining wall in the form of a reinforcement frame with concrete or brick. To lighten the structure, expanded clay can be added to the concrete, reducing the overall load. The top of the parapet must also be reinforced with a metal profile.

If the protective grille of the balcony is strong enough, and the double-glazed windows are single-chamber, aluminum - very light, then they can act as a support wooden boards under the window sill, which are attached to the top of the grille.
If the balcony has a small area, then you can weld a frame on brackets that protrudes beyond concrete slab. At the same time, the window sill will not “eat up” the valuable volume of the balcony. This arrangement of a balcony is called a take-out.

After this, the window sills and frame of the future glazing are installed - without frames and sashes, which will be installed later. To do this, the metal structure is welded to metal profile parapet and supports attached to the balcony slab of the neighbor above. If you live on the top floor, the design will be more complex, since you will have to make a canopy-roof, for example, from corrugated sheets, polycarbonate, etc. At the same time, the racks must be more durable.

After the frame is secured, the upper drains (canopy) are installed and double-glazed windows are installed according to the instructions.

For information on the features of glazing small balconies without increasing the area, watch the video:
Insulation of the balcony from the inside
From the inside, the balcony is insulated from the walls, floor and ceiling. For this, you can use various thermal insulation materials.
Materials for thermal insulation of balconies
The thermal conductivity of building thermal insulation materials varies widely, so it is impossible to clearly state the recommended thickness. For information, see how the optimal thicknesses differ to achieve the same thermal resistance when using popular materials.

The basic requirements for materials also include:
- long lasting strength;
- non-hygroscopic;
- fire safety.
Most often used:
- mineral or stone wool— fiber insulation;
- lightweight polystyrene foam and Penoplex ( different types expanded polystyrene) - slab materials;
- polyurethane foam or "Penoflex" - polyurethane foam.

Sometimes a composition of these materials is used.
Fiber insulation is easy to install when it is made in the form of soft slabs or blankets with a foil surface.

Polyurethane foam is applied using special, preferably professional, equipment.

To compare the consumer properties of materials, we have summarized their main characteristics in a table.
Stages of insulating a balcony from the inside
Now that we know the basic properties of thermal insulation building materials, let’s consider the order of work.
Advice! If lighting or connection of heating devices is expected on the balcony, do the wiring to the lamp, switch and socket in advance, placing the cables in plastic boxes. This way the wiring will be hidden, which is much more attractive than open wiring.
Before work, make sure that dust, small particles of insulation or solution do not pollute the apartment - cover the openings with film.
Floor insulation
Insulation should begin from the floor. First, you should lay a layer of waterproofing on the balcony slab. It can be ordinary polyethylene or foil insulation. At this stage, the waterproofing material can also be fixed to the walls.


To protect against condensation, a layer of vapor barrier is laid on top. If you purchase an embossed film, then you need to lay it with the embossed side up.
The subfloor is completed with 10 mm thick plywood in two layers. It is attached to the joists with self-tapping screws. Instead of plywood, you can use fiberboard or chipboard sheets.
Ceiling insulation
Apply a layer of antiseptic to the cleaned ceiling. For thermal insulation, you can take foil mineral wool or polystyrene foam. Good decision will use penofol - a foam material covered with aluminum foil, which is glued to PVA, and nailed on top with lathing to attach the finishing layer of finishing - a set ceiling, plasterboard or siding.

Polystyrene foam can be fixed to the ceiling using polyurethane foam.

The mineral wool is laid on a false ceiling made of plasterboard, which is fixed to a frame made of an aluminum profile or a 40x40 mm wooden block.

If required, we fix the lamps.
Wall insulation
Waterproofing has already been completed at the first stage, so a vertical or horizontal timber sheathing is immediately installed on top of it. The distance between the bars is equal to the width of the heat-insulating material. For walls, it is better to use polystyrene foam or mineral wool boards.

PPS can be glued with special glue or polyurethane foam, making sure to blow out all the joints and cracks with it.
A vapor barrier film is fixed over the insulation.
Finishing work
There are many materials that can be used to decorate a balcony. This includes drywall, which can be plastered or covered with wallpaper, tiles, vinyl siding, and lining.

Most balconies have stationary or mobile clothes dryers that can rise to the ceiling.

If the space allows, you can install compact furniture or transformable furniture on the balcony: reclining tables and seats, and some lucky owners of wide balconies even arrange a sleeping place. The window sill can be made wider and turned into a tabletop - for morning coffee or doing business.
If desired, you can install a fan heater on the balcony, which will allow you to use additional space in spring and autumn, or install an electric convector, which will make the balcony all-season for equipping an office or winter garden there.

In conclusion, we invite you to look at photos of designer finishes for the balcony space - for inspiration and a source of ideas.


Owners of city apartments often wonder how to insulate the inside of a balcony with their own hands. This procedure is actually simple. However, it is still necessary to follow the required technologies when performing it. First of all, of course, you will need to decide how to insulate the inside of the balcony with your own hands. The type of cladding of the parapet, walls and ceiling will largely depend on the type of material chosen.
Expanded polystyrene or mineral wool?
These two materials are most often chosen for insulating balconies and loggias. Expanded polystyrene is a little more expensive than mineral wool. However, it is also the best answer to the question of how to insulate the inside of a balcony. The fact is that when covering the loggia from the side of the living quarters, the so-called one is located inside the insulating “pie”. Therefore, it is much better to use moisture-resistant material for insulation. Inexpensive mineral wool, unfortunately, does not differ in such properties. It gains moisture very quickly. Of course, you can use it. However, in this case you will have to pay maximum attention to waterproofing. So the best answer to the question of how to insulate the inside of a balcony with your own hands is still polystyrene foam.
Material characteristics
When choosing sheets for balcony insulation, you should pay attention to the following factors:
density,
Expanded polystyrene sheets produced modern manufacturers, have standard sizes: 2x1, 0.5x1 or 1x1. Those who are wondering how to cover the inside of a balcony should think about purchasing smaller sheets. Install too large slabs in limited space the loggia will be very inconvenient. For a balcony, the best option is 0.5x1 or, as a last resort, 1x1.
As for thickness, you can buy absolutely any polystyrene foam for a balcony. The only thing you should be guided by in this case is such an indicator as the area of the loggia. After assembling the insulating pie, there should be enough free space left on the balcony for a comfortable pastime. Most often, loggia owners standard houses Soviet-built polystyrene foam with a thickness of 40-50 mm is chosen.
The density of this type of insulation can be found by looking at the markings. The best answer to the question of how to sheathe the inside of a balcony would be to use expanded polystyrene grade 15-25. The higher the numbers, the lower the thermal conductivity of the material, and the more fragile it is. If the expanded polystyrene is intended to be covered with decorative plaster or wallpaper in the future, it is worth purchasing thicker slabs. If lining or panels are used, you can take loose sheets that retain heat well.
Where to begin?
So, now you know how to insulate the inside of a balcony with your own hands. Next, let's figure out how to do it right. Before proceeding with the installation of the insulating “pie”, it is necessary to carefully prepare the loggia itself. First of all, wooden floors are dismantled. Then they begin to repair the parapet. If there are through gaps in it, they must be sealed with sealant. The chips are being repaired cement mortar or moisture-resistant putty. The walls, floor and ceiling are prepared in the same way.
Loggia waterproofing
Having asked the question of how to properly insulate a balcony inside with your own hands, apartment owners should first of all ensure that small room it was always dry. Waterproofing when performing this operation is considered mandatory (especially when using mineral wool as insulation). In its absence:
the service life of the balcony finishing will be reduced;
all metal structures will quickly rust;
due to increased humidity they will begin to develop various kinds fungi, resulting in an unpleasant odor on the loggia.
Sometimes on balconies that are not insulated in this way, the supporting structures even begin to collapse, which, of course, is very dangerous.
The easiest way to waterproof a balcony is to use bitumen-polymer mastic. It is heated to a liquid state, the floor is poured with it and the parapet is coated in 2-3 layers. Sometimes roll materials are used to waterproof a balcony.

What kind of glue is needed
Those who are wondering how to insulate the inside of a balcony with polystyrene foam or expanded polystyrene should, among other things, take care to use suitable glue to fix the sheets. This material can be mounted directly on mastic (on polymer-bitumen - immediately, on bitumen - after complete drying). In this case, special glue should be used. It's called Bitumast.
What else will you have to buy?
Thus, you now know how to insulate the inside of a balcony with your own hands. Photos of polystyrene foam sheets - the most suitable material for this purpose - can be seen on the page. However, in addition to them and glue, to insulate the balcony you will also need to prepare:
reinforcing mesh,
mushroom dowels,
polyurethane foam (without toluene),
decorative plaster or wallpaper.

Pasting technology
So, next, let's look at how to insulate a loggia from the inside. Installation of sheets should begin from the corner. This rule is true both when gluing the parapet, and walls or ceiling. The actual installation operation itself is performed as follows:
Expanded polystyrene sheets are given a rough feel. To do this, they are passed with a special needle roller. Treated this way, they will hold up much better.
A support rail is attached to the bottom of the parapet.
The adhesive solution is evenly applied to the surface of the wall, ceiling or parapet.
Press the polystyrene foam tightly to the surface.
The material for insulating the balcony from the inside should be installed in such a way that the joints between the sheets have a T-shaped appearance (as when laying bricks). After the plate is glued, it should be additionally secured with mushroom dowels (5 per sheet). Holes for them can be drilled directly through the sheets. At the final stage, the joints are processed. In this case, construction foam is used.
Gluing reinforcing mesh
Expanded polystyrene is an excellent answer to the question of how best to insulate the inside of a balcony. However, decorative plaster does not hold up very well on this material. To correct the situation, a special reinforcing mesh is used. Mount it as follows:
The polystyrene foam surface of the ceiling, parapet and walls is first completely coated with glue (for polystyrene foam).
Another layer of glue is applied on top of it. Its thickness should be such that the joints of the mesh do not protrude above the surface plane.

Finishing
So, we found out how to insulate a balcony with our own hands. Step by step photo this process is presented above. As you can see, this procedure is relatively simple. At the final stage, the dried adhesive surface is passed special grater to give it roughness. Next, start applying decorative plaster. You can also wallpaper your balcony.
Second way
The loggia insulation method discussed above is suitable when using dense polystyrene foam. What if the owners decided to buy mineral wool as an insulator? How to insulate a balcony with your own hands? A step-by-step (photo of the process is presented below) guide to performing the work in this case will look like this:
A frame made of wooden beams. The pitch between its elements should be equal to the width of the slabs of the selected insulation. The timber can be secured to the concrete parapet with self-tapping screws. For balconies with metal fencing, an independent paving structure is assembled.
Next, the insulation itself is inserted between the frame elements. The material is attached to the concrete parapet with “fungi” (expanded polystyrene can be additionally glued). If the fence is metal, it is better to use cotton wool and insert it into the fence. If polystyrene foam is chosen for insulation, you can, for example, attach it to reverse side plywood frame and glue the material to it.
It is stretched over the insulation. It is better to secure it with thin slats (two on each side of the beam).
the balcony is trimmed with clapboard, plastic panels, drywall or plywood. Attach the material to the frame beams.

How to insulate a floor
The base of the balcony is insulated last. The floor is pre-waterproofed and then logs are installed on it. The answer to the question of how to insulate the inside is simple. Most often, polystyrene foam or mineral wool is laid between the beams. You can also use expanded clay. A vapor barrier is attached on top of the insulation, and then a flooring or edged board is filled. Then the floor is covered with linoleum or finished with any other suitable material.
Balcony heating
Whatever answer to the question of how to insulate the balcony inside, the owners of the house choose, if the installation technology is followed, in the future it will be possible to have a good time here, including in winter. However, on very cold days, even an insulated loggia may require additional heating. Removing central heating is strictly prohibited by regulations. That's why the best solution will install a regular electric heater here. It should be placed near the wall separating the balcony and the apartment. It is not recommended to install heating devices near the parapet. The fact is that in this case, due to the warm air rising upward, the windows on the balcony will begin to fog up heavily.

You can also arrange it on the loggia
Warm floor
This work is done as follows:
Placed on the floor thermal insulation material.
Metal is installed
The heating cable is laid.
The thermostat is hung on the wall.
Poured concrete screed 30-40 mm thick.
The flooring is being laid.
Well, we hope we have answered the question in sufficient detail about how to insulate the inside of a balcony with your own hands and how to do it correctly. The most important thing when assembling a “pie” is not to break the required technology. In this case, the balcony will be cozy and warm.
Most apartments require balconies additional insulation, on which the comfort in the entire apartment directly depends. With basic finishing in summer time it's very hot on the balcony, and winter period- Cold. To prevent this from happening, you need to know how to insulate a balcony with your own hands. Step-by-step photos and videos from this article will help you carry out insulation correctly at minimal cost.
Where to start insulating a balcony
The method of insulation and the type of materials directly depend on the location of the apartment. If the apartment is on the top floor, the roof often overheats in summer, creating a strong Greenhouse effect, which contributes to overheating of the balcony.
If the balcony was made of low-quality slabs, they crack and allow moisture to pass through.
In any case, the balcony is insulated if it faces north or south. The south side provokes heat on the balcony, and the north side does not warm up in winter.

During thermal insulation, the balcony further improves the quality of sound and moisture protection.
A high-quality insulated balcony allows you to use it at your discretion. There are practically no disadvantages of such thermal insulation, and the advantages are immediately noticeable.

Loggia floor insulation scheme
Before insulating the balcony from the inside, you prepare the surfaces yourself.

Photo of a balcony with foam insulation
Before insulation, the balcony must be glazed. The best option for glazing a balcony is a double-glazed window with argon filling. At severe frosts, it is better to install three-chamber double-glazed windows.
Step-by-step instructions for insulating a balcony
Insulating a loggia is divided into several steps:
Step 1. After installing the windows, all cracks are filled with sealant and foam for installation. If there are large potholes or gaps, they need to be repaired.
Step 2. For waterproofing balcony surfaces, roofing material is used, bitumen mastic, liquid formulations of deep penetration.
Step 3. The insulation material is fixed, and then the vapor barrier.
Step 4. The balcony is decorated with your own hands.
Step 5. The flooring is being installed.

How to insulate a loggia with penoplex
Penoplex insulation allows you to protect the balcony from cold and dampness. This material is resistant to mechanical stress. The side part can be ribbed or smooth. The first option allows you to more effectively fix the plates to each other.

Photo of penoplex insulation
If the average annual temperature is low, material up to 7.5 centimeters thick is used. If in winter time the temperature does not drop below -25 degrees, a material 4 centimeters thick is required.
Methods of fastening penoplex depend on the further finishing. When finishing from plasterboard, lining, fastening is done using mushroom dowels. If the surface is plastered, then the penoplex is glued.

To insulate a balcony with penoplex, follow these steps:
- The slabs are fixed on the primed surface.
- Penoplex is attached using the tongue-in-groove or joint-in-joint method.
- The slabs are fixed on top with special dowels.
- The joints are sealed with tape.
- The joints are filled with installation foam (composition without toluene).
- On top there is a vapor barrier, sheathing and surface finishing.
- Penoplex insulation can be done after installation of the sheathing.
- The insulation is placed between the bars.
Interesting article: how to insulate a dacha with your own hands
Do-it-yourself insulation of a balcony with polystyrene foam
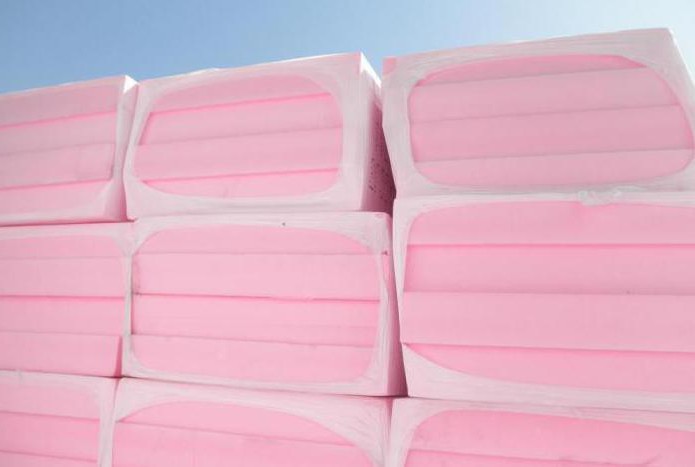
Penoplex is durable, but if this indicator does not play an important role, then you can use standard polystyrene foam to insulate a balcony or loggia.

Photo of foam insulation
Polystyrene foam for insulation is available in the form of sheets with a thickness of 5 to 15 centimeters.
To insulate the balcony from the inside, sheets 10 centimeters thick are used.
How to insulate a balcony with clapboard yourself
Insulation with clapboard cannot be of high quality if the balcony does not have sufficient heating. If there is no heating, then basic insulation material is placed under the lining.

Photo of lining on the balcony
To install the lining, a wooden sheathing is required, which is mounted horizontally. Foam plastic or penoplex is fixed in the gaps. A lining is installed on top of the insulation. It is fixed to the sheathing. Such insulation can be done on a durable, reliable balcony.
Mineral wool for insulating balconies
Insulating a balcony with mineral wool makes the structure lighter. This material allows you to protect the surface from cold, heat and moisture. Poor installation reduces the properties of the insulation by almost half.

Photo of mineral wool
A sheathing is placed on the surface coated with a waterproofing compound. The plates are fixed with special glue and dowels. In the corners, fixation is done with extreme caution. The insulated surface is covered with a vapor barrier.

Balcony insulation scheme
After which the surface is ready for finishing. When installing any insulation material, compliance with certain rules guarantees high-quality insulation of the balcony. Before you start work, carefully study the features of the selected material and how to install it correctly. Remember that the heat in your apartment or country house directly depends on the insulation.
How to insulate a balcony with your own hands now you know and can choose suitable material for performing thermal insulation work. Step by step photo – good helper during DIY repairs. If you learn how to properly insulate a loggia at home, you will have a new profession that is in demand today.
The loggia could well be called an additional room in the apartment, but, unfortunately, many people use it only in the summer, since it initially does not have insulation, and there are no heating radiators installed there.
 A modern method of insulation is spraying polyurethane foam
 Polyurethane foam is sprayed onto the walls using special equipment, and specialized companies deal with this insulation.
However, before inviting them to spray such insulation, the walls need to be prepared by lathing them. It will be a kind of frame for the sprayed and expanding heat insulator, as well as for securing decorative finishing material.
The advantage of this method of insulation is that when sprayed, the material, expanding, closes all the cracks, making the surface absolutely not blown, without cold bridges. Polyurethane foam covers not only the walls, but also the ceiling and floor.
Video - How polyurethane foam is sprayed
Loggia design solutions
I would like to show several options. Perhaps, having started the process of turning a cold room into a usable area, someone will be inspired by one of the ideas developed by the designers.

In this case, a standard loggia with a small footage is presented, transformed into cozy room recreation. Here you can retire with a book or laptop and delve into reading. If a large family lives in an apartment, usually each member is doing what they love, and sometimes it is difficult to find a cozy place to sit in silence. An insulated loggia will be an ideal option for this.
In such a room you can place a small TV and enjoy your favorite programs or sit with handicrafts, comfortably choosing comfortable armchair legs. The main thing is that there is extra space that can serve all family members in turn to do what they love.
 An original option - the loggia turns into a stylish bar
 This option is suitable for apartments in which the door to the loggia is located in the kitchen. In this case, it can become a dining room, especially since most kitchens in apartments are quite small.
If apartment owners like to frequently host parties, a loggia window sill can easily replace a bar counter.
You can also have a romantic dinner here. The evening city, which offers a wonderful view and a pleasant summer air will create the necessary mood for this. In winter, it’s nice to sit at the counter, sipping coffee and looking at the opening wide panorama outside the window.
Glass sliding doors installed between the kitchen and the loggia will help to unite or separate the rooms, depending on the need.

In this version, it was combined with the living room, and the wall, which previously served as a dividing element between the two rooms, became a unifying one, as it was transformed into a comfortable table.
The area of the former loggia in this layout can be used as an office with a comfortable desk, as well as hobbies when you don’t want anyone to interfere.
And, of course, combining the loggia and the room will increase common space by opening a large window. The room will be more illuminated, which will help save on electricity.
Additional living space can be adapted for various activities, for example, on a loggia winter Garden, workshop or computer room. Therefore, if the apartment is equipped with a loggia, but it is not yet insulated, you need to urgently get down to business and expand the area of your home by using a room that is not used functionally.
Video - How a loggia is insulated
September 4, 2016
Specialization: Capital construction work (laying a foundation, erecting walls, constructing a roof, etc.). Internal construction work (laying internal communications, rough and fine finishing). Hobbies: mobile communications, high tech, computer technology, programming.
I have already talked many times about the internal insulation of balconies in city apartments and private houses, but I spent little time covering the question of how best to insulate a loggia from the inside. But right choice thermal insulation material is the key to the effectiveness of the measures taken.
And now is the time to fill this gap. The instructions that I provide below will tell you how to choose the appropriate insulation material yourself.
Requirements for insulation
Before I tell you how to insulate the inside of a loggia with my own hands, I want to devote a few words to the criteria by which I personally choose thermal insulation materials for such work.

So, what it is advisable to pay attention to:
- Heat transfer coefficient. The lower this parameter is, the better. That is, to insulate a room (be it a separate loggia or combined with the main room) you will have to use a smaller layer of material. This means that more usable space in the room will be saved.
- Easy to install. The more complex the installation procedure for the thermal insulation material you have chosen, the longer and more labor-intensive the repair process will be, especially if done independently. However, I have already written a lot about how to properly insulate a loggia from the inside. If you need it, you can find the relevant material or ask a question in the comments.
- Strength. It is better to choose insulation that can withstand external mechanical stress (both static and dynamic). In this case, subsequent decorative finishing of the room is facilitated.
- Antiseptic. Internal insulation shifts the dew point inside the insulating pie. In addition, air vapors that are formed as a result of human activity can penetrate through the walls. Therefore, I recommend paying attention to materials that are not subject to biocorrosion - mold, mildew and other microorganisms, rodents and insects do not appear in them.
- Affordable price. Naturally, this factor is also very important, although I would not put it at the forefront. Below I will tell you about insulating materials that have an optimal cost-to-cost ratio. performance characteristics. And then you can choose for yourself which material is best for insulation.
Characteristics of individual types of insulation
So, let's get started with the story. Let's start with the most common and very inexpensive heat insulator - expanded polystyrene or, as it is popularly called, polystyrene foam.
Expanded polystyrene

Expanded polystyrene is a material consisting of 98% air, which is enclosed in closed polystyrene shells. The result is a kind of solid foam in sheets, which, after finishing the walls, floor and ceiling of the loggia, prevents unproductive heat loss.
Specifications
I’ll tell you briefly about the main technical characteristics of the material:
- Thermal conductivity. The thermal conductivity coefficient of expanded polystyrene is in the range of 0.028-0.034 W/(m*K), that is, lower than that of mineral wool. The specific value depends on how dense the foam you purchase for the job.

I'll warn you right away. Do not confuse polystyrene foam and extruded polystyrene foam. Although they are related, their technical characteristics differ significantly. Therefore, we will talk about EPS separately in the next section.
- Vapor permeability and water absorption. Conventional construction foam does not allow air to penetrate through the insulating layer.

Therefore, insulating a loggia from the inside with polystyrene foam requires taking additional measures to ventilate the room in order to remove excess moisture from it. Otherwise, the microclimate in the room will be far from comfortable.
The situation with water absorption is different. When in contact with liquid, foam absorbs approximately 4% of its volume. However, unlike mineral wool, its heat-retaining properties do not deteriorate significantly, so there is no need to waterproof the insulating layer very carefully.
- Strength. For insulation, construction foams are used, which meet the requirements of DIN number 7726 and are classified as “rigid”. That is, when a load is applied, the surface of the heat insulator reacts elastically. However, when dynamic or strong static force is applied, the integrity of the insulation may be compromised.

In other words, if you use foam for internal insulation loggias, you immediately need to decide how to decorate the inside after insulation. You need to choose this method decorative finishing, which would simultaneously protect the insulating layer from mechanical damage.
The strength of polystyrene foam largely depends on its density. But as the density increases, the heat-retaining properties deteriorate. The optimal density of foam plastic for internal insulation is 25. You can buy 35, but this, in my opinion, is an unjustified waste of money.
- Chemical resistance. Classically, expanded polystyrene perfectly withstands the effects of household chemicals, which include soap, soda, mineral fertilizers. It is chemically neutral in contact with bitumen resins, cement and lime mortars, and asphalts.

However, I myself saw how foam plastic “melts” when certain varnishes, drying oils and other similar substances come into contact with it. In addition, petroleum products with various alcohols are also dangerous.
All this once again suggests that if you are going to use this insulation for interior work, care should be taken to protect it thoroughly.
- Sound absorption. If you want the insulating layer to simultaneously act as a sound insulator, then you will be disappointed with polystyrene foam. It can protect a little only from impact noise, and only if you lay 10-15 centimeters of insulation.

Foam plastic does not dampen other noises that are transmitted through the air. The fact is that the cells with air inside the material are rigidly fixed and completely isolated from outside world. Therefore, sound waves are not absorbed.
- Antiseptic and environmentally friendly. In 2004, research by scientists from the USA finally proved that biological life on the surface of polystyrene foam is impossible. Therefore, there is no need to be afraid of the appearance of mold and mildew.

As for security issues environment(for some this is very important), then everything is fine here too, since in the production of insulation they abandoned the use of freon, which harms the ozone layer of the planet. In addition, the foam itself lasts quite a long time without losing its performance properties. Moreover, regardless of the number of freezing and thawing cycles.
However, the insulation in question is susceptible to oxidation. Moreover, the lower the density of the material, the faster this process occurs. Especially if the material is exposed to direct sunlight. And during oxidation it releases many harmful substances, which includes:
- benzene;
- toluene;
- formaldehyde;
- methyl alcohol;
- acetophenone and so on.
But during the construction of houses, wood is also treated with various chemicals, which also harm human health. So wood cannot be considered a completely environmentally friendly building material. However, I am only stating the facts, and you will have to make the final choice.
- Fire safety. According to current Russian standards(GOST number 30224-94) foams belong to the third and fourth classes of flammability. In other words, they are very dangerous if you look at them from this point of view.

When choosing insulation, pay attention to what standards the polystyrene foam is certified to. In Europe, the flammability class is determined by three factors (biological, chemical and complex). So, experts from the EU believe that the most flammable material is wood, but do not take into account the danger of combustion products formed when foam plastic is ignited.
Therefore, when purchasing material, pay attention to certificates issued based on the results of comprehensive research. And buy polystyrene foam that contains fire retardants (it is marked with the letter “C”). This does not mean that such material will burn worse. It just requires longer exposure to a more intense flame to ignite.
In any case, I can say that despite various fire retardants and other additives to foam, it continues to remain a fairly flammable material. Therefore, if you are going to set up a workshop on the loggia, it is better to choose other materials for insulation. Moreover, fire retardants disappear over time.
- Lifetime. If you follow the technology for installing foam plastic (that is, laying it under plaster or other decorative material) he will keep his operational properties for at least 30 years. However, this is if you don’t make mistakes, which I want to talk about below.

First of all, this is the wrong choice of elk insulation. Some, for example, believe that if you lay a foam plastic board 30 cm thick, the loggia will be insulated as efficiently as possible. This is not true, because thick insulation will warp and crack due to temperature fluctuations.
As a rule, 5 cm thick slabs or two such slabs stacked on top of each other are used to insulate a living space. Among other things, this installation method allows you to reduce the amount of smoke released during a fire and reduce the risk of poisoning people in the room.
Well, now I’ll summarize everything that’s been said and give some advice to those who have already decided to buy polystyrene foam to insulate their loggia:
- For internal insulation, I recommend purchasing polystyrene foam labeled PSB-S with a density of 35-40. In any case, do not take insulation with a density of less than 25. It is only suitable for packaging household appliances, but not for construction.
- Sometimes manufacturers mark foam plastic with the number “40,” which does not indicate its density. Therefore, pay attention not only to the numbers in the name, but also to the technical characteristics, which, according to the law, must be placed on the packaging or provided separately at the buyer’s request.
- Buy polystyrene foam produced by extrusion (must be indicated in the accompanying documentation). This is the only way to give the material a density higher than 20 kg per cubic meter.
- To check the quality of the material on the spot, break off a piece of it. If you see balls at the fracture site, which are also easy to separate, then you have packaging material in front of you. Polystyrene foam for insulation has cells in the form of polyhedra, along which fracture occurs.
- If we talk about specific manufacturers, I recommend paying attention to the materials of TechnoNikol, BASF, Styrochem or Polimeri Europa. These materials are of excellent quality and are quite affordable.
Penoplex

Not long ago I used extruded polystyrene foam to insulate a balcony. And I chose a material from a domestic manufacturer for the work - penoplex. That’s why I’ll tell you about him in this section.
Specifications
The first extruded polystyrene foam was produced in the United States about half a century ago. The essence technological process is as follows: polystyrene foam granules are placed in a chamber where they melt under high temperature. Then this mass is foamed with the help of chemicals and squeezed out through rectangular nozzles onto a conveyor, where it cools.
For foaming, so-called foaming agents are used, that is, substances that, when heated, release gases: nitrogen or carbon dioxide.
After hardening, the extruded polystyrene strip is cut into slabs and packaged in polyethylene for transportation to construction sites.

As for penoplex, it consists of the following components:
- polystyrene;
- ground perlite;
- sodium bicarbonate;
- lemon acid;
- barium stearate;
- tetrabromoparaxylene.
The use of penophores in the production of penoplex gives the latter a porous structure, like polystyrene foam. But unlike the latter, the cells of this material are tightly connected to each other into a homogeneous structure, so the air is more evenly distributed inside the material.
The size of the air cells in the insulation is from 0.1 to 0.3 mm. They are insulated from each other, therefore they have good thermal resistance and low water absorption. In addition, this entire structure has greater strength than classic polystyrene foam (foam).
The exact technical characteristics of penoplex are shown in the illustration below:

As you can see, there are several varieties of this extruded polystyrene foam on the building materials market, which differ in the characteristics and sizes of the boards. Accordingly, they should be used to insulate various structures.
If you are not too versed in the above figures, I will decipher some parameters:
- Coefficient of thermal conductivity. For penoplex this figure is approximately 0.03 W/(m*K). This is one of the lowest coefficients of all existing insulation materials. At the same time, what attracts me personally: this indicator does not change depending on humidity and temperature. That is, when using penoplex, there is no need to protect it with additional waterproofing membranes.
- Hygroscopicity. When in contact with water or moist air, the foam board absorbs no more than 0.6% of its own volume. In this case, humidification continues only during the first 10 days after installation, and then stops. Only the top layers of insulation are impregnated, which has a positive effect on the integrity of the material.
- Vapor permeability. The material does not allow moisture vapor dissolved in the air to pass through it well. Therefore, surfaces finished with penoplex are not covered with vapor barrier films. On the other hand, you will have to take measures to ventilate the room to remove excess water vapor.
- Compression resistance. This parameter is excellent, which is achieved thanks to the homogeneous structure of the penoplex. Therefore, it can be used for insulating floors on loggias (by laying insulation under cement screed). If you apply significant force to the insulation, a dent no more than 1 mm deep may form on the surface.
- Environmental friendliness. Although the manufacturer claims that the material is completely safe for the environment and humans, during operation it still releases a small amount of chemical compounds that can be hazardous to health.
- Lifetime. Experiments carried out at the Penoplex plant show that the material is able to withstand more than 50 consecutive freezing and thawing cycles. Therefore, when operating on outdoors it will retain its technical characteristics for at least half a century. And inside the loggia there is even more.

To all of the above, I can also add that penoplex tolerates the effects of aggressive chemicals and solvents well. However, it is destroyed upon contact with petroleum products, benzene, formaldehyde, acetone, oil and some other materials. This must be taken into account when choosing a decorative finishing method.
Marking methods
There are several types of extruded polystyrene Penoplex on sale. To make it more convenient for you to choose the appropriate variety, I will provide the following table.
| Marking | Scope of application |
| Penoplex 31 | Used for insulation of industrial containers with various liquids and technical pipelines. |
| Penoplex 31C | A material that, like the previous one, is not highly durable and can therefore only be used for internal insulation. Unlike the previous one, it has the ability to self-extinguish upon fire. |
| Penoplex 35 | A material of medium strength and density, which is ideal for internal insulation of a loggia. Moreover, it can be installed not only on walls and ceilings, but also on the floor under a cement screed. |
| Penoplex 45 | Very durable and moisture-resistant insulation. Used for external thermal insulation of surfaces that experience large static and dynamic loads. On the loggia it can be used to insulate the floor. |
| Penoplex 45C | A self-extinguishing type of insulation described in the previous row of the table. It is mainly used for insulation of industrial and commercial facilities. |
However, in addition to digital marking, penoplex also has proper names. Detailed description I will list each brand in the following table.
| Name | Density, kg/cub.m. | Purpose |
| Wall | 25-32 | Used for internal and external insulation of enclosing walls, internal partitions and basement floors located above ground level. |
| Foundation | 29-33 | It is used for thermal insulation of structures buried in the ground. This type of penoplex is very durable and can withstand the load exerted by the soil after backfill pit. |
| Roof | 28-33 | Used for insulating attic spaces. Insulation has a low thermal conductivity coefficient, but is fragile, so it is better not to use it in places where it will be subject to constant load. |
| Comfort | 25-35 | A material ideal for internal insulation of balconies, loggias and other premises. It differs in that it can be used in rooms with high humidity air. |

If you ask my opinion, I would recommend using Penoplex Comfort slabs 5 cm thick to insulate the loggia, laying them in one layer under the screed or in a pre-arranged sheathing.
Basalt wool

Another fairly common insulation for loggias and balconies is mineral wool. There are several varieties of this material, but I prefer the variety that is made from the volcanic mineral basalt. It is basalt wool that is most environmentally friendly material with excellent technical characteristics and performance properties.
This insulation was invented in Hawaii, when local residents, after one of the volcanic eruptions, discovered strong and thin fibers in the surrounding area.
Nowadays basalt wool is produced industrially. To do this, gabbro-basalt is collected and melted in a smelting furnace at a temperature of just over 1500 degrees Celsius. The mixture then falls onto the drum, where it is blown with a stream of air and rotates. The result is fibers 7 microns thick and about 5 cm long.
After this, a binder is added to the mass of fibers, after which the mixture is heated to 300 degrees Celsius and pressed into mats, which are used for insulation.
Specifications
I’ll tell you the most important things about this insulation:
- Thermal conductivity. According to this indicator, although cotton wool does not outperform penoplex, it is not an outsider. The thermal conductivity coefficient ranges from 0.032 to 0.048 W/(K*m).

So that you understand what we are talking about, let me compare, for example, a 10-cm layer of basalt wool with a density of 100 kg per cubic meter with other building materials. To provide the same level of thermal insulation, it is necessary to build a wall of ceramic bricks 1 m 20 cm thick. You will need even more sand-lime brick - 2 meters. As for the wooden wall, its thickness should be at least 25 cm.
- Water absorption. Basalt wool has hydrophobic properties. That is, water does not penetrate into the fibers and does not linger in the insulation, changing its technical characteristics.

This, by the way, is the fundamental difference between basalt fiber and glass wool or slag wool. The last two varieties, after getting wet (from contact with water or moisture vapor), increase their thermal conductivity coefficient, that is, they retain heat indoors worse.
So if you are going to insulate the loggia from the inside, you need to take basalt wool, and not glass fibers. Don't be confused. Its water absorption is no more than 2% of its own volume.
- Vapor permeability. The described insulation, unlike the previous ones, does not prevent air infiltration through the enclosing structures. Moisture, penetrating through the decorative material, is removed outside and does not condense in the insulation layer.

The vapor permeability of the material is about 0.3 mg/(m*h*Pa). That is, on the loggia where you use such insulation, a microclimate that is comfortable for living will independently form, if you look at it from the point of view of air humidity.
- Fire safety. Due to the fact that basalt, being a volcanic rock, has a very high melting point, the thermal insulation material itself belongs to the class of completely non-combustible materials.

Moreover, it is able to stop the further spread of the flame. The thermal insulation layer loses its integrity at a temperature of at least 1100 degrees Celsius. Therefore, by the way, it is used for insulation of engineering systems and pipelines, the surface of which becomes very hot during operation.
The material fully complies with the requirements of GOST number 30244 and SNiP number 21-01-97. It has no restrictions when insulating residential premises.
- Soundproofing properties. Unlike expanded polystyrene, basalt wool perfectly absorbs sound waves. This is due to the fact that the air contained inside the insulation is not closed inside the cells, and the fibers themselves are randomly located.

Moreover, cotton wool not only cuts off noise from the street, but also reduces reverberation time. That is, not only the loggia itself is soundproofed, but also the rooms located behind it.
- Strength. As in all other cases, this parameter depends on the density of basalt wool. Although it is less than that of polystyrenes, it is still sufficient for construction work, since some basalt fibers are arranged vertically when forming mats.

As a result, when the insulation layer is deformed by 10%, it shows a compressive strength of 5 to 80 kilopascals. And this figure does not decrease depending on the operating time.
However, you cannot install basalt mats under the floor screed. For insulation, I recommend installing a sheathing, onto which decorative material is then mounted. Although there are some varieties (for example, Dan Floor from Danova) that are specifically designed for insulating floors under cement screed.
- Biological and chemical activity. The material does not react with chemicals and does not cause corrosion metal parts. In addition, mold and mildew do not grow inside the insulation layer and on its surface, and insects and rodents do not live.

So you can insulate the loggia at your dacha. Unlike polystyrene foam, which mice love to chew on.
- Environmental Safety. The insulation is completely safe for the environment and humans, as it is made from a natural mineral. However, the fibers are glued together using phenol, which can be hazardous to health.
But I hasten to reassure the skeptics. All hazardous substances are neutralized when heated at the stage of basalt wool production. But even at the stage of manufacturing the material, the emission is no more than 0.05 mg per cubic meter per hour.
In addition, during operation, mineral fibers do not irritate the skin, mucous membranes and respiratory organs of humans.
Disadvantages of the material

So that you don’t get the impression that basalt wool is just a gift of fate for insulating a loggia, I will list the main disadvantages of the material:
- high cost of insulation;
- the presence of seams in the insulating layer, which make it leaky;
- the possibility of formation of basalt dust, which causes inconvenience to installers when working with it;
- high coefficient of vapor permeability, which in some cases is simply not needed.
Summary
Now you have all the necessary information to choose the appropriate insulation for thermal insulation of the loggia. Those who are interested in how to lay the selected insulation with their own hands can watch the video in this article.


Dua for Sadness Anxiety and Depression
Buddhism: the basics of religion, how many Buddhists are there in the world
Obligatory prayers: features and order of performance by men
Druid horoscope by date of birth: interpretation and features
What is oregano: all about the amazingly healthy seasoning!