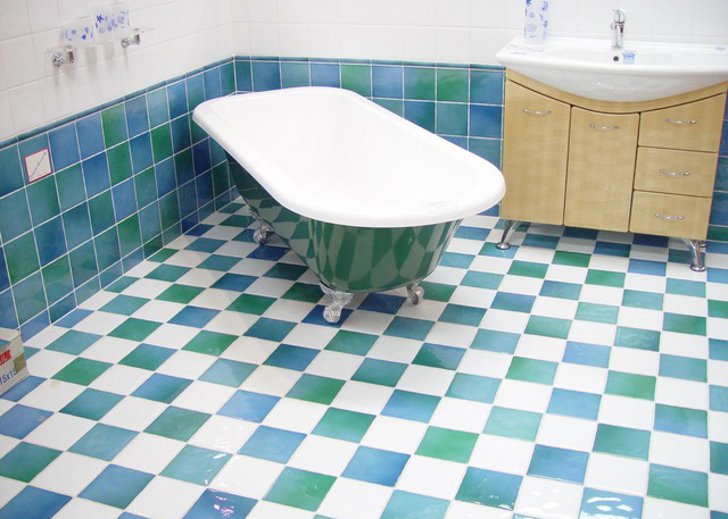
The most common on the market are steel baths. One of the advantages of such containers is their relatively low cost and low weight, due to which the installation of a steel bath with your own hands is quite real.
The most common form steel baths- rectangular. And in the kit of such a container there are always legs. Bathtubs with curved shapes are also available, in this case you need to pay attention to the presence of additional supports or a special reinforcing frame.
The first step is to bring the pipes to the place where the mixer is installed. For this, it is better to use metal-plastic flexible pipes... It is not difficult to lay them along the bottom of the wall, securing special devices, which are installed on the wall with self-tapping screws in dowels.
Laying pipes in the bathroom
At the place where the pipes turn in a vertical direction, about 50 cm from the floor, you need to make two grooves along the thickness of the pipes and place the pipes in them. Secure with staples. Screw the corners to the ends of the pipes to install the mixer. The axial distance between the outlets of the corners must correspond to the average axial distance between the eccentrics of the mixer.
Seal the grooves with pipes using alabaster in order to speed up the process of solidification of the mass. Clean the installation site of the bath from debris, dirt.
Steel bath installation options
First of all, you need to make sure that the overall dimensions of the hot tub correspond to the dimensions of the bathroom, otherwise the installation will be laborious or even impossible.
On standard legs
As a rule, bathtubs are equipped with supports, which also need to be paid attention to. The desire of manufacturers to reduce the cost of their products to make them more attractive, often gives the opposite effect - the legs can be used only theoretically:
- the container must be dragged into the bathroom and placed directly at the installation site upside down;
- mount the siphon - to do this, screw the upper and lower drain sleeves into the openings of the vessel. In this case, do not forget to install the rubber gaskets from the bath kit, having previously treated them with silicone sealant. Connect both holes with a corrugated tube. Install a corrugated pipe on the siphon outlet, which, after the installation is completed, will be connected to the opening of the gravity sewer pipe;

Bath trap with waste overflow system
- we install the legs - the most practical and reliable supports "P" - about different shapes on a self-adhesive basis. They have a slight deflection along the length, which eliminates unnecessary contact with the bath body. The contact points of the self-adhesive plates with the body must be degreased with acetone, followed by drying for 7 - 10 minutes;

Steel bath feet
- assemble a control system consisting of threaded rods with plastic supports and nuts. Tighten the studs almost to the stop with the body. By unscrewing the studs when installing the baths, it will be possible to level the level of the bath. Place the assembled legs on the bottom of the bathtub and press down for firm adhesion to the body;

It is best to attach the legs to an inverted bathtub.

Bathroom legs adjustment

Bath ground
- turn the bath over, install it in place;
- check the horizontality along the diagonals of the bath. To do this, you need to take a rule or a long ruler, place the bath diagonally and attach a level. There should be a slight slope towards the drain, the same for both diagonals.

Installing the bath on legs
If adjustment is necessary, use the adjusting screws that the legs are equipped with, and then fix their position with locknuts.

Bath installation diagram
To the corner of the room
With this arrangement of the container, two sides of the bath will be in contact with the walls. To obtain a reliable installation of the steel bath on the short side of the bath, it is necessary to make an additional support.
The procedure is as follows:
- drill 5 holes with a diameter of 5.5 mm in the 32x32 mm support flange;
- according to the holes obtained, mark the places of drilling holes in the wall and drill them with a 6.5 mm drill;

Special brackets for fixing the bathtub to the wall
- insert the bushings (dowels) into the holes and screw the corner to the wall;
- push the bath into place, seal the cracks between the wall and the container with silicone sealant;
- in the future, install ceramic skirting boards in this place.

Bath fastening with special brackets
Between the walls
Bathroom designers take into account standard sizes capacities, so such a coincidence is very likely. There are three contact lines and support angles to be installed on both short sides of the bath. The order of execution is the same as described above.

Installing a steel bath between walls
In the middle of the room
In this design, bathtubs are installed in their own homes, where it is possible to arrange a non-standard drainage system. The container is installed on bricks and lined with brickwork, which ensures its stability, and then tiles... A feature of this installation is the presence of a niche at the bottom of the lining half the length of a person's foot. In this case, the legs are not used.

Installing a steel bath on bricks
Many consider this method preferable, especially those who are familiar with brickwork, and also if the height of the bath on standard legs for some reason does not suit the owner.

You can put bricks under the legs to raise the bath to the desired level.
As an option for installing a metal container, it is installed on decorative legs, if the bathtub is made with a design outside.
Installation materials and tools
The required materials and tools are summarized in the table.
| Name | Application area | Terms of use |
| Tools and fixtures | ||
| Electric drill | Drilling holes in the wall for supporting angles. | When installed against walls without the use of brickwork |
| Drill with a diameter of 6.5 mm for concrete | Same | In the same place |
| Drill with a diameter of 5.5 mm for metal | Drilling holes in support angles | In the same place |
| Marker | Marking the installation locations of the support corners on the walls, marking the holes at the corners | In the same place |
| Dowel | Fastening the support corners | In the same place |
| Power screwdriver or screwdriver | Installation and fastening of support corners on walls | |
| Gas wrench | Tightening threaded connections when installing the drain system | In all installation options |
| Construction level | In all accommodation options | |
| Rule (a flat bar is longer than a bath) | Checking the horizontal position of the container and adjusting the slope | In all accommodation options |
| Construction trowel | Masonry for tiled installation | When using brick supports and brick lining |
| Notched spatula | Applying tile adhesive to tiles | When performing cladding |
| Wrench | Height adjustment of the feet | In all locations |
| Materials (edit) | ||
| Corrugated pipe | Siphon connection to the sewerage system | In all installation options |
| Corner 32x32mm | Manufacturing of supporting devices on the walls | When located against walls without the use of brickwork |
| Masonry mortar | Laying of brick supports and cladding | When placed in the middle of a room or bricked bathtub |
| Sealant | When placed against walls | |
| Ceramic skirting board | When sealing joints between the bathroom and the wall | When placed against walls |
| Tile tiles | Cladding device | When using brickwork |
| Tiled glue | Cladding device | Cladding |
When installing a bath, you should adhere to some rules:
- before replacing a bath, it is better to consult with specialists, because in this matter, innovations are constantly being introduced that will be useful when performing work;

Correct connection of the bathtub to the sewer
- be sure to make the grounding of the bath, because the use of electrical appliances in the bathroom is by no means uncommon, these are hair dryers and electric shavers and much more. The safety rules have not yet been canceled;
- the space under the bathroom before placing it must be carefully treated with antiseptics;
- the same processing is required for brickwork when it is used for the installation of a container. Otherwise, damage to the masonry is inevitable. A fully enclosed bathtub should be vented to allow moisture to escape.
Bathroom furnishing begins with the choice of plumbing. Most often when doing renovation works they prefer to install bathtubs from the following materials:
Cast iron- traditional material for baths. Such baths are quite expensive, but durable. They are very difficult to install, so now cast iron equipment is losing popularity. Such plumbing is uneconomical: a bath is quite expensive. Other disadvantages are that it takes a long time to warm up and cools down quickly.
Steel baths- inexpensive, easy to install, but not durable. Warm up quickly, cool down quickly. Experts advise putting them in small apartments. Earthenware and glass baths are too fragile compared to others.
Acrylic sanitary ware gained great popularity due to its low price, not heavy weight, efficiency and ease of use (warms up quickly, cools slowly). The average service life of such baths is fifteen to twenty years.
Bathroom connection diagram
In addition, bathtubs of different geometry are chosen for bathrooms of different shapes. Traditional form- oval, but now round baths are gaining popularity. Even polygonal bathtubs are installed in large apartments and houses.
Related videos: DIY bathroom renovation. Bath installation, bath extension with a shelf and installation of a screen under the bath
If the choice is made in favor of acrylic plumbing, then the installation of equipment can be done independently. It is necessary to watch the video with step-by-step instructions and read the technical information - this way you will familiarize yourself with the steps of the procedure and learn about the difficulties that you may encounter when installing equipment in the bathroom.
Basic rules for storing a bathtub or sink
If, after acquiring plumbing from acrylic, repairs do not start immediately, then you need to follow the basic storage rules:
- it is not necessary to remove the packing material until the start of work
- it is forbidden to put foreign objects into empty plumbing
- the equipment must be securely fixed, not wobbly
To prevent the surface of the plumbing from being scratched, it is important to ensure that construction debris does not fall on it.
Preparatory work for self-installation of an acrylic bath
Experts advise to decorate the walls after installing the bathtub - this will reduce the risk of mold. The floor must be leveled. Also, if you are installing a cast iron bathtub, then remember that the floor must be very solid. Otherwise, it may simply not be able to support the weight.
Installation is carried out on special legs, but for better stability, it is necessary to install an additional frame made of metal or brick. With some bathtubs, additional structures are included, but if they are not there, then it is best to make a substrate of bricks, foam blocks or wooden beams.
Before starting work on the installation of the substrate, it is necessary to mark on the bathroom floor a projection intended for draining.
 Installation diagram of a bathroom on a brick
Traditional options for a reliable substrate:
- A solid masonry backing is installed under the entire acrylic bath or sink structure. To calculate the height of the substrate, it is necessary to leave about three centimeters of masonry for the device of the polyurethane foam pillow
- brick supports and cement pad
Step by step installation
To install a bathtub with your own hands, you will need cement, bricks, foam, a hammer, a fork wrench, silicone sealant, electrical tape. You need to do the following:
- prepare a waterproofing platform of the required height
- perform work on the installation of a reliable frame
- install plumbing equipment, having previously prepared it for installation
- carry out the necessary finishing work
If you follow this sequence of actions, the installation of the bath will be done correctly and quickly enough.
How to connect a sink or bathtub to the drain
Many are worried about the bath installation procedure, especially the installation of the sewer outlet. If you are afraid that you will not be able to connect the bath yourself, contact a specialist. But if you figure out how the water outlet should go correctly, then you can connect a sink or bathtub quickly enough. To get a better understanding of the process, it is useful to watch the training videos on the Internet.
When connecting plumbing equipment to the sewer, you must perform the following steps:
- a water outlet must be installed at a minimum distance
- install a siphon, before installation by connecting it to the sewer pipe
- put a rubber sleeve in the sewer pipe, lay the siphon pipe
- Before installing the coupling, lubricate it with silicone sealant on both sides
- install a sink or bath
 Photo of installing a bath on bricks
Before starting work, make sure that the branch pipe and pipe are dry. This is important for a good seal.
Corner bath installation method
Corner baths are often installed in small apartments. Despite the unusual design, the installation of the bathtub is a fairly simple process. To independently carry out the installation of a corner bath made of acrylic, you must have certain knowledge and skills. The steps in the procedure do not differ much from the installation of a traditional bath.
 Photo preparatory work
To install a corner bath, follow these steps:
- bring the communication system down
- align bath legs
- create wireframe
- perform equipment installation
The installation of an angular bathtub (unlike a traditional bathtub) must be carried out on a combined substrate of special legs embedded in a brick base.
If the bath has electrical options, a grounded socket must be installed. Often, when installing such plumbing, sound insulation is also carried out. Special material laid between the bathroom and the floor.
 Photo of bath installation and cladding
Often, when replacing plumbing in a bathroom, you have to change other equipment as well. It is best to do this at the same time so as not to damage communications and decoration.
Source: remont.youdo.com
Related videos:
Installing an acrylic and steel bathtub
We bring the bath into the room vertically sideways, holding with one hand by the edge of the bath, and with the other by the previously installed support leg. We install it in a permanent place, moving it close to the walls, adjust the level, check the strength and reliability of fixation so that the bathtub does not "dance". Next, the siphon is connected to the bathtub and sewage system, and all places of possible leaks are sealed and treated with a sealant. Only after that, you can start cladding the walls with ceramic tiles, after which, the legs are tightened until they stop.
Sometimes, there is a problem of high location sewer hole... this usually happens in old houses, or, in new buildings, with an illiterately installed sewage system. Then the bathtub needs to be raised to an additional height, if it is not cast iron, which is quite problematic to raise. Wooden blocks of the required height are substituted under light bathtubs, either lay out a substrate of red (white) brick, or, more simply, replace the threaded rod with a longer one. They are sold in construction markets and plumbing stores.
The cast-iron bathtub, known to us for a long time, is heavy, so install it together. This bath is good because it keeps the heat inside for a long time, so it is suitable for those who like to soak up the fragrant foamy water for a long time, it is purchased once and for all.
The new bathtub is brought into the room vertically and turned over on its side, placed in its place with the bottom against the wall, and the outlet should be located in the direction we need. The supports are fixed from the upper side of the bath with a tightening bolt, if there are wedges, they are installed by lightly tapping from the center to the edges, until they are securely and firmly fixed.
An adjusting screw with a nut is pre-installed on each support.
Then the bath is turned upside down, two missing side supports are installed. Now, using a level and an adjusting screw, align the bath to the ideal horizontal position, without tilting. If the installation surface of the legs is smooth and slippery, it is fixed with waterproof polymer glue, or decorative plastic plugs are used.
Then they connect to the water supply system, making reliable waterproofing of all gaps, cracks and joints. The final stage of the bathroom installation is the installation of a faucet and a shower hose, taking into account all design features and their ease of use in the future.
 Photo of corner sealing
Decorating is the ultimate bathroom renovation, done on a fully fixed piece only. You can tiled the bathtub with tiles, drywall, purchase a special protective screen, all according to your wishes and imaginations. In any case, it is necessary to leave windows for access to pipes and drain, if necessary during emergencies. It is strictly forbidden to close these places tightly so that leaks can be eliminated at any time.
Source: remontset.ru
How to fix the bathtub: the right sequence
Usually, a special mount for the bathtub is used, depending on the material from which it is made - steel, cast iron or acrylic:
- The advantages of cast iron baths are durability and the ability to retain heat longer, while the disadvantages include the large weight of the bath. Therefore, it should be mounted on a sufficiently strong and reliable surface,
- The steel bathtub can be mounted on a specially made podium. For the manufacture of the podium, bricks can be used, as a result, the bath will stand on such a podium quite steadily and firmly, without swaying. Steel baths are much cheaper than cast iron ones, their main disadvantage is noise when filling with water,
Useful: to eliminate noise when filling a steel bath with water, you should treat its surface from the outside with a putty, which also allows the bath to keep warm for longer.
- Acrylic bathtubs have a range of positive qualities: keep warm well, do not slip, have a pleasant appearance. Moreover, the strength of such baths is inferior to the strength of baths made of cast iron and steel.
Acrylic bathtubs have a flexible bottom that can break under the weight of a heavy person. How to strengthen acrylic bath? To do this, it is necessary to make a solid metal structure in the shape and size of the bath, which is highly stable. - For fastening metal baths, in addition to the podium, special iron legs can be used. This method sometimes turns out to be less reliable - over time, the bathtub begins to sway a little.
 Foaming the corner
Basic principles of fastening
Regardless of whether the question of how to fix an acrylic bath or a metal bath is being considered, there are several general principles for fixing it:
- The drain pipes are easiest to attach to the bathtub by placing it on its side,
- The first step is to connect the drain and only after that attach the bathtub to the legs or podium,
- Next, you should slowly move the bath to the wall, adjust it in height and secure it carefully,
- After the bath is fastened to the wall, the gaps in the contact points between the bath and the wall should be repaired with a special covering mixture,
- Without waiting for the mixture to harden, they also install a plastic skirting board or plinth.
Fastening of various types of baths
The fasteners used for the bath depend on what material it is made of:
- Cast iron baths are usually installed on four cast supports (legs) rigidly fixed to the bath body. The fixing of the supports depends on the design of the bath and is carried out either by hammering in the metal wedges supplied in the kit, or by tightening the tie bolts.
- Important: when installing a cast iron bathtub on a low to medium hard surface of the bathroom floor. under each support, a metal (not aluminum) backing must be installed, the diameter of which is at least 50 mm and the thickness of at least 5 mm.
- Unlike heavy cast iron bathtubs, which can be securely installed even in the middle of the bathtub, light steel bathtubs are securely anchored by abutting the three walls of the bathtub. The bathtub is installed before the wall tiles are laid, and in the ideal case, the end walls are at a distance of 3-5 mm longer than the bathtub length.
Baths are usually installed on legs, but the main problem is that placing the bath on the floor will cause it to rock during the adoption process. water treatments that causes some discomfort.
 Photo of a bathroom installed on legs
In the case of a cast iron bath, the most effective way to solve this problem is to build a podium at the place of its installation.
Fastening an acrylic bathtub is made in almost the same way as fastening a steel one. The main difference is that the supports are most often not fastened with bolts, but screwed directly to the bottom of the bath with screws. If there are no ready-made holes in the seats for complete screws, you must drill them yourself.
Important: When drilling holes in acrylic, only stop drills should be used, as drilling in acrylic is very easy.
Bath fixing instructions
Let's consider the main stages of fixing the bath.
 The final part of installing a corner bath
Related videos: Bath installation. How to install a bathtub with your own hands.
The first step is to figure out what material the bathtub is made of:
- Cast iron baths have high durability and are able to retain heat for a long time. At the same time, they also have a very high weight, so the best option for how to fix a cast-iron bath is to build a podium.
- Steel bathtubs are characterized by lower weight and cost, as well as simplicity. Moreover, their service life is also significantly lower than that of cast iron baths.
In addition, steel bathtubs quickly lose their attractiveness, since the enamel comes off quite easily. - Acrylic bathtubs are comfortable, attractive in appearance, and also retain heat well.
At the same time, thinking about how to fix an acrylic bathtub, one should take into account its low strength, since there are cases when an acrylic bathtub is under the weight of the weight full of man could not stand it, which was expressed in pushing inside her legs.
- The podium should only support the bottom of the tub, while the legs should remain on the floor.
- The podium is usually made of bricks and is leveled with a bubble level.
- After the construction of the podium, a bath is installed on it and the height of the legs is adjusted. Leveling the height will be greatly facilitated as the bathtub now rests on the podium instead of on the legs.
The bath is laid on its side and an overflow pipe is installed outside to prevent the bath from overflowing. An outlet is mounted at the bottom of the bath.
- The floor siphon is connected to the overflow and outlet of the bath.
- The legs are attached to the bathroom and installed in such a way as to insert the siphon pipe into the sewer pipe.
- Slide the bathtub against the bathroom walls.
- The joint of the drain and the siphon is minted.
- Place small pieces of wood under the legs of the installed bath so that the bath has a slight slope in the direction of the drain, which prevents the accumulation of water inside the tank.
- After firmly fixing the bath and adjusting the height of the gap between the walls and sides of the bath, seal it up with putty or cement.
- After the bath is installed, it is covered with drywall. On top of it, tiles are laid in the bathroom or a plastic screen is installed under the bath.
 Plasterboard cladding of the installed bathroom
Source: eto-vannaya.ru
We determine the optimal height of the bath from the floor
Bathroom renovation is always accompanied by accurate calculations and careful measurements. After all, everything is interconnected here: plumbing is mounted taking into account the location of pipes and drains, cabinets and shelves in optimal places for use.
Even the height of the bath from the floor is very important, and this parameter should be taken into account when carrying out any repair work.
If professionals are engaged in the installation of plumbing and repair, then by all means expect from them the question: what is the height of the bath from the floor you need. It is worth considering in advance what answer to give to the masters. To do this, you need to analyze the following information:
- The growth of family members living in the house - it is always difficult for people of short stature to climb over high sides
- The presence of children and elderly relatives in the house - it will also be difficult for them to master great height due to age and complexion.
- Do you plan to decorate the walls with tiles, and what size will its elements be?
When the installation height is standard - 60 cm, the ceramic tiles are laid down from the floor in exactly two or three rows. It does not need to be cut and adjusted to size once again. It is very convenient for installation, more aesthetically pleasing in appearance and reduces the consumption of finishing materials.
The tile lays down in perfect rows when exactly 60 cm from the floor to the sides of the bathtub
As for the distance from the sides of the sanitary ware to the floor, it can be easily changed during installation. Of course, the presence of adjustable legs should be clarified at the purchase stage so that there will be no problems in the future.
It is worth deciding in advance on the distance of the sides from the floor, since after the installation of cast-iron plumbing it will be difficult to change something due to the large weight of the product.
Acrylic products are in greatest demand among other types of sanitary ware, as they are light in weight, good thermal conductivity, easy installation and elegant design. However, such equipment is susceptible to improper maintenance and is easily damaged by shock loads. The height of the acrylic bathtub from the floor can be adjusted without problems thanks to the adjustable legs of the product.
Steel tubs are also easy to install, but less popular than acrylic and cast iron. They are mounted on three walls, as they are not very stable. But their main disadvantages are that they quickly cool water and are quite noisy during operation.
Since most of the bathtubs offered on the plumbing market have adjustable feet, installation problems usually do not arise.
So, the standard height of the bath from the floor is 60 centimeters, but if this indicator is somehow inconvenient, then when installing the product, you can stop at your own version. You should not experiment too much - it is better to choose a comfortable height in the range of 50-70 cm from the floor.
The height from the floor determines the comfort when using plumbing products by a person
 Laying bricks around a corner bath
When choosing a bath, two parameters should not be confused: the depth of the product and the height from the floor. The height is determined by the distance from the horizontal floor to the sides.
The depth is measured by inside- also from the sides, but only to the bottom. If the installation of the bath is already close, and you have not yet decided on its height from the floor, then try to find the best option empirically. Or listen to the advice of professional builders, who will suggest the best solution based on the interior of the room, the location of the decoration on the walls, as well as taking into account the outlet of pipes and sewer drain.
Source: vannaguide.ru
Acrylic bathtubs are popular due to their attractive appearance, variety of designs and colors, affordable price and ease of installation. In addition, acrylic bathtubs are light in weight, not porous, most of them have an antibacterial coating, and defects are cleaned with special pastes. But there are also disadvantages - the surface does not withstand mechanical damage, cleaning with abrasive agents, and they keep heat to a lesser extent than cast-iron bathtubs, and it is not recommended to sit on the sides of acrylic bathtubs.
Preparing to install an acrylic bathtub
The bath is installed in the room before it is tiled. Before choosing a new bath, the central tap is shut off, dismantled old bath, cut out or break out the old drain (depending on whether it is metal or plastic), clean the sewer bell, then insert a corrugation (an element of drain fittings) into it and liberally lubricate the joints with silicone sealant, the floors must be carefully leveled.
After that, they begin to measure, carefully checking all the dimensions of the place where the new bathtub will be located. When choosing a location, keep in mind that the bathtub should not block access to the pipes, but at the same time it should fit snugly against the wall.
The last stage in the preparation of the bathroom is the cleaning of debris.
 Scheme drawing of the installation and connection of the bathroom
The shape of the bath can be not only rectangular, but also other geometric shapes - round, square, angular and others. At the same time, despite the shape, the walls of the bath should not bend under the pressure of the hand, shine through, and there should be no pungent chemical odor.
The quality indicator is the number of supports. A sufficiently sturdy product has four corner supports, less durable - more. Included with the purchase, check the quality certificates, product batch number, availability of installation instructions, fittings, quality and quantity of fasteners.
Installation options for an acrylic bath: frame with legs, brickwork and a combination of these two methods. The most correct is the first method, installation of the bath on a special frame, which should come with the bath.
Tools and materials for work
One of the preparatory stages is the preparation of materials and tools for work. You should stock up on the following:
- mounting gun for sealant,
- building level,
- adjustable wrench,
- corrugation or rigid tube.
 Tiling mounted bathroom
How to install an acrylic bathtub with your own hands
Before starting the installation and installation of the bath, it is necessary to turn it over.
- unpack all the details of the frame fasteners,
- we put the guiding marks with a pencil, one will be located closer to the drain, the other closer to the head of the bath,

- according to these marks, we drill holes for screws (it is advisable to install a mark on the drill with a piece of electrical tape so that it does not go through the bathtub, and the hole is not more than six millimeters deep),
- we fasten the fastening brackets with self-tapping screws, and to them the legs of the product.
Installing a siphon
 Brickwork for the subsequent installation of a bathroom on it
- we connect the upper drain hole, then the lower one,
- we collect the siphon,

- degrease the surfaces with a solvent and apply a layer of sanitary sealant.
- turn the bath over and, using the level, measure the degree of curvature of the bath along and across it and, accordingly, twist the legs in the desired direction.
 Bathroom with glued soundproofing
- The bath is adjusted according to the level
Installing hooks to prevent the bath from turning over
 Photo of making a box for a bathroom
- mark the edge of the bathtub on the wall,
- we drill holes with a puncher,
- we attach the hooks to the wall with dowels,
- we put the bath on these hooks.
 Drain connection
- We connect the siphon to the sewer using a corrugation or a rigid tube.
 Bathroom installation
- We check the bathtub for leaks (we fill the bathtub with water and carefully look to see if a leak is found, if any, we re-process it with plumbing sealant, after drying and degreasing the surface).
 Bathroom installation process
Source: stroyvopros.net
How to install a bathtub on bricks: lay out a brick base and a side
The method of installing the bathtub depends on the type of room (combined with a bathroom or autonomous) and its area, the size of the bathtub itself, the presence in the room of other plumbing fixtures and household appliances, furniture, etc. Maximum stability is ensured by installing the bathtub on bricks. At the very beginning, we want to note that ergonomic requirements require maintaining a distance to the bath rim of about 0.9 m.
 Foam as soundproofing
Placing the bathtub on legs does not guarantee its stability: the screw fastening looses over time, reducing the static. The most reliable location for a cast iron bowl is on solid brickwork. But simply placing the bowl on such a "pedestal" is not enough.
It is necessary to do the work efficiently, which means, slowly, step by step to make the installation so that there is no gap between the side of the bathtub and the wall where water gets in, and then, over time, mold forms. First, you need to understand that cast iron products are heavy in themselves, and if you take into account the average dimensions of the baths 80 × 160 with a height of 50 cm, then it is clear why the installation should be done at least by two people.
The cast iron bathtub should be installed on a brick lined base. Note: with the seeming archaism of such baths, they are actively used, because the indicator of the heat capacity of cast iron surpasses all other materials at times!
Brick base for a cast iron bath
In just a few steps, the bath will be installed on a solid base. For this you need:
 Corner bath installation
- Measure the room and bath, think over its location in relation to other household appliances and plumbing equipment.
- Prepare bricks. They need just enough so that it is enough to lay out a scaffold 2-3 bricks high across the bathhouse. On average, 20 pieces. To get a notch (bed) along the edges, another half-brick is laid. Depending on the length of the product, the number of rows is calculated, taking into account that the optimal distance between them is 50 cm. In height, the bathtub on bricks from the sides to the floor should not be higher than 0.7 m, so that it is convenient to get into it. The height of the front scaffold is 17 cm, and from the other end it is performed 2 cm higher.
The masonry is done on a sand-cement mortar: for one part of the cement there are 4 parts of sand mixed with water. The edges of the container are attached to the wall with tile adhesive. For greater reliability, the side surfaces of the bathtub adjacent to the wall, and the wall itself, are processed in the same way. This ensures, firstly, strong connection"Wall-bath" Secondly, the adhesive base creates a seal of the seams. Ideally, for good adhesion of the mortar to the bricks, the masonry should be allowed to stand for at least a day.
- A siphon with an overflow is mounted on a bath that has not yet been installed. To do this, turn the bowl on its side and equip the drain hole for the siphon with rubber seals to prevent water leakage. So that you do not have to "turn over" the container again soon, it is better to immediately take care of a high-quality reliable siphon. The sewer pipe with a drain must be located below the outlet of the siphon.
- A bathtub is installed horizontally on the prepared surface at a level laid on the bottom, without a slope. But the outer edge is literally half a centimeter higher than the inner one (so that there is no spillage of water over the edge on the floor).
- Correct installation of a cast-iron bathtub on bricks involves connecting the drain with the sewer hose in two ways: a strong and more reliable rigid connection: a plastic pipe and an elbow with an angle of 45 ° and 90 ° are used, a flexible and movable compensating plastic corrugation is connected hermetically with a seal to the sewer inlet.
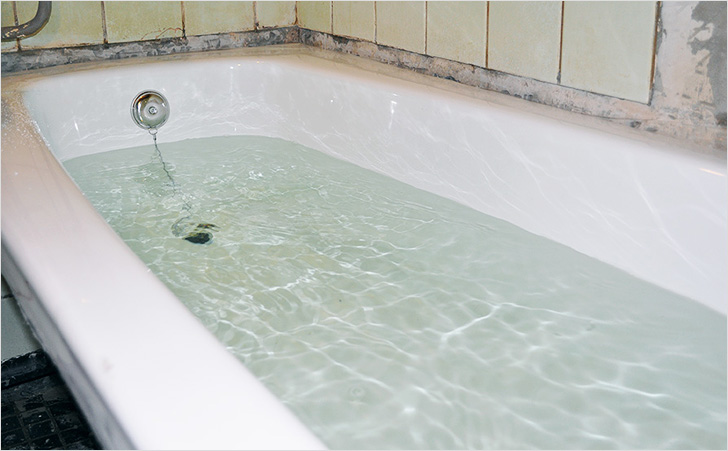
It is necessary to provide free supply of pipes for hot and cold water supply, drainage systems. It is important to make sure the installation is correct right away. For this, the container is filled with water and the drain is opened. If the liquid does not leave immediately, with delays, then there is a skew.
- One more nuance. Before installing the bathtub, the distance from its rear end to the wall is calculated. If an excess of space is assumed, it must also be laid with bricks. Alternatively, a support box under the bowl, just below the rim.
Brick rim for steel bathtub
Installation technology different baths in general terms the same. The undoubted advantage of steel sanitary tanks - their low weight (about 30 kg) - is one of the reasons for instability.
The steel bath can be installed on metal profiles and then the structure is complemented by brickwork
Installation work is carried out even before the walls are tiled. Before installation, bricks under the bathtub are pre-pasted with rolled plastic guerlain, and the walls are treated with a moisture-proof compound. The fabric layer at its base serves as a dividing element (compensator) between cement mortar and a body that changes its geometric parameters and shape depending on heating or cooling with water. For better adhesion and elimination of air zones between surfaces, tile adhesive is applied to the interlayer.
 Bathroom screen shaping
The "shirt" made of the same Guerlain, into which the entire iron bath is packed, not only increases its strength, but also serves as an excellent sound insulator, drowning out the noise of falling water.
Polyurethane foam is blown out from below between the red brick posts when the bath is filled with water. When the foam increases while solidifying in volume, it can lift the light container over the uprights. The weight of the water keeps the bath on the bricks. The foam heat insulator is also a good sound absorber. Finishing work is carried out with the provided hatches for the inspection of plumbing units.
It is important to note that a steel plumbing product needs to be grounded. The best way to do this is to use an industrial tested grounding device.
A bathroom in any house or apartment takes pride of place, so creating a cozy atmosphere in it is a guarantee of comfort. In order for a visit to a room to evoke pleasant emotions, you periodically have to make repairs in it, it is better if the repair is combined with the replacement of plumbing. Progress does not stand still, and banal cast-iron baths can be replaced with more prestigious ones. We will talk about how to install the bathtub itself with our own hands in our article.
Installing a bathtub with your own hands is easy and simple if you know at least the basics of this work. You should also not refuse the help of specialists or friends, especially when it comes to cast-iron models. Let's take a look at the installation of a steel bath, which consists of several important steps.
Step-by-step instruction:
Subtleties of installing bathtubs on different floor coverings
The material from which the bathtub is made influences the tile laying process. If you decide to install an acrylic bathtub, which has a relatively light weight, then the tile must be put first on the floor and then on the wall.
If you are installing a cast iron structure, then the order of laying the tiles changes slightly. First of all, the tiles are laid on the floor, then the bath is installed, and from the line of contact between the bath and the wall, you need to start laying the tiles on the walls.
If your bathroom already has floor tiles then you need to take care that mounted bath was stable and did not slip on the floor. To do this, you need to fix the base with waterproof polymer glue, and "put" the legs themselves in plastic tips that will protect your tile from scratches.
Types of baths
If you decide to change the bathtub, then you need to consider two parameters:
- bath shape.
- material.
Depending on the shape, the bath is:
- round;
- oval;
- rectangular;
- square;
- angular.
Depending on the material of manufacture of the bathtub there are:
- steel;
- cast iron;
- acrylic;
- wooden;
- marble;
- concrete and others.
The most popular are the baths in the first four positions. If you decide to install a cast-iron, acrylic bathtub, then our advice will definitely come in handy.
Installing a cast iron bath
 The installation of a cast-iron bath begins with its drift, which has its own nuance. When skidding, the drain hole should be located on the side of the pipe. In addition, the bathtub must be placed on its side so that the bottom is on your side, as in the photo.
A cast iron bathtub can be installed in two ways, on legs or brick supports. If it was decided to mount the bathtub exactly  on brick supports, then they must be prepared in advance. The height of such supports should be calculated taking into account the height of the edges. Place a bathtub on them. You can see how it should turn out in the photo.
If metal supports were chosen for the installation of the bowl, then their fastening is described in detail in the installation of a steel bath. Pay special attention to the tightening of the bolts so as not to overdo it.

In order not to form stagnant water when installing the bath, one rule must be observed - its inclined position. Usually 3-5 degrees is enough to tilt the bathtub towards the drain, to ensure a good drain.
It remains to check the bath for stability and horizontal sides, using a level, as in the photo. 
Installing an acrylic bathtub on a factory frame
 The installation of such a bath is slightly different from the technologies of the previous two methods. Since a plastic bathtub cannot boast of its strength and rigidity, its installation requires a frame that will take the main load on itself. The frame can be purchased or made by yourself. This is what a bathtub looks like, in a factory frame.
If, in addition to the bath, you purchase an additional set, then the installation of the bowl will be simple and quick. For this type of bath you need to purchase:
- details for fixing the bath to the wall;
- details for fixing the panels to the bath;
- system for draining water;
- panel for protection;
- frame.
 How to install the bath:
- The first thing you need to do is measure the height of the drain hole and compare if it matches the height of the bowl;
- Apply markings on the walls for installing fasteners, install them;
- Install the frame;
Please note that the properties of the bath require fixation on three sides, otherwise there will be no need to talk about its rigidity.
- The bathtub must be brought into the room, observing the position of the drain hole;
- Secure all supports;
- Install the bath into the frame;
- Check it out horizontally.
The protective film is removed from the bath only when all construction work has been completed.
If you need to renovate a bathtub, we will tell you.
Installation of an acrylic bathtub on a homemade frame
Installing a bathtub in a self-made frame is no different from the previous method. The only difference is in the frame itself, which will take more time to make.
To work you will need:
- wooden beams;
- drying oil;
- plywood, resistant to moisture, 15 mm thick;
- self-tapping screws;
- glue;
- corners for fastening.
Step-by-step instructions for making a frame looks like this:

To connect the bath water supply, it is better to use polypropylene pipes.
Varieties of drain fittings
When installing bathtubs, several types of drain fittings are used.
- Tubular siphon, has a curved design reminiscent of the letter U, resulting in a hydraulic seal at the bottom. One side of the structure is attached to the bathroom, and the other to the sewer hole;
- Bottle siphon matches its appearance. The structure is attached to the drain pipe and has a side branch pipe that acts as a water seal and a sump;
- Ladder or flat siphon, which is installed when installing shower trays, or in a situation where it is necessary to equip a drain in the floor. Such a system is available with a dry seal or a hydraulic seal.
 In addition, the listed models are equipped with a drain opening and shut-off system. In this regard, siphons are:
- mechanical;
- semi-automatic;
- automatic.
Depending on the materials, drain and overflow structures are divided into two groups:
- plastic;
- metal.
Advantages and disadvantages of drainage systems
If you cannot decide which drain system to install, then the advantages and disadvantages of all types listed below will help you make a choice faster.
Tubular siphon
The advantages of a tubular siphon include:
- simple construction;
- easy manufacture and affordable price;
- wide passage opening, which eliminates frequent blockages;
- easy installation and those. service.
The disadvantages of such a siphon include:
- inconvenience of operation.
Bottle siphon
The advantages of a bottle siphon include:
- compact size;
- aesthetic appearance;
- easy disassembly and cleaning.
The disadvantages of such a system include:
- frequent blockages in the system.
Tubular design with automatic
Such a siphon has the following advantages:
- convenient operation;
- aesthetic appearance;
- brass body;
- a quality mechanism.
The disadvantages of this siphon include:
- high cost:
- a control mechanism that is exposed to water and dirt;
- poor quality materials;
- movable elements and housing made of plastic.
The last three drawbacks apply only to cheap models.
Homemade baths, how and from what you can make
If none of the proposed options suits the style of your bathroom, then you can find a more extraordinary solution to this problem and make a bath with your own hands.
At home, you can make several options for baths:
- Polyethylene bathtub... This offer is the most budgetary and low-cost one. All you need is a large container and the polyethylene itself, which needs to be sent to the bottom and sides. A more improved example of such a bath is a recess prepared on site and lined with the same material. This option is more suitable for the implementation of the functions of a small pool;
- Brick bath... For such a bath, you need to prepare a deep pallet, which is lined with bricks on the outside. The height of such a bath should exceed the level of the pallet, but also take into account the wishes of the owners of the house.
The second option is more demanding, since you need to think over the drainage system in advance. To do this, you need to make a hole in the pallet and bring a corrugated pipe to it, which with the second end will dock with the sewer.
You can read how to install a mixer with your own hands.
For the construction of such a bath, it is allowed to take narrow formwork modules made of metal. Then the finished structure will be solid and solid. To do this, the frame is poured with concrete and, after it dries, is revetted interior material with moisture-proof properties. As a result, you should get a small semblance of a pool.
Building brick bath can be divided into several stages:
- Plumbing work, which provide for bringing drain systems to the bathroom. Such work must be done before installing the walls. It is better if, instead of conventional drainage systems, a drain for shower cabins is installed, since if a blockage occurs, it will be easy to clean the hole from above;
- Bath construction... The first thing to do is measure the entire room and draw up a drawing that will help calculate the amount of material needed. Then you need to lay out the bottom of the bathtub with bricks, aerated concrete or other types of blocks. For brickwork, ordinary masonry mortar is used;
The walls of such a bath are laid in half a brick. If other types of blocks are used, then their thickness should not exceed 100 mm. It is also impossible to make the wall thinner, otherwise it will not withstand the load. If such a need arose, then reinforcement should be used to strengthen the structure, which will add the required thickness.
- Waterproofing- this is the most important stage in the construction of a brick bath. For these purposes, it is necessary to choose roll waterproofing used for arranging pools or foundations. It is better if such waterproofing is combined with a bitumen coating. Waterproofing is done in two layers so that its edges overlap each other. And the top layer must be covered with a primer in order to create a good adhesion of the waterproofing with the finishing material;
- Finishing- this is the final stage of work, for which small tiles are used.
As you can see from our article, installing a bathtub with your own hands is a process that is not characterized by increased complexity. The desired result can be achieved by observing the sequence in the process of performing the work. With a neat and attentive attitude to work, you are guaranteed comfort and coziness in the bathroom, as can be seen in the video.
Choosing and buying a bath is only a part of the problems in the noble cause of bathroom renovation. It is very important to correctly install the bathtub, connect it to the drain and not damage the surrounding interior, especially if part finishing works already completed.
This task cannot be called simple and easy, but if you have certain skills, a suitable tool and knowledge of important nuances, even a novice master can install a bath with your own hands. When installing this bulky plumbing equipment, it is very important to take into account the peculiarities of its design and the material from which the bathtub is made.
Before you go to the store and buy a bathtub, you need to do some preparatory work. First you need to dismantle and remove the old bath. And if there are no special problems with a steel or acrylic product, then you will have to work hard on the old cast-iron bathtub. Sometimes you just have to cut or break the tub and take it out piece by piece.
Then you need to prepare the base. As with other types of work, dirt should be removed and irregularities should be repaired. In most cases, it is recommended to perform a new cement-sand screed and wait for it to dry.
Then you need to prepare the tools and purchase the materials that will be needed for the installation work:
- screwdriver;
- hammer;
- grinder;
- chisel;
- cement;
- polyurethane foam;
- paint;
- electrical tape;
- sealant, etc.
Depending on the type of tub, bricks, beams, plywood or other materials may also be needed for the frame supporting the device to finish it
It is necessary to purchase a bath tubing, drain fittings and other necessary elements. For plastic sewer pipes, a drain-corrugation with a diameter of 50 mm is used, and for cast iron - a drain-corrugation with a diameter of 40 mm.
Another important step is to inspect the sewer drain and eliminate any identified faults. It is imperative to eliminate any likelihood of leaks, otherwise you will have to dismantle an already installed device over time, and this is a complex process. At this stage, you should also think about how to connect communications in order to install the bath correctly.
It is necessary to conveniently put a mixer with cold and hot water, as well as connect the sewer. To do this, attach an overflow funnel, siphon, tee, pipes, etc.
Together with the strapping kit, the manufacturer usually encloses instructions, following which, you can easily connect all the components correctly. The assembled strapping is carefully coated with sealant at the joints.
How to install a cast iron bath on supports?
The large weight of the cast iron bath gives it sufficient stability, so you can install it on legs without additional support. After all the preparatory work has been completed, the bath should be transferred to the installation site. Since a cast iron bathtub weighs quite a lot, you need at least one assistant.
In order not to accidentally damage furniture, decoration, openings and other objects during the transfer of a heavy and bulky bathtub, it is recommended to protect problem areas in advance with shock-absorbing material.
The cast iron bath has a significant dead weight, which allows it to be installed on legs in the form of legs without an additional base
For correct installation follow these steps:
- Place the bathtub on the floor sideways so that the bottom faces the wall and the drain is directed to the sewerage connection. This will make it more convenient to mount the siphon.
- Install the supports securely on the side facing up.
- Carefully turn the tub over.
- Install the rest of the supports in the same way.
- Place the bathtub on its feet.
- Using a level and adjusting screws, level the bathtub so that there is a slight slope towards the drain.
- Move the bathtub close to the wall.
- Fill up the remaining gap with polyurethane foam; you can also use tile adhesive.
- Connect the drainage corrugation with the installed strapping using a special gasket so that its cone is directed towards the strapping.
- Secure the connection with a special nut.
The force that is applied to tighten the bolts on the supports should be moderate so as not to damage the plastic base of this element. After finishing the installation, it is necessary to check the quality of the work performed. To do this, close the drain and fill the bath to the brim.
It is necessary to inspect the place where the overflow is installed, as well as the connection of the bath body with the drain. The presence of leaks at this stage is most often caused by improper installation of the gasket. If the leaks are not fixed, you should open the plug and observe the condition of the piping.
For quick and accurate detection of leaks, you can put hygroscopic material on the floor: paper towels, napkins, toilet paper etc. For small leaks, it is sometimes sufficient to simply tighten the union nut to ensure a secure connection.

The place where the cast-iron bath adjoins the wall must be fixed with cement mortar or glue for ceramic tiles and then carefully seal
You should also take care of the grounding of the device. This stage is simple to accomplish: a piece of wire is attached to the body of the bath, and its other end is brought to the nearest metal structures... After that, you can start finishing work.
Installation of a cast iron bath on a brick base
The brick base is widely used as a bath frame. This is a reliable and affordable installation method that can be successfully used for both steel, cast iron and acrylic models.

If the metal legs can deform over time, which fatally affects the position of the bath, then the brick perfectly withstands decades of operation.
There are two options for installing the bathtub on a brick base: two supports are made from it, as shown in the figure above, or one large brick base is prepared.
For cast-iron bathtubs, it is recommended to use a combined installation method: first, the legs are screwed on, then the structure is mounted on a brick base, in which openings are left for the legs. Given the severity of the bath itself, the base is most often made large, although sometimes two brick supports can be used.
The length and width of the brick base must correspond to the dimensions of the bath bottom. To make a brick clack, you will need about 20 bricks, as well as a sand-cement mortar in a ratio of 1: 4.

A combined method is considered effective when installing cast iron and acrylic bathtubs, in which the bottom of the bath is supported by brickwork and the legs are also used as support
Before starting work on the floor, markings are performed indicating the size and configuration of the bath. After the masonry has been made in two bricks, another half-brick is added on the sides to form a recess for the bottom.
Sometimes a layer of polyurethane foam is applied to a brick support, on which a cast-iron bath is installed. The foam on the top takes on the precise shape of the bottom and bonds the unit securely to the brick base.
Foam can also be used as a material to enhance the thermal and acoustic insulation of the bath. To do this, cover the entire outer side of the bath with polyurethane foam or only the bottom and sides to the middle of their height.

The bottom and sides of a cast iron or steel bath can be treated with polyurethane foam. This improves the noise insulation of the device, as well as increases its ability to retain heat.
After the bath is installed on the foam, it is necessary to connect it to the sewer, close the drain and fill with water approximately to the middle so that the foam sags correctly under the weight of the bath. At this stage, the position of the bath is adjusted horizontally so that it stands level, but with a slight slope towards the drain.
In this case, the external bath tap should be about 1 cm higher than the edge located against the wall. This will help prevent overflow of water onto the floor. After that, you need to open the drain and see how the water leaves. If this happens quickly, the bath is right.
If the water leaves too slowly, you should increase the layer of foam in the right places in order to level the structure. As with installing a cast-iron bath with legs, the edge adjacent to the wall must be treated with tile adhesive and sealant. All other components and connections should be sealed as well.
Before finishing work, while there is free access to the tub piping, you should fill the tub with water and check the quality of the drainage seal, as well as the correct slope
Features of installing a steel bath
To understand how to install a steel bathroom, you can use the principles described above for a cast iron structure. The main difference between a steel bathtub and a cast-iron analogue is a much lower physical weight, which is both an advantage and a disadvantage.
Unlike a cast-iron bathtub, a steel structure is much easier to move in space: to bring in, turn over, etc. With a certain skill, it is not difficult to do it yourself. However, if the cast-iron structure can quite confidently stand in the middle of the bathroom, relying only on the legs, then this option will not work with a light steel device.

Steel baths must be fixed on three sides. On the fourth side, it is recommended to reinforce the bathtub with brickwork, which can then be tiled with ceramic tiles.
When installing, do not forget to leave access to the communications and connections located under the bathroom!
If the cast-iron bath can be simply moved close to tiled wall and close up the joint, then the steel should be installed even before laying the tiles. The optimum clearance between the ends of the bathtub and the walls is five centimeters. This will allow you to freely place the device in the space provided for it.
If the manufacturer supplies feet that can be adjusted in height to the bathtub, it is preferable to use short legs equipped with long adjusting bolts. In this case, it is advisable to use the legs, which are equipped with self-adhesive pads.
They prevent the enamel from peeling off the adjusting bolts, which can occur both during adjustment and during operation.

To install the legs of the steel bath, the device must be turned upside down. The surfaces to be joined are degreased with acetone or alcohol
Here is a rough procedure for installing a steel bath:
- Place the bathtub upside down with a soft material such as packing cardboard underneath.
- Try on the paired supports for the installation locations: the first one - two centimeters from the outlet, the second - as close to the opposite edge as possible on a flat bottom.
- If necessary, align the supporting channel for a snug fit of the support to the bottom of the bath.
- Degrease the joints with acetone or alcohol (but not with paint thinner!).
- Remove the protective films from the overlays, put the supports in the places allotted for them and press firmly (before the procedure, the overlay can be slightly warmed up with a construction hairdryer).
- Carefully drive the threaded rods into the plastic ends.
- Screw the lugs to the supports using the fixing nuts.
- Place the bathtub in the space provided for it with the legs down (do not hold on to the legs when carrying the bathtub, they can be deformed).
- Pre-adjust the position of the bath using the adjusting bolts, observing the required slope.
- Connect the mixer and sewerage system, seal the joints.
- Using four narrow wedges, driven between the walls and the end sides of the bath, fix correct position devices.
- Cover the edges of the bathtub adjacent to the walls with paper tape.
- Fill the gap between the walls and the sides of the bathroom with polyurethane foam.
- After the foam dries, remove wedges, protective tape and excess foam.
- Run a supporting brick wall on the fourth side.
- Tile the brickwork or install a decorative screen.
A steel bathtub, strengthened in this way, will be secured sufficiently securely and will serve for many years. Sometimes, to give the structure additional stability, it is not installed on the legs, but on a sand cushion.
The outer side of the bottom and sides can be treated with polyurethane foam to reduce the noise of water pouring into the bath and improve its ability to retain heat.
Acrylic bathtub installation rules
One of the advantages of acrylic structures is their low weight. This allows you to carry out all the installation work alone. However, for such a bath, it is necessary to make a special frame frame that will hold the lightweight structure in the correct position.
It is best to purchase an acrylic bathtub, which comes with everything you need for a successful installation. This is a set of accessories that allow you to attach the bath to the wall: frame frame, waste-overflow, decorative panel, installation kit decorative panel etc. Different manufacturers complete their products in different ways, this point must be clarified when purchasing.
A practical experience of installing a bathtub on a factory frame is presented in the following video:
Custom-shaped acrylic bathtubs are very popular today, which improve the use of the bathroom space or its appearance. However, the more complex the configuration of the acrylic bathtub, the more difficult it will be to install.
The frame-frame can be made independently, but it is still recommended for novice craftsmen to use factory products, as they are more reliable and of high quality. And the availability of a ready-made frame will significantly reduce the installation time.
If there is no frame, the frame is made of brick, sometimes using timber and plywood as additional materials.

The frame of the acrylic bathtub can be made of beams and plywood. Moreover, all wooden elements must be treated with a moisture-proof compound
The frame is fixed in such a way that it is attached to a wall or other support. You should not just connect the edge of the frame to the side of the bathtub, since in this case the entire load will be on the frame, which has no additional reinforcement and may break. Sometimes a special plinth is made to secure the bath.
When working with timber frame use galvanized self-tapping screws for concrete and wood, as well as drying oil, which should be carefully processed all wooden elements.
Vertical racks are installed at the corners of the bath, as well as along its sides at a distance of 50 cm from each other. The height of the vertical racks is determined as follows: measure the height of the side of the bath to the floor level, and then subtract the width of the upper and lower base from this indicator.
The bath bowl must rise above the floor level by a distance sufficient for the correct connection of the drain to the sewer.

Acrylic bathtubs of non-standard shape are very popular, but it is more difficult to install such structures, since you will have to make a frame that exactly repeats the outline of the device

If the bath has an uneven bottom, when installing it, it is necessary to make the base so that each part of the bath has a reliable support of a suitable height
To install an acrylic bathtub using a homemade frame, the following plan is usually followed:
- Brickwork is performed on the concrete base, leaving a drain hole.
- In accordance with the configuration and dimensions, the base of the frame is fixed on the floor with self-tapping screws from beams of the appropriate size and configuration.
- In the places where the vertical posts are attached, 100 mm bars are placed.
- Install vertical racks.
- Mount the top base.
- A sheet of plywood is laid on the upper base.
- All wooden elements are treated with linseed oil and wait for the protective layer to dry completely.
- After a few days, the brick base is covered with a layer of polyurethane foam or cement mortar.
- Install the bath on the prepared frame.
- With the help of a building level, the position of the bath is adjusted.
- The bath is filled with water so that the cement layer takes the shape of the bath bottom.
- After the cement has dried, the water is drained.
- Install the overflow.
- Cover the frame with a decorative screen.
Regardless of the type of construction, the chosen method and the materials used, in order to properly install the bathtub, you should take care of reliable support and the correct slope of the structure. Second important point- correct connection of communications and sealing of joints.
If you follow these principles, you can safely install the bath yourself!
Rationally located and trouble-free functioning plumbing in the bathroom is an important component of the owners' comfort. Its flawless connection is a guarantee of good relations with neighbors from the apartment below. To achieve the ideal, you need a professional installation, with the price for which not everyone agrees.
We suggest that you familiarize yourself with detailed description the process of installing and connecting plumbing fixtures made of cast iron, acrylic, steel. We describe in detail the nuances of connecting to the sewer. The information presented by us is supplemented by photo collections, diagrams, videos.
Modern industry offers us bathtubs of different shapes and colors, made from different materials. Due to the variety of models, the home owner always faces the problem of choice.
If the shape of the container and its colors excite us more from an aesthetic point of view, then important performance characteristics of the product depend on the material of manufacture: its practicality, appearance and durability.
In addition to the material, dimensions and configuration of the bowl, the choice of the bath is influenced by the size of the hygiene room, the height of the sides convenient for all members of the family, the availability of additional devices and functions.
In the production of bathroom bowls are used:
- Steel. Steel plumbing attracts with an affordable price, an abundant assortment. Due to its lightness, the installation can be handled without assistance. The disadvantages include high heat transfer, the ability to deform, bend under the weight of large people, "noise" when collecting water in the bowl.
- Cast iron. Expensive, reliable, durable. Does not make noise when filled with water, maintains the temperature in the container flawlessly. Due to the impressive weight, it is impossible to install a cast iron bath alone. Plumbing is quite fragile; careless handling can split the bowl or damage the enamel.
- Acrylic. Lightweight and inexpensive option, which is easier and more logical to replace than to repair. It does not sound when water is collected, it retains heat, but it does not last long enough and does not please with stability. You can easily handle the installation with your own hands.
If there are people with an impressive weight in the family, it is advisable to install plumbing containers made of steel and acrylic on pedestals made of brick or additional supports built from it.
These measures will provide stability and stabilize the position of the bottom. For owners with a less solid build, instead of capital brick devices, it is enough to install an additional frame made of a bar or steel profile.


Preparing the premises for the upcoming installation
If you have already made a choice in favor of a particular model, a number of preparatory work should be performed before installation begins. In addition, you should choose a place in advance, decide how you will install the bath: you plan to do the work with your own hands, invite workers or call friends.
After drawing up a kind of plan for upcoming actions, it is necessary to assess the condition of the premises, if a need for repairs is found, to carry it out.
When do you need to wall cladding?
It is best to install the bath before the wall cladding during the period overhaul premises. This sequence of work will allow you to achieve the best practical and aesthetic results.
Installing the tiles after installing the bath allows you to most effectively seal all the gaps and crevices so that moisture does not accumulate in them, which creates an ideal environment for the development of bacteria and mold.
If you were not going to renovate the bathroom, but only wanted to replace the bathtub itself, you need to choose a model that will be slightly higher than the previous one. At least 1.5 cm.
Note that the tiles under the edge of the old bathroom differ in color from the general canvas: they did not fade. In addition, it may have a dirty surface that can no longer be washed. Therefore, it is better to hide it.

It takes a lot of effort to seal up all the seams in the tile adjacent to the side of the bathtub, but the result is worth it: your bathroom should be a place of concentration of power, not infections
How to properly prepare the floor?
The bathroom floor should not only be perfectly flat, but also durable. This is especially important if we have to work with a cast iron product that has a fair amount of weight even without water.
If we are laying floor tiles under the bath with our own hands, then it should be laid using the indentation method in order to exclude the formation of voids under it. Otherwise, the tiles may crack during the operation of the bath.
Any bathtub filled with water creates a significant load on the floor surface. For its even distribution can be used wooden logs... Practice has shown that larch is optimal for this purpose.
Wood is prepared by processing with antibacterial and antiseptic solutions. Then the logs are impregnated with PVA putty or drying oil.
Lags not only redistribute the load, but also successfully solve the issue of increasing the height of the product. Sometimes we need to raise the bathtub in order to be able to install it. Such siphons will not allow sewage waste to penetrate in the opposite direction. Raising the bathtub slightly, for example, will reduce hair accumulation in the siphon.

Before installing and connecting the bathtub, the walls and floor in the room must be repaired, if necessary reinforced
Selecting the right drain fittings
When choosing drain fittings, it is no wonder how wide the range of products offered by the market is. But really, what characteristics should you pay close attention to when buying, and what can you ignore?
Reinforcement material
Market building materials offers us two types of materials: PVC (polyvinyl chloride) and polyisopropylene. We meet PVC more often, that's why we choose it.
But relatively expensive polyisopropylene is not only stronger than polyvinyl chloride, but also has a whole list of indisputable advantages, these are:
- Hardness... This material is significantly harder than its opponent, which reduces the likelihood of it mechanical damage during the installation of the bath.
- Durability. Its strength characteristics do not decrease over time.
- Surface quality. The surface of this material is smoother than PVC, which means less dirt adheres to it.
The coefficient is also extremely important useful action... The efficiency of polyisopropylene is higher than that of PVC, since the friction of water against the walls of smooth pipes made of this material is much less.
Plum element qualities
Most of the plums you see for sale are from China. In the process of their installation, a bolt is used. Regardless of what material it is made of, after a while this bolt will oxidize, rust or corrode in some other way.
You can buy a stainless steel bolt separately, but from its contact with the mesh, a solder will certainly form, which will significantly reduce the maintainability of the product.

The industry offers drain fittings for bathtubs in two versions: from PVC (polyvinyl chloride) or from PP (polypropylene). If you are interested in the durability and reliability of the device, it is better to prefer polypropylene as a material that is more resistant to household chemicals.
When buying drain fittings, do not hesitate to check its complete set and make sure that all the elements declared in the passport are present:
- Drain mesh. The most economical of all commercially available nets is the model that consists of two criss-cross bars. It traps hair perfectly, preventing clogging. The most practical is the option with round holes located around the perimeter of the product. The most reliable is called a mesh that has profiled oblique holes. However, this is also the most expensive model.
- Cork chain. It would seem that the chain is a detail that does not matter. But this is not the case. Usually we use the chain that comes across to us as part of the kit. It is undesirable to do this. Buy separately the one the fishermen use. Its surface is covered with a protective paint that does not allow water to spoil its appearance over time.
- Overflow pipe. In older bathtubs, the overflow pipe is made of metal, but modern production offers a better option. Use a corrugated pipe that has large diameter, and, hence, the bandwidth. The high flow capacity of the pipe significantly reduces the risk of water overflow.
There are some nuances of installation that are worth considering. For example, if the outlet valve of the drain fitting is wide enough, the connection can be made without using the collar. The resulting gap is simply filled with a silicone-based sealant or silicone itself.
Correspondence between the dimensions of the room and the bath
Owners of spacious bathrooms can rest easy: they have a wonderful opportunity to choose any bath they like, as long as they can fit in it themselves.
Everyone else will have to carefully measure their small rooms to make sure that the chosen model will look organic and will not deprive you of the opportunity to place the equipment you need in the bathroom.

If the area of your bathroom allows, you can install a bathtub of non-standard size and unusual shape, equipped with all sorts of additional functions.
Remember that the appearance of a product can give a false impression. Some very similar models have completely different sizes. The most common sizes of bathtubs from different materials are also different from each other.
The length of steel products is 150-180 cm, and the height is 65 cm, the width is 70-85 cm.
For cast iron models, three types of sizes are considered standard:
- small-sized with a length of 120-130 cm and a width of 70 cm,
- European standard with the same width of 70 cm, but with a length of 140-150 cm,
- large-sized with a width of 70-85 cm and a length of 170 to 180 cm.
The choice of acrylic models is truly huge. Their length varies from 120 to 190 cm, and their width is 70-170 cm.

A compact sitz bath can be literally crammed with all kinds of electronics. The price of such a baby can be several times higher than the cost of a standard model.
Small bathrooms are purchased for various reasons. Sometimes due to the fact that there is not enough space in the bathroom for a large structure. But sometimes the owners of large rooms also opt for compact models.
For example, elderly and disabled people are often advised to take hygiene procedures while sitting. They need small sitz baths.
By the way, the fact that the model takes up little space in space does not make it cheaper. On the contrary, compact products are often quite expensive. They are created in order to satisfy the needs of a number of people. And since they are in demand, then you have to pay for them.
Image gallery


However, usually completely different models reign in spacious rooms. They are made of acrylic or cast iron. Cast iron ones look monumental and reliable, but without claims to originality, but the variety of acrylics can be envied. There are both angular and rectangular models, there are even polygons or ovals. The abundance of decorative finishes is also impressive.
Sometimes buyers, falling under the influence of unscrupulous sellers, buy cheap plastic fakes instead of acrylic products. As a rule, this is a Chinese low-quality consumer goods, which you will torment to install later. We will return to the nuances of installing plastic bathtubs.

Modern models of bathtubs are becoming more complex and multifunctional: progress allows us to meet the growing needs of customers, if there were money
Preparing for self-installation
Bathtubs, regardless of type or size, are not installed in one go. The same steps are performed when connecting and full-size bowls. The number of operations increases significantly only when installing a jacuzzi.
In the process of installing them, you will definitely need some special tools, which it would be better to prepare in advance so that they are at hand, such as:
- Rule. Exactly so, with the stress on the letter "and", is called an even long bar. Its length should be equal to the diagonal of the bathtub that we have to install. If your farm does not have a rule, and you don’t want to buy it specifically for a single operation, you can use for this purpose any even and long bar with a level set on it.
- Fork key. This tool is used to install drainage mechanisms, which are usually made of plastic.
- Rubber hammer. It is necessary if you want to seat the legs of the bathtub. Rubber, unlike metal, will not damage the bath enamel and will not cause deformation of the product itself.
Silicone sealant is required as an additional material. If you have to install an acrylic bathtub, do not forget to stock up on "rag" tape.
Plumbing alignment and connection
We will level the bathtub using a level. In this case, one should adhere to the following principle: we raise the lowered part, and do not lower the raised one. Don't forget what matters to us.
First, you need to complete the alignment of the bath, and only then connect it to the sewer drain. Otherwise, the siphon could be accidentally damaged.

In order to properly align the bath and check its installation, you need to use the rule, repeating the check procedure several times
There are two ways to level the bathtub with your own hands:
- along the sides;
- diagonally.
When aligning diagonally, the rule is placed on opposite corners of the container. A level is set on top of the rule. We level the bathtub by twisting its legs until the level shows that our goal has been achieved.
After that, we shift the rule with the level to other angles, also located diagonally relative to each other. The procedure should be repeated twice to be sure of the result.
When aligning along the sides, the rule is set first on one side of the bathroom, and then on the other. First, one side of the container is adjusted and then the other. This procedure should also be repeated several times, because when adjusting one of the sides, the other may lose the setting. This method is much more labor intensive than diagonally. If the floor itself has an uneven surface, then you have to sweat.
How to prepare the sewerage system?
The water will have to be turned off. It may be necessary to cut off the water supply to the entire house, but, most likely, it will be possible to do only with apartments powered on the same riser with your living space.
In any case, people should be warned in advance so that this event does not become an unpleasant surprise for those who are washing dishes, washing or taking a shower or bath at this time.
The purpose of this measure is to achieve a complete absence of moisture, not only in the pipe sewer pipe, but also in the pipe itself. By ensuring dryness, we will achieve a better seal during the connection process. You can use a regular household hair dryer to dry the inner and outer surfaces of the pipe.
Image gallery


Detailed Installation Guide
Everything. Workplace ready. Getting started with the installation. Since the installation of different types of baths has its own characteristics, let's talk separately about this procedure for each type of bath. Let's start with the acrylic model.

In general, the connection diagram for any bath is similar to this one. There are some peculiarities of working with a particular model, caused by the properties of the materials from which it is made.
Acrylic plumbing installation
Features of installing a cast iron bath
Cast iron is a heavy material. And the bathtub made of it has a lot of weight. So that this massive object does not damage doorways and furniture, you need to properly organize the installation work. The bath should be adjusted and connected directly in the bathroom, without transferring the capacity to other rooms.
Some cast iron bathtubs can be equipped with decorative legs. Such models become a real decoration of the interior and a designer find. If, in the process of adjusting the level of such a bath, you use raising pads, you can completely destroy all the efforts of the designer.

Pay attention to the legs of this charming cast iron model. Of course, they cannot be twisted or lengthened by placing some materials under them, but they should stand on a perfectly flat surface.
You can get around this moment by sawing the legs at the base, but only a professional can perform these works with high quality.
There are peculiarities when connecting the drain to the sewer. it is better not to put it on its side. You can simply raise the front of the container. In this case, additional space will appear, which will be enough to carry out work. It is necessary to temporarily fix the structure in the desired state, while using wooden blocks.
General principle performance of work consists in maximum accuracy and in the absence of the ability to move a heavy container.
A guide for installing a cast-iron container on bricks, if there is a need for the specified solution, can be found in the one posted on our website.
The nuances of installing a plastic bath
Plastic bathtubs are a cheap analogue of acrylic models, so the installation process for these models is similar to one another. But, of course, there is a difference. For the plastic structure, a special pillow must be created, the task of which is to relieve the load on the bottom of the product.
The pillow can be made of wood (larch) or cement. Plastic baths must be handled very carefully. Look after her with aggressive detergents Absolutely forbidden. If these nuances are ignored, then in 7 years, or even in 5 years, the bath will need to be thrown out.
Bath screen construction
The space between the bathtub and the floor may not be covered if the outer surface of the model has an attractive appearance. But more often we still try to close this gap.
This can be done using, for example,. This bathroom accessory is sold in stores, but some prefer homemade screens. The homemade product attracts with its originality and cheapness.

Those who think that the bath screen is only used to cover the side of the bath are wrong. It can become a storage place for all kinds of household chemicals and hygiene products.
Conclusions and useful video on the topic
Installing any bathtub is not as easy as it might seem. This video presents some of the nuances of editing that you should pay attention to. Take a look and think if you can master this work yourself:
The theory of how to install different types baths with your own hands, we have explained to you. It remains only to apply the knowledge gained in practice. We warn you that theory is not always easy to translate into practice.
You will have to skillfully use different tools, as well as demonstrate knowledge of the intricacies of the installation process. Particular attention should be paid to cast iron products. Exercise reasonable care not to injure your hands and feet.
You can ask a question or talk about how you personally installed the bath and connected it to the sewer in the block below. Please comment and share useful information. We and site visitors are interested in your opinion.


 Future marriage of Prince Harry year NTV")


Energy drinks: give vigor, but take away health What will happen if you drink 4 energy drinks
Mustard for weight loss: how to use the seasoning with maximum benefit Is it possible for children to have mustard
The benefits and harms of mustard for the human body Table mustard benefits and harms
How to treat the ear after piercing: types of antiseptics, their composition, rules and features of the treatment of a pierced ear
Sistine Chapel in the Vatican: description, history, architectural features