Self-arrangement of a bathroom is more difficult than repair in other rooms of apartments and houses with all amenities. The main difficulties are caused by laying pipes in a closed scheme, installation steel bath and other containers for personal hygiene. The bathroom and the bathroom are the most visited rooms in the apartment, and according to their internal equipment, guests judge the cleanliness and real prosperity of the family. It is important to learn how to install a tank for taking water procedures without leaks, and the fastening of a steel bath must be reliable and stable.
What is important to know about steel bath installation?
The bathroom is the place from which the working day begins in the morning, where everyone takes turns putting themselves in order. Taking a bath in the evening upon returning home is not only a hygienic need, but also a place where you want to relax and tune in to the rhythm of home life. Someone refuses large containers in favor of a tray in the shower, but it is better to “relax” in a bath filled with fragrant foam. This is especially loved by women who simultaneously perform a number of face and body care procedures. For general convenience, a comfortable steel bath and a cozy atmosphere in the room are required.

reddened by time old bath does not look against the background of a new tile or other cladding. It's not such a value to leave it after a major overhaul, and then spend the mass on exhausting bleaching and cleaning. It is much easier to buy a new tank and do the installation of a steel bath with your own hands. But she has her own characteristics, which is important to know for easy installation and efficient use.
Any DIYer knows that buying new personal care containers is very costly these days, and the installer's fees often cost half the price or more. Therefore, it makes sense to do the installation of a steel bath yourself.
The modern building materials market offers bathrooms from different materials:
- steel;
- cast iron;
- acrylic;
- polymer concrete (artificial marble);
- wooden (made of durable wood);
- stone (carved from a single block);
- porcelain;
- ceramic;
- fiberglass;
- composite (steel plus acrylic, acrylic plus quartz powder, fiberglass).

A steel bath is one of the most affordable containers. But it has some disadvantages that are eliminated during installation. There are options for installing a steel bath:
- on a special frame or frame;
- on finished metal legs;
- on brick supports or a podium;
- for welded corners.
Attention: A full thin-walled steel tank with a mass of water up to the brim may be slightly deformed, so it is useful to make additional reinforcement - for a uniform load.
Features of steel tank for installation in the bathroom
Steel fonts are offered in different shades, shapes and sizes. The most popular pattern is the elongated rectangular bathtub, which is produced by stamping methods. This design comes with a set of stable legs for secure fixation. Inner surface, as a rule, is covered with a layer of smooth enamel for ease of care of the container.
The market also offers corner options with a curved outer edge, but these bathtubs are more expensive due to the more complex molding. They require a frame frame or are mounted on a special pallet with a large number of supports. And the installation of a steel bathtub on the frame is a new expense, for example, on a brick pedestal with mosaic tiling.

Modern steel bathtubs are available with interior color options. Elite imported models do not visually differ from expensive products, but are much cheaper than luxury products. Their shape is extruded from a sheet of metal under great pressure and at high temperature. Then a facing polymer layer is applied, enamel is applied or combined with an acrylic container of the same shape.
Tip: When buying, carefully inspect the purchased product - the enamel should be smooth, without sags and edges at the junction of the base and the coating. Request a certificate from the manufacturer and a warranty card. The thickness of the bath determines its susceptibility to deformation and the overall service life. The thicker, the more expensive, and the cheapest bathtubs are used for temporary use - the enamel in them will gradually crack.
Attention: With a smaller distance between the walls of the bathroom than the dimensions of a steel bath up to 3-4 cm, it is quite easy to install it, but it is important to properly close the gaps for sealing. If the edges of the tank are 2-3 cm wider, then recesses are cut on opposite walls to bring in its sides. Wall defects can be easily eliminated by tiling, but sealing is not required.
A steel bath differs from cast iron products in its low weight, so the installation of a steel bath can be done independently, without the help of assistants. The steel bath is stronger, and with a strong mechanical impact, it is deformed, and the cast iron will crack.

Advantages and disadvantages of a steel bath, ways to eliminate them
An inexpensive steel tank has a lot of advantages and small disadvantages, there are few of them, and they are eliminated during installation. Main advantages:
- light weight;
- simple transportation;
- self-assembly available;
- quick heating when filling before taking water procedures;
- low cost with decent design;
- dense smooth enamel does not peel off, is easy to wash and clean, does not form a persistent calcium deposit, retains a “new” gloss and whiteness for many years with reasonable use;
- thanks to the ductility of steel, variations in container shapes provide the largest selection on the market;
- possibility of installation in several ways.

Main cons:
- a thin-walled bathtub is prone to cracking of the enamel layer under heavy load or careless handling;
- high heat transfer (the bathroom cools down quickly), thermal insulation of the outer layer is required;
- shorter service life than cast iron or stone;
- noisy filling with water;
- thin-walled containers can be deformed if they are not properly mounted on steel bath legs and if they are overfilled.
Tip: So that the bath does not “buzz” when filling, does not cool quickly, cover it with mounting foam from the outside. This will not be visible when sheathing the podium. When collecting water, use the faucet nozzles with a rubber hose for silent filling.

Features of installing a steel tank in several ways
The installation method depends on the type of fasteners. The most common method is mounting on paired self-adhesive supports. Mounting for a steel bath in the form of an arcuate channel is doubtful for some buyers. But if you follow the accompanying instructions, and the bath will rest against the wall with 2 ends, then such a mount is quite reliable.
Calculations and measurements are made on the basis of the upcoming location of the steel tank. The bath cannot be wider than the place on which it should stand. Ideally, the dimensions of the tank coincide with the place where the product is placed, resting against the walls on three sides. Such fastening is the most effective and does not depend on the type of fastener.
The most uniform distribution of the load is when fixed along the entire perimeter to the frame or frame. It seems to sag, and so that when filled with water to the top it does not deform, supports from below are also needed. In any case, the screws from below are additionally adjusted if it is planned to install a steel bath on legs. Each leg is adjusted in height separately and attached to the floor.
When it is planned to mount to the wall, experts must level the floors in the room and make markings along the walls strictly horizontally. This ensures that there are no distortions and redistribution of the load at maximum filling. If a steel bath is installed on the corners for the frame, then it is sawn at the junction with a hacksaw for metal at 45 °. After a preliminary fitting, welding will be required, and the resulting frame is fixed with brackets to the wall.
Attention: The more support zones, the more reliable the installation of the steel bath. If the container is without legs, when marking it is important to take into account the height of the supports so that there is a gap under it between the bathroom and the floor.

Thermal insulation, sound insulation and sealing of a steel bath
The elimination of the shortcomings of the steel tank is carried out along with its installation. Noise isolation of the tank is carried out by processing with mounting foam or porous insulation, which is applied by spraying.
To produce high-quality processing, the steel bath is turned over and placed on the floor. Noise-absorbing fiber is glued onto the previously degreased surface. In this case, it is important to carefully process the ends and securely fasten with any sealant.
As mentioned in the disadvantages section, a steel bath heats up quickly, which is good, but it also cools down just as quickly, giving off heat. For this reason, they try to make high-quality thermal insulation or insulation of a steel bath. The same mounting foam will help to cope with this task. The foam is released from the can in small portions and the back side of the font is evenly treated.
It is best to cover the surface with foam with polyethylene, smoothing and leveling the foam. When the foam has completed the expansion and hardening process, the bathtub is turned over and the installation is completed.
In production conditions, Vibroizol, well known to motorists, is used for noise and heat insulation. Good results are also obtained by processing with sealants such as bituminous resin, which is used for general waterproofing in the bathroom.
Sealant is also needed to process the gap between the tub and the wall. And there are many ways to prevent water from entering outside the tank along the walls. Use:
- construction silicone;
- mounting foam;
- bath tape;
- plastic skirting boards;
- special ceramic lining in the form of a plinth, etc.
Attention: If the foam has not yet dried, and the gap between the bathtub and the floor is minimal, then the bursting substance is able to push out the container, violating the accuracy of installation. To prevent this from happening, it is advisable to weight the light steel bathtub by filling it to the brim with water. But this can only be done after installing the siphon and connecting to the sewer.

Siphon selection and installation method
A bath of any type is installed in a place where the nearest outlet to the sewer and connection to the water supply. The assembly of all components of the siphon is carried out in accordance with the instructions that are attached to any product. Detailed description and the diagram shows all the assembly steps. No matter how reliable the connection is, it is recommended to treat the seam with silicone or other sealant.
Attention: Any bathing container must have not only a drain hole through the siphon, but also a hose for the outflow of water through the overflow funnel. An ordinary washbasin siphon is not suitable, only with a tee.
Today, semi-automatic siphons are on sale for draining water from a full bath without having to look for a gag. One turn of the washer and the water drains. This is convenient for large containers, although such a siphon is more expensive. The most practical are siphons with bolted metal outlet, which are easier to install than plastic ones. Metal fasteners are coated on the outside with grease so that they do not rust.

Fixing a bathtub to brick supports
Experts recommend installing a steel bath on bricks - the easiest and most reliable method. If the container is supported on a solid support, like a podium, then this is the most stable position. But most often only the lower brick supports are used, and the bathtub is attached to the wall with brackets.
If you make the installation according to all the rules, the bath will be motionless, and this is not only comfortable when landing in the font, but also guarantees the longest service life. An ordinary red brick is suitable, from which two lower supports or a podium-type perimeter are constructed.
It is very convenient to make 2-3 wide steps out of bricks with handrails, along which it is easier to climb into and out of the bath. With proper cladding, it looks very expensive, like a mini-pool in luxury hotels. A corner steel bath with a rounded edge is best suited for this purpose, and it is better to choose a mosaic cladding.
The supports are formed from 2-3 rows of red brick so that they recede from the edges of the container from below by 15-20 cm. They form something like a recess under the bottom from the brick, so that the supports cover it a little from the sides by half a brick. It is laid using a conventional cement mixture with sand, after which the cement should harden within 2 days.
When installed on the lower brick supports, the niche under the bathroom is closed in front with a shield and lined with tiles or other moisture-resistant facing material. For example, bathtub steel installation, video:
Steel baths, occupying an intermediate niche between cast iron structures and their acrylic counterparts, are very popular among a wide range of consumers. This is easily explained by the fact that steel structures successfully combine a presentable appearance and high performance.
A significant advantage of such products over cast iron and acrylic models is their low weight, so you can do the installation of a steel bath yourself. But the technology of mounting steel bathtubs has its own characteristics, which we will consider in more detail.
Installation and connection to communications of a steel bath cannot be carried out without installing a siphon. On sale there are semi-automatic models equipped with a special washer, with which water can be drained without “diving” by hand: the cork itself rises and the water drains.
Semi-automatic siphons are much more expensive than conventional models, and the cost of their purchase is justified when installing bathtubs with a large capacity
Some siphons are supplemented with metal outlets that are bolted to the overflow. They are famous for their more aesthetic appearance in comparison with plastic counterparts.
But low-quality products with frequent interaction with water can quickly become rusty. Fasteners made of a material subject to corrosion, after a couple of years of operation, are able to “stick” to each other so that, if necessary, it will be almost impossible to unscrew them.
From materials it is also necessary to prepare:
- mounting foam;
- electrical tape;
- silicone sealant;
- waterproof paint.
Regarding the overflow pipe: it is better to use a corrugated flexible hose. If we compare inner size corrugated hose with a rigid pipe clearance diameter, then this parameter will be larger with the same outer diameter. This seemingly small thing can reduce the likelihood of overflow.
To carry out the work you will need tools:
- rule;
- building level;
- electric drill;
- fork wrench;
- electric welding machine.
Some "pre-installation" rules
Do-it-yourself installation of a steel bath can only be started after the completion of the floor installation. By this time, waterproofing should be completed, the floor level should be leveled and flooring.
In old houses, the floor in the bathroom was made with a slope of 1-2% from the door, referring to the current SNiP, according to which the direction of the slope was arranged in such a way that the wastewater did not cross the passages when discharged into the channels.
Modern current standards require only the presence of a threshold between the bathroom and the corridor, which should be at least 2 cm. Such an obstacle, with a room area of 3-4 square meters, can hold up to 50 liters of water.

Ideally, it is still better to equip the floor in the bathroom, providing for a uniform level difference, which is 2 mm per meter of length.
Before installing a steel bath, it is necessary to check the condition of the sewer system. By identifying and correcting problems, you will prevent yourself from post-installation troubles that can only be eliminated by dismantling the system.
It is necessary to place the structure in such a way as to be able to easily connect to all necessary communications.

Rectangular steel bathtubs are most often installed on stands that are included in the product package, the material for their manufacture is galvanized steel, which has increased resistance to moisture
Models of a non-standard curved shape need a more reliable fixation, the role of which can be performed by the supports included in the kit and an additionally constructed frame.
Making an additional reinforcement
The walls of the bath under the mass of water and the body immersed in it can be deformed. Therefore, when installing a steel bath, the manufacture of an additional reinforcement structure will definitely not be superfluous. The material for the manufacture of the frame can be:
- wooden bars with a section of 20x100 mm;
- galvanized profile UD or SD with a section of 20x40 mm;
- metal corners 25 mm.
Calculation of the dimensions of the structure
The size and design of the frame depends on where the bath will be located. It can stand alone or be placed close to the wall. Installing a steel bath against a wall is preferable, as this placement allows for a more even distribution of the load.

The frame is a structure on racks located at a distance of 500 mm from each other, the upper belt of which is made along the perimeter of the bath
When planning to place the bath directly against the wall, from the side adjacent to the vertical surface, you can refuse to install support racks. In this case, the upper belt must be fixed to the wall itself.
When measuring rectangular bathtubs, keep in mind that the outer layer will be mounted flush with the front edge of the rim of the structure.

The installation height is considered to be 600 mm, but it may vary depending on the placement of plumbing fixtures, as well as the features of communication systems
After measuring the dimensions of the structure, add a margin of 10% to the resulting value. This will not significantly affect the costs, but at the same time it will allow in the future to prevent possible problems associated with a shortage of material in case of damage.
Wooden bars or metal corners are cut with a hacksaw into frame elements. The cutting angle must be 45°. When working with wooden blanks, before proceeding with the installation of a steel bath, it is advisable to cover the frame elements with protective enamel. Treating the elements with a special primer will help prevent corrosion of the metal.
Assembly and installation of the frame
The prepared elements are placed on the floor and a preliminary fitting is carried out. The wooden base of the structure is attached to the floor with anchors or dowels. When making a frame from a profile, metal elements are connected by welding.
Vertical posts are fixed to the base frame. On the short side of the bath, only one rack is provided, placing them exactly in the middle of the segment.

Installation of corner support posts does not take much time, but it must be done with the highest quality, since it is the corner posts that will take on the load of the bowl itself, as well as water and human weight
With the help of connecting elements, the upper belt of the frame is assembled. The design will completely repeat the assembly of the lower support. The cut profiles are laid on the corner posts and fixed by welding or self-tapping screws.
Bathtub leg adjustment
When installing a bathtub on a frame assembled from metal corners, it is important to eliminate distortions, ensuring a snug fit over the entire area. To do this, at the stage of mounting the frame, the legs are adjusted. They are alternately twisted and, tightened with moderate force, and attached to the floor with screws.

When working with the adjusting mechanism, achieve only the horizontal plane: the angle of inclination of the bottom of the bowl for the rapid flow of water into the drain hole is already provided by the manufacturer
When leveling the position of the body, one should be guided by the rule that it is better to raise a lowered corner than to lower a raised one. The rule is laid diagonally across the bath. A level is placed on it, by which the horizontal plane is determined.
Some manufacturers produce models equipped with wide supports. They are attached to the base with double-sided tape. But, as practice shows, this mechanism is not so effective.
Having adjusted the legs of the structure, it remains only to seal the gaps between the bathroom and the wall.

It is better to decorate wide gaps with decorative plastic skirting boards, which can be purchased at specialized plumbing equipment stores.
Narrow gaps are easy to seal with silicone sealant, tile adhesive or foam. After sealing the seams, experts recommend filling the container with water and leaving it in this position until the sealant has completely solidified.
To give the junction a more presentable appearance, it is decorated with a thin plastic corner or coated with a moisture-repellent dye.
Decorating a farm is a matter of taste and opportunity. For finishing, you can safely use moisture-resistant drywall sheets, plastic panels or tile.
Warming and soundproofing
Many owners of steel baths complain that when filling the container with water, a strong hum is heard, which causes a lot of anxiety. You can correct the situation by performing soundproofing of the case.

Extruded polystyrene is a sheet of plastic, consisting of small cells and characterized by a uniform structure. It is famous for its low thermal conductivity, lack of water absorption and high rates compressive strength. Polystyrene is often coated with a metallized or foil layer.
The easiest way to work with self-adhesive mats. The insulating material is cut out according to the dimensions of the bath, making allowances of 2-3 cm. Before gluing the material, the metal surface is degreased by wiping with a cloth soaked in alcohol. When gluing, the formation of bubbles must be avoided. When a bubble appears, without waiting for the glue to dry, you need to pierce it with an awl or a needle soft material, completely releasing the air.

Sheets of extruded polystyrene are applied to the back of the bowl, with the adhesive side to the metal, and pressed tightly in several places
Some craftsmen prefer to perform soundproofing using a technical cork. The main advantage of this choice is an environmentally friendly material that does not emit technical fumes even when the bathtub is filled with hot water. The coating, as in the previous case, is glued to reverse side bowls. After the adhesive mixture has completely dried, the bath can be used for its intended purpose.
If we talk about the thermal insulation properties of steel, then the thin walls of the metal are not able to provide this. This problem is easily solved by arranging thermal insulation.

Polyurethane foam is one of the most affordable and simple materials, thanks to which the level of thermal insulation of a metal structure can be increased several times
For insulation, it is allowed to use any mounting foam. The work is carried out in several stages:
- Training. The bath is laid on a flat surface, covered with a piece of polyethylene, turning upside down. The structure is fixed so that it does not “fidget” during the application of foam. Plots of connection with drain pipes are pasted over with masking tape.
- Sealant coating. A thin mesh of sealant is applied to the metal surface of the bowl. These manipulations allow you to increase the reliability of fixing the mounting foam.
- Applying foam. The foam is applied slowly, forming a uniform layer on the surface. The material is distributed in a circular motion starting from the edge of the bath and rising towards the center. During the application, small pauses are made, allowing the material to dry and fix on the surface.
The bathtub can be turned over on its legs and installed in place only after the foam has completely hardened. The applied building foam will have sufficient plasticity, which is especially important during the operation of the structure.
This process is clearly shown in the video:
Summing up communications
The assembly of the steel bath must be carried out in accordance with the instructions attached to it. When installing the bath, you need to attach a siphon, install an overflow funnel, attach taps and dock pipes for water outflow.
To do this, it is necessary to connect the corrugated pipe and the strapping. The main nuances when connecting:
- Rubber gaskets are treated with silicone before installation.
- The drain gasket is mounted outside.
- The gasket between the overflow and the hose is positioned with a cone in the direction of the piping.
- In the presence of threaded connections, it is necessary to use fum-tape.
The easiest way to determine the correct connection is to fill the container with water. If there are no leaks, the job is done correctly. If the plug is tightly closed, but the junctions of the drain with the pipe are leaking, this indicates an incorrect installation of the gasket.

Having connected the main elements of the system, until the sealant has hardened, gently tighten all joints with a fork wrench, and after it hardens, check for leaks
After making sure that there are no leaks, they drain the collected water, checking at this moment the connection of the strapping. If leakage occurs, carefully tighten the nut.
Having corrected all the shortcomings, you need to carefully wipe all the binding connections with a dry cloth. To perform a control check, cover the floor under the pipe with paper towels or toilet paper. The drain hole is closed with a stopper, and the bathtub is half filled with hot water. After that, the plug is removed from the drain and the water is drained. If during this time interval the paper remains dry, the installation is done correctly.
When installing metal structures, it is important to take care of grounding. In the event of a wiring fault, there is a high probability that life-threatening voltage will appear on the case. For this copper wire with a cross section of 2.5 sq. mm, they are fixed at one end to the bath, fixing it with a screw, and at the other - to a metal structure. It is not allowed to ground the housing to the water supply pipes or the heating system.
And we'll finish useful tips from the masters - watch the video clip:
At present, it is impossible to imagine a modern bathroom that would not be equipped with a bathtub. Basically, builders install and fix the bath, but over time, plumbing fails, loses its attractiveness or undergoes deformation. In this case, there is a need self-assembly bathtubs to replace the old product. In our article, we will look at how to fix the bathtub with legs if it is on a tiled floor, and other options for installing it.
Bath selection
A bathtub is a large volume sanitary container used for washing, washing and other household needs. More recently, showers tried to supplant this device, but due to less functionality, they were defeated.
There are 3 types of baths:
- Cast iron. This is a classic option that perfectly retains heat and has high strength. The disadvantage of this product is big weight, since a bathtub made of such material weighs about 80-150 kg. With a large mass, transportation and installation of the product is difficult. Also, cast iron containers are expensive and limited to a set of standard sizes and shapes.
- Steel. A steel product is able to retain heat much less time, but at the same time, their weight is 3-5 times less than cast iron. Basically, steel bathtubs weigh up to 30 kg. The main disadvantage of these models is the large noise that occurs when the water jet falls. It is very difficult to install a steel bath on the floor so that it does not stagger and play. However, these models are widely used because of the affordable price, which is 3 times lower than for cast iron products.
- Acrylic. Acrylic from which they are made modern baths, is durable polymeric material. Products from it are able to satisfactorily retain heat, and they can be purchased at a very affordable price. In addition, these products have a beautiful appearance. Acrylic containers are easy to install because they are not heavy. A significant disadvantage is the low strength, which is inferior to cast iron and steel. Therefore, the solid weight of a person can break through an acrylic product.
Important! So that after installation the bath does not sway and stand level, you should choose the right size of the product. The length of the container corresponds to the distance between the walls minus 4-5 cm. When you buy a bath, you need to opt for models that are as close as possible to the calculated dimensions. This requirement helps prevent possible appearance gaps between the bathroom and the walls that may appear after installation is completed. Moreover, at right choice containers, the process of attaching the product to the wall and floor of the room is greatly facilitated.
Features of installation of various bathtubs
Many people ask themselves: how to fix the bath on their own so that it does not stagger and play? When installing a sanitary tank, you need to remember some nuances, given which you can independently cope with the task.
To do this, you should take into account the features of fastening various types baths:
- The most difficult moment of fastening cast iron bath is to bring this product into the room with a weight of about 100 kg and install it on the floor. To mount this container, the 4 supports supplied with the selected product are required. The cast iron bath is installed on the floor of the room with the help of legs, which are attached to the bottom of the product with special bolts or wedges. To distribute the load from the weight of the bathroom, a metal sheet is laid on the floor of the room.
- A steel container is much more difficult to install than a cast iron product. Since it has less weight, very often illiterate installation leads to its staggering and slipping. To securely fasten the steel product, it is required that the bath adjoins 3 walls as close as possible. You can install the container on a brick podium or brick supports that come with the bathroom.
- Acrylic products are fixed on a podium or adjustable supports so that the container does not swing, wobble or slip. Without fail, there must be an adjoining of the container to 3 walls of the room. Since acrylic models have low mechanical strength, it is recommended to build a frame around them, which makes it possible to give the product additional rigidity and hide communication elements.
Important! When repairing in the bathroom, only after laying ceramic tiles, you can install the product. In order to provide access to the floor under the tank, the product must be lifted, and then installed on wooden bars or bricks.
Basic rules for installing a bath
When buying a bathroom without fail, you should pay attention to the mounting system with which it will be completed. After purchasing the product, you must carefully read the instructions, familiarize yourself with the installation method that is recommended for this model.
How to fix a steel bath so that it does not rock? Basically, the product installation process is as follows:
- Before fixing the steel bath, we prepare the site for installation. If it is intended to perform Finishing work ceramic tiles, then we lay the tiles on the walls and on the floor of the room.
- We set the bath on its side, then carefully place it on the floor, since this position facilitates the convenient connection of the overflow and drain pipes.
- Applying a sealant or sealant, as well as changing the position of the product, we connect the floor siphon with plastic pipes.
- We fasten or glue the legs to the bottom of the sanitary container, while adjusting the supports in height.
- We place the product in such a way that it is possible to connect the siphon to the sewer system.
- Under the bottom we build a podium of bricks or some other materials. We install a frame that would allow us to hide the pipes behind a decorative screen.
- We hermetically process the joints between the walls and the product, using a sealant, a moisture-resistant solution or a plastic corner.
- After the installation is completed, experienced specialists check the reliability and quality of fastening. To do this, fill the product with water and control the correct operation of the drain. We observe that the product does not swing or stagger.
Mounting with mounting foam
Mounting foam is used to strengthen the product and simultaneously fix it on the floor and walls of the room. Attaching the bathtub to the wall using mounting foam is done as follows:
- We set the sanitary container in place and in height with the help of adjustable legs so that there is a gap of about 0.5-1.5 cm near the walls.
- After that, fill the tub to the brim with water.
- Using mounting foam, we close the gaps between the body of the sanitary container and the walls of the room, as well as between the legs of the product and the floor.
Important! Sealing foam has the property of expanding when dry, so it must be used in a strictly metered order. Otherwise, undesirable deformations of the structure occur, which reduce the reliability of its fixation.
The use of a brick frame
As a rule, a brick frame is used in situations where you fix the product without using legs, while ensuring even distribution of the load around the entire perimeter of the support. This installation method allows you to apply the option of laying out the frame both across the bathroom and along the room.
Important! With a transverse arrangement, the product should directly rest on the brick, which implies additional fastening of the frame to the walls using metal corners - aluminum or steel. We fix the pre-prepared corners with dowels on the wall. With this option, the free edges of the container have additional support, and when pressed, it does not swing.
How to fix a steel bath with a brick frame:
- We unpack the purchased product and conduct a thorough analysis of the dimensions of the product and the room.
- We install the bathtub on the spacer bars, placed right next to the wrong side of the sides.
Important! When installing a bowl in a niche, it is necessary to observe the required distance between the plumbing sides and the wall on each side, which corresponds to 2.5 cm. This requirement does not apply when installing corner products.
- Using a spirit level, we check the position of the product relative to the horizon. If necessary, we change the angle of installation of the spacers, thus aligning the installation of the bowl.
- In the intended places for installing the legs, we lay out the brickwork.
- The last row brickwork we install close to the wall of the container, while using pieces of brick.
- When the masonry has dried, we take out the spacers, after which we check the stability of the bowl, using its own weight.
- Using a brick, along the perimeter of all plumbing, we lay out the screen under the very edge.
Attention! In this case, the creation of the screen serves not only decorative ornament, but also provides additional rigidity of this design. With insufficient strength of the lower supports, laying out brickwork to the lower segment of the side around the entire perimeter of the bowl does not allow plumbing distortions.
When performing such work, be sure to provide a small inspection hole that would allow free access to the siphon. As a finish to cover the hole, a small piece of drywall is used or a small plastic door is installed. If you are going to use ceramic tiles for wall decoration, then you can use a ready-made screen that serves as the front panel of such a base.
Installation on a metal frame
This installation method is mainly used when installing acrylic bowls, which are already equipped with a finished steel frame. In the absence of such an accessory steel frame can be purchased separately or created independently.
How to mount an acrylic bathtub to the wall using a metal frame:
- When installing such a product, we attach the guide rails of the frame to the bottom of the product, using self-tapping screws.
Important! Fastening should be carried out in special places that have a thickening.
- We install the legs included in the kit on the fixed guides, using a bolted connection.
- We lower the bowl into place.
- We outline the points of contact of the product with the walls of the bath room.
- In these places we mount special strips that provide additional support.
Important! A small gap should be left between the bar and the rim - about 2-4 mm, which is taken into account when the product expands after the bowl has been filled with hot water.
Installation of an acrylic corner bath on standard supports
To secure a corner acrylic bath on legs, if it stands on a tiled floor using standard supports:
- We release the purchased acrylic container from packaging.
- To prevent scratches on the bathroom floor, spread the bedspread and turn the sanitary container over it.
- We carry out measurements of the sides of the product and correlate them with the dimensions of the installation site.
Important! For quick and high-quality installation of the corner product, it is necessary to check the converging walls seat, the angle between which must be right. Otherwise, a gap appears, which is very difficult to cover.
- We unpack the components necessary for the manufacture of the frame.
- For the ends of the legs we use plugs.
- We screw the studs onto which we wind the locknuts.
- We collect a profile to create a frame.
- We fasten the pin of the adjusting leg into the profile hole. We tighten one lock nut close to the profile, and screw the other to the leg for stability and structural strength.
- We install prepared profiles on the product and fasten them with self-tapping screws included in the kit.
- To assemble the second profile, we prepare a short and longer hairpin. Using a locknut, screw in a short stud.
- From the protruding side of the side of the product, we screw in a long hairpin.
- On both sides of the screwed long hairpin, we install plastic legs in such a way that one leg can rest against the acrylic side of the product, and the other, respectively, against the floor.
- We fix the installed legs with nuts.
Important! After installing the support legs on the profile, it is necessary to check that the plugs are located at the same level. With a ruler, you can check the location of the extreme points of the support legs, while measuring the distance from the profile plane to the surface of the plugs.
- We turn the assembled structure over and install it in the required place.
- By applying the level to the sides, we check the position of the sanitary container.
- If necessary, align the legs and tighten the locknuts again.
Reinforced acrylic bathtubs
Strengthening the acrylic bathtub on the support legs has one significant drawback, which is that in the area formed between the fixed profiles, the bowl crackles under the weight of a person.
To make reinforced fasteners for an acrylic bath:
- We select standard brick blocks with a length of 625 mm and a thickness of 250 mm.
- With the help of adjusting supports, we raise the container to the maximum height.
- We blow foam around the perimeter of the product, on the surface of which we install blocks.
Important! In order for the foam to interact better with the blocks and the floor screed, it is necessary to moisten the mounting surfaces with water from a spray bottle.
- We lower the bowl onto the foam and, using nuts, fix the supports.
- After a day, plumbing stops crunching and becomes motionless.
This method is very simple, because for it you need to purchase only a bottle of foam and a few bricks.
Niche recessed bathtub
Small-sized apartments very often create difficulties for installing a sanitary ware in the place allotted for it. As a result, the installation of the bowl is complicated, but on the other hand, the possibility of rigid and reliable fixation of the container in the niche of the room is provided.
How to fix a cast iron bath to the floor? For rigid fastening of the product on each side of the wall, it is necessary to prepare grooves having the thickness of the edge of the bowl. For this purpose, a puncher or grinder is used. The lapels of the bowl are inserted into the prepared grooves with a slight “interference”. The absence of full backlash guarantees the most rigid fixation.
Important! In the absence of the required rigidity of the legs, you can further strengthen the bowl by using special transverse profiles that serve as supports for the lapels of the product.
How to fix a large gap in the wall?
Sometimes, during the installation of the container, a large gap remains between the wall and the end, which does not allow for a rigid fixation of the bowl. In this case, this disadvantage can be turned into an advantage, while creating a frame. As a result, a shelf appears between the wall and the bathroom, which can be used to store shampoos, powder and other accessories.
Consider some ways to eliminate a large gap:
- We make a frame from profiles that can be sheathed with a moisture-resistant material, such as drywall.
- We create a hatch to have access to plumbing.
- We fix the bar to the wall and build a shelf, one side of which is located on the bar, the second is on the product or frame.
Important! When designing a shelf, it is necessary to create it with a slope so that there is no accumulation of water. To avoid stagnant water, plumbing should be mounted with a slope towards the drain.
footage
Basically, any installation work within the power home master if he responsibly and scrupulously treats the forthcoming work. In this article, we have offered you several options on how to fix the bathtub on legs so that it does not stagger for different models plumbing. We hope that using our step-by-step instructions, you managed to do everything efficiently and reliably.
When carrying out repairs in an apartment with a complete replacement of plumbing, its owners quite often have to deal with the problem of securely fixing the equipment installed in the bathroom. This is especially true for the work procedures for installing a new bathroom, the installation specifics of which are determined by many factors, including the material of the product and its texture. Thus, a traditional cast-iron bathtub, which is notable for its significant weight, is best installed according to a long-established method, which assumes its reliable support on the legs included in the kit and adjustable in height.
For lighter acrylic bathtubs, for example, an additional mount will be required to ensure its secure fixation and even distribution of loads throughout the body. In our article, we will consider in detail the features of the installation of each of the samples of this sanitary ware.
Bath fixing methods
To everyone who wants to figure out how to strengthen the bath so that it does not stagger - we advise, first of all, to decide on the material from which it is made, since this is largely the determining method of its installation.
When choosing a product, most often you have to deal with the following options:
- classic cast iron bath
- steel bath.
For each of the samples of these products, a special, only suitable method of fastening should be used, taking into account the features of the relief of the walls of the bathroom itself.

Cast iron bathtubs have sufficient stability due to their considerable mass, so that their installation is permissible anywhere in the room. Typically, these bathtubs are installed on standard legs that are included in the delivery of the product and are securely fixed to its body using special steel wedges or bolts. As additional fastening a pre-laid brick base or corners fixed to the wall can be used (in the case of a brick base, its body may not be located close to the walls).
A steel bath is best placed on several points of support, so that it should be located directly against the wall. Since the legs included in its kit do not provide the required reliability of fixation, a special brick podium is often used to increase the stability of the product.
To fix the steel bath, the following techniques can be used:
- use of mounting foam, which seals the junction with the wall and at the same time strengthens the contact zone;
- installation on the walls of special metal profiles that provide additional support;
- and, finally, the usual tie-in to the wall.
To securely fasten and ensure even distribution of loads, it is best to install an acrylic bath on the same brick podium or use a special metal frame for this purpose.
Let's consider each of the methods of fixing bathtubs discussed in this chapter in more detail.
Mounting foam

Using mounting foam to fix the bathtub is the simplest and most affordable method of simultaneously fixing it to the floor and walls. When implementing this method, the bath product is first set in place and in height using adjustable legs so that there is a gap of about 0.75–1.5 cm near the walls, and then it is filled to the brim with water.
After that, it will be possible to start sealing the gaps between the body of the bathtub and the adjacent walls of the room, as well as between its legs and the floor using mounting foam.
Sealing foam tends to expand when it dries, so its use must be strictly dosed. Otherwise, undesirable deformations of the structure are possible, reducing the reliability of its fixation. Despite the fact that the “setting” time of the mounting foam is about 12–35 hours, it will be possible to start wall finishing work after about 6 hours.
The use of a brick frame

The brick frame is most often used in cases where you decide to fix the bath without the help of legs and ensure even distribution of loads around the entire perimeter of the support. With this installation method, it is possible to lay out the frame both along the bathroom and across it.
In the case of a transverse arrangement, the bath should rest directly on the brick, which will require additional fastening of the frame to the walls using metal corners (steel or aluminum). At the same time, pre-prepared corners are fixed with dowels on the wall in such a way that the free edges of the bath have additional support, and it does not sway when pressed.

With longitudinal laying, something like a trough is formed, into which the mounted bathroom product is placed. The gap or cavity formed between the walls of such a base and the bath itself must be sealed with mounting foam, which also helps to increase the reliability of its fastening. In the case of laying out the front wall to the very top, it is possible to completely hide the body of the bath, thus preparing the base for subsequent cladding with ceramic tiles.

When performing these works, it is imperative to provide a small inspection hole necessary to provide access to the siphon. When finishing, this hole can be closed with a piece of drywall or by installing a small plastic door. In the event that you plan to finish the walls with ceramic tiles, a ready-made screen can be used as the front panel of such a base.

The specified method of fixing bathtubs is mainly used for the installation of acrylic products, which, as a rule, already provide for a ready-made steel frame (in its absence, this accessory can always be purchased separately or made independently). During the installation of such a bath, the mounting or guide rails of the frame are first attached to its bottom with the help of self-tapping screws (note that they are fastened in places specially designated for this purpose, which have thickenings). And then, on the guides fixed in this way, the included legs are installed by means of a bolted connection.

After fixing the legs, the bath will need to be put in place and the points of contact with the walls of the room should be marked, after which special strips are mounted at these points, providing additional support.
It is necessary to leave a small gap between the bar and the side (no more than 2–4 mm), taking into account the expansion of the bath after filling it with water.
Niche recessed bathtub

V small apartments very often a situation arises when the bathtub is placed with great difficulty in the place allotted for it, which, on the one hand, significantly complicates its installation, and on the other hand, provides the possibility of rigid and reliable fixation in the bathroom niche.
For tie-in and rigid fastening of the bath, you will need to prepare grooves in the wall along the thickness of the edge of the product on each of its sides (for these purposes, you can use a perforator or grinder). The edges or lapels of the bathtub should be inserted into the grooves prepared with their help with a slight “interference”, which guarantees maximum fastening rigidity due to the complete absence of play.
In case of insufficient rigidity of the legs supplied in the kit, you can additionally strengthen the fixing of the bathtub by using special transverse profiles that serve as supports for its lapels.
Video
How to install a bath in a strobe, see below:
Step by step we will analyze the installation of a steel bath. We will securely fix it on legs, learn about installation tricks that increase the service life and characteristics of plumbing, make a niche for a bathtub from moisture-resistant drywall and a Knauf metal profile.
Step 1: Installing the legs
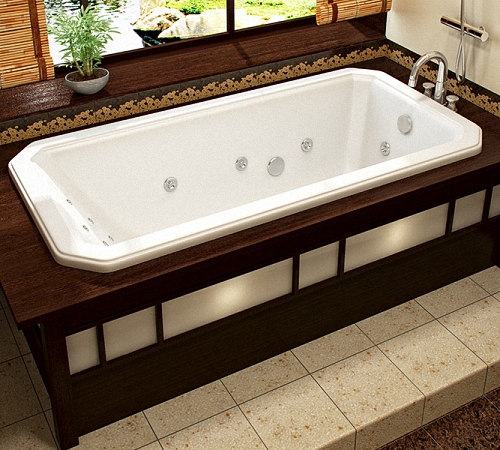
For installation, a steel rectangular bath of the Spanish company Roca of the Contesa series with dimensions of 1700 × 700 × 400 mm was selected. The volume of the bath is 185 l, and the thickness of the steel is 2.4 mm. The main advantage of a steel bath is its lightness. The presented plumbing weighs 29 kg, so one person can handle its installation. But installing a cast-iron bath alone will not be easy. Its minimum weight is 80 kg and varies up to 180 kg. You will have to connect an assistant or even a brigade.
Installation of the bath begins with the fastening of the legs. In order not to damage the floor covering, lay something soft under the bath. You can not remove the factory cardboard yet, this is a reliable substrate from scratches. Flip the bath. Self-adhesive structures, as in our case, which follow the contour of the bottom, are considered good legs for fastening. They have height adjustment, prevent distortions and uneven floors. To install a bathtub on legs, we first try on U-shaped supports. After marking, degrease the surface with alcohol, ensuring reliable adhesion. We attach the structures with double-sided tape. We fix the supports exactly on both sides of the bath, avoiding distortion. There are also bolt-on feet, but we do not recommend using them. They may not withstand the uneven load on the bath and damage the enamel.

Legs are supplied with long adjustable studs. They must be inserted all the way into the plastic tips. We do this smoothly, making sure that the threaded connection is not broken. We adjust the hairpin with a rubber mallet.

We proceed to the installation of studs. We pre-screw the nuts to the plastic tips and screw the stud into the intended hole on the support. It is this detail that allows us to adjust the bath in height and horizon.

Step 2: Assemble Drain Fittings
After installing the legs, turn the bath over. Installing a drainage system. Unpack it and study the instructions. We start the assembly with a bottom drain.

We install the drain socket in the technological hole under the bottom of the bath. This element consists of two parts - a tube with a funnel-shaped extension and a cup-shaped chrome detail, which prevents large debris from entering the drain system. During installation, the main thing is not to forget to put all the gaskets, and if you are not sure of their quality, use additional silicone for reliable sealing.

We proceed to the connection of the overflow. This element is represented by a tube, one end of which is installed in the upper hole under the rim of the bathtub, and the other end is installed in the lower drain leading to the sewer drain. When buying a kit, choose a corrugated overflow tube. It is simply mounted, has a larger clearance of the outer diameter than a rigid tube, which means that the probability of water overflowing over the edge is minimal.


The modern market offers two drain systems for bathtubs. A well-known set with a plug on a chain and with an automatic stopper. In the second option, opening (closing) occurs with the help of a mechanism that is mounted on the overflow, as we have. In this case, there is no need to bend over and pull out the plug, just turn the lever.

This is what the final version of the installation of the drain system looks like.

Step 3: Calculate the height of the bath and install the stop
We calculate the height at which the bath will be installed. Proper measurement will ensure not only a good fit with the tiles and the supply of a plumbing unit, but will also allow you to install a siphon with a deeper elbow. The likelihood of leakage of foreign odors in this case is minimal. Raising the bathtub an additional 5 cm will also eliminate the accumulation of hair and debris in the siphon and the metal mesh of the drain.

To strengthen the bath against the wall, mount the stop, the main thing is that it is stable. We used a metal profile from Knauf.

We fasten the profile with the help of dowel-screws, we choose the step ourselves. It is advisable to mount the fasteners as often as possible.

This is what the metal stop looks like after attaching it to the dowel-screws.

Step 4: Fitting the Bathtub to the Bricks
We return the bath and put it in its place. Since the drain hole in the wall is a little high and the legs are not long enough, you will have to install the bathtub on bricks to even out the level. In addition, the metal legs are not strong enough and heavy, they can easily twist under the weight of the body or water. Beauty is not the main thing here, since in the future you will close the niche under the drywall bathroom and tile it. When laying out the brick, do not forget to leave enough space at the siphon so that you have free access. We carry out bricklaying on a cement-sand mortar.

We draw a line against the wall and move the bath. We apply silicone sealant to the screwed profile, and below the marked line. After the silicone has been applied, put the bath in its original place.

We expose the bath exactly in level with the help of adjusting bolts.

We seal the joints between the bathroom and the wall with silicone sealant.

To firmly fix the legs and prevent slipping, we strengthen them with brick fragments, we close the joints cement mortar. The legs should be sealed especially firmly when installing a heavy cast-iron bath.

After we pulled the back corner of the bathtub and securely attached it to the wall, we attach a file for rigidity from the ends, we put it on tile glue.

Step 5: Connecting the siphon to the sewer and checking for leaks
When the silicone sealant and glue dry, we proceed to connect the siphon to the sewer drain.

The connection will take place using a rigid structure. To separate the system, we use corners at 45 ° C. Unlike a corrugated tube, such a system is easier to operate and clean. If a blockage occurs, it is enough to open the shut-off valve and clean the drain.

This is how the system should look after connecting a hard siphon to the sewer.

We install the bottom drain plug and the rotary lever for opening and closing the side drain.

To check the quality of the installation of the drain system, open the tap and fill the bath with water. When the plug is closed, no leakage is observed - the upper neck is assembled correctly.

When the bath is half full, open the plug, check all other connections for leaks.

Everything is dry, you can use the bathroom. If leaks are observed, most likely you have loosely tightened the nuts, skewed, or not firmly fixed the adapters. Tighten the nuts and direct the structure in the desired direction.

Step 6: Foam blowing and sheathing a niche for a bath
Despite the advantages, a steel bath has two main drawbacks - the water in it cools quickly and increased noise is created when water is collected. A budget option to eliminate these problems is blowing with mounting foam. Installing an acrylic and cast iron bath does not require this procedure. These materials have good sound insulation and low thermal conductivity. However, if you want to improve their quality characteristics, no one forbids you to blow over such bathtubs. It is better to apply mounting foam on a moistened surface than on a dry one, in small areas. Leave a small gap around the technological holes, about 2 cm. Excess foam can be easily removed with a sharp blade.

We proceed to the assembly of the frame from the ceiling profile. Here you are again using the Knauf profile. We start by marking the depth and width of the niche. We mount the guides to the floor and fix them with dowel-nails. We install the profile on the sides, deepening it into a niche for the thickness of drywall sheets and tiles with glue. Together, this distance will be approximately 22–24 mm, given that the thickness of the drywall sheet is about 12–13 mm, and the tiles with glue are 10–11 mm. It is better to take the distance with a margin. If the niche is slightly recessed, it's not scary. But the bulging of the plate will look ugly. We connect the side strips with a wide ceiling profile, fixing them close to the side of the bath, we foam the gaps. We fix the vertical profiles in the middle with self-tapping screws.

We proceed to the sheathing, we use moisture-resistant Knauf drywall. The standard sheet size is 3000×1200×12 mm. A bath up to 170 cm long will require no more than one such sheet. For an inclined surface of a niche, we measure a rectangle of the desired length and width, cut it out and fasten it. We sew the rest of the niche. The resulting space between the inclined and straight parts is closed with drywall triangles cut to size. We do not pay attention to small cracks, these errors will not be visible under the tile. After sheathing, we make a window right size and install a plumbing hatch. The final stage is the application of glue and tiling.

Step 7: Seal the seams with silicone
The missing tile between the bathroom and the wall is laid, the seams are worn, now we proceed to the last stage of finishing - sealing the seams. We clean the seam between the bathroom and the wall, wipe everything dry. For sealing, we will use white silicone, which will not allow water to seep through the side of the bath.

To prevent silicone from smearing the tile and bath, we glue a barrier in the form of masking tape around the entire perimeter. It will prevent the sealant from getting on the cladding and plumbing.

The cleaned and prepared seam is filled with white silicone sealant.

We make the seam even, smear it gently with a finger, a plastic spatula or a spatula. Wipe excess sealant with a damp cloth.

When the silicone dries slightly, carefully remove the masking tape.

After the silicone has completely hardened, the bath is ready for use.


How to cook ham in the oven at home
Pain in the lower abdomen during pregnancy, reasons for what to do Can the lower abdomen hurt if pregnant
Protein for muscle gain
The best vitamins for men according to customer reviews
How to lose weight on a vegan diet?