Plastic panels are increasingly used today as a finishing material for walls and ceilings. Their popularity constantly tends to grow, which is due to good operational characteristics, aesthetic appearance and easy holding installation work. Another significant advantage of panels of this type can be called an affordable level of price indicators.
How to choose plastic panels
Plastic panels can be used without any special fears in rooms with high humidity -.
This material is impact resistant aggressive environment and fluctuations in temperature indicators - suitable for. Moreover, their use prevents the formation of mold and mildew, which is important for. When choosing PVC panels, length and width indicators should be taken into account. The surface of the material can be lacquered, glossy or matte.
Another significant advantage of PVC panels is the absence of the need for careful leveling of the surface, as well as the ability to hide individual communication elements under the frame.

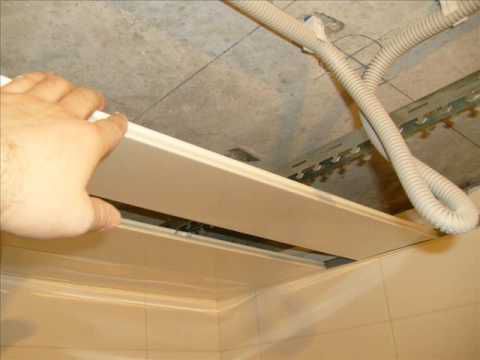
Photo: finishing the bathroom with plastic panels
When choosing this variation of the finishing material, you should focus on the fact that plastic panels for walls and ceilings have certain differences. The former have higher weights. In addition, they have a more rigid structure.

Option to finish the bathroom with plastic panels
Plastic panels designed for finishing the ceiling are lighter. This is due to the need for installation work at height. The minimum weight indicators greatly facilitate this procedure.

Finishing the walls and ceiling in the kitchen with plastic panels
Along with this, plastic ceiling panels are more fragile. When performing installation work, you should be very careful, as you can easily damage the surface of the finishing material.

Wall decoration with decorative plastic panels
At standard thickness 5-10 mm wide panels can vary from 25 to 50 cm. The length varies from 2.7 to 3 m. When choosing a finishing material, you should pay attention to the quality of the color of the panel, the uniformity of the drawing and the correctness of the shapes. The quality of the stiffeners should also be taken into account. They should not stick out from the outside. The surface of the material should not contain characteristic chips and cracks.
The level of resistance of the material to deformation will depend on the quality of the density and flexibility of the PVC panel. If such a panel is tightly compressed, then no traces of mechanical damage should remain on it.
Necessary tools and materials
When performing installation work plastic panels on the wall and ceiling at the initial stage should be selected necessary tools and materials. To resolve an issue related to installation, you may need:
- PVC panels;
- drill;
- dowel;
- cord and pencil;
- perforator;
- ladder.
This should also add moldings and corners. By using the latter, you can achieve the most even markup. Otherwise, when installing plastic panels on walls or ceilings, certain difficulties may arise.

Photo: plastic panels for bathroom tiles
Plastic panels are selected depending on the features of the layout of the room. V small room it is advisable to use narrow panels. Under the condition of finishing a more spacious room, it is best to resort to the use of wider products.

Photo: ceiling decoration with built-in lamps with PVC panels
Self-tapping screws can be used instead of dowels. They are necessary if the frame will have a metal version. Dowels are relevant only if used wooden frame. It should also be noted here that the wooden base cannot be installed in rooms with high humidity. This is due to the fact that such material is subject to decay, as well as negative influence fungi and mold. For this reason, in the kitchen and bathroom, the use of a wooden frame is not a viable solution.
Construction of battens for walls and ceilings
The frame device is a primary issue that should be resolved when installing plastic panels on a wall or ceiling. It was noted above that a wooden or metal variation of the frame can be used as the basis. The optimal distance between the individual elements of such a base is equivalent to 50 cm. In this way, it is possible to compensate for the unevenness of the surface of the ceiling or walls. The recommended sequence of actions will look like this:
- Carrying out markup.
- Installation of profiles around the entire perimeter of the surface.
- Installation of transverse profiles.
- Installation of the basis for fastening PVC panels.
- Panel installation.

During the marking, you should first determine the smallest height of the ceiling. From this point, two lines must be drawn on the walls. To do this, you can resort to using a cord painted with chalk. The correctness of the markup is checked using the building level.

After marking, profiles should be installed around the entire perimeter of the surface. The fixation of these elements should be carried out without the formation of voids and gaps. Otherwise, it will be very difficult to achieve maximum reliability of the entire structure.

Profile frame for walls
After installing the transverse profiles, you should solve the problem, which consists in mounting the base for fastening the panels. Self-tapping screws can be used to fasten plastic profiles.

Profile frame on the ceiling
When installing a metal variation of the frame, you should be as careful as possible. The total weight of the structure will be large enough, so it is necessary to ensure high reliability of its fastening. Mounting hangers to concrete floor can be carried out by using special dowels with a cap on the sleeve. Ordinary dowels will fail, as concrete is characterized by the presence of internal voids.

Attaching the first panel to the frame
Holes in the metal profile can be drilled simultaneously with the preparation of holes in the wall. Provided that the frame is mounted on ceramic tiles it is advisable to resort to the use of a perforator only if adhesive mixture dried up completely. In a different scenario, cracks may appear on the surface of the tile.
Features of mounting panels
Or a wall, it is best to start by determining the optimal length of the material. It is recommended to provide a solution to this issue in advance. To cut plastic panels, you can resort to using a regular hacksaw.
There is nothing difficult in the installation procedure of such panels. Previously, they are placed in the profile, and then fastened with self-tapping screws. It is recommended to start the installation of plastic panels from the corner of the room. This applies to both the ceiling and the wall. It is also very important to monitor the quality and evenness of the installation of the first element. It should be strictly perpendicular to the wall or ceiling. Otherwise, the panel will not be able to snap into the groove and will need to be removed and reinstalled.
Special crate for plastic panels with fasteners
The edges of the plastic panels should go into the slats. The last detail is adjusted to the optimal distance to the wall. If necessary, you can cut the panel with a regular hacksaw.
Advice! Before performing work related to the installation of plastic panels on a ceiling or wall, it is recommended that you first take care of installing various elements of communication systems. They are good at camouflaging water pipes, electrical wiring or heating pipes.
The construction market is now replete with a wide variety of finishing materials. The main advantages of modern innovations are ease of use and reliability. However, this is not always about practicality in terms of price. In this matter, undoubtedly, finishing materials made of PVC are leading in terms of profitability. Polyvinyl chloride panels make it easy and simple to sheathe walls with a ceiling in any room. At the same time, you should not worry about the costly alignment of the base of the wall or worry about the exorbitant cost of installation work. Making the same suspended ceiling with your own hands using PVC panels is not difficult, even without many years of experience in repair work.
What will be required?
So, now we will consider exactly the option of mounting a false ceiling using PVC panels as a finishing material. To do this, you will need the necessary minimum of tools, PVC panels and the required mounting elements. More specifically, you will need the following tools:
- screwdriver or low-speed drill;
- tape measure, bubble level, water level;
- hammer;
- miter box, hacksaw, construction knife.
PVC panels are used as material. According to generally accepted standards, panels can be 25 and 50 cm wide. The main parameter when buying is the area of \u200b\u200ball elements in the package. When calculating the required amount, you should calculate the area of \u200b\u200bthe room in which the suspended ceiling will be installed, and increase the resulting amount by 10-15%, taking into account the trimming of the material.
To fix the panels on the ceiling, use special fasteners and form a frame. By themselves, PVC panels are quite fragile and soft, so for reliable fastening you will need a strong frame with frequent crates.
U-shaped is used around the perimeter of the room plastic profile, into which the edges of the panels will wind up. As an alternative, you can choose a color-matched ceiling plinth for PVC panels, which is already equipped with a U-shaped groove. In high-quality performance, such a plinth is a prefabricated structure, in which the U-shaped groove is assembled from two parts to facilitate installation.
For the crate, you can use a wooden beam measuring 20X40 mm or a metal profile as for drywall. In the bathroom or in the kitchen, a wooden beam will not work due to high humidity. However, thanks to more easy installation wooden beam and attaching the panels themselves to it, it can be used in a bedroom or living room. The second parameter for selection is the price of the material, in this matter it is only necessary to check the availability and price in your region. When using wood in any form in construction, it must be treated with antiseptic impregnations and fire retardants before installation. The latter is necessary to improve the refractory properties of wood.

PVC panels of various standards
In addition, there are plastic or aluminum profiles especially for PVC panels. If the sheathing will be carried out along the ceiling with small differences up to 4-5 mm and with a minimum lowering of the false ceiling, the installation of PVC panels on the ceiling may turn out to be completely simple. The profiles are made with a special groove in the center for fastening to the base and for fixing the clips that will hold the sheathing panels.
Of the hardware, you will definitely need plastic dowels and nail-screws for them (an alternative can be anchors with a wedge for driving). They will fasten the frame elements and profiles around the perimeter to the walls and ceiling. The frame itself is assembled using screws with a drill tip for metal profile and wood screws for timber. PVC panels can be fastened either with screws with a press washer or with special metal clips. The approximate number of all hardware can be calculated after the method of fixing the ceiling is chosen, and after reading the installation instructions.
Preparation stage
Even considering that the ceiling is out of sight, it should be cleaned of all elements that may subsequently fall off or sprinkle on the suspended ceiling being mounted: damaged plaster or putty between the plates, whitewash, old finishing material etc. The entire surface of the ceiling is primed.
Only after that you can start marking for the installation of the perimeter and frame. To do this, draw a line on the walls throughout the room, which will indicate a single level of the future ceiling. The ceiling should be lowered, taking into account which lighting fixtures will be used, the presence concealed wiring or other communications, as well as irregularities in the ceiling itself. For wiring, you should take into account the mandatory presence of a gap between the upper edge of the frame and the ceiling of at least 1.5-2 cm. As a guideline from which the lowering will be measured, you should choose the lowest place on the ceiling.

As soon as the first mark is set, you can transfer it to all four walls along the edges using a water or laser level. To outline the line around the entire perimeter, you can use twine, richly painted over with bright chalk. By pressing the edges of the twine against the wall along the marks, you can slightly take it away and let it go. As a result, the chalk will remain on the wall.
When the perimeter is outlined, you can begin to mark the location of the supporting elements of the frame. Profiles or beams should be placed perpendicular to the future direction of PVC panels and at a distance of 40 to 60 cm. At a greater distance, suspended ceilings from panels may sag slightly during operation.
Advice: No matter how much you would like it, but still there are cases when both the floor and the ceiling of the room in high-rise buildings mass buildings are not brought out according to the level, and it is extremely expensive to fix this. In this case, it is better to deviate somewhat from binding to a strict level and draw a perimeter line with a certain slope so that the difference between the planes of the ceiling and the floor is not visually striking.
Frame installation
Option 1: plastic crate
A plastic U-shaped profile or a plinth with it is attached around the perimeter of the entire room so that its lower border runs along the previously drawn line. To join the profiles in the corners, use a miter box and a hacksaw. This is the only way to get a beautiful cut and a minimum gap. The profile should be fixed every 25-30 cm. Further, to facilitate the process of mounting the frame, you can pull a thread or fishing line across the ceiling so that it forms a plane along with the upper edge of the profile.

Option 2: wooden frame
Wooden beams are attached to the ceiling with dowels and impact screws, every 60 cm. In order to bring them to the same level along the bottom edge, you can use wooden linings between them and the ceiling.

Option 3: metal profile
The metal profile, as in the case of drywall, is attached using U-shaped elements located every 60-80 cm. The so-called "pawns" are most conveniently attached to the ceiling with anchors with a driven wedge, and to the profiles using screws with a drill tip.
There is no need to mount jumpers between the carriers of the frame, however, they will be needed in places where it is supposed to fix something heavy, for example, a chandelier.

At the end of the installation of the frame, laying is performed power cables for lighting. When using PVC panels, wires must be laid in corrugations to ensure fire safety. In places where spotlights will be installed, it is enough to leave loops 10-15 cm long.
Installation of PVC panels
Now, when the frame is ready and brought to a single level, you can proceed with the installation of false ceilings. This is the least troublesome and at the same time responsible process. The first strip of material is inserted into a U-shaped profile. Some masters cut off a latch along the edge at the first strip. As soon as the strip is in place, it is fixed with screws or clips to the supporting profiles of the frame, without missing a single one. cut off the strip required size you can use a hacksaw or simple knife. The material is fairly easy to cut.
Important: PVC panels should be cut to a length slightly less than the distance between the walls. There must be a gap between the strip and the walls, about 4-5 mm from each end.
The next strip is applied to the lock at a slight angle and led into it along the entire length. After that, the second side is pressed against the frame and also fixed with screws. In order to tightly bring the strips together, you can use a bar or a piece of the same PVC panel, which is inserted into the groove and carefully hammered all the way with a hammer.
The main thing is not to bend the strips of material in any case and not to apply too much effort during installation. PVC panels are quite fragile and even inaccurate hand pressure can leave a dent that cannot be removed. Installation is best done with a partner or using simple supports with crossbars.
The main difficulty may arise when installing the last strip. In one embodiment, you can turn the strip with the lock in the other direction and cut it along the length from the side of the groove to the desired width. Further, having attached tightly to the previous panel, the last element of the ceiling is also fastened with screws. When using collapsible skirting boards, it is easier and more reliable to simply cut the strip to the width and snap the lock with the previous strip, as in all other cases.

If it is planned to install spotlights in the ceiling, it is naturally more expedient to think it over in advance and insert spots “on the ground”. Read more about installing lighting in a plastic or any other ceiling -.
Completion
After all the stripes are installed, you can proceed to finishing. When using a U-shaped profile around the perimeter, a plinth is installed separately. It is best to fix it on liquid nails. At the same time, it is better to apply them only on one side of the plinth. That is, the plinth is attached either only to the wall, or only to the ceiling.
In the case of a collapsible plinth, the mating part simply snaps into place. In the corners, you can use special adapter sleeves or cover the gaps with a sealant of a suitable color.
In pre-marked places, holes should be made for the output of lighting wires or for the installation of spotlights. The same work can be done during the installation of the ceiling. At the very end of the work, the fixtures and all the equipment necessary for them are installed directly. It is advisable to adhere to generally accepted standards, and in the case when a suspended ceiling is mounted in the bathroom, then install low-voltage lighting fixtures with a converter instead of the usual circuit using 220 V. However, the fact that the ceiling of PVC panels is to a certain extent not afraid of moisture can be guaranteed to secure themselves from the effects of moderate flooding by neighbors from above.
- familiar stranger
- Training base ceiling
- Lathing device
- Installation of plastic panels
Until recently, there were not so many ways to finish the ceiling. Whitewash, paint with water-based emulsion. The daredevils still dared to glue the ceiling with wallpaper - that's all. And today there are suspended, stretch, mirror, stained glass ceilings, etc.
Ceiling sheathing with plastic panels is the simplest, most economical and fast way finishes.
To date, one of the most popular, especially among those who like to do everything around the house with their own hands, has become a plastic ceiling. Such popularity is due to the fact that making a plastic ceiling is quite simple, especially for those who have had to deal with suspended ceilings, and it will cost only a little more than a plasterboard ceiling.
familiar stranger
Strictly speaking, a plastic ceiling is a false ceiling.
It is attached to the main ceiling with the help of special suspensions on a metal profile frame or wooden slats. Only the material for panels instead of drywall is polyvinyl chloride, one of the safest and most harmless types of plastic. Suffice it to say that in addition to wall and ceiling panels, food containers are made from PVC.
It is easy to make such a ceiling with your own hands, giving it an attractive look. appearance. Panel seams will not be visible on it, besides, it will last you much longer than the plasterboard counterpart, and it requires the most minimal care - from time to time to remove dust from the plastic. This is easy to do with a damp cloth, as plastic is absolutely not afraid of water.
When choosing panels, it is important not to confuse and not buy wall panels instead of ceiling panels. Although they are made of the same material, they differ significantly. Wall panels are much heavier than ceiling panels, which makes a huge difference.
Related article: Choosing a sofa in the living room: some recommendations
If you mount such panels on the ceiling, you will get a significant load on its frame. And this is fraught: one fine day, the frame may simply not withstand, and the ceiling will collapse. And if you install ceiling panels on the wall, they deform over time, since their mechanical strength is much lower.
Back to index
Preparation of the base ceiling

Types of plastic panels.
Making such a plastic ceiling with your own hands is no more difficult than a regular plasterboard suspended ceiling. Installation of any false ceiling, incl. and plastic, you should start with the preparation of the base ceiling. Its surface must be thoroughly cleaned of exfoliated lime or plaster and treated with an antifungal solution.
Then you need to take care of the electrical wiring passing through the ceiling. Indeed, in most cases, lamps and chandeliers will be mounted on the ceiling. Before mounting the ceiling, you need to fix the wires and at least bring them to the switch. Wires must be securely insulated. Jokes with electricity are dangerous, so if you do not have enough experience in this matter, then it is better to seek help from a specialist.
To mount the plastic ceiling yourself, you will need the following tools:

Scheme of fixing PVC panels.
- puncher or electric drill with a drill bit;
- hacksaw for metal;
- construction knife;
- roulette;
- square;
- rebound paint cord;
- water level;
- screwdriver
From the materials do not forget to purchase:
- antifungal solution;
- suspensions;
- dowels (be sure to take the same diameter with a drill with which you will drill holes);
- plastic panels;
- ceiling profiles;
- self-tapping screws.
Back to index
Lathing device

Installation of plastic ceilings.
The frame for a plastic ceiling can be made from both wooden slats and a metal guide profile. Still, the second option is preferable, since the metal is less susceptible to changing its dimensions under the influence of temperature and humidity.
You need to decide in advance how far you will lower the panels. At the same time, you need to take into account the depth of your lamps - mainly from 5 to 10 cm. Having decided on the height, you need to install and fix the profile guides strictly horizontally. Here it is better not to rush and double-check everything several times. Otherwise, rushing and setting the wrong profile, you will not leave yourself any other choice but to make the ceiling oblique, which will immediately catch your eye.
Related article: How to defrost plastic plumbing
From the base ceiling at the corners of one of the walls, the required distance is measured down. It is important that the marked marks are at the same level, so be sure to check their location using a water level. Then these two marks are connected with a cord into one horizontal line.
Taking the measured horizontal as a guideline, you need to draw the same lines around the entire perimeter of the room, checking them with a level. This will be the horizontal plane to make the ceiling even.
The next step in the installation will be the installation of metal guide profiles along the marked border. The profiles are fixed directly to the wall by drilling holes in it with a perforator or drill, using plastic dowels and galvanized self-tapping screws for fastening.
In order not to break the horizontal line when fastening the profiles, the end of the unattached profile is laid at the end of the attached one, then its other end is laid strictly according to the markup, and the profile is attached to the wall along its entire length.
Having finished installing the profile on the walls, you need to install the profile on the ceiling itself. To do this, on the ceiling along the direction of installation of the ceiling profile, you need to fix straight suspensions in increments of 50-60 cm. The suspensions must be fixed strictly along a straight line, breaking it off with a paint cord. Ceiling profiles are attached to these suspensions, and guide profiles fixed on the walls are laid at the ends. With this false ceiling design, there is no danger that one day it will fall on your head.
With the advent of inexpensive building plastics, it has become much easier to repair the ceiling, and a presentable appearance of the structure has been added to the reduction in costs and easy installation. Indeed, practical glossy panels in the bathroom or kitchen look elegant and quite appropriate, and their design is not inferior to the design of plasterboard and tension systems. Thanks to a wide range of ready building materials you can make a suspended ceiling of plastic with your own hands, while the result will practically not differ from the work of professional craftsmen.
Why plastic is better than other materials
The first question that arises at the mention of plastic false ceilings concerns their safety for people or animals. Modern artificial PVC panels are absolutely harmless. PVC modifications are used not only for the production of building materials, but also for the manufacture of dishes, food packaging, and souvenirs.
At the same time, plastic, unlike wood, is light in weight, and for a ceiling device this is an important factor. In addition, PVC parts have a smooth, non-porous texture, while the natural material - wood - changes shape and weight with changes in temperature or humidity in the air. confined space.
Plastic is great for finishing ceilings in modern kitchens
One of the important advantages for utility rooms and bathrooms is practicality. Reiki and panels do not need to be updated with paint, it is enough to wipe it several times a year with a cloth slightly dampened with water. Stronger contaminants are removed by traditional detergents- Laundry soap or cleaning gel. Abrasive powders are not recommended, as they can scratch smooth surface, it is especially easy to spoil the look of mirror and glossy elements.
The ease of installation of the PVC panel structure is also one of the advantages of this material. Even without special training, you can design and create a frame from a metal profile or wooden slats, and then attach plastic parts to it. Anyone who knows how to use a screwdriver or drill will succeed.
Do not forget that the plastic false ceiling perfectly masks communications: ventilation pipes and electrical wiring. PVC panels also perfectly hide heat-insulating mats. In the event of flooding from above, even repairs will not be required, although, suppose the drywall becomes unusable, and the tension structure has to be restored. As you can see, plastic ceilings have enough advantages.

Ceiling sample from fragments of textured plastic panels: thanks to segments of various lengths, an interesting pattern is formed
Choice of plastic panels
Consumable plastic can be divided into two categories - wide panels, most often glossy or matte, and narrow slats, resembling a wooden "lining" in size. The assembly principle for both types is the same: the parts are folded in parallel end-to-end, one by one, over the area of the entire ceiling. It is not necessary to place elements along or across the walls, some hobbyists stack them diagonally, although this method is a little more difficult to perform.
Given the interior of the room, you can choose colored panels - most often they are painted in pastel, pale colors. There are options with a pattern, but they should be used with extreme caution, while the ornament on plastic should be combined in style with wallpaper, tiles and furnishings.
After choosing the color and size of the parts, you need to calculate their number. The dimensions of the panels are indicated on the labels, therefore, knowing the total area of the room, it is easy to calculate the number of pieces: we divide the area of \u200b\u200bthe room by the area of one part. 1-2 additional elements will not interfere, since some of the panels have to be cut.

Samples of panels with drawings of natural themes
When buying, pay attention to the following nuances:
- the same color of the elements of the entire batch;
- integrity of cardboard or film packaging;
- No scratches or chips on the plastic.
Pay special attention to the thickness of the panels. As a rule, ceiling specimens are slightly thinner than wall ones, their average thickness is 8-10 mm, the most reliable ones are 12.5 mm.

In addition to traditional panels white color widely used colored plastic
What materials and tools will be required
In addition to plastic panels for suspended ceilings, you will need a number of materials for the frame and a set of tools:
- starting (bearing) profile;
- connecting H-profile;
- corner (end) F-profile;
- ceiling plinth;
- corners (external and internal).
In the process of drafting a project, it is necessary to draw a layout of the panels and calculate how much it will take approximately consumable. Do not forget about lamps, wires and fasteners - dowels and screws.
A standard set of tools is most likely to be found on the farm, the rest will have to be purchased: a drill, a screwdriver, a hacksaw or a circular saw, carpentry knife.

Mirror panels visually increase the height of the ceiling in the bathroom
Installation instructions for plastic ceiling
The proposed phased plan is the basis for the construction of a plastic false ceiling the simplest design. It is suitable for decorating a kitchen, bathroom or hallway of a rectangular or square shape. The instructions can be supplemented or slightly modified, if required. design solution.
Surface preparation and marking
Preparatory work consist in removing everything superfluous from the surface of the ceiling - old paint, fragments of plaster. If there's big cracks, they need to be puttied. Concrete plates in rooms with high level humidity should be treated with a composition against mold and fungus.
Then, using a level and a tape measure, you need to make a markup for the guide profile. The distance from the ceiling surface to the starting level is at least 10 cm, and preferably 12-15. The height of the ceilings will noticeably decrease, it is for this reason that it is not recommended to arrange suspended structures in a typical panel and brick housing with a ceiling height of 2 m 50 cm.

Ready-made frame from the guide and ceiling profile in the bathroom
Installing a box from a profile
Properly mounted profile frame is a guarantee of long service life and reliability of the suspended structure. The procedure for installing a metal profile box (a crate made of wooden slats is attached according to the same principle):
- We drill holes for dowels in the walls and fix the guide profile.
- We connect the parts together with special fasteners - "bugs".
- We attach suspensions to the ceiling - in a straight line, at intervals of 50-55 cm.
- We mount to hangers ceiling profile on which the plastic panels will be attached.
If necessary, if the room has a length of more than 4 meters, we build up the profile in segments using longitudinal connectors or simply fasten it with self-tapping screws.

Fastening plastic panels with pre-installed spotlights
Installation of plastic panels
The final step, which should be done slowly and very carefully. We release each part from the film and cut off the excess part, if necessary, using a grinder. You can work with a hacksaw or a jigsaw, but the process in this case will be delayed. The length of each panel should be 4-5 mm shorter than the length of the room. Sand the edges and fasten with screws to the profile.
From the following panels, folded back to back, we assemble a smooth canvas. For glossy parts, the seams will be barely noticeable, for elements with a pattern, they will show through more clearly. Small grooves will remain between the thin slats. We cut off the last part according to the width of the remaining space.

Standard scheme for laying plastic panels
We cut out holes for the lamps with a knife, the wiring to them was laid even during the installation of the frame. Spotlights come in a variety of sizes and designs, so it won't be hard to find the right spotlight for your type of ceiling. We cover the edges of the plastic sheet with a frieze or corner.
The result of your efforts will be a beautifully designed suspended structure that masks all the flaws of the old ceiling.
Video selection: installation of a ceiling made of plastic panels
Plastic ceiling panels are a good alternative to plasterboard constructions. Easy to install, durable in use, they perfectly mask the defects of the ceiling surface and give the room an attractive look. Mounting is not difficult if you carefully study the technology.
Tools and materials for work
In order not to be distracted by searches in the process of work, all the necessary tools and materials should be prepared in advance:

It is better to use the water level, so the markup will be done faster and with greater accuracy. The frame of the rails can only be mounted in a dry room, it is better to mount an aluminum profile in the bathroom or in the kitchen. If the length of the ceiling is longer than the length of the panels, an additional H-shaped connecting molding will be required. Its design allows you to securely fasten two adjacent panels and avoid sagging at the joints.
Calculation of the amount of materials

When planning, it is very important to correctly calculate the amount of materials needed. This will help avoid unnecessary costs and reduce the amount of waste after repairs. First you need to calculate the area of \u200b\u200bthe ceiling by multiplying its length by its width. In the same way, the area of \u200b\u200bone panel is determined, and then the ceiling area is divided by the panel area and the resulting value is rounded up.
Since the panels will be trimmed during installation, and the material may not be enough, it is recommended to increase the ceiling area by at least 10% when calculating. If the ceiling surface has a complex configuration, it is better to add 15% for trimming. In addition to the panels, you will also need rails for the frame; to find out the total length of the rails, you need to divide the width of the ceiling by 0.3 and multiply by its length.

When attaching the rails to the ceiling, dowels and self-tapping screws are placed at a distance of 40 cm from each other. The starting profile is fastened every 0.5 m. Knowing the length of all the rails and the profile, it will not be difficult to calculate the number of fasteners. The total length of the UD profile is equal to the perimeter of the ceiling plus 10% for joints. The ceiling plinth should be the same length. The consumption of the primer mixture is usually indicated by the manufacturer on the packaging, so when buying, you need to know the area of \u200b\u200bthe ceiling.
An important point: when buying plastic panels, you should immediately check their integrity in the package and the absence of defective elements. It often happens that after printing out a purchase at home, people find defective, bent or broken panels, which are very difficult to get a free replacement.
Installation technology of plastic ceilings

The connection of the panels is quite tight, but not tight, and therefore the smallest particles of dust, lime and plaster from the ceiling surface can penetrate through the seams. In addition, mold often appears on the ceiling, especially in the corners, and fungus spores also enter the room and are inhaled by people. To avoid such troubles, you need to properly prepare everything.
It is not necessary to level the ceiling, but it is necessary to remove the exfoliated whitewash or plaster. It is best to walk along the ceiling with a stiff-bristled brush, and then wipe it with a damp cloth from dust. cracks and through holes or cement mortar. Finally, the ceiling is primed twice with a deep penetration antifungal compound.
Prices for mixtures for leveling walls and ceilings
Mixtures for leveling walls and ceilings
Markup for the start profile

In order for the ceiling to be even, the panels must be located in the same horizontal plane. To do this, along the perimeter on the walls, accurate markings are made for the starting profile. Depending on the curvature of the working surface and the thickness of the wiring, they retreat down 5-10 cm from the ceiling. Mark a point on the wall with a pencil and start marking the level from it. Marks are placed in each corner and in the middle of the walls, and then connected with a beating.
UD profile fixing


TO concrete walls the starting profile is fixed with dowel-nails or anchor bolts, having previously drilled holes along the marking line. TO wooden surface the frame is fastened with long self-tapping screws. The fastening step is 50 cm. The profile is applied to the markup, leveled horizontally and screwed. At the joints, as well as along the entire length, there should be no gaps between the wall and the profile.
Frame installation

Lathing slats are arranged in parallel rows every 30-40 cm. First, straight lines are drawn, stepping back from one of the walls 30 cm. Metal suspensions are screwed to the ceiling along these lines with a step of 35-40 cm. A crate from a profile or rails is mounted on the hangers, the ends of which are brought into the starting profile along the perimeter, then the design is checked building level. All elements must be strictly in the same plane, any irregularities and deviations from the horizontal will lead to deformation of the ceiling.

Laying electrical wiring
When the frame is securely fixed, proceed with the installation. Carefully consider the location of the cables, the output points of the lamps, ventilation ducts. Each system should be as isolated as possible from the rest, and cables, hoses and wires should be neatly bundled with plastic ties. It is desirable that the wires be corrugated and firmly attached to the ceiling; sagging of the wiring elements is unacceptable. Where the lighting device will be installed, you need to additionally strengthen the crate with guides. In conclusion, they once again check the horizontality and strength of the fastening of the crate, the absence of parts protruding beyond the boundaries of the frame.
Prepare an L-shaped bar and the first panel: measure the distance between the walls and cut the plastic with a hacksaw. The ends of the extreme strips are cut at an angle of 45 degrees. Please note that the panels are mounted perpendicular to the guide profile. The L-shaped bar is mounted first; it is fixed with screws to the rails located along the perimeter of the ceiling. Stand on the side where the skin will end, the bar does not need to be screwed yet. Next, the first panel is inserted into the profile with one side, holding it in a horizontal position along its entire length.

If the ceilings have a large area, it is better to work with an assistant, since it is quite inconvenient to hold the panel on weight and at the same time attach it to the crate. The free side edge of the panel is fixed with self-tapping screws to the supporting profile or rails. Thin plastic can be attached to wooden rails with construction stapler. Each subsequent panel is mounted in the same way, carefully inserting the ends into the L-shaped strips.

When using panels of short length, it is recommended to move the transverse seams in a checkerboard pattern. So the ceiling will look more attractive. Trimming of each element is performed sequentially, as soon as the previous one is fixed. This contributes to a reduction in material consumption and a more accurate fit of the joints.

When mounting panels, holes are pre-cut in the plastic at the exit points of the electrical wiring desired diameter. This can be done with a sharp utility knife. The last bar is first adjusted to the width of the hole, then inserted into the L-shaped profile, and its edge is smeared with glue and inserted into the ceiling. If instead of a profile it is planned to use a ceiling plinth, the edge of the panel can be fixed with self-tapping screws - they will not be visible under the baguette.

When gluing baguettes, you should very carefully apply them to the ceiling so as not to stain the plastic. If this happens, you must immediately wipe the glue with a clean cloth, because it is quite difficult to clean it after drying. On this, the installation of a plastic ceiling is considered complete.


Prices for popular finishing wall panels
Wall panels
Video - Do-it-yourself plastic ceiling


How to cook ham in the oven at home
Pain in the lower abdomen during pregnancy, reasons for what to do Can the lower abdomen hurt if pregnant
Protein for muscle gain
The best vitamins for men according to customer reviews
How to lose weight on a vegan diet?