Depending on the size and layout of the apartment, the doorway can be decorated with a door or an arch without a door leaf, which will look advantageous between the kitchen and the dining room, between the living room and the corridor. In any case, the passage between the rooms plays an important role in the interior, attracting attention and adding, in some cases, convenience and functionality.
Doorways without the usual doors surprisingly transform the room
If for a number of reasons you decide to leave the doorway open, you should understand the advantages and disadvantages of this method.
The pluses include the following:
- Allows you to add functionality to adjacent rooms. The most suitable option is such a design between the kitchen and the dining room.
- There are no hinges and fittings in the open arch, so nothing will fail.
- Finishing the daytime opening will be carried out without difficulty, since there is a fairly wide range of facing materials in hardware stores.
- The decoration of an open opening does not require large financial investments effort and, in most cases, time.
- You can do the work yourself.
- The open arch will blend harmoniously into any style of interior and design. Its shape can be any - square, triangular, curved, arched.
The disadvantages include the lack of sufficient sound insulation in adjacent rooms and the free penetration of odors, which is especially important for the kitchen.

An opening without a door is a win-win solution for visually combining adjacent rooms: a living room and a hall, a corridor and a dining room, a kitchen and a living room
All doorways can be divided into several main types:

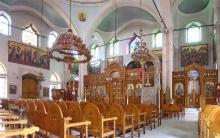
The design of doorways, depending on the purpose, has some features. In particular, bedrooms and children's rooms should provide peace and quiet, so it is not advisable to leave them without a tightly closing door leaf. Kitchens, libraries and living rooms, on the contrary, can be equipped with an open doorway - this will add convenience when moving, expand the space and allow sunlight to freely enter small rooms.

The light decor of the doorway will emphasize the beauty and complexity of the interior of the room.

A wide edging, on the contrary, will highlight the complex shape of the opening and make a visual accent on it.
In small apartments with low ceilings, arched openings will look best. This type will visually expand the space and add height to it. In this case, the arch should be gentle and have a large radius.
How to arrange a doorway?
Popular design options:
- Decorating with curtains or draperies. Will serve ideal option for passage between the bedroom and the loggia. We recommend using high-quality dense textiles that prevent the passage of sunlight. For a lighter option, curtains made of threads of beads and beads are suitable.

For a bohemian style, curtains made of dense material in a rich color are suitable.
- Also, for the design of doorways, various vertical blinds. Their range is widely represented in hardware stores. You can use folding wooden, glass, fabric or plastic partitions.

Vertical blinds as a decorative partition
- A more classic version of decorating open doorways is plasterboard and wood cladding. The convenience of the first is that you can build almost any shape from it and cover it with a finishing material - decorative plaster, paint or wallpaper - the choice is yours. Patterns and ornaments can be carved on wood decor. The tree will look more "chic" and will last a long time. When changing the color scheme of the room - wood trim can be easily repainted to a different shade.

Wood paneling is a good solution when you want to highlight the edging against the background of the walls.
- A small decorative cornice called "sandrik" will harmoniously merge into classic interiors. It may consist of columns or moldings, contain elements of statues.

Making a doorway in a classic style
- If the interior is made in the Renaissance, Gothic or Baroque style, you should take a closer look at the decorative stucco moldings and columns. This technique will definitely add chic and aristocracy to the room. They are not suitable for rooms decorated in high-tech and contemporary styles. The surface of moldings can be painted in various colors, decorate and apply gilding. It is not necessary to use natural natural materials; polyurethane will cope well with this task. It is much lighter and stronger than gypsum. In addition, it can be used to simulate the finish natural stone and marble.

Decorating the opening with stucco will make the room exquisite
The glass door will appeal to those who do not want to completely separate and isolate the space. You can use stained glass, frosted or tinted glass. Apply an ornament to it or leave it completely transparent.

A glass door is relevant when you do not need complete visual isolation, but you need to protect yourself from noise and smell
Compartment doors are suitable for owners of large-sized premises with the ability to equip a wide opening. Their convenience is multifunctionality. If you need to delimit the space - just close the doors.

Sliding doors can be matched to any style of interior
An excellent and convenient way to design doorways in small apartments will be an accordion door. Can be glass, plastic or wood. Absolutely does not take up space and does not require free space.

The accordion door folds compactly, so it is very appropriate in small rooms
Stone doorway decoration
Facing doorways with decorative stone will appeal to connoisseurs of natural materials. This type of decor is quite expensive and laborious. Picking up a stone is not difficult, because the palette of colors, shades, textures is very wide - from smooth gray, black to embossed elements of brick color. This material can be found in various sizes, shapes. With the help of artificial stone, you can imitate shell rock, malachite, sandstone or any other.

If you have chosen a natural stone finish, remember that the idea must be really worthwhile and backed up by similar details in the design of the room.

Facing the doorway with "torn edges"
Commonly used elements small size, placing them along the edge of the opening, creating either smooth or torn edges. The stone can be used both in the same color scheme with the interior, and to highlight the finish, using contrasting shades. The stone is combined with both textiles and wood. A fairly durable, low-maintenance way to design a doorway. Since the decorative stone is heavy, it is important to attach it tightly to the wall. To do this, use specially designed glue-based compositions, liquid nails.
Often, instead of decorative stone, brick tiles are used. This material is moisture resistant and fireproof. Able to last several decades. Just as in the previous version, it is laid out scattered along the contour of the opening or even edges are formed. It goes well with both plaster and wallpaper.

The option of decorating the arch with tiles under the old brick

And here the doorway was overlaid with real brick
To prepare a section of the wall for laying tiles, you need to remove all previous finishing materials, degrease the surface. If the wall has rough irregularities, cracks, it is recommended to level it with putty or plaster. Mandatory stage - primer in two stages.
At the end of the drying process, proceed with the installation of the "clinker". To fix the tiles to the wall, tile adhesives, liquid nails are used. It is important to prevent the appearance of glue in the seams between the elements. In order for the joints to be perfectly even, it is recommended to use special crosses. You can find them at any hardware store. The last step will be the application of grout, which may be similar in shade or contrasting to the tile.
How to make a doorway with plastic
A quick and budget option for finishing a doorway. Its installation process is simple. You can do it yourself. Sufficiently durable, plastic and picky in care. Under the material, you can conduct wiring and make the backlight with small lamps. Attach the plastic with plastic glue.

Before sticking the panels, the planes should be leveled with putty and primed

Corner elements are used to seal gaps between panels and walls.
With the help of an open doorway, you can radically transform the room. It will add space, light and lightness. If the apartment is small, this option is simply indispensable, as it will save usable space. It will serve as a win-win option for combining a kitchen with a dining room, a bedroom with a loggia, a library with a living room, a hall with an entrance hall.
A wide range of finishing materials, a variety of shapes will allow you to choose the design of the doorway for any room - from country cottages and huge mansions to modern apartments in new residential complexes. If you are going to combine a sleeping space with a loggia, do not forget about various ways blocking sunlight, such as curtains, drapes or blinds.

The arch of the original form in the bedroom

Doorway decoration with wooden columns
Whichever option you choose - finishing with decorative stone or wood, plastic, brickwork, wallpaper or drywall - it is important to strike a balance. All elements of the interior must be harmoniously combined with each other.

The original solution - built-in open shelves
Video on how to decorate a doorway with a stone
When ennobling the opening of the entrance or interior door take into account the peculiarities of its design. The presence or absence of a sash affects the choice of material. There are many finish options doorway, but when implementing the design idea, it is necessary to take into account the harmonious combination with the interior of the entire room.
To choose the right decision for a doorway, first think over its shape. The front door is traditionally associated with a rectangle. Interior rooms in the absence of a sash are given curly configurations.
Classic
Classic style technology allows you to ennoble the passage between rooms without affecting its shape. A traditional rectangle, with or without a sash, is lined with platbands. For finishing wide slopes, extensions are used. As platbands, you can glue a decorative corner. The stained-glass windows above the doorway, made of multi-colored glass inserts, look beautiful.
Arch
The arched shape is considered the most popular way to decorate an opening without a sash. Its advantage lies in smoothing sharp corners. Smooth upper transitions door structure let the imagination run wild. In low rooms, the arch visually makes the ceiling higher, and in high rooms - lower. The effect is achieved due to the size of the structure. The more the arch expands, the lower the ceiling appears.
The wood frame of the arched doorway between the rooms looks rich. In the budget option, you can use plastic or MDF. Arches usually separate the hall from the kitchen or hallway, and are also used when combining an insulated loggia with a living room.

Trapeze
Not a very popular form for decorating a passage in a partition, especially in a small apartment. Sharp corners will make the room uncomfortable. The trapezoid fits a wide doorway in a large apartment, and the best way facings - materials of light and warm shades. In a house with low ceilings, it is undesirable to make a narrow upper part of the trapezoid. A small jumper will visually lower the ceiling, reduce the room and give the interior a heavy look.

Asymmetrical shape
For achievement modern interior, the design of the room is often associated with the idea of arranging an asymmetric opening on interior partition. Hardware stores offer ready-made kits. When implementing your idea, a bizarre shape is created with a galvanized profile, and sheathed with drywall on top.
Asymmetric configuration involves the formation of smooth transitions in different parts designs. Avoid sharp corners. Finishing is usually done by painting or wallpapering.

Curtain decoration
Free passage between rooms without a sash is decorated with a screen or curtains. This is the most affordable way decorations. Curtains made of fabric look cozy. Unusual interior create thread curtains. In the "eco" style, the room is decorated with bamboo curtains.

Materials for finishing the doorway
Plaster
Stucco, which is gradually losing popularity, is used as a budget option when you need to arrange a doorway for painting or wallpapering. The disadvantage of this method is the complexity of the work and a large number of mud. If the technology is violated, the formation of cracks and even shedding is possible. In stores, plaster is sold in the form of a mixture. The composition is different. The method of preparation and application to the wall depends on the type of plaster.

In general terms, finishing work consists of the following steps:
- Mix the solution in the container. The amount of one batch is calculated for half an hour of work.
- The solution is thrown onto the surface of the wall, distributing it with a rule and a spatula.

- When applying a thick layer of plaster, beacons are used. Guides will help to perfectly level the surface.
- So that a thick layer of plaster does not crack, after applying 1 cm of mortar thickness, a reinforcing mesh is laid.

Decorative plaster can be painted. If this is a rough finish, then the surface is covered with textured putty.

Drywall
Finish the doorway with drywall in two cases:
- when changing dimensions or shape;
- if you just need to sheathe the opening instead of plaster for subsequent finishing.
To create figured openings, a galvanized profile is used. First, a metal structure of the required shape is assembled, and then it is sheathed with plasterboard.

Drywall can be used to correct large irregularities without changing the shape of the opening. The slopes are sewn up with sheets, and the corners are aligned with a profile.
After installation, the GKL surface is primed. Seams, protruding caps of the self-tapping screw and other defects are sealed with glue with a sickle lining. After the surface has dried, a layer of starting putty is applied. If it is not supposed to paste the opening with wallpaper, but painting, apply another layer finishing putty. After drying, the surface is rubbed with a sanding net.

MDF panels
The advantage of finishing the MDF doorway is that there is no need to additionally prepare the surface by applying plaster or plasterboard sheathing. A wide selection of colors allows you to choose the material even under the old metal door. When the door slope is sheathed with MDF panels, the total thickness of the cladding is taken into account. It should not interfere with the opening of the sash.

Installation is carried out on the frame. The structure is assembled from a metal profile or wooden slats. Attached to the wall with dowels and screws. Sheathing starts from the top crossbar, then goes to the side slopes. The joints at the corners are sealed with a decorative strip matched to the color of the panels.
Plastic
PVC door trim plastic panels similar to MDF board. However, the disadvantage of the material is its brittleness. The sheathed frame creates cells with voids between the slats. Near the door, someone will definitely press the slope with their hand and the lining will break through.
PVC panels are best glued with liquid nails. The color is selected with imitation of natural materials, most often wood. Nice classic white. Glue the panels on a perfectly flat surface, pre-finished with plaster or drywall. Before installation, the back of the plastic is rubbed with sandpaper. The roughness will provide better adhesion to the adhesive. The joints at the inner and outer corners are hidden by corners.

Laminate
To beautifully finish the door slope with a laminate with your own hands, you need to choose the right material. The color of the panels is selected so that it matches the shades of the doors, flooring and even the baseboard. The slope, which stands out in contrasting colors, looks tasteless.

Fix the laminate in three ways:
- On a perfectly flat surface, the panels are glued with liquid nails. The process is identical to the installation of plastic. Slopes are first plastered or sheathed with plasterboard. Laminate begin to glue on the top crossbar, then go to the sides.
- Mounting on the frame allows you to lay thermal insulation in the cells. Simultaneously with the finishing, the opening is insulated.
- Gluing with mounting foam is similar to using liquid nails. The difference is that there is no need for a perfectly flat base. The foam itself will even out the flaws when it swells.
Facing made of high-quality laminate will last up to 20 years.
Decorative rock
In modern apartments, it is fashionable to finish the doorway with a decorative stone that does not differ appearance from natural material. Facing is best done with small elements with a weak relief. Registration doorways decorative stone with a deep texture inside the room creates the effect of bulkiness of the structure.
A variety of materials allows you to embody bold design ideas. Imitation looks good on the entrance door slope brickwork. Fans of the classics are offered elements with the texture of clinker tiles. To finish the corners of doorways, there are special corner plates that eliminate the need to cut stone.
To get a beautiful door slope, you need a flat surface. Elements are glued with liquid nails. The formed seams are covered with grout.

Polyurethane
The elements used to frame the doorway made of polyurethane have completely replaced the gypsum moldings. Lightweight and durable material sticks well, does not break when dropped, and is resistant to moisture. The resulting seams are covered with putty, and after they dry, they are rubbed with sandpaper. Polyurethane stucco is suitable for rooms with high ceilings.

Dobory
To finish the doorway with extensions, they buy a kit. It consists of wooden or MDF planks. When assembled, a product is obtained that hides the slopes protruding beyond the door frame. The end result is a complete structure.

There are three types of extensions on the door slope:
- simple;
- with an edge at the end;
- telescopic.

The first option is a plank with a raw edge. Tape-edged extensions allow you to hide the uneven edge in case of installation flaws. Telescopic boards are equipped with mounting grooves.
Tile
Finishing the door slope with tiles is justified if the material is in harmony with the design of the walls. The option is optimal for a bathroom or kitchen. Tiles are produced different shapes, which allows you to veneer not only rectangular areas, but also arches. For laying ceramic tiles, you need a flat, solid surface. Installation takes place on the adhesive composition. The joints are covered with decorative grout.

Gypsum
Making a doorway with gypsum stucco is rare. The material is quite brittle and heavy. In case of poor fastening, the falling element will break, and can also injure a person. To make it work beautiful decoration doorway, there should be a lot of plaster, and one style should be observed. This can only be achieved in a large spacious room with high ceilings.

Wallpaper
The simplest and old way- This is to glue the wallpaper on the slope. Moreover, the door leaf itself is often subjected to pasting. Wallpapers are selected high-quality, resistant to abrasion and dampness. If you are finishing with photo wallpaper, the opening can be designed in the form of a living corner. To hide the doors from view, the slopes and canvases are pasted over with the wallpaper that was used for the walls. For contrasting highlighting, the sash is partially pasted over with patterns. Geometric shapes or pattern fragments are acceptable.
Doors and objects adjacent to them are considered the hallmark of the house. It is not worth saving on the design of this site, because it first of all catches the eye of guests.
The front door forms the first impression of the home, so it must be both reliable and aesthetically attractive, and well-mounted. At the same time, the complete editing cycle includes stages that are often neglected due to ignorance. These include finishing the slopes of the front door, which is necessary not only for the beauty of the structure, but also for high-quality operation for a long time.

What it is?
As practice shows, slopes are often confused with platbands, since platbands are their external, decorative part. By themselves, they have only an aesthetic function. But the slopes are involved in ensuring tightness, sound insulation and thermal insulation, increase the resistance of the front door to breaking.

By definition, slopes are the inner and outer portions of a wall that “surround” a door frame. Slopes are also considered to be the left, right and upper sides of the doorway in which the door is supposed, but not installed. Not all types of doorways have slopes on both sides. Sometimes they may be absent on the outside, but on the inside they are in most cases.

The device of the door slope is quite complicated. High-quality slopes are not just parts of the wall that protrude beyond the frame, it is the optimal combination of materials, each of which is necessary to perform a separate function. Materials are superimposed on the principle of "layer cake".
The first layer is rough. To create it are used:
- Primer. It is applied to the cleaned wall surface as a pre-finish coating. Priming compositions are necessary to level the absorbent properties of the surface, as well as to improve the “adhesion” of the following materials to it.

- Styrofoam. This layer is optional, but desirable in cases where the wall needs to be insulated. This is true for apartments on the lower floors and private houses.

- Plaster. The primer improves the adhesion of materials to the wall, but does not level the surface. Plastering is necessary to fill in irregularities, recesses or cracks in the wall. This process is the most time-consuming and long and requires certain skills and abilities.

Alternatively, you can use an easier-to-use material - drywall. This option allows you to quickly prepare the surface for further types of finishes, but it is not suitable in all cases. In the conditions of the Russian climate, it is more often used for interior decoration or in warm regions with high humidity.
- Reinforcing corners. These are thin but strong. metal corners necessary to protect the plaster at the corners of the slopes. The front door is a place with a lot of traffic, and the corners of the opening are often hit, hit, scratched. Without proper protection, plastered corners will quickly begin to crumble and lose their presentable appearance.

- Putty. With its help, all the shortcomings are leveled after the installation of the corners. Putty compositions lie in an uneven layer, therefore, after they dry, the surfaces of the slopes must be cleaned. For this purpose, fine-grained sheets of sandpaper or small power grinders are used. Furniture is also suitable if it reaches hard-to-reach places.

- Re-priming before applying the decorative coating.


The second layer is the finishing, or front. There are no strict rules in choosing finishes. It depends only on individual preferences and financial capabilities. The only condition that must be met is to choose a finish that is in harmony with the door leaf and wall decoration.

What to decorate inside the apartment?
The slopes protrude both from the outside and from the inside of the door. Accordingly, there are two types of finishes - external and internal. External, as a rule, is less variable. The main focus is on the design of the door leaf, and the slopes echo either with it or with the wall decoration. More often these are practical and concise options that do not attract attention.


Inside an apartment or house, the slope decoration becomes part of the interior. She is assigned a decorative role, so the types of materials and methods of decoration are of great importance.
Finishing with facing materials from the inside is of the following types:
- Surface plastering.
- Bonding finishing materials.
- Frame cladding.
- Coloring.

For the first type, plaster, primer, water and all the necessary tools are used. This process takes a lot of time, but it makes it possible to putty all the irregularities, insulate the structure, and make a layer of the desired thickness. Decor from other materials is often superimposed on top of the plaster, but in itself it is already considered a finished finish, therefore it belongs to the basic repair techniques.


“Clean” slopes after plastering are easy to paint in any suitable color, while they are polished to smoothness or, on the contrary, left embossed.
For decoration, you can use the following materials:
- Ceramic tile (tile). Differs in rigidity, moisture resistance, hygiene, low price and a wide range of colors, shapes and textures. It is easy to care for the ceramic surface, however, the tile can crack or chip off due to mechanical damage, and during the replacement process you will have to work hard so as not to damage neighboring elements.


The undeniable advantage of tiles is the many possibilities for design. The mosaic looks especially original. It can be made from whole tiles of small size or from small pieces. Mosaic fragments are obtained artificially from tiles, cutting it into pieces of the desired size, and jacks of all trades can use for this purpose broken tiles which is considered unsuitable. The result is original and unique, and the cost of materials is minimal.
Any construction adhesive is suitable for gluing tiles. It is applied evenly with a plastic spatula, and the seams are rubbed in a day with a rubber spatula.
- Porcelain tile. This material is often confused with ceramic tiles. Indeed, in the manufacture of porcelain stoneware, the same composition of the substance is used as for tiles, but the production technology is very different. As a result, the tile has a color coating only on top and becomes ugly when chipped, while porcelain stoneware has a uniform color throughout the entire thickness of the slab and damage is less noticeable on it. Also, its structure is denser, so it is more resistant to damage. In addition to being moisture resistant, environmentally friendly and durable, it also has frost resistance. In appearance, this material is more noble, but the color spectrum is very limited and its cost is higher than for ceramic tiles.


- Decorative rock. It is truly an interior decoration, although it is far from always appropriate and is expensive. A feature of this material is that it can be used to simulate real masonry. It has an attractive appearance, gives zest to the interior, and is impeccable in terms of performance. The stone is not prickly, easy to clean, refers to durable and safe materials. To fix it on the surface of the slopes, construction glue is used, but there are also ways to “sheath” the surface with decorative stone.

- Wallpaper. Wallpapering is perhaps the easiest and most budgetary way to decorate. It is most convenient to stick wallpaper on slopes with plasterboard trim. The glue will also “grab” on the plaster, but for this the surface will have to be leveled especially carefully so that “bubbles” do not form on the wallpaper.


Given the high traffic at the entrance to the room, it is better to choose a washable wallpaper and in dark colors.
Sheathe openings with the following materials:
- MDF. Finely dispersed fraction panels are very popular in all types of finishes. They are universal for any interiors, they look aesthetically pleasing and have a number of other advantages: durability, a variety of coatings that imitate different types of wood, ease of installation, improved sound insulation and thermal insulation in the room.

- Chipboard. Finishing chipboard is the easiest way to tidy up part of the doorway if, after installing the door, it looks deplorable. In this case, even a primer and putty are not needed. It is enough to sheathe the surface with even sheets, matching in tone and pattern to the door leaf.

- Laminate. Laminate sheathing is widespread for two reasons: it is inexpensive and looks an order of magnitude more solid than non-laminated recycled wood materials. The basis of the coating is fiberboard or chipboard (therefore, “sew up the slopes of chipboard” means the same as laminate), and on top it is decorated with a polymer film. The most common option is the stylization of precious wood, but there are other shades in a dark and light palette. It has a number of advantages inherent in all wood-based materials, as well as certain disadvantages. So, among the most common disadvantages are hydrophobia (the material can exfoliate and swell from water) and average wear resistance.

- Dobory. Sheathing of internal slopes from dobor is rather a necessity than an element of decor. Dobors are narrow plates of different materials, which are necessary to mask the slopes, the width of which is more than 7 cm. As a rule, they are used when the door and slopes must be sheathed in the same style and with the same materials.

- Drywall. The choice of drywall is relevant when you need a high-quality and budget result, which is convenient to work with with your own hands. In addition, drywall perfectly levels the surface for decorative finishes in the future and enhances the insulating properties of the front door.


- Plastic. No matter how versatile MDF, laminate and similar materials are, plastic door requires the design of the adjacent space with PVC-based materials. The use of sandwich panels is especially popular. They have a variable width - from 5 to 150 cm, which allows you to cover each side of the slope with just one piece.

Performance characteristics products are also on top: aesthetic appearance that lasts for a long time, biostability, resistance to humidity and temperature changes, the presence of air sections inside the panels that ensure the preservation of heat in the house, hygiene.

Modern technologies plastic manufacturing guarantee its environmental safety and non-toxicity.
- Siding. The characteristics of siding panels are very diverse, because they are made from various materials - from aluminum to plastic. Slopes are finished with aluminum, copper, wood, plinth and vinyl siding.

The best option is vinyl. It is a monolithic PVC panel, the main feature of which is flexibility. It can be given absolutely any shape, ideally adjusted to angles without joints and gaps. Vinyl is not subject to the processes of rotting and burning, is not afraid of water, does not crack at temperature extremes, is easily cleaned of contaminants, and is not of interest to fungi and insects. Front side panels can be plain, with a pattern, stylized as stone, wood or brick.

Frame sheathing involves the preliminary installation of a metal (aluminum) or wooden profile around the perimeter of the doorway, to which any material is subsequently attached using self-tapping screws. This method is considered the most time-consuming, since before attaching the profile, it is necessary to prime and level the slopes with cement mortar.

Some types of materials (plaster, chipboard, MDF and drywall without a decorative coating) need to be painted to harmonious combination with indoor interiors.
For these purposes are used:
- Acrylic paints. They are convenient to add to the composition for plastering the surface. This simultaneously reduces the number of finishing steps, since surface leveling and painting take place simultaneously, and makes damage less noticeable, since the entire layer of plaster is painted over;
- Water emulsion. Such paints can be added to the plaster or painted on the wall over the leveling layer. When using acrylic and water-based paints, it is important to remember that they must be primed on top, otherwise the surface will get dirty. You can dilute the primer yourself from PVA and water in a ratio of 1: 5;
- Latex based paints can also be used in two ways, but their advantage is that the final primer is not needed. Latex compounds are not hydrophobic and easy to clean;
- Alkyd and oil. These compounds are indispensable in conditions high humidity. They are more wear-resistant and dense, but they are more difficult to work with due to the thick consistency and toxic smell.
How to insulate?
Thermal insulation and sound insulation are functions of the front door, which partially depend on the type of slope finish. To warm the room, it is not necessary to run to the store for a heater. First you need to take care of maximum tightness, and you should start with the front door. This will not only increase the level of comfort in the house, but also help save money on utility bills in the future.

Insulation of slopes from the inside is carried out step by step:
- Choice of materials. The leading positions are occupied by sandwich panels, drywall, polystyrene foam, mineral wool, polystyrene. Experts recommend choosing polystyrene, which is superior to other materials in many ways. At a relatively low cost, it is capable of thermoforming and vacuum forming, is resistant to moisture and chemical processing, does not smell, is environmentally friendly, and can be processed in various ways. If polystyrene is not available, it can be replaced with a mineral slab (wool).


- Preparatory work. They include all measures to clean the work surface. It is necessary to cut off the mounting foam, remove the old coating, if any, and eliminate irregularities as much as possible. After removal old plaster the surface must be dusted with a vacuum cleaner and a damp sponge.

- Primer and putty. It is imperative to prime the surface of the slopes. This will ensure a good adhesion of subsequent layers to the wall, as well as minimize the likelihood of fungi and bacteria on the wall. Suitable for this purpose any soil of deep action. After applying it, the surface must be allowed to dry for 3-4 hours. Reapplying primer to plaster is acceptable.

It is not necessary to putty the slopes, but it is desirable, especially if the surface has many defects, chips and depressions. All these minor gaps greatly affect the insulating qualities of the front door.
- Heater installation. At this stage, it is the turn of the insulating material. Polystyrene boards and mineral wool glued with specialized adhesives. The glue is applied with a spatula to the slab, then it is applied to the surface of the slope and adjusted to the level. The drying time of the glue is at least a day. After that, the plates are fixed with dowels.

- Fixing the heater. Ideally, polystyrene or mineral boards should be covered with a plastic mesh for indoor finishing works. This will protect against cracks and bumps in the future. The glue is applied to the mesh in layers, each layer dries to hardness in 6-12 hours.

- Surface leveling. Here again, putty is needed. You can level the surface up to 2-3 layers. Then you need to let it dry for the time indicated in the instructions on the container, and process it with fine-grained sandpaper. The grain number on the sandpaper package is at least 100.

- Final finishing. It includes the application of a colorless primer, followed by painting or any other decoration method.

It is important to consider that finishing materials have not only their own characteristics that affect thermal insulation, but also their own weight. It is necessary to calculate in advance whether the insulated slope will withstand, for example, the weight of porcelain stoneware or wall paneling, or whether paint, plastic, wallpaper should be preferred.
How to make a slope on the front door from MDF panels with your own hands, see the next video.
Colors
Slopes are a small detail that can both support the style in the interior and completely break out of it. The inappropriate color of the finish will become an element that violates the integrity of the overall picture, so it is important to choose the right color in accordance with the design of the door and the decoration of the walls, floor and ceiling in the room.
DIY polyurethane finish
An interior door that separates a room from the rest of the house is not only a means to create a private atmosphere in the room, but also the only way to provide it with proper sound insulation. Practicality is a good thing. But many are unaware that the decoration of openings: arched or just passages without doors, can be the very highlight that will “make” the interior.
We will not prevaricate, arguing that a design similar to what we see in the photo is easy and simple to create: it requires some knowledge and skills, a harmonious perception of color, a certain amount of imagination. We hope that the video in this article on the topic: "Technologies for finishing doorways" will help you thoroughly understand this issue in order to independently and efficiently perform such work.
The opening design option is selected depending on the appearance of the installed door, the decoration of the walls adjacent to it, or taking into account the concepts of the architectural style, if it is taken as the basis for the design of the room.
It is clear that the decoration of the opening with plastic panels will look harmonious only when the walls are sheathed with the same material. And in extreme cases, if it has . In an apartment, this is usually a bathroom or a balcony, less often a kitchen.
Structures with doors
In rooms where door blocks are installed - and in most cases they are made of wood or MDF, it is easiest to use additional trims for facing slopes, which manufacturers offer to the main product. If for some reason it did not work out the planks of the desired shade, the slopes can simply be leveled and finished in the same style as the walls.
- In fact, this is exactly what landlords do most of the time. In the absence of additional elements, the main decorations of the opening are door frames on the one hand, and plastic corners on the other.

- To the question: “How to finish the opening of the front door?”, It will not be possible to answer in a nutshell, because there are much more cladding options here. Wood textured sheathing materials are best suited for this purpose. It looks good even when it is at the entrance - and if it is wooden, then sheet MDF, chipboard, or an ordinary floor laminate, correctly matched in color, will fit just perfectly.
- At the entrance, you can also use additional strips. However, due to the large width of the slope, this is not always possible. The entrance door opening is located on a load-bearing wall, the width of which can reach 67 cm (2.5 bricks).
Note! The internal space of the apartments is zoned with partitions, the thickness of which varies between 40-120 mm. In such a situation, even extensions are not always needed - the openings are usually completely blocked by the door frame. Their framing is carried out with the help of platbands, matched to the door leaf in terms of shade and texture, and does not require any additional finishing.
Free passes
It is a completely different matter when the door is not installed in the opening at all. In this case, much more design possibilities open up - and especially when the passage is provided in a thick load-bearing wall.
This makes it possible to design the side surfaces of openings by analogy with columns: use wooden Wall panels, polyurethane pilasters, decoratively plaster and edging them with a frieze, as shown in the example below.
- In terms of aesthetics, a wide passage without doors always looks better in the interior - even if it has a simple rectangular shape. But it can also be an arch in the form of a circle or a semicircle, as well as a design with a more complex curved line or a pointed end.

- Curvilinear openings on the inner walls can, of course, be provided at the design stage, and made during the construction of the house. But most often, they are made of drywall, in the process of zoning and interior decoration. The complexity of the execution of a plasterboard arch, compared with a similar brick structure, is much less - accordingly, its price is also lower.
- It is also important that you can do this work yourself - you only need step-by-step instruction and it takes very little time. The absence of a door in the opening also has a number of practical advantages. In a small apartment, this simply saves space, which is already lacking.

- There is one more plus: a through opening visually unites adjacent rooms. This is most relevant when they have a similar purpose: lobby-living room, kitchen-dining room, hall-corridor. In them, by and large, it is not required to create a private environment, so doors are completely unnecessary here.
Quite another thing is such premises as: bedrooms, children's and teenage rooms, bathrooms, home theaters, or offices equipped in the house - you can't do without doors here. They need to be installed after the walls in the room are leveled and the flooring is laid. But the slopes should be sealed after the installation of the door frame.
Decorating doorways
Door slopes and through openings can be lined or sheathed with absolutely any material that is used in wall decoration. How to trim a doorway was discussed in general terms in the previous chapter.
Now we will consider in more detail those options that are quite possible to implement independently, without incurring large financial costs.
Plasterboard slopes: what is the advantage
What is good about additional planks is that they allow you to do without leveling and further finishing the slopes. But, as mentioned above, this is not always possible due to the mismatch in their width - and in terms of money it is quite expensive. In general, judging by the cost of the materials used, the plaster slope is the cheapest.
- Only now this savings is eaten up due to the need to purchase special tools: a mustache rule, a trowel, a grater, wide and narrow spatulas, which are unlikely to be found in the house of a person who has never done such work before.

- For independent execution, this is the most difficult option, and hired craftsmen take separate money for openings. Please also note that the prices per meter of slope are usually higher than for plastering one square of the wall. So, if you want to get real savings, line the openings with drywall.
It is impossible to do without a plaster screed only if you plan to tile or stone the opening in the future, which we see in the above example. Such finishing is carried out only on the base base - moreover, it is leveled not with gypsum, but with cement plaster.
False slope from GKL
For the installation of sloping walls made of drywall (see), from special tools you only need peeling and edge planers, which in total will cost a little more than 1000 rubles, and a knife with a reinforced blade. GKL sheets must be taken with a thinned edge, 12.5 mm thick, and a length that completely covers the height of the opening.
If the installation will be carried out by adhesive method, from Supplies you will need a universal gypsum putty, plaster corners and expansion dowels.
So:
- The blanks are cut, and then adjusted by trying on dry, first on the sides of the slope. The strips should be solid, but at the same time, you need to pay attention so that the thinner edge of the sheet is on the outer perimeter of the opening. This is only necessary to ensure that the protective profile installed at the corners is flush with the surface of the plasterboard cladding element.

- Fitting parts is to eliminate the formation of gaps between the workpiece and the door frame. Most often this happens due to the fact that the walls of the slope are somewhat turned to the sides. You can eliminate the gaps by trimming the edge of the part adjacent to the inner corner with a planer.
- It will be possible to eliminate the irregularities of the base base in the process of gluing the element, increasing, where necessary, the thickness of the gypsum putty. If there are any gaps on the draft slope, they must first be sealed with mounting foam. But at the time of the beginning of the installation of the cladding, the foam must dry, and its protruding parts must be cut off.

- When installing any drywall parts in a frameless way, with putty, they not only prepare the surface for painting, but also use it as an adhesive. They apply it randomly on the wall, with small bosses, after which they install the cladding element. It is slightly pressed against the base, the excess putty squeezed out from under the drywall is taken away, and distributed over the surface of the slope with a spatula.
- Visually control the position of the sloping part, the easiest way is with the help of a plaster rule, but in its absence, for this purpose, you can use a flat rail or board, which must be attached to the outer corner. To prevent the facing element from slipping, it must be fixed to the base.

Finishing with drywall
- For this, spacer dowels are needed. The holes for them will be checked directly through the drywall, also randomly, in increments of 35-40 cm. The dowels are carefully inserted into the holes - at first not completely, after which the screws are screwed into them. With their help, you can also level the position of the drywall part: where necessary, press harder, or vice versa, loosen.
- After the adhesive layer of the putty has hardened, the dowel heads that protrude outwards are completely hammered with hammer blows. The lining of the horizontal part of the opening is started after the installation and fixing of the side slope walls.
When the entire perimeter of the opening is lined, you can start installing the corner profile. Its only function is to protect the corner from mechanical damage. You will learn how to properly prepare the opening for subsequent painting by watching a video on this topic. Platbands on drywall openings are best mounted with polyurethane - on glue.
wooden openings
Along with plasterboard sheathing, one of the most budgetary options for facing slopes is the finishing of chipboard doorways.
Certainly, particle boards with a laminated coating are more expensive than gypsum boards. But given that when they are used, there is no need for finishing, in the end, this option turns out to be even more profitable.
- Most often, laminated or veneered sheet material is used to finish the entrance opening. Since it has the greatest thickness, it is almost impossible to pick up extensions there. In addition, in the hallway there is usually cabinet furniture, which, coupled with a doorway, skirting boards, or even wall cladding in the form of wooden panels, creates a single interior ensemble.
![]()
Ennoblement of openings: how to trim an opening
- If for facing slopes we take sheet material decorated in the factory, then cutting the blanks must be done in such a way that the cuts are in the inner corner, since its ends are already painted or pasted over with edge plastic. Most often they are covered by a casing, but sometimes they can still be seen.
- Finishing MDF or chipboard doorways, according to the method of attaching the cladding elements to the base, is not too different from the same drywall. If the base is sufficiently even, these materials can also be mounted using an adhesive method - only instead of putty, foam is used here. If the opening is problematic, with drops and irregularities, sheathing is carried out on a frame constructed from an aluminum profile or wooden slats.
- Each master selects the technology of cladding himself, based on specific working conditions. The only difficulty for those who do not have a professional tool may be the installation of a platband. There will be no problems with overhead planks, but they don’t look so good either, because they have to be attached to the slope lining with nails.

- Therefore, many people prefer to deal with telescopic architraves. They have an L-shaped shape, the bend of which is inserted into the groove of the door frame or additional strip. If you undertake to make extensions on your own, then the grooves for telescopic platbands must be selected at their ends using a manual milling cutter.
- This is done after the fitting and fitting of the blanks for the slope has been made. During adhesive mounting of elements made of rigid sheet material, which are MDF or chipboard, a slightly different procedure is followed. In this case, the horizontal part is installed first, and then the side racks.
The sidewalls support the upper element of the cladding, and securely fix it in the desired position. Wooden wedges are inserted between the improvised extensions and the draft slope, and the space between them is foamed. When the slope lining is mounted on the crate, its cavity can be filled with insulation, which eliminates cold bridges, and perfectly eliminates noise penetrating from the outside.
Stucco finish

Stucco finish
Plastering slopes requires a certain skill. As in the case of drywall, the opening after a rough finish must be puttied, painted or wallpapered (or choose another finishing option). But the coating will be short-lived, it is difficult to care for it. The disadvantages of plaster are also that working with it is “dirty” and takes a lot of time.
The adjacent wall can be wallpapered, painted or applied with decorative plaster.
Finishing with decorative plaster
A variation on the item above. "Decorative" is applied to a pre-plastered surface. If the decorative plaster is textured, then the rough layer does not need to be removed perfectly evenly. You can choose plaster with colored stone chips - it is very durable.
;
Dobory
The option is especially good if there are several doors in the hallway (interior and entrance). In this case, all boxes and slopes can be finished with the same material.
The extensions are relatively easy to install. But the material itself is more expensive than chipboard, laminate and other analogues.
To install dobors on the front door with your own hands, you will need a minimum set of tools:
- level;
- hacksaw or jigsaw;
- mallet;
- pencil.
First you need to saw off the excess in height. To do this, measure the required distance and use a jigsaw to cut off unnecessary material. To install the simplest models of extensions, you will need nails and mounting foam. To begin with, fix the element in the opening and nail it in such a way that the nails enter into wooden base, which can be represented by a door frame or an additionally laid lath. Then foam the space between the wall and the extension and install special spacers in the opening so that the trim elements do not move under the pressure of the foam.

Telescopic extensions are the easiest to install. In order to fix them in the opening, it is only necessary to bring the element to the box and insert the spike into the prepared recess. Then the extension is extended to the required width. On the reverse side, platbands are put on in a similar way. In general, the application of mounting foam is not necessary, since all elements snap into place and are firmly fastened together. Nevertheless, the presence of glue, foam or sealant will provide a tighter connection, eliminate the gaps between the wall and the cladding, and also provide additional heat and sound insulation, which is especially important for the front door.
;
PVC panels
Such slopes look very “simple”. But the material is inexpensive, durable, not afraid of moisture, easy to care for. In addition, it is easy to work with it - installation of panels does not require great skill.
Usually, a simple white material is used to finish the slopes with plastic with their own hands, since this is essentially a neutral option, or a beige color. For wooden doors it is also important to select material in the appropriate color and with a similar wood pattern. Thanks to the range of modern finishing materials, this is not a big problem.
There are several ways to install plastic slopes. Finishing might look like:
- Direct overlays. This is the simplest option. In this case, you only need to select PVC pieces that are suitable in size and fix them vertically on the sides and horizontally along and above in the opening.
- Horizontal arrangement. This method is suitable for those cases when pieces of plastic remain after the repair. They are laid on a frame across the wall, masking the joints as much as possible.
- Lamels. If you want to highlight the slopes, then try this option with your own hands. To begin with, a frame is being built, and then plastic is put on the rails, located across, as in the previous version. In this case, it is better to use a relief material, like siding.
Installation of plastic slopes can be done by hand in several variations:
- To begin with, you should consider the simplest and most advantageous option, namely, slopes from ready-made sandwich panels. It is best if one of their edges has a ledge with a corner, which will allow you to simultaneously fix the finish on the wall itself from the outer corner and bring out the smooth contours of the opening.
- The easiest way is to mount on foam. To do this, you need to attach the panels cut to the width and length of the opening to the place where you are going to mount them. Level and install spacers. Then you need to apply a small amount of foam into the gap.
- After the mounting foam has dried, the finish will be securely fixed in place. This can also be done in advance if the PVC trim blocks access to reverse side planks.
Another installation of plastic slopes on the door with your own hands involves the use of profiles. You can take the same PVC material or use aluminum as for drywall.
- First of all, you need to make a frame around the perimeter of the opening.
- After installing it with your own hands, front finishing can be performed.
- The plastic is screwed with self-tapping screws, and then the fastening points along the edges are closed with a PVC corner, planted on glue.
;
Artificial or natural stone
This way of finishing slopes has already gone out of fashion. And it was good for its durability and high wear resistance of the material, ease of installation. Of the minuses - the process of "applying" the stone is lengthy. Another disadvantage is that adjacent walls can only be painted or covered with decorative plaster. Other finishing options (wallpapering, installation of MDF or other panels) will require the involvement of repair virtuosos.
- We chose a site for work (the place is already prepared in advance for work - no old paint, the surface is even, primed)
- On the wall we make markings in which way the wall will be covered with decorative material. Do not forget the rule mentioned above - the bottom of the stone is more than the top.
- A selected section of the wall is primed with a roller or brush (the primer is selected in the store).
- After it dries, see the instructions for the primer, we recommend treating the wall surface with concrete contact.
- We lay out the tiles on a flat horizontal surface in order to select the optimal tone combinations.
- We begin to attach the tile from the bottom and from the corner.
- The level determines the horizon, retreating 3-4 cm from the floor. We fasten the strips of stone to the wall using liquid nails, tile adhesive or another composition suitable for this purpose.
- The corners of the walls, when facing with decorative stone, should be done in a special way. Use a butt-to-butt joint, at an angle, connect to a wooden base, and so on. More often, the connection of the plates of the end edges of one side of the corner to the rear edges of the plates of the other corner is used.
- After completion of work, time is given for the glue to dry.
- Next, proceed to decorating the surface of the stone.
- The last step in decorating doorways with decorative stone is fixing skirting boards on the floor and trim around the doorway.
Entrance door - important element house interior. The image of the entire building depends on its appearance and the quality of the finish of the opening. The most requested are metal doors. Such popularity is due to the fact that it is reliable, unpretentious in care.
Today there are many various options doorway design. One of important points in repair are slopes. The doorway is finished with different materials. With proper and high-quality work, the new coating will be beautiful, reliable and will become a worthy decoration of the interior of the hallway.
Many people do not even know what slopes are, accepting cash for them. But this is an erroneous opinion. Because slopes are not finishing material, and part of the wall around the door frame. The choice of their cladding is given special attention, because they decorate the room and set a certain style for the interior. Therefore, regardless of the type of door chosen, attention must be paid to the slopes. In order to qualitatively arrange the slopes, you need to choose the finish correctly.
Reasons for finishing
be required repair work may be for various reasons. But most often the doorway is finished after the installation of the iron door. Metal sheets are quite heavy and bulky. When they are installed, the appearance of adjacent walls deteriorates. There is a need to ennoble the doorway. More often, finishing the front door from the inside is required. If the damage is serious, it is better to entrust the repair of the doorway to a specialist who understands this matter.

Finishing methods
Ennoblement of the doorway is performed using different materials. For facing slopes, plastic, tile, drywall, MDF and more can be used. But in order to properly finish the doorway of the front door, it is necessary to take into account the material of the door leaf, the width and degree of damage to the slopes, as well as personal preferences. You can finish the opening after installing the iron door with your own hands, but it is better to entrust this task to professionals.
Laminate
Laminate can be used even by inexperienced craftsmen. It has a chic appearance, environmentally friendly and therefore does not harm environment. The only disadvantage of laminate is its poor resistance to high humidity. Therefore, for finishing the outside, it is better to use a more reliable material.
Before finishing uneven slopes, it is necessary to assemble the frame to which the panels will be attached. Flat surfaces can be sheathed with laminate by gluing onto mounting foam. Making the doorway of the front door in this way is popular due to the ease of installation and affordable price.
mdf panels
openings entrance doors often trimmed with MDF panels. Installation is simple and fast. To install the panels, you will need dowels, mounting foam, a chisel, a jigsaw and liquid nails. MDF may have different types external cladding. Therefore, it is necessary to decide in advance which panels will be used for decoration. They can be laminated, painted or veneered.
Laminated panels look chic and have excellent technical specifications. Veneered panels are considered the most durable. Therefore, the decoration of the front door opening is most often performed with just this type of panel.
Before you start working with MDF panels, you must carefully take measurements. The distance between the inner slopes is less than between the outer ones. Finishing the front door with MDF panels is carried out only after the removal of the old slope lining. A big plus of this material is that the decoration of doorways with MDF panels can be done by hand.
Decorative rock
The decoration of the doorway of the front door with the help of decorative stone looks original and beautiful. Such material gives the surface an attractive appearance. Before laying decorative elements markup needs to be done. You can lay out the material on the floor in the same order as it will fit on the slopes. This will allow you to understand how the stone will look on the wall and decide on the pattern.
The material has an uneven shape, so small defects will look organic. It is necessary to prepare the surface in advance. fixed fake diamond with glue. Work starts from the bottom. Laying can be done in two ways. With the first, seams of a certain thickness are left between the decorative elements, and with the second, they are completely absent. Particular attention should be paid to the corners that are cut and sanded.
Decorative stone can have any shape. When choosing this method of finishing, it is necessary to take into account how this material corresponds to the overall interior design. Doors framed with bricks look unusual and beautiful.

pvc panels
You can finish the doorway of the front door PVC panels. Affordable material, has many advantages. But its fragility does not allow the use of plastic for exterior finish entrance doors. This is precisely its main drawback. The slightest careless movement can lead to damage to the material. A large selection of panel shades opens up wide possibilities for the implementation of any design solutions. Thanks to this, the doorway in different rooms is sheathed with plastic.
To date, the most popular are PVC panels with imitation of the structure of wood and fabric. Plastic is glued to the wall with special glue, or attached to a wooden frame. The joint is closed with a special corner.
Cement screed or plaster
by the most in a simple way finishing slopes is plaster or screed. A solution is applied to the surface of the wall, and then all irregularities are leveled and eliminated. But in order for the surface to turn out to be even, it is necessary to set the beacons. Fix special strips vertically with alabaster. After the beacons dry, the distance between them is filled.

It will take several days for the screed to dry. A big plus is that with the help of plaster you can eliminate any defects on the surface of the walls. After it dries, it is painted with acrylic or facade paint, and from the inside they are pasted over with wallpaper. And decorative plaster can also be used. With high-quality and proper plastering, the slopes look neat and beautiful.
Most often, this method is used in order to trim a wide opening. Because other ways of finishing can look rough and ugly. But in order to qualitatively plaster the surface, it is necessary to have certain skills and knowledge.
Drywall finishing
One of the most popular types among modern doorway finishes is plasterboard sheathing. The surface sheathed with this material has an attractive appearance, and if properly installed, it will last a very long time. Smooth surfaces can be pasted over with drywall using a special glue. A frame made of a metal profile is first attached to the curved surface, and then it is sheathed with sheets of drywall.

The availability of material and simple installation contribute to the fact that plasterboard cladding is popular for decorating the front door.


Promotional codes e-delivery for September E-delivery promotion
Codes for the game dungeon hunter 5
Indian castes: what is it?
The lost memoirs of Faina Ranevskaya Faina became friends with Ekaterina Geltser immediately
Life schedule by date of birth Who will I be in my future life