Home improvement involves the implementation of a wide variety of work related to finishing, laying communications, arranging various systems etc. There are a number of universal solutions that allow you to simultaneously perform several important tasks. And one of them is laying out a fireplace with your own hands. A well-built unit will become not only a source of heat, but also an excellent addition to the interior.
For self-layout of the fireplace, you need to use as much as possible quality materials. They must be refractory, so the selection process necessary materials should be approached with the utmost responsibility.

Fireplaces are made of metal and brick. Metal constructions the easiest to arrange - just buy the model you like and install it on the prepared base.
However, for all its ease of installation, metal fireplaces cause a lot of inconvenience during further operation, primarily related to the safety of the residents of the house. The metal gets very hot and can cause severe burns and other damage. Therefore, it is strongly recommended to refrain from installing such equipment where small children live.
For intensive use hardware burn out pretty quickly. On average, after a few years, such a fireplace becomes unusable. Therefore, it is better to approach the issue thoroughly and lay out a full-fledged brick fireplace.
 Such a design will require the arrangement of an individual foundation. Masonry is carried out using a special solution, which will be discussed later.
Special attention should be paid to the choice of the main building material. Only fireclay bricks are suitable for laying a fireplace. The manufacturing technology of this material is such that, as a result of numerous treatments, its properties become similar to those of natural stone. The brick becomes as resistant as possible to high temperature and its differences.

Before use, the product must be left in water for about three days. This will remove excess air from the bricks and get the highest quality masonry.
What to prepare a mortar for laying a fireplace?

The first stage is the choice of clay. To prepare the solution, a small amount of elementary and widely available components is used. The traditional option is an aqueous solution of clay. Special attention must be paid to the choice of the main component of the solution. In nature, this material may have different characteristics, according to which it is divided into normal, skinny and fat.
Only normal clay is suitable for the preparation of masonry mortar. In other cases, it will be necessary to include additional elements in the composition, which will not have the best effect on the final financial costs.

The second stage is the preparation of clay for work. Take normal clay and soak it for 2-3 days in a large container of water.

The third stage is the preparation of the masonry mortar. Usually the solution is kneaded with a shovel. If desired, this can be done with your feet, after putting on high rubber shoes. Carefully monitor the condition of the solution and promptly remove various debris when it appears. If you can’t find normal clay, you can take skinny clay and add oily clay to it. It is impossible to use oily and lean clay separately.
The fourth stage is checking the readiness of the clay. Before use, the resulting mass must be checked for strength. To do this, make a couple of small balls. Put one of them in some dry dark place to dry. Flatten the second into a cake and place next to the first product. After a couple of days, evaluate the condition of the cake and the ball. If the material is cracked, the solution is too greasy and some kind of binder must be added to it, for example, cement. In the absence of cracks, the mortar is normal or lean.

Skinny clay "in its pure form" is not suitable for use. To deal with this moment, try to break a clay ball on a table, floor or other similar surface. If the ball breaks, the solution is thin and some more fat clay needs to be added to it. If the ball does not break, you can start laying.
A step-by-step guide to self-laying a fireplace

The first stage is the choice of a place for the construction of a fireplace. First of all, remember that the fireplace should not be placed in close proximity to flammable products. Examine the ceiling and roof of your home. To install a fireplace, you need to choose a place so that the chimney does not pass through beams and cuts.
The second stage is preparation for the foundation. The fireplace is built on an individual foundation. First, a recess is prepared for pouring concrete. Add to the dimensions of the future fireplace 100-150 mm on each side, and you will get the optimal dimensions of the foundation.
The depth of the pit is selected individually. Traditionally, it is 300-500 mm. The specific value is determined in accordance with the characteristics of the composition of the soil. For example, if there is a lot of sand in the ground, a 30-centimeter deepening will be enough. Otherwise, you'll have to dig a little deeper. First, the bottom of the pit is covered with a small layer of sand, which must be compacted. After that, a layer of rubble is poured.

The third stage is the preparation and pouring of the solution. For such a foundation, a simple cement mortar. Prepare it from a piece of cement, the same volume of water and 3 times as much sand. Mix the ingredients thoroughly until a homogeneous mass is obtained and pour it into the prepared pit. Level the solution with a trowel. Wait until the cement hardens, lay a waterproofing material on top of the fill (usually roofing material is used, it fits in 2 layers) and proceed to masonry.
The fourth stage is the formwork device. At this stage, you need to install the formwork. Prepare wooden planks, bars, plates and wedges. The wedges are placed under the wooden blocks.
The fifth stage is the laying out of the supporting parts. Mark the rows on the formwork, taking into account the thickness of future seams. The fireplace will consist of an odd number of rows of masonry. The central brick is called the castle brick. It is installed vertically, at a central point.

The sixth stage is the creation of a wedge-shaped jumper. This element must be laid on both sides in the direction of the lock brick. Laying is done so that in the central part the jumper can be easily wedged with the center brick. Use a string to check if the seams are correct. Fix it at the junction of the jumper with the side partitions.

The side walls must be of sufficient thickness and width, otherwise they simply cannot cope with the incoming loads. Where the wedge-shaped jumper mates with the side partitions, you need to make ties. Steel strips are used to create them. The ends of such strips should be bent up.
The seventh stage is the device of arched and arch type jumpers. The structure of these elements differs from the design of the wedge-shaped jumper. The surfaces of the jumpers under consideration should form arcs with a certain radius. In the case of beam-type jumpers, their radius must exceed half the distance between the side posts. The considered jumpers are evenly laid out on both sides. Pay attention to the seams - they should be wedge-shaped.

It is important to maintain the correct width of the seams: in the upper part it should be about 2.4 cm, at the bottom - 0.3 cm.
Use a string to check the accuracy of brickwork and joints. Wedged the jumper with a locking brick.
Jumpers must be allowed to brew in the formwork. Waiting time will vary. The specific time depends on the temperature environment and the quality of the solution. For example, in the summer it may take 1-3 weeks. The colder it is, the more time it will take.
The eighth stage is the layout of the firebox. At this stage, special attention must be paid to the back wall of the firebox. If screens are planned in the wall, the laying is carried out according to the pattern. A cutting board is suitable for making patterns.

Choose the appropriate shape and dimensions of the template in accordance with the existing drawing of the unit being built.
Be extremely careful when laying a fireplace. Refer to available drawings. Errors in laying even a single brick will inevitably lead to a violation of the laying of further rows, and it will not be possible to correct defects in all situations. Therefore, it is better to immediately do everything as required by the technology.
Unit finishing
Consider questions ahead of time finishing. If desired, the fireplace can not be finished at all, but it is better to decorate the structure with tiles, or at least process it with plaster.
Looks beautiful design, made using decorative brick. However, for the installation of such a cladding, certain skills and experience are needed, therefore, it is not recommended for beginners to undertake its implementation. Even the slightest mistake can lead to damage to the decor and simply a waste of money.

Very beautiful and simple in its execution is the decoration with tiles. It is not recommended to use tiles for facing the fireplace. Temperature drops will gradually destroy even the highest quality glue. It is recommended to pay attention to this option only if you are ready to periodically repair and restore the finish.
The chimney traditionally has a size of 1.5x1 brick. To improve and stabilize traction, it is recommended to use additional devices. For example, with the help of wind vanes and deflectors, the chimney can be protected from precipitation and various kinds of debris.

Thus, self-laying of the fireplace is possible. Take the time to study the theoretical part, be patient and follow the recommendations received at each stage. The reward for your efforts will be a reliable, beautiful, efficient and durable fireplace, in front of which you can gather with family, friends or relax alone.
Successful work!
Video - How to lay out a fireplace with your own hands
Thinking about building or purchasing country house, almost every owner dreams of a beautiful fireplace.
They add a graceful and romantic sophistication to the interior and allow you to truly enjoy the atmosphere. home comfort.
In this article we will tell you in detail how to make a fireplace with your own hands, and ours step-by-step instruction will allow even a beginner to cope with this difficult task.
Any fireplace, no matter what size and shape it is, consists of the following main parts:
- firebox;
- ash pan;
- grate;
- portal (body);
- chimney.

The combustion chamber, in turn, can be of an open or closed type. If you have chosen a fireplace with a closed firebox, then the design will include additional elements: a damper, transparent doors made of heat-resistant glass.
The efficiency, service life and reliability of the fireplace are also affected by the materials from which it will be made. You can completely build a fireplace out of brick, making the furnace part of heat-resistant (fireclay) material, and the rest of the structure of red ceramic.

And you can buy a ready-made cast-iron firebox, around which to build a body, a portal and a brick chimney.
Of particular importance is good thermal insulation combustion chamber, because if a fireplace is erected in a house made of wood, there is a high risk of fire. Therefore, great attention should be paid to the thermal insulation of the fireplace and the protection of the flooring, walls, and roof.
There are several classifications of the fireplace: according to appearance portal, in shape and size of the firebox.
If the width of the portal does not exceed 51 cm, then such a fireplace is classified as a small form.
Width up to 63 cm - to medium.
Over 63 cm - to large fireplaces.
The combustion chamber is made of steel or cast iron. The purchase of a ready-made firebox will greatly facilitate the process of building a fireplace. In addition, a closed-type cast-iron firebox looks very stylish in a modern interior.

Some experts recommend laying out the inside of a cast-iron or steel combustion chamber with fireclay bricks in order to minimize metal contact with fire, especially when it comes to steel. Under the fuel chamber, as a rule, there is a fuel basket.
The working processes in the fireplace are as follows:
- Logs and firewood are placed in the combustion chamber on the grate and set on fire.
- The intensity of combustion is controlled by a slide gate, which opens or closes the access to oxygen. With an open type of firebox, the intensity of combustion can only be regulated by the amount of firewood.
- As the firewood is burned, the ash is collected under the grate, in a special ash pan, which must be cleaned regularly. The ash pan can be built-in, or you can make a retractable design, which will greatly facilitate the operation process.
- Gases from the combustion of logs are discharged through a special pipe to the street. It is possible to equip the chimney with forced draft, which is a fan. In this case, you can adjust the draft by turning the fan on or off, which will increase the heat output of the fireplace.
The fireplace chimney can be made of steel or brick. Ceramic ready-made structures can also be found on sale today, but their construction requires special skill.

When developing a fireplace project for a home, great attention should be paid to fire safety measures.

The construction of the fuel chamber is one of the most difficult and critical stages of work. The firebox is located under the chimney. A special role is played by the chimney tooth, which is integral with the back wall of the firebox.
Base
As for the foundation, in itself it can have a completely different size and form. This is a structural part that is located under the fuel chamber. It depends only on the owners where exactly the firebox will be located: below the floor or at the level of the kitchen table.

The lower the firebox is located, the more heat it will give, taking the cold part of the air from below.
It is preferable to make a firebox, under which it is located at floor level, but this is not always possible. In a multi-storey modern cottage, it is impossible to build a fireplace of this configuration, because the ash pan should be located under the stove. Ideally, this is a working basement where the foundation is being built.
But you can implement another version of the ash pan, placing it below the hearth of the fireplace with a retractable system. Then the operation of the fireplace will not cause any difficulties at all.
Separately, you should stop at the level of the slope of the back wall of the fireplace.

Here, the opinions of experts are divided into 2 camps. Some argue that it should be erected strictly vertically. Others insist on erecting the back wall of the fireplace at an angle of 300 inward. Why is it necessary to perform this slope.
The laying of the fireplace also depends on the size of the combustion chamber. So for structures with increased heat transfer, it is necessary to put the walls "on edge". The inclination of the rear wall of the firebox gives improved heat reflection into the room area.
Portal
There are two options for covering the portal: straight and arched. In this case, the radius of the arch should be equal to half the width of the portal.

The arch is the most reliable overlap of the portal. It transfers all vertical load top row masonry. According to their shape, they, in turn, are divided into 3 types: arched, straight and semicircular.
A semicircular arch is ½ of a circle. This option is the simplest and most reliable. The radius of curvature is equal to ½ of the width of the firebox.

The bow arch is flatter than the semi-circular and is best used for wide fireboxes. Or, in the event that you are forced to limit the height of the firebox.

Bow arch
The bow arch is not a ½ circle, but only its 1 sector.

And finally, a straight arch is suitable if you need a direct overlap of the fireplace portal. Despite its simple appearance, it is considered the most difficult to manufacture. Here it is necessary to very accurately calculate the angle of the cut of the brick.

The firebox, located under the firebox, usually has a rectangular or trapezoidal shape, and above the firebox there is a mouth where smoke rushes during the combustion of firewood.
A small lintel or overlap is built in front of this mouth, and a “tooth” is behind it. Above the firebox is a smoke bag (smoke box), where smoke is collected and directed up the pipe. In order to regulate this flow, a damper is installed in the front.
Types of fireplace: configuration and location
Starting a project for arranging a fireplace in a house, first of all, you need to consider its location.
There are several options for placing this heating unit:
- Central location. By placing a fireplace in the middle of the room, you certainly make it the main focus. It looks stylish and allows you to give the interior a special charm of country comfort. This arrangement also allows you to effectively heat the room, as warm air will circulate freely throughout the room.

But there is a drawback to such a location: the fireplace will occupy most of the area and interfere with movement. Therefore, if you are cramped in square meters, then it is better to refuse this option.
- Wall fireplace. One of the most common options, which has a lot of advantages: saving room space, efficient heating, the ability to create a separate recreation area, etc.

The only drawback is that you will have to properly take care of fire safety and lay an additional layer of insulation between the fireplace and the wall.
- Corner fireplace. This option is suitable even for the smallest room, as it takes up a very small area. In addition, the corner design looks especially stylish. Another advantage of this arrangement is a simple ordering scheme that even a beginner in the furnace business can handle.

If for the construction of a free-standing fireplace you need to have certain experience, knowledge and skill, since all the walls are in sight, then the corner design will hide all the flaws. The main thing is to do the front part well, all other sides can be hidden from the eyes with finishing materials.
The following factors must also be taken into account:

Basic rules for the construction of a fireplace
In order for the fireplace to serve for a long time and please with its warmth, it is necessary to strictly follow the basic rules during its construction:
- A brick fireplace is built on a separate foundation.
- For laying the firebox, it is necessary to use only fireclay (heat-resistant) bricks, which should not be tied with the main one.
- In the places where the door and ash pan are installed, it is necessary to lay an asbestos cord and leave a gap for the expansion of the metal.
- The inside of the combustion chamber should not be plastered.
- The rear wall of the fuel chamber should be slightly inclined.
Do not forget about fire safety, because any design that runs on solid fuel presents an additional risk.

The main point of fire safety in arranging a fireplace in a country house or in a country house is the installation of cuttings in the path of smoke.
If the wall is adjacent to the fireplace, then heat-resistant material (basalt fiber, asbestos, felt, etc.) must be laid between it and the heating unit. The thickness of such an overlap should be at least 20-25 mm.
If the fireplace is installed on wooden floor, then it is necessary to lay a metal sheet around the perimeter or to cover it with ceramic tiles with an indent of 30-35 mm on each side.
Within a radius of 150 mm from chimney where it passes through the ceiling, it is necessary to organize reliable thermal insulation from a double layer of felt impregnated with clay or asbestos fiber.

The chimney must work autonomously with only one fireplace.
There are also certain fire safety rules for the operation of the fireplace:
- Do not bring the fireplace to the maximum temperature.
- Carry out a systematic cleaning of the fireplace from ash and soot.
- The safe distance between the fireplace and nearby flammable objects must be at least 70 cm.
- Use only suitable fuel for your outdoor fireplace.
We calculate the dimensions of the fireplace correctly
When designing and creating a drawing of a future fireplace, it is very important to correctly calculate its width and height.
| Dimensions of elements, mm | Room area | |||||
|---|---|---|---|---|---|---|
| 12 m2 | 15 m2 | 20m2 | 25 m2 | 30 m2 | 40m2 | |
| Portal Width | 400 | 500 | 600 | 700 | 800 | 900 |
| portal height | 420 | 490 | 560 | 630 | 700 | 770 |
| Firebox depth | 300 | 320 | 350 | 380 | 400 | 420 |
| Back wall height | at least 360 | |||||
| Back wall width | 300 | 400 | 450 | 500 | 600 | 700 |
| Smoke box height | 570 | 600 | 630 | 660 | 700 | 800 |
| Chimney section with a rough inner surface | 140*270 | 140*270 | 270*270 | 270*270 | 270*400 | 270*400 |
| Chimney section with a smooth inner surface | 140*140 | 140*270 | 140*270 | 270*270 | 270*270 | 270*270 |
The size of the firebox depends on the area of the room. There is a simple formula that will allow you to correctly perform all the calculations:
Measure the area of the room and divide it by 50.
The resulting value is the size of the furnace window.
To heat a small room at 20 square meters, a fireplace with a furnace opening of 0.50 m 2 is quite enough.
We also suggest using the table to correctly calculate all the necessary parameters for the future fireplace.
After calculating the width of the firebox, you need to decide on its depth. The efficiency of heating the fireplace directly depends on this parameter. According to the standard calculation formula, it is equal to 2/3 of the furnace height.
If you ignore this factor and, for the sake of appearance, decide to increase the depth of the furnace, then this will directly affect the heat transfer of the fireplace.
Almost all the heat received from the combustion of firewood will go through the pipe to the street. In this case, the fireplace will perform more of a decorative function, delighting with a beautiful glow of fire. You will only have time to put firewood in the firebox.
When reducing the depth of the combustion chamber in relation to its height, there may be a possibility of smoke in the room.
In addition to the correct calculation of the firebox, great attention must be paid to the arrangement of the chimney, on which fire safety and good draft depend.
According to the norms of SNiP, the diameter of the chimney must be at least 150:170 mm. If you chose a chimney with a rectangular section, then its width should be equal to 1/10 of the size of the combustion chamber.
The height of the chimney must not be less than 5 meters. But sometimes, with high floor heights, you will need to raise the chimney even higher. In this case, we focus on the ridge of the roof and the place where the pipe exits.
The figure shows how to correctly display the height of the chimney.

Therefore, it is good to calculate all these parameters before you start building a fireplace with your own hands.
How to make a fireplace with your own hands: step by step instructions and ordering
We give a diagram of laying a fireplace with a fuel chamber of the following size:
Portal width - 62 cm.
Height - 49 cm.
The depth of the fuel chamber is 32 cm.
The cross section of the chimney is 26*26 cm.
We will lay out the back of the structure from ½ of the brick, and the side from the whole.
Step 1. Sketching and Drawing
Whatever size and configuration you choose for your fireplace, you must complete the drawings and sketches before you start building it.

- Drawing a sketch and making a drawing.
Having decided on the place where you want to place the future fireplace, draw a drawing on paper. Now decide on the size of the unit and calculate each side. Make a detailed drawing. Make sure that the flue system will not come to floors and beams. Decide which side the blower will be on, and which firebox will be.

- We prepare tools and materials.
Immediately you need to decide what kind of lining you will cover the fireplace. If the design is being prepared “for jointing”, then the brick must be purchased red ceramic. If you plan to decorate with clinker tiles, then you can buy a more budget option.
We offer detailed diagram erection of a red brick fireplace "for jointing" with a stone firebox.
For this we need:
- Fireclay refractory brick for the combustion chamber (not lower than M200).
- Red ceramic brick for whole fireplace. - 250 pcs (excluding pipes). You can additionally take 10% of the total, taking into account defects and errors.
- Mortar for laying the foundation (cement, fine sand, gravel and water).
- Mortar for laying bricks.
- Roofing material for foundation waterproofing.
- Boards for the construction of formwork.
- Grate.
- It blew.
- Metal door.
- damper.
- Metal rods and wire for reinforcement.
- Metal wire 0.8 mm for dressing.
- Asbestos cord.

From the tools prepare:
- Trowel for laying bricks.
- Roulette and marker.
- Rule.
- Bulgarian for turning bricks.
- Building level, protractor and plumb.
- stapler.
- Shovel and bayonet shovel.
- Solution bucket.
- Construction mixer or drill with a nozzle.
- Rubber mallet for laying bricks.
- Construction hammer for the construction of formwork.
Step 2. Preparatory work
- Foundation arrangement.
The construction of the foundation should be given special attention, since all further operation of the fireplace depends on its reliability.

When arranging the foundation in an operated cottage, you must immediately take into account the location of the beams, roof lintels, rafter legs, etc.
Do not save time and effort and make a separate foundation for the heating unit so that when shrinking, the general foundation for the house does not deform the structure of the fireplace.
When arranging the foundation for a fireplace at the zero cycle of building a house, this process will not cause any particular difficulties. You simply perform work on the construction of the base of the fireplace according to a single scheme:
- excavation to the depth of freezing.
- creation of formwork;
- execution of the underlying layer of sand and gravel;
- waterproofing with roofing material or polyethylene;
- reinforcement with metal rods;
- pouring the foundation for 2 bricks to the final floor;
- technological break 20 days.
We have previously discussed in detail that. The scheme for laying the foundation for a fireplace is no different.
Another thing is if you decide to build a fireplace in an already operated house. This process will be accompanied by the stage of dismantling the flooring at the installation site of the fireplace.
To do this, measure with a marker required size fireplace according to the drawing, indent 15-20 cm on each side and use a grinder to cut a hole in the floor.
Remove the used boards and start deepening the soil. Next, proceed according to the standard scheme for pouring the foundation.
After removing the base of the fireplace to the level of the finished floor, you will need to beautifully arrange the gap between the floor covering and the stone structure.
Advice! No matter how carefully you work, in the process of laying a fireplace in the house, dust and dirt will inevitably form. Before proceeding to construction work, cover all furniture and floors with polyethylene.
- Fire safety works.
When arranging a fireplace in a wooden house, it is very important to protect the walls adjacent to it from overheating.
You can lay an asbestos sheet between the fireplace and the ceiling, or you can tile the wall with ceramic tiles.
- Preparing bricks for laying.
After the foundation is completely dry and set, you can start building.
Select the entire brick, sort it by size and soak the part that you will work with at this stage. This must be done so that it does not absorb moisture from the masonry mortar.

Before erecting a fireplace, according to the order, even experienced stove-makers first “dry” lay out the bricks. So you can see all the difficult places that you have to face, and avoid serious mistakes that will be hard to fix later.
Advice. Laying out the rows “dry”, number each row on the bricks and put a serial number. So you can get the job done faster.
Step 3. Laying the fireplace
The fireplace must be built on a base that is well waterproofed. To do this, measure the size of the structure on a roofing material sheet, cut it out and lay it in layers on the base.
Now you can start laying the fireplace itself. For laying a fireplace, use a mortar that is also suitable for laying stoves.
Soak red clay for several days in a trough of water.

To prepare the solution, we combine 8 parts of sand and 8 parts of clay, add 1 part of water and mix thoroughly with a construction mixer.
Now we check its readiness. By consistency, it should resemble thick sour cream. If it turned out to be too liquid, you can add a little sand.
Dip the trowel into the solution and see if the mixture flows off it or not. If it is glass, leaving a thin layer of 2-3 mm, then the solution is ready. If it gets thick, dilute with water.

In order to clearly erect a fireplace vertically, you can pull the plumb lines. They will serve as a kind of beacon by which you will navigate.
1st row is the base of the fireplace.

The correct layout of the entire structure depends on it. For this row, it is better to use a masonry mortar with a small addition of cement. The recommended joint thickness is 5 mm. Check the level horizontally and diagonally, determine the angles with a goniometer. They must be strictly 90 0 .
If you want to give the shape of the base of the fireplace an unusual look, then you can lay out the bricks on the edge on the basement row. The base must be raised by 25-28 cm at the level of the finished floor.
Maintaining the same thickness of the seam when laying a fireplace is not so easy, especially for a beginner. There is a little trick. Use wooden slats 0.5 cm thick as a guide.

Make sure that the masonry mortar does not come into contact with front side, because we are building a fireplace "under the jointing". After completion of work, it will be troublesome to wipe off the frozen solution.
When laying a brick on the rail, press it gently with your hand and tap it with a rubber mallet over the entire plane. So he sits well and grabs. Make sure that the solution is not squeezed out of the cracks.
Wooden slats are removed after 3-4 rows of bricks have been laid.
2 row. It is laid out similarly to the first red brick, according to the scheme. Completely fill this row with bricks.
3 row. Here we begin to build the bottom of the fuel chamber, laying fireclay bricks on edge. It is not necessary to bind the refractory brick with red.
We install the grate, taking into account the metal expansion gap of 3-5 mm.

4 row - we begin the formation of the firebox. Laying out several rows, wipe the bricks with a damp cloth so that the mortar sets better. Here in this row, we install the fuel chamber door. Consider the metal expansion gap.

the door, for reliability, is mounted on a metal mustache, which is laid in the seam between the rows of bricks.
In the 5th row we install a blower.

8 row. We carry out the slope of the rear wall of the firebox at 30 0. This element is also called the "mirror" of the fireplace.
9-14 row. We proceed to the formation of the arch.
The overlap of the portal is largely determined by the design of the fireplace. This part of the work will not cause much difficulty.
The easiest option would be to use steel corners on which bricks are placed. But with such masonry, it is better to veneer the fireplace with decorative material in the future, which will cover the steel corner.
Considering that we have chosen the option "with a fireplace" we will not use this method.
In order to accurately perform a semi-cylindrical arch, it is necessary to make a circle from a sheet of plywood.

We draw a circle on the sheet with a compass, divide it into 2 parts of the required radius (1/2 of the width of the firebox) and cut out 2 semicircles using a grinder.
Place these 2 parts of the circle on the floor and insert 11 cm long wooden bars between them. Fasten the structure with self-tapping screws. The circle is ready.
All bricks must be ground into a wedge. How to accurately determine the size of the wedge. You can, of course, calculate it according to the formula, or you can use the proven method manually.

Place the circle on the floor and attach 1 brick to it.
Take the thread and pull it from the center of the circle to the upper left corner. Draw with a pencil along the stretched thread.

Do the same procedure with right side- so you got a batch of bricks with measured markings for a wedge. It remains now to carefully cut off the grinder according to the markings. Remember to number the bricks first so that you can easily lay them in the correct order.

Lay out the arch symmetrically, bringing the bricks from the corners to the center.

15-18 row. We make a fireplace tooth. This is the name of the protrusion in the fuel chamber, which prevents precipitation and ash from entering the fireplace and improves traction.

Step 4. Building a chimney

Chimney masonry
19-20 row. We run a chimney.
21-22 row. We continue to run the chimney. In the 22nd row, we install a fireplace valve.
23 row we make fluff, giving the structure the shape of a dovetail. Fluff or "otter" is done in the place where the chimney pipe is in maximum contact with the roof.

The height of the fluff can vary from 29 to 36 cm. A drain is discharged above the fluff, which is laid out until it comes into contact with the roof. The size of the riser and the chimney must match.
A metal umbrella follows on top of the chimney to protect against precipitation and debris.
Step 5. Facing work
In order to grout the fireplace, add clean, sifted river sand to the clay mortar and mix thoroughly. This mass should be thick and plastic.

Step 6. Putting the fireplace into operation
Considering that the fireplace is laid with wet bricks, before the first kindling, the structure must be well dried.
In the first week, natural drying occurs. To do this, it will simply be enough to open the door of the ash chamber and the firebox. And in the second week, it is necessary to kindle the fireplace every day and not bring it to maximum heat. Check traction.
Instructions for laying a fireplace with a cast-iron firebox and a metal chimney
The advantage of installing a steel chimney (in our case, sandwich pipes) is that it can be led out through the wall. This greatly expands your options for placing a fireplace in the house.
To build such a fireplace, you will need the same tools as in the previous instructions, and from the materials you need to prepare:
- Cast iron firebox with glass.
- Sandwich pipe kit.
- Silicone sealant.
- Clamps, tee.
- Elbow 45 0 or 90 0 (depending on the location of the chimney structure).
- Bracket for supporting the chimney pipe.
- Mineral wool (to isolate the passage of the pipe through the ceiling).
- Protective umbrella on the pipe (from precipitation and debris).
- The arrangement of a separate foundation is carried out as standard with deepening of the soil, erection of formwork and cementing.
- Fireplace insulation. It is impossible to mount a fireplace close to the wall. Therefore, between the wooden wall, which will have a fireplace, it is necessary to lay out superisol. If space allows, you can build an additional thin wall of sand-lime brick. Please note that the wall in this case must be built on the same foundation as the fireplace. Please take this into account when designing. The size of the wall should exceed the size of the fireplace by 50-70 cm on each side.
- Base laying (2 rows are laid with solid bricks).

- The erection of the pedestal - lay out 4 rows of red brick in the form of the letter P. If you have chosen a wide firebox, then the width of the pedestal should also be increased. Use cement-clay mortar when laying bricks. The pedestal will increase the heat transfer of the fireplace, because cold air will climb from below and, passing through the firebox, rise up.
- Ash pan installation.
- On the 4th row of bricks, we make grooves using a file, and insert metal corners into them with the ribs up.
- We put the 5th row of bricks, which will go under the base of the firebox. We apply a layer of refractory mastic on it.
- We install .

You will need an assistant for this job because heavy weight designs. It is necessary to carefully lower the fuel chamber from the bottom up, while indenting from the back of the wall by 5 cm. While the mastic or refractory glue has not hardened, check the degree of horizontal inclination with a building level. At this stage, errors can still be corrected.

- from sandwich pipes.


- Furnace lining with bricks. After the firebox is connected to the chimney, it is necessary to overlay it with bricks using heat-resistant glue or cement mortar.

When lining the firebox, it is very important to take into account a thermal gap of 5 mm between the cast-iron wall and the outer casing. The order in this case is not important, since, in fact, you are building a brick box according to the size of the finished firebox. At the stage of finishing the chimney, it is very important to ensure that the lining does not rest on the pipe.
- Chimney lining with plasterboard. Immediately according to the scheme, a frame is erected from a metal profile, onto which drywall is screwed with self-tapping screws.

From the inside, it must be insulated with heat-insulating mats made of non-combustible material. In this case, they should be attached to the firebox and chimney with the foil side.
- The outer part is sheathed with drywall.
- Facing work. You can beautifully decorate the fireplace with any facing material: clinker brick, decorative stone, plaster, etc. After the cladding work is done, the flooring can be done. Keep in mind that parquet or laminate cannot be laid close to the fireplace. The distance must be at least 80 cm.
- Fireplace drying and heating.
When all work is completed, you can decorate the fireplace with a stylish, hand-made one.
It is unlikely that anyone will argue that you can look at the flickering fire in the fireplace for an infinitely long time.

And if everything is clearly done according to our instructions, then such a fireplace will delight not only with the creation of a special aura of home comfort, but also give warmth, heating the house.
To make it easier for you to deal with the construction of a fireplace with your own hands, we suggest that you familiarize yourself with detailed video instruction.
Video. Fireplace masonry
If a country house is being built or has already been built, then you can always find a place for a fireplace in it, especially since many people dream about it. Excessively massive fireplaces are not easy to place in small room, and besides, they have a complex internal structure that is inaccessible to a beginner in the furnace business for self-construction. Another thing is a corner fireplace. We can say that this option is suitable even for the smallest room, as it occupies a “modest” part of the usable area, but it is able to fully bring maximum comfort to the house and create a special style.
In addition, a do-it-yourself corner fireplace with step-by-step instructions for the construction of which is necessary for self-construction can even be tried by a novice stove-maker.
Advantages of a corner fireplace
There are corner fireplaces various models. Some of them are made only of brick, while others are combined from metal elements and brickwork. Which one is better to choose will depend on the preferences of the homeowner and on his financial capabilities. It should be noted that a combined fireplace will cost a little less than one in the construction of which only brick was used.
It is worth evaluating the advantages of a corner fireplace in order to understand how profitable it is to install it under certain conditions:
- The first is saving money on the material for construction, since it will be required much less than for the construction of a wall or island fireplace.
- The second is the rational use of space, since the compactness of the structure allows you to install it both in a small country house and in a cottage with a fairly large area.
- The third is a relatively simple ordering scheme, which even a novice master can figure out. Even with not entirely successful external masonry, it can be covered with finishing material, such as decorative plaster, ceramic or ready-made stone portal. Moreover, some options for applying plaster can be made in the form of complex exclusive relief patterns.
- And finally, the aesthetic and functional value of the building. The fireplace will make the room cozy, which will allow you to spend rainy days and evenings around it in comfort.
fireplace project
preliminary sketches
In order for the process of erecting a corner fireplace in the room to be successful, it is first necessary to make a detailed project and sketch of the future heating structure. It is better, of course, to lay the foundation of the fireplace along with the foundation of the house, while remembering that they should not be interconnected.

You can also fit a corner fireplace into one of the rooms of an already built house, but you will have to make careful calculations so that its chimney does not rest against an attic beam or rafter leg.
Design work is carried out as follows:
- First you need to determine the room and the corner in it where the fireplace will be installed.
- Next, on a sheet of paper, you need to make a small sketch drawing, which will allow you to visually determine how the chosen option will be “out of place” in this particular room and in the style of its design.
- After that, taking into account the design scheme of the attic floor and the truss system, a drawing-project of the fireplace is created.

Corner fireplaces may differ from each other in some design elements. For example, in its lower part, you can equip a chamber for drying firewood, or a blower chamber equipped with a door or a metal drawer. Brick pedestals are sometimes placed on both sides of the fireplace insert, used as decorative shelves for installing fireplace accessories or floor vases.
The fireplace insert may have different forms. It can be rectangular, square, trapezoidal or semicircular. Each developed model has its own version of the furnace niche. When choosing a fireplace for yourself, you need to immediately pay attention to this element, since it will be difficult to remake it later.
In addition, a corner fireplace can be with a fireclay brick firebox or with a finished metal one built into the structure. Such metal chambers are equipped with a door with heat-resistant glass, which allows you to enjoy the view of the fire and at the same time does not let combustion products into the room. For those who love an open fire and the aroma of burning wood, the door will not be an obstacle, as it can always be opened.

All the desired elements must be immediately included in the project and sketch of the fireplace, and then try to choose the order developed by stove-makers using it.
Calculations of the linear parameters of the fireplace
In order for the fireplace to function normally and meet all safety criteria, you need to know what should be taken into account when making calculations:
For high-quality and safe operation of any heating device, it is necessary to create optimal traction - in order to exclude smoke in the premises and, at the same time, for the longest possible preservation of heat. In addition, normal draft will help to quickly ignite the fireplace and maintain an acceptable fire intensity. The overall design of the fireplace should combine:
- High heat transfer, fast and uniform heating of the structure.
- The fireplace should not make the house cold during downtime, that is, it is necessary to create conditions for blocking the chimney.
- Aesthetic appearance and compactness.
It is these factors that are taken into account and calculated during the preparation of the project. In many ways, they depend on the area that the fireplace should heat.
fireplace insert
The choice of the correct size of the firebox directly affects the heating of the room and the creation of a comfortable atmosphere.
The calculation of the size of this element is based on the area of the room. Simplified for this, the area is divided by 50 - the resulting value will show the approximate size of the firebox window. Yes, for small room a fireplace with a furnace opening with an area of 0.32 to 0.54 m² is enough.
You can use the table that will help you easily calculate this important parameter for the good functionality of the fireplace:
| Dimensions of various elements of the fireplace, mm | Room area, m². | |||||
|---|---|---|---|---|---|---|
| 12 | 15 | 20 | 25 | 30 | 40 | |
| Portal Width | 400 | 500 | 600 | 700 | 800 | 900 |
| portal height | 420 | 490 | 560 | 630 | 700 | 770 |
| Firebox depth | 300 | 320 | 350 | 380 | 400 | 420 |
| Back wall height | At least 360 | |||||
| Width of the rear wall of the firebox | 300 | 400 | 450 | 500 | 600 | 700 |
| Smoke box height | 570 | 600 | 630 | 660 | 700 | 800 |
| Cross section of a chimney with rough inner walls | 140×270 | 140×270 | 270×270 | 270×270 | 270×400 | 270×400 |
| Chimney section with smooth inner walls | 140×140 | 140×270 | 140×270 | 270×270 | 270×270 | 270×270 |
The best proportions of the fireplace window is considered to be a ratio of 3: 2, and the height should be less than the width of the hearth.
An equally important parameter is the depth of the combustion chamber - the efficiency of the fireplace will directly depend on it. By standards, it should be equal to ⅔ or ½ of the height of the firebox.
If these parameters are ill-conceived, for the sake of economy or appearance, they increase, then heat transfer is significantly reduced, since most of the heat will go directly into the pipe. All that remains is to admire the intense flame from the fire, barely having time to put firewood into the fireplace.
And with a decrease in the depth of the combustion chamber in relation to its height, there is a risk of regularly getting smoke in the room - this means soot and soot on the walls, ceiling, furniture and accessories. Yes, and the operation of such a fireplace will become extremely unsafe.
chimney for fireplace
To prevent smoke from occurring, in addition to the correct calculation of the firebox, the parameters of the chimney will be no less important, since they also affect the creation of normal draft and the activity of burning firewood.
It is required to correctly determine the diameter of the channel or the size of the rectangular section of the chimney and the height of the pipe. According to safety standards, the diameter of the chimney cannot be less than 150 ÷ 170 mm, or the rectangular section must be 1/10 of the size of the combustion chamber.

The chimney usually rises no lower than five meters, but sometimes more height is required. This parameter will depend on in which area of the roof it will be located, and on the height of the roof ridge.
Fireplace materials and necessary tools
Having drawn up a project and made calculations, they proceed to the selection and acquisition building materials. Immediately you need to decide whether the fireplace will be finished with decorative material, or whether it is planned to make its masonry “for jointing”. It depends on which brick can be chosen for masonry.
Since the work on the construction of a fireplace begins with the foundation, and only after it is ready, they proceed to laying out the firebox and the chimney, then it is worth starting the listing of the necessary materials from it.
Foundation
Since the planned structure is not as massive as a full-fledged furnace, there is no need to build a powerful foundation. If a slab, well-buried foundation was erected for the house, then under a light corner fireplace it is quite suitable as a base. If the foundation is tape, then you will have to work extra on the base for the fireplace.
- Waterproofing is necessary for any structure - it will reliably protect it from capillary penetration of moisture from the soil and allow it to stand without damage long time. Therefore, it is necessary to purchase a waterproofing material - it can be roofing material or a dense plastic film.
- Crushed stone and sand will be required for the installation of foundation pillows and the manufacture of concrete mortar.
- For the manufacture of formwork, a board is required. There are two ways of making formwork - temporary and stationary. When choosing a temporary option, after the foundation has gained strength and is ready for further work, the formwork is dismantled, and a sand and gravel mixture is poured into the gaps left from it between the soil and concrete.
In addition to formwork boards, a metal sheet is often used, especially in cases where the foundation has a semicircular or other complex shape.
- Reinforcement in the form of metal rods with a diameter of 8 ÷ 10 mm. Reinforcing bars are interconnected with steel wire, forming a grid.
Another option is to purchase a finished reinforcing steel mesh with cells of 50 - 80 mm.
Fireplace walls and chimney
For the construction of the fireplace itself and the chimney, the following materials will be required:
- For laying walls, a firebox and a chimney, it will be necessary to purchase two types of solid bricks - red and fireclay.

Prices for fireclay bricks
fireclay brick
- If the fireplace will be decorated with jointing, then it is necessary to choose high-quality ceramic bricks. In the case when the external decoration of the fireplace is supposed, a working (ordinary) brick is also suitable.
- Fireclay fire-resistant brick is used for laying the combustion chamber and the beginning of the chimney.

Prices for ceramic bricks
ceramic brick
Brick is calculated piece by piece, and this quantity depends on the order, the chosen model. Even a small corner fireplace may require 350 to 650 pieces. When purchasing a brick, you need to add 10 ÷ 12% of the reserve to the total quantity - it will come in handy in case of defective copies or unforeseen damage as a result of fitting in accordance with the order.
- Traditional materials such as clay, sand and cement can be used for masonry mortar. However, it should be noted that for kiln work it is very difficult to choose the right fat content of clay and optimal proportions, and if there is no experience in this process, then it is better to use ready-made compositions that require only proper preparation, the technology of which is indicated on the packaging. Such masonry compositions can be purchased in specialized stores in the form of dry building mixtures.

You need to know one more subtlety recommended by experienced stove-makers - the laying of the combustion chamber, carried out with fireclay bricks, should be carried out on a rubbed mortar made of clay with minimal additions of cement and sand to it.
Prices for heat-resistant mixtures for laying fireplaces and stoves
masonry heat-resistant mixture
- Steel corners sized 40x40 or 50x50. The length of these elements is selected depending on the width of the combustion, drying or blowing chamber. 300 ÷ 400 mm are added to the dimensions of these chambers, and the resulting value is multiplied by two, since the corners will be laid on both sides of the chambers.
- If a fireplace model with a semicircular shape of the firebox overlap is chosen, then you will have to prepare a template from a board, plywood or metal sheet. For props, you can use loose bricks or a wooden beam.

- The flue pipe can be made of brick or made of metal. If selected last option, then the pipe must be purchased with a length of at least five meters, but to find out more precisely how much it will take, you need to take measurements at the installation site of the fireplace, from its top to the height of the ridge.
- For a brick chimney, you will need a fireplace valve with a long handle.

- For metal pipe a built-in adjusting element - gate will be required.

Element of stainless chimney - damper
- If it is decided to build a finished cast-iron or steel firebox into the fireplace, then it is she who is purchased instead of fireclay bricks. It must be said that the installation of a finished firebox in the fireplace will greatly simplify and speed up the work, since brick lining of an already finished form will be made.
- Since the fireplace will be installed in a corner, the walls forming the corner must be insulated from exposure to high temperatures. For this, heat-resistant drywall or asbestos sheets are purchased.

- For facing the building, you can use different materials - it can be facing tiles imitating stone, ceramic tile, decorative plaster or even a finished portal made of natural or artificial stone.
You might be interested in information on how to knead properly.
Required Tools
For laying any fireplace, you must prepare the following tools:

1 - a pickaxe will be needed to split the brick.
2 - trowels of different configurations, having small size for applying and leveling the solution.
3 - large trowel (trowel) for mixing and applying the solution on large planes.
4 – building level it is necessary to control the horizontal and vertical laying and seams.
5 - plumb line for checking the verticals of the walls.
6 - laser level (if possible) to simplify the process of marking the floor and walls.
7 - a cord along which each of the rows of masonry will be displayed.
8 - mallet (wooden or rubber mallet) for leveling bricks in a row.
9 - the rule is used to level the flooded foundation and to check the evenness of the walls of the fireplace.
10 - containers for mixing the solution and for water.
11 - stitching to give the seams a neat shape of the seams.
Preparatory work
Foundation pouring
If you have to start work from the foundation, then it is carried out according to one scheme, in the following order:
- Before erecting the foundation, it is necessary for it to make a deepening of 400 ÷ 500 mm in the soil under the floor. It should be in the shape of the base of the fireplace, but 100 ÷ 120 mm wider.
- Further, sand is poured to the bottom of the pit - it will become the first layer of waterproofing for the foundation. The thickness of this layer in compacted form should be 100 ÷ 120 mm. In order to achieve the maximum density of the sand layer, it is moistened with water during the tamping process.
- On top of the sand cushion, a gravel backfill is made, which is also compacted. Its layer should be the same thickness as the sand layer.

- Further, reinforcing elements are laid on the crushed stone.
- Then the walls of the house are fenced off from the future foundation with asbestos sheets, which will protect them from high temperatures and help keep the heat inside the room.
- The next step is the installation of formwork. If the base is semi-circular, as shown in the photo, then the most optimal an option would be to enclose it with a metal sheet, which is supported by stacks of bricks.
For a foundation with straight lines at the base (rectangle, trapezoid, etc.), the formwork is most often made of boards that are knocked together. If gaps have formed between the boards, then from the inside the formwork is upholstered with a dense polyethylene film. It will not only prevent the solution from seeping out, but also retain moisture in the solution for a longer period, which will allow it to seize and gain strength evenly.
- When the formwork is ready, you can knead the solution. It is desirable to fill the entire volume of the foundation in one go, but its first layer can be made coarser, consisting of a sand-gravel mixture and 4: 1 cement. The thickness of this layer can be 120 ÷ 150 mm.
On top of it, a thinner layer of mortar of cement and sand is immediately poured, in proportions of 1: 3.

- The surface of the foundation is leveled using the rule, closed plastic wrap and left to mature. This method of maintaining freshly poured concrete is especially appropriate if the foundation is being built in summer time at high temperatures outside, when the evaporation of moisture occurs at an accelerated pace.
On top of the finished foundation, which has gained grade strength, roofing material is laid in two ÷ three layers.
Preparing for bricklaying
Each master stove-maker has his own secrets of laying heating structures, which are acquired in the process of a long time of work. It would be nice to know about several of them before starting the construction of the fireplace.
- The laying of the fireplace begins only three to four weeks after the foundation has been poured, since the concrete must be well hardened.
- If the laying will be carried out on a clay mortar, then before starting work, the brick is soaked in water for one and a half ÷ two days. A water-soaked brick will no longer absorb moisture from the mortar too intensively, and this will allow drying to pass evenly, which will prevent cracking at the seams.

- In order to avoid serious errors in order and carefully understand the configuration of each row, even experienced stove-makers, starting the construction of a new stove model, lay the entire structure “dry”, without the use of mortar. If you perform this procedure, the main laying on the mortar will be much easier and faster.
In addition, laying out the fireplace "dry" you can immediately adjust the bricks to right size and number them, putting the number of the row and the location of the given element in it. In this case, it must be taken into account that the seams between rows and bricks should have a width of 8 ÷ 10 mm.
- Well, one more everyday moment that must be taken into account - when carrying out such work in the room, dust and dirt will inevitably form. So that things are not spoiled, it is recommended to take them out of the room or cover them with a thick plastic film, with overlapping sheets of 500 mm.
These subtleties will greatly facilitate and simplify both work and cleaning after masonry is completed. Having studied all the nuances preparatory work, you can go directly to the masonry.
You may be interested in information about what is
Masonry corner fireplace
To be able to choose the appropriate option, you can consider several ordering schemes - simple and more complex. And everyone will decide for himself which of the models will be easier for him to complete.
First option

This version of the fireplace is quite complicated due to the unusual shape of the combustion chamber, but if desired, it can also be implemented, based on a description of the features of each row of the circuit.

- 1 row - you need to work on it very carefully and carefully, since the quality of all further masonry will depend on it.
- 2 row - a niche is formed in which the ash collection box will be installed.
- 3 row - laid out according to the scheme. A hole is left in the middle part of the surface for dumping ash from the combustion chamber into the ash pan.
- 4 row - at this stage, the bottom of the furnace is laid out, for this fireclay refractory bricks are used. The hole left in the previous row is covered with a cast-iron grate (grate).
- 5 row - on this row, the back and side walls of the furnace begin to be erected, which will form the portal. The laying of the walls is carried out in two rows in thickness - the first, located near the wall, and is removed from red brick, the second, inside the firebox, is laid from fireclay, and the brick is mounted flat. The front part of the firebox floor and the side walls of the portal are also built of red brick.

- 6 ÷ 9 row- laying is carried out according to the scheme and fully corresponds to the description of the fifth row. The walls of the combustion chamber are erected.
- 10 row - on this row a very responsible work - erection fireplace portal. It should be noted that the shape of the portal can, if desired, be changed to arched or rectangular. However, if the portal will have an arched or arch-like shape, it is recommended to make a template for this. In this case, it can be cut out of ordinary plywood, 10 mm thick. For stability, the template must have a certain thickness of 100 ÷ 150 mm, so two identical parts are cut out of plywood, between which a wide gasket is made.
The template is leveled and supported on both sides by stacks of bricks. On the end side of the template, a brick is laid out, forming a figured portal.

11 - 19 rows
- 11 ÷ 12 rows - these two rows form the inner walls of the combustion chamber and the outer walls of the fireplace. When laying out the portal in the form of an arch or the same shape as presented in this order, the bricks on the outer and inner walls are sawn or chipped so that they fit snugly into the shape of the figured portal.
- 13 ÷ 14 rows - laid out on the back wall of the portal the so-called "mirror wall". Its laying is carried out at an angle.

Inclined wall - "mirror"
The work can be carried out in two ways: the brick is installed at a slope, as shown in the photo, or it is laid flat with a shift towards the firebox by 40 ÷ 50 mm. In the latter case, after the removal of the wall is completed, its surface will have to be leveled with a mortar, since it must be smooth. It is this slope that sets the direction of the smoke rising from the burning wood.
- 15 ÷ 18 rows - the back inclined, side and front walls around the figured portal continue to form.
- 19 row - the inner bricks of the combustion chamber are shifted towards the furnace, forming a rectangular chimney opening.

18 - 20 rows
- 20 row - the penultimate row before the completion of the laying of the front wall around the portal. The upper part is laid out according to the scheme - the chimney hole continues to form.

- 21 row - completely covers the arched portal on the front wall and is displayed on even rows of masonry. The back inclined wall goes into the so-called "tooth", which, in combination with the slope of the wall, regulates the passage of smoke to the chimney.

- 22 ÷ 23 row- the "tooth" of fireclay bricks continues to form. External masonry is carried out with ceramic red bricks.

- 24th row - the chimney hole is made of fireclay bricks, and the surface of the mantelpiece is made of ceramic material.

- 25th row - the mantelpiece is completely covered, a hole is left for installing a chimney valve.
- 26 row - on this row, a valve is mounted on the hole for the chimney pipe. It is best to choose the option with a long handle or gate.
- 27th row - a ceramic or asbestos smoke pipe is installed above the valve and lined with bricks prepared for its shape on all sides. Or an even brick is used, and the gaps between it and the pipe are filled with a solution consisting of sand and clay.
- 28 and subsequent rows - there is a brick lining of the installed round ceramic pipe.
It should be noted that this version of the corner fireplace will be difficult for a beginner to complete if there is no experience in deriving the design of stoves. Therefore, it is better to invite an experienced craftsman as a partner who can help you not to make mistakes.
Second option
This model of a corner fireplace is simpler in execution, therefore it is quite accessible for beginners. Moreover, a detailed ordering is given, which is less complicated compared to the design presented above. On the ordering scheme, the areas of use of red and fireclay bricks are highlighted in color, which makes it more understandable.

The foundation of this corner fireplace is arranged in the form of a square - this is convenient because the pre-furnace area will immediately be framed with a heat-resistant surface, which is necessary for any heating facility.
- On the waterproofed the foundation is laid with a zero row of bricks - it will become the basis for laying subsequent rows, so work on it must be carried out with special care. It must be laid out in strict accordance with the figure shown in the diagram.
- 1 row forms the bottom of the blower chamber and is laid out according to the presented scheme, so it will be necessary to adjust the two bricks, the corners of which must be cut or carefully chipped at the desired angle.
- 2 row - at this stage, a niche is formed for drying firewood or a blower chamber. They will differ only in the presence or absence of an ash box and a grate.
If it is decided to place a drying niche under the firebox, then on its outer side it fits metal corner, size 40 × 40 or 50 × 50 mm. The length of this metal profile should be 600 mm.

- 3rd row - the masonry goes according to the scheme, and a metal sheet with a size of 600 × 400 mm and a thickness of 4 ÷ 5 mm is mounted on top of the drying niche. If an ash pan is installed, a cast-iron grate of the same size is laid instead of a metal sheet.
- 4 row - the masonry goes according to the scheme in the event that a metal sheet was laid on top of the niche. When installing an ash pan under the firebox, the laying is carried out according to the ordering plan, with the exception that the grate remains open.
- 5 row - the bottom part of the firebox is formed from fireclay bricks. It is highlighted in yellow in the diagram.

- 6 ÷ 8 rows - work is carried out in the same order: the walls of the combustion chamber rise from ceramic red material, and inner part the walls of the firebox are formed from fire-resistant fireclay bricks, cut in two in thickness.
- 7 ÷ 9 rows are also mounted according to the order.
- 10 ÷ 11 rows - a slope begins to form on the back wall towards the combustion chamber, which will become the lower part of the "tooth". In order for the slope to be even, the bricks are undermined and adjusted to each other.
- 12 row - at this stage, the combustion chamber is blocked along the outer edge with steel corners 50 × 50 mm, 600 mm long.
- 13 ÷ 14 rows are laid out in order.
- 15 row - the construction of the back wall and the "tooth" is completed, above which the chimney begins.
- 16 ÷ 17 rows - the upper part of the portal is formed, turning into a mantelpiece. The brick is placed with a shift to the outside.
- 18 ÷ 20 rows - work is proceeding according to the scheme. The upper opening of the fireplace narrows with each row, forming a chimney channel.
- 21 ÷ 24 rows - laying a chimney with additional side walls.
- 25 ÷ 29 rows - a chimney is removed, while a smoke damper is mounted on the 27th row.
- Starting from the 30th row, the chimney pipe is being installed - it can be laid out of brick, or a metal version is installed. The pipe is passed through attic floor and then through the roof.
Third option
This model of a corner fireplace was developed by master V. Bykov and has been used for construction for many years. During this time, it has become popular due to the excellent efficiency of its design.

Having a length of the sides located along the walls, only 770 mm, the fireplace is quite compact, and it can be installed even in a small room, which is an indisputable advantage of the model.
This fireplace is equipped with a blower chamber, so a 250 × 250 mm grate is required for the hole in the bottom of the firebox. Metal strips 5 mm thick and 40 mm wide will be needed to lay out the ceiling of the ash and combustion chambers.

Work on the construction of the fireplace begins with the marking of the first row of masonry, which is mounted with great care.
- 1 row is laid out on waterproofed foundation surface, according to pre-made markings and in compliance with the brickwork pattern.
- 2 ÷ 3 rows are also laid strictly in accordance with the ordering pattern.
- 4 row - the base of the combustion chamber is formed, so the laying of its middle is made with fireclay bricks.
- 5 row - the formation of the blower chamber begins. Metal inserts are installed on its side and back walls, which are securely fixed to the surface of the bricks.
- The 6th row is laid out with fireclay bricks, and a grate is installed on the metal inserts. You can do without inserts, but then the sides for installing the grate will have to be provided in the masonry of the previous row, pushing the bricks 10 ÷ 15 mm forward.
- 7 row - the walls of the combustion chamber are laid, as well as the sides of the portal.
- 8 ÷ 12 rows - the walls of the firebox and the side racks of the fireplace portal are displayed.
- 13th row - the walls are tied with steel strips, 600 × 50 × 5 mm in size.
- 14 ÷ 15 rows - the back wall is laid out under a slope towards the front of the furnace - this slope is called a "mirror". This configuration helps direct the smoke into the chimney and, at the same time, it serves as a heat reflector towards the room. The inclined part of the rear wall of the firebox, laid out at an angle of 20 degrees, smoothly passes into the ceiling and the chimney.
- 16 row - a horizontal surface is displayed, the so-called "tooth", in fact, which is the completion of the laying of the "mirror". The “tooth” is coated with a solution of sand and clay, since its surface must be perfectly smooth so that soot does not accumulate on it.
- 17 ÷ 19 rows - the inside of the front wall of the fireplace is laid out with hewn bricks, since the shape of the chimney channel is created, which should evenly go around the “tooth”.
- 22 ÷ 22 rows - a part of the chimney channel called "hailo" is mounted. It must have a size of at least 140 × 270 mm. After laying the 22nd row, a smoke damper is installed on it on a clay solution.
- 23rd row - the chimney channel continues to form, having a curved shape.
- 24 ÷ 25 rows - the curved direction is displayed in the vertical position of the chimney. This hole should also have a sectional size of 140 x 270 mm.
- Having reached this section of the fireplace, they install a metal or ceramic pipe, which is closed with a metal casing or brickwork.
In order to comply with fire safety requirements, it is necessary to carefully consider the passage of the pipe through the ceiling and truss system, since these parts of the building are made of combustible materials. They must be isolated from the chimney with special boxes filled with non-combustible materials, such as expanded clay or sand.
After the completion of the construction of the fireplace, its masonry should dry well. In each individual case, this process takes a different time, since it depends on the massiveness of the structure and the ambient temperature.
Drying takes place with open doors and latches. An ordinary 200 W light bulb, which is hung in the combustion chamber and left on until the masonry mortar is completely dry, will help speed up the process.
Surface finishing, if planned, should be postponed for several months, during which the fireplace will be actively used.
So, building a corner fireplace with one chimney is much easier than building one of the complex stove models. Therefore, study
![]()
The construction of barbecues, oven complexes, gazebos are the main activities of our company. Many years of experience allows us to create practical and multifunctional designs that are easy to use and are of excellent quality and durability.
We present to you the brick barbecue complexes built by us - these are a variety of options, each of which is an author's work. Stove structures implemented by our company: barbecues and fireplaces are provided with a full cycle of their manufacture, from design development to the creation of author's decor elements and their turnkey installation.
What are brick barbecues?
Currently, our company is able to bring to life almost any barbecue construction projects that are easy to operate and will look harmoniously on almost any landscape. Professional stove builders will build a barbecue from bricks of varying complexity in any decorative design.
These can be barbecue ovens, on which you can cook food and warm the veranda. Most Russians prefer having a garden stove on outdoors. In this case, you will like joint projects - gazebos with a barbecue.
You can cook any dishes, ranging from traditional barbecue (both fish and meat), and ending with all kinds of oriental dishes (pilaf, vegetable snacks). Among the main advantages that a brick barbecue oven has, the main ones can be distinguished:
- Excellent aesthetic characteristics - such a design will become a stylish decorative element that adorns the site
- Healthy cooking - create delicious meals without a gram of fat
- Fire safety - the design of the barbecue is carefully thought out, and therefore you can use it without fear of fire
- Durability - We use only high-quality materials designed for a long service life.
Barbecue is an acquisition that will not lose its relevance even after years. It's so nice to fry a barbecue, enjoying its amazing taste and aroma. Moreover, our stoves will allow you to enjoy such a pastime at any time of the year.
It is convenient to work with us, because we have a comprehensive approach to working with each client. You can order exclusively a barbecue oven, or equip a full-fledged recreation area - we will take care of creating a spacious gazebo in which it is so pleasant to enjoy a meal.
The main stages of building a barbecue:
- Location selection
- Development of the project and design of the structure
- Selection of materials for construction
- Draft masonry
- Final cladding.
Skilled stove-makers create real masterpieces - we develop a barbecue project, taking into account all the requirements and wishes of our customers. We successfully implement tasks of any complexity, creating original and non-standard designs: if necessary, you can supplement a standard oven with additional elements, from a skewer to additional shelves and free surfaces.
4 reasons to entrust the construction of a barbecue to the specialists of "Kamin Ochag"
By trusting professionals, you get a guarantee of the quality and safety of the barbecue oven - our work meets all applicable standards. Moreover, cooperating with us, you get whole line additional advantages and benefits. Namely:
- Ready-made projects and individual design development - we will select what will suit you 100%
- Qualified specialists - our craftsmen are well versed in the intricacies of building stoves and barbecue gazebos
- Free consultation - we will answer all your questions in detail and help you make the right choice
- Efficiency - we work quickly and productively, we never break deadlines and do not delay customers.
And most importantly, our pricing policy is profitable and loyal - the total cost of construction depends on the choice of the project, its complexity and size. We will select the best option for you, in accordance with the allocated financial budget - only fair prices and favorable conditions.
To find out more and order the construction of a barbecue in Moscow, contact us today by contact numbers. Or fill out the callback form on the website - we will call you back at a convenient time for detailed agreement on the conditions.
Fire has always been in the service of man, and it still is. But in most devices, it is hidden from the human eye: it is located either in the depths of heating boilers, or under the dishes on the stove. But the instinctive craving for an open fire in a person has never disappeared, therefore there is a constant desire to build a fireplace in one's home. Those people who know how to do this - master stove-makers, in the understanding of many people, have some kind of sacred knowledge that is inaccessible to a simple layman, although in fact the laws of physics and engineering are the basis for arranging fireplaces. And, in principle, anyone can comprehend this science - how to lay out a fireplace with your own hands. All you need is a great desire and patience.
General information about fireplaces
The fireplace is essentially a stove, only its design is simplified. In most cases, it has an open firebox and its design is less massive, so it accumulates much less heat than a stove. The smoke channel of the fireplace is straight, without smoke circuits, the fuel burns faster than in the stove and a significant part of the heat flies out into the chimney. It can be said that the fireplace has a more decorative and aesthetic function than a heating one, but this does not detract from its merits. An important advantage of the fireplace is the ability to very quickly heat the room with radiant heat from a burning flame. A large volume of oxygen burning in the furnace contributes to the supply of fresh air, provided that the supply ventilation is properly organized. Rooms where a fireplace is periodically lit will always be dry and free from musty odors, even if there is no main heating system.
Looking for how to make decorative fireplace with your own hands?
We suggest that you familiarize yourself with a step-by-step guide on how. In addition, this material shows in detail the process of decorating the fireplace with stucco molding and the stage of connecting the LED strip!
Modern fireplaces with a closed firebox can already be called a mini-oven, since convection air heating is organized in them. The efficiency of such fireplaces is much higher, they burn fuel more completely and efficiently, they can heat not only one room, but even a small house. If the owners want to enjoy the contemplation of an open fire, then the door can be opened, and in some models even raised.

Open fireplace device
Before starting the arrangement of the fireplace, it will be useful to find out what structural elements it consists of, and their purpose. The sectional diagram of the fireplace is shown in the figure.

- fireman or firebox (3) of the fireplace - its main part, which is a niche made of refractory material - fireclay bricks. This is where fuel combustion takes place.
- Portal(5) - frames the firebox and performs a decorative function.
- Under(2) - the lower part of the firebox is also made of refractory material.
- Grate(it is not visible in the diagram), serves to maintain fuel and supply air from below.
- Ash pan(1) designed to collect ash and is most often made in the form of a metal box.
- Pre-furnace area(12) limits sparks from the firebox to the floor and is an element of fireplace decor.
- The rear inclined part of the firebox (4) is also called mirror. Its task is to reflect heat from the furnace into the room. mirror shapes smoke tooth(6), which is also called goose or smoke cornice. This important detail The fireplace prevents mixing of air flows, soot and smoke penetration into the room.
- Hailo(7) or smoke box, collects combustion products from the firebox and transfers them through smoke mouth(9) and withdrawal(10) in chimney (11).
- gate valve(8) or gate blocks the flow of cold air into the room from the street when the fireplace is not working, and also regulates the draft.

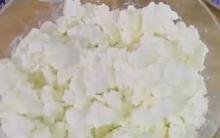


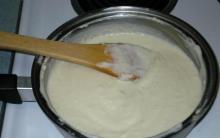


Sun skirt: types and how to wear it Black sun skirt with a T-shirt how to wear
Ground bird cherry Ground bird cherry cook
Own business: production of chips
How to care for your skin in spring Face masks in spring
Seizures in the corners of the mouth: causes and treatment in adults and children