PVC panels are practical and durable material, and therefore are widely used in . They are suitable for any room, and a variety of textures, shapes and colors allows you to make the interior not only cozy, but also very stylish. The fastening technology is quite simple, so decorating the walls with plastic panels is a great option for a novice master.
The choice of panels for decoration
The range of plastic panels is so large that it is very difficult for an inexperienced buyer to figure it out. To avoid mistakes, you should familiarize yourself with the characteristics of this material and its varieties in advance. It is worth considering only certified material, because low-quality panels do not have the required strength and quickly burn out.

The main advantages of plastic panels:

The disadvantage of this material is its low impact resistance, so the panels should be handled with care during transportation and installation. Depending on the coating, the panels are divided into matte and glossy, and according to the drawing technology, they are divided into film and printed.

Standard sizes:
- width from 200 to 350 mm;
- length from 2700 to 3000 mm;
- thickness from 8 to 10 mm.

The strength of the material depends not only on the wall thickness, but also on the number of stiffeners located inside the panel. To check how durable the material is, you need to press your finger on the surface - if the plastic is bent, the panel will not last long.

Besides, you should not buy panels if:

Comparative table of characteristics of PVC panels
| Indicator / panel | PVC panel ТМ Decomax | Average Chinese panel | Average European Panel |
|---|---|---|---|
| Front surface thickness, mm | 2,5 | 1,5 | 2,0 |
| Number of stiffeners, pcs | 29 | 20 | 29 |
| State of the stiffeners | smooth, without deformation | smooth, there are minor deformations | smooth, without deformation |
| PVC panel weight, kg/sq.m | 2,2 | 1,7 | 2,0 |
| Appearance | The coating is even, but with pronounced gaps in the stiffening ribs, there are slight deformations | The coating is smooth, without manifestations of stiffening ribs | |
| Raw material | after a slight pressure, the panel is deformed, which proves the high content of chalk | after a slight pressing, the panel returns to its original form, which indicates a low content of chalk |
Prices for popular finishing wall panels
Preparatory stage

preliminary calculations
You need to start by calculating the amount of finishing material so that you do not have to overpay or go to the store for an additional batch. Panels can be mounted both vertically and horizontally, depending on the desire of the owners of the apartment. With vertical fastening, the number of panels is calculated as follows: measure the length of the perimeter of the room, subtract the width of the openings and divide by the width of one panel. 2-3 lamellas are added to the resulting number in reserve.
For horizontal installation, the area of the room is measured minus the door and window openings and divided by the area of \u200b\u200bone panel. Here, the margin should be at least 10%, since the consumption of material for trimming increases. Additionally, you need to calculate the number of rails for the crate and fasteners. First, the height of the walls is divided by the step of the crate, which is usually 0.5 m, and multiplied by the perimeter of the room. The resulting number indicates the length of the rails in running meters. By measuring the height of the corners and multiplying it by their number, we get the total footage of the corner profiles; to this number you need to add the perimeter of the window and doorways.
Methods for attaching lamellas

There are three ways to fix the panels on the wall - with glue, self-tapping screws and clamps. The first method is suitable for very even and smooth walls; glue is used special for PVC, universal "Moment-mounting" or "liquid nails".

The use of this method facilitates and reduces the cost of the installation process, since there is no need to fix the crate. Disadvantages: it is impossible to replace a damaged panel, it is difficult to remove the coating from the wall during subsequent repairs.


Fastening with self-tapping screws is a reliable and convenient option that does not require perfect flat surface. To screw in the screws, you definitely need a screwdriver, otherwise the installation process will be delayed for a long time. Disadvantages of the method: a wooden frame is better suited for self-tapping screws, therefore, additional time is spent on sawing the timber and processing it

The third option is the most optimal. Kleimers are conveniently and quickly attached to the crate and securely fix the panels on the wall. The crate is mounted from a metal profile, the assembly of the coating is effortless. A damaged lamella is easy to replace with a new one, and the dismantling of the finish also does not take much time.

Tools and necessary materials
In the process of work, everything should be at hand, so materials and tools for installation are prepared in advance. You will need:
- fine-toothed hacksaw;
- pencil and tape measure;
- level;
- square;
- plastic panels;
- rails or plastic profile;
- dowel-nails, self-tapping screws or kleimers;
- screwdriver;
- perforator;
- antiseptic composition;
- sealant;
- ceiling plinth.
Wall preparation
Before paneling, the walls must be cleaned of the old coating, repaired to one crack, noticeable defects and treated with an antifungal agent. Due to this, dust will not accumulate under the plastic and mold will not develop, which negatively affects the microclimate in the room. If the installation will be carried out on the frame, it is not necessary to additionally level the surface.
Prices for mixtures for leveling walls and ceilings
Mixtures for leveling walls and ceilings
Installation of plastic panels

Step 1. Marking the walls
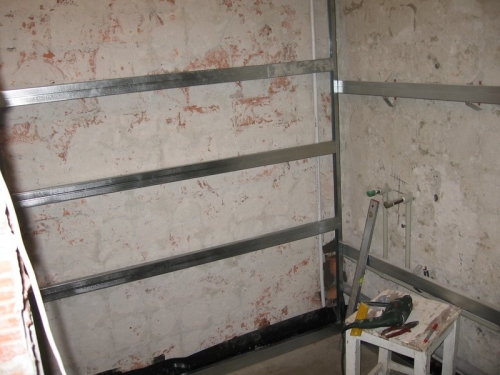
The crate should be fixed strictly according to the level, this will help to avoid distortions. In order not to measure each rail, you should make markings on the walls. The bottom row of the crate should be located 1-2 cm above the floor, so a point is marked on the wall with a pencil at this height, and then a horizontal line is drawn along the entire perimeter using a level. Exactly the same line is drawn under the ceiling or along the edge of the finish, if the walls are not sheathed to the full height. Further, 40-50 cm are measured upwards from the bottom line, a beacon is placed, and so on to the very top. Strictly parallel lines are drawn through the beacons along the perimeter of the walls. The markup is ready.
The panels must be attached to the crate perpendicularly, so the horizontal frame is sheathed vertically, and vice versa. To make markings for a vertical crate, the first line is drawn in the corner from ceiling to floor using a plumb line. Next, mark the second corner, and then draw the rest of the lines in increments of 50 cm.
Step 2. Mounting the crate


If a tree is used for the crate, all slats must be primed in advance antiseptic. Holes for dowels are drilled along the marking lines with a puncher at a distance of 50 cm, then slats are applied, leveled horizontally and fixed on the wall. Where the walls have irregularities, wooden wedges are laid under the crate. If there is wiring along the wall, it must be hidden under the trim. To do this, measurements are taken, holes are drilled in the wall and the wires are fixed with clamps so that they do not protrude beyond the plane of the crate.


Step 3. Fixing the slats
The first lamella is installed in the far corner from the entrance, which is considered the most noticeable.

Make measurements, if necessary, cut the panel along the length with a hacksaw. With one edge, the panel is inserted into the side molding, applied to the corner and attached to the crate from the back side.

The second lamella is inserted into the mounting groove of the first, the joints are pressed tightly and fixed to the frame rails.


To achieve maximum sealing of the joints, the side edges are lightly smeared with silicone before insertion. All subsequent elements are mounted in the same way.


Holes are cut out under the switches and sockets in the panels with a sharp knife, and after installation, these areas are covered with plastic boxes. The last lamella most often requires cutting in width, so first they try it on the wall, mark the cut line with a pencil and cut off the excess with a hacksaw.

Step 4. Installing moldings
After installing all the elements, the surface should look monolithic and even, without gaps at the seams and around the perimeter. To do this, all corners, joints and joints are closed with special plastic moldings. Their design allows you to carefully insert the edges of the panels on both sides, making the corners look much more attractive.

Finally, a decorative molding is installed around the perimeter of the ceiling, and a plastic molding is attached around the perimeter of the floor. On this wall decoration with PVC panels is considered complete. With careful operation, the panels do not lose their attractiveness for a long time and do not require repair.
Video - Wall decoration with plastic panels
How to fix plastic panels to the wall on your own when decorating the interior, what you need to know for this, what tools to use and what is the sequence of work - all this is not difficult to learn today. The modern generation of plastic panels, from traditional lining, 6-10 cm wide, to solid panels 25-30 cm, is increasingly used not only in conventional, standard wall-to-floor wall cladding solutions, but also in options that claim to something to be called really interesting interior solutions that you can implement yourself.
Features of interior solutions for the use of plastic panels
Today, plastic is experiencing a new era of its development. Thanks to more advanced release technologies, manufacturers have moved away from the use of many harmful components. The current generation of this material has a higher environmental friendliness and safety. In addition to this, new aesthetic solutions appeared in the design of the panels - one-color, with unnaturally bright colors, strips of plastic gave way to new, more interesting models. Today, in accordance with the requirements of fashion, panels with imitation of precious woods, having a rough, similar to natural wood, texture, interconnected without traces of docking.
Following this rapid improvement in the quality of plastic products, new solutions immediately began to appear, making it possible to use plastic panels in interior design - from traditional office spaces to individual corners of modern homes.
Popular today is the use of combined combinations of plastic and other textures, for example, decorative plaster, in the lining of balconies and loggias, creating panels from various textures and colors.
Design features of panels
At the same time, the independent creation of such original interior design solutions is not something special today, because working with plastic does not require special skills and expensive tools, and the panels themselves, like most modern building materials for decoration, fastened very simply.
One of the factors influencing the choice of this particular material is design features panels that allow you to create smooth, seamless surfaces. Various ledges, niches and cornices are not an obstacle. Indeed, unlike wooden panels, in addition to the main type of flat panels or strips of plastic with locking joints on the sides, there are also other shaped elements that allow you to simply and reliably cultivate edges, internal and external corners, create reliable protection cut end.
An additional convenience is the ease of installation and the arrangement of all necessary communications. Sockets, switches, ventilation outlets are easily installed in the coating and do not require additional costs for moving to another place.
The main types of panels are mounted both vertically and horizontally. And thanks to his light weight, they do not require a large number fastening materials. Therefore, the process of self-attaching plastic panels to the wall is extremely simple.
Preparatory work. What to pay attention to
Starting the practical implementation of the project, that is, by installing pvc panels with your own hands, you should first carry out a series of preparatory work:
- clear workplace- fitting plastic panels requires a lot of free space;
- walls planned for sheathing are strongly recommended to be cleaned of dust, old coatings, such as wallpaper, and treated with a deep penetration primer with a mandatory antifungal effect;
- with a long rule or building level, check the correctness of the plane of the wall and determine the largest irregularities - depressions, bulges, distortions;
Important! Before starting the sheathing, you need to bring the plastic panels into the room so that they adapt to temperature and humidity.
The preparatory stage is really important because it allows you to prepare the surface for further work and avoid errors that will be visible almost immediately. A feature of modern plastic panels is their ability to show even small irregularities - a glossy surface will immediately demonstrate where a mistake was made.
Fastening technology
For self-assembly of plastic panels to the wall, two main methods are used today. The first, the most common, using prepared mounting rails. This is the most common method of fastening today, although there are variations of this method, for example, arranging panels first on a frame base, and then attaching them to the wall. But basically, this is the traditional installation of guide rails to the bearing surface, and only then directly to the plastic.
The second, less common option is the use of mounting adhesive as a means of mounting PVC panels. This is a somewhat unconventional approach, since it requires an excellently prepared wall surface, the selection of the appropriate adhesive composition, and careful preparation of the glued surface of the plastic itself. However, this saves space, since there are no slats and the risk of insect colonization of the cavities is minimized. However, this is a very time-consuming and costly installation method both in terms of time and cost.
Attention! It is possible to fix plastic panels with glue only on pre-aligned walls.

Lathing fastening
Sequence of work on self installation plastic lining, taking into account the conditions of each particular room, can be ordered in the following algorithm of actions:
- preparatory stage - cleaning of unnecessary things and furniture, cleaning the surface of the walls from wallpaper and their primer;
- marking the walls for the crate, taking into account the passage of communications and the features of the interior solution for laying panels;
- installation of the crate;
- installation of the starting ceiling profile, plinth, first corner profile;
- installation of planks of panels;
- installation of external elements of engineering communications - switches, sockets, air ducts, contours of heating pipes, water pipes, gas pipes;

The most crucial point, in addition to installing the panel strips, is the fastening of the crate, which acts as a frame for plastic. Lathing battens can be wooden and plastic. Traditionally, wooden slats are used, as they allow the structure to be held and give rigidity to the panels. The tree allows you to eliminate the unevenness of the wall and thereby ensure a flat plastic surface. Of the minuses of wooden planks as a frame is that such planks are prone to decay, and the space between the wall and the plastic increases even up to 2 cm.
Plastic guides make it possible to minimize the gap between the wall and the panel, they do not rot, but require a perfectly flat wall surface and the use of special brackets-panel holders - clamps as fasteners.
When choosing a method of how to independently attach plastic panels to the wall, you need to take into account one more feature of the plastic - it reacts to temperature, and expands when it rises, therefore, for reliable fixation, you need to take into account the step of the crate - 30-50 cm. This step is enough to keep panels.
Lathing laths are arranged perpendicular to the direction of the panel strips, the lower lath is mounted at a height of 5-10 cm from the floor, the upper one at the same distance from the ceiling, if the panels are installed in the entire height of the wall.

For the installation of rails you will need:
- puncher with a set of drills;
- screwdriver with a set of bits;
- saw on wood;
- jigsaw;
- mounting saw;
- drill with a set of drills;
- screwdrivers;
- a hammer;
The rails are fastened with quick-fix nails in through holes, it is preferable to use quick mounting systems with dowels 80 mm long for wooden battens and 60 mm for plastic rails. Nails are installed at least every 80 cm.
For a plastic guide, the attachment points correspond to the technological holes.
Installation of plastic panels
Installation begins with the installation of the lower guide profile (plinth) and the upper ceiling starting profile from shaped elements. It is preferable that the profile be selected along the length of the entire room. The first bar, adjusted in height (it needs to be made slightly smaller by 5-7 mm), is attached to the corner profile. Installation is carried out vertically in level (or at an angle, if the design solution requires an angle of inclination). The first strip is fixed with staples, small nails or kleimers.
The second and subsequent strips are attached after the lock connection is tightly fitted. It is allowed to use a wooden block and a mallet for a tighter fixation - the block is attached to the end of the plastic panel and the panel is put in place with light blows of the mallet.

To work with plastic you will need:
- tape measure, ruler, corner, marker, and possibly a protractor;
- level or plumb;
- glue gun and mounting glue (for gluing the ceiling plinth);
- a hammer;
- a mounting saw with a disc for a fine cut (a disc with small or very small teeth);
- miter box, at least with angles of 45 and 90 degrees.
A feature of this stage is the need to correctly fit the panel to size, and it is recommended to cut it with an electric jigsaw or a mounting saw. The cut should be straight, at an angle of 90 degrees. It is preferable to use a saw with small teeth, resulting in a neater cut. Before mounting in the guides, it is necessary to carefully clean the cuts from sawdust and sintered plastic, and even out the bumps.
In rooms where air temperature fluctuations are small, and plastic will not be subject to frequent expansion and contraction, it is recommended to fix plastic panels to the crate using a construction stapler.
Gradually typing the entire surface of the wall with panels, the edge panel is cut in accordance with the dimensions, while taking into account the size of the corner profile. A dressed corner profile with an extreme strip of plastic is fixed with clamps on an adjacent wall. Thus, all panels in the room are installed.
The edge panel, cut to size, is mounted into the lock groove, first at the bottom, into the wall panel, and then gradually, using a plaster spatula 90-100 mm wide, carefully bending the edges of the plinth and corner, insert further, rising up.
The bent edges of the corner panel and ceiling profile will eventually fall into place, without visible signs of deformation.
In fact, fixing plastic panels to the wall yourself is much easier than it seems. Follow the tips above and you'll be fine. Good luck!
Wall decoration with plastic panels is widespread. After lowering prices for seamless panels, which allow you to create a solid-looking plane, you can talk about the "plastic wave" in interior decoration.
However, there is foam on the wave: at first glance, there is an abundance of information about finishing plastic, but it is often distorted, and some significant points are obscured. Therefore, solving the question: “Maybe sheathe the walls with plastic panels?” It doesn't hurt to deal with them without prejudice.
plastic as is
The truth about plastic
Plastic panels are harmless
It's right. Chemists-technologists have long since learned to produce high-quality plastics without cadmium, asbestos and other toxic and harmful impurities. Safe technologies for the production of plastics have also turned out to be simpler and cheaper than the previous ones, so only fanatics of the “conspiracy theory” can be afraid of fakes.
Plastic panels are beautiful
It is truth too. Modern range of prefabricated decorative coatings plastic is wide and rich, just look at the pictures.

Plastic trim is now "homemade"
And that's right. Seamless (more precisely, apparently seamless) plastic panels allow you to get an interior that is completely non-office look, see fig.

Plastic is easy to make "personal" and "open"
True again. Photographic quality images can be applied to the plastic coating by thermal printing, painted, glued with self-adhesive, see the first selection of illustrations. This allows, for example, to make a do-it-yourself living room individual, and create an effect in the bathroom or bedroom. panoramic window(images can be 3D), without starting a complex, troublesome and expensive redevelopment and without giving the opportunity to spy on yourself.
Plastic is convenient for inconveniences
Again true. For any designer headache – different kind housing inconveniences: niches, corners, etc. There is little light and space in them. It often happens that, having suffered enough with the layout, the author is discouraged by the question of the builders: “Listen, man, how can we do this? This is not for you to sharpen iron on a machine! Plastic panels have the precision of a machine-turned hardware, and by working with inconveniences, the designer can apply any solutions suitable to the case, obtaining a completely acceptable end result, see fig.

Plastic makes it easy to change decor
Truth. If the panel is pierced with a sewing needle at an angle from top to bottom, and then an unbent paper clip is inserted into the puncture, then such a hook will withstand from 1 to 3 kg, depending on the quality of the paper clip. 2 punctures are allowed on a plastic board, i.e. heavy oil painting on wood baguette frame can be changed several times. In the same way - drapery, brackets for curtains, lambrequins, etc. And if you walk along the released puncture from the bottom up with a coffee or teaspoon, pressing it with your finger, then the hole will be completely smoothed out.
Plastic is consistent with the technique
Another truth. Ventilation grilles, also plastic or metal, sockets, etc. even on the most painted plastic they look quite natural.
Plastic racks and durable
And it is true. In the bathroom or on a "cold" balcony, PVC with minimal care lasts 10-12 years or more. You just need to remember to clean it from time to time: dust eats into the plastic, as in everything in general, and the tone with the pattern “gets dirty”.
Myths about plastic
Plastic will go on any wall
Indeed, from the walls under the plastic, it seems to be enough to tear off the tatters of wallpaper and knock down the swollen plaster. But the crate still needs to be leveled! Otherwise, they will go to play an ugly glare, the joints of the “seamless” panels will not converge, the curvature of the baseboards will be striking, and in the end what the finishers call “lining” will come out. The device of the crate on an uneven wall may turn out to be cleaner, but no less laborious than its re-plastering. But, unlike plaster, the crate on an unprepared wall often “floats” and again it turns out to be a “lining”.
Plastic does not require skill
Again not true. The end results shown in the figures require fine workmanship and special expensive tools. Attempts to get by with a hacksaw for metal, a square and a drill end with a "lining".
Plastic is hygienic
Perfect lie. First of all, plastic walls do not breathe - do not have the proper ratio of moisture resistance to vapor permeability. In the bedroom, breathable walls are a must: without them, you can’t expect healthy sleep, relaxation, and what happens in the bedroom besides sleep and rest. Therefore, the bedroom can be finished with plastic only partially, in the form of decorative panels.
Secondly, plastic glares and polarizes reflected light. This immediately excludes plastic trim for children: medicine with psychology is strictly prohibited.
 Finally, the plastic is really easy to clean, and the seams of the "seamless" panels are so narrow that dirt does not accumulate there. But each plastic board is a spatial thin-walled hollow structure with stiffening ribs inside. The voids in the panels are an attractive nesting place for small house evil spirits. In the southern regions, rich in entomofauna (insects), when dismantling the old plastic sheathing, it used to squirt out of it so that the red-haired kid-installer suddenly found himself sitting on the closet, with bulging eyes and a gaping mouth, and could not explain how he jumped in there from a place without a run or what brought him there.
Some craftsmen sometimes try to seal the ends of the boards, partially filling the grooves of the installation profiles with silicone before installation. Bitter disappointment awaits them: deprived of the opportunity to freely thermally deform (see below), the boards warp, turning into a “lining”.
Plastic is not flammable
The biggest lie. Yes, it is very difficult to set fire to PVC with a filler, and it is simply impossible with a match or a lighter. But, once in the fire, it perfectly supports the flame, while releasing a huge amount of very toxic gases.
Therefore, if the apartment caught fire - God forbid anyone! - and with a slight or moderate smoke, an unbearable pain in the eyes is felt, a "chemical" smell eats the nostrils and tears the throat, immediately stop extinguishing and run out into the fresh air, leaving your good to the mercy of the flame. And do not forget to immediately call an ambulance - the poisoning process can begin to develop in full force after a few hours, when medicine is already powerless.
Video: sellers about plastic
What are they silent about?
Polyvinyl chloride (PVC), from which plastic panels are made, has a fairly high coefficient of thermal expansion (CTE). Therefore, the walls should be finished with PVC panels with a thermal gap of half the width of the narrow shelf of the installation profile, see below, and the fastening of the boards to the crate should allow reversible elastic deformations in the plane of the board.
Example: from floor to ceiling - 2540 mm. The width of the narrow profile shelf is 12 mm; its wall thickness is 1.5 mm. There are two profiles, on the floor and under the ceiling, so you need to take into account the double wall thickness, but the width of the shelf - only ONCE. We have: 2540 - 2x1.5 - 6 = 2531 mm. This is the length you need to cut the boards.

When installing boards on a soft crate or on a wooden crate, this condition is met, but when fastening with self-tapping screws to a metal crate, it is highly desirable to use thermal washers, see fig. This complicates and increases the cost of work, but without thermal washers in a hot, humid summer in a room without air conditioning, one or several boards at once can suddenly bounce off by themselves with a bang. Especially often such cases were observed in the abnormally hot summer of 2010.
For laminate and MDF, in such a case, special mounting brackets are provided - clamps that firmly hold the board on any crate, while at the same time allowing it to “fidget” a little along. But MDF with laminate does not expand much from heat anyway, and the design of plastic panels, unfortunately, does not allow them to be fixed with adhesives.
Design
The design of the elements of finishing with PVC panels is shown in the figure.

Explanations:

Tool
Installation of PVC panels on walls requires a set of special tools:

Note: when choosing a stapler for plastic, you need to ensure that the slot through which the staples are squeezed out is located as close as possible to its toe. This will greatly facilitate the installation of the last board.
Plastic installation
In general, wall cladding with PVC panels is carried out in the following order:
- Arrange a crate;
- Install the start, finish and guide profiles;
- The first board is brought into the lower installation profile, and then, having bent in an arc, into the upper one, the small mounting shelf should be facing the starting profile;
- With a mallet with the rule, they bring the board into the starting profile to the place;
- Attach the board to the crate through a large mounting shelf in one way or another;
- The rest of the boards are also mounted, including the penultimate one;
- The last board is cut from the side of the LARGE fastening shelf to the size in width, it is necessary to give a margin for thermal expansion, see the example above;
- Having unbent the shelf of the finishing profile (if it is non-separable) with a spatula, they lead the lower end of the last board into the groove of the installation profile and into the finish one, this work requires a skilled assistant, and preferably two;
- Alternately bending back sections of the narrow shelf of the finishing profile with spatulas, a board is inserted into it to the upper corner;
- In the upper corner, the shelves of the finishing and mounting profiles are simultaneously bent with two spatulas, and the board is finally brought up;
- Also alternately bending the shelf of the finishing profile, they fix the board together with the profile to the crate;
- install plinths.
Notes:
- When using a special finishing profile, all the difficulties of operations 8-11 come down to applying and snapping its shelf.
- A cheap profile from all these manipulations, it happens, remains bent or cracks along the edge of the corner. You can easily fix the defect - warm up the damaged place with a household hair dryer and immediately iron it with pressure with a COLD iron with a Teflon sole.
- For the sake of beauty, the profiles are cut exactly to size along the wall, and then their ends in the miter box are cut at 45 degrees. An option is to wipe the cracks with PVC putty or a homemade compound. For him, plastic sawdust is kneaded on dichloroethane until the dough is thick. Prepare in small portions as needed, the mixture is not stored.
- If the crate was carelessly aligned, the last board will immediately show this - its edge will bend outward. It turned out to be a "fake".
crate

Lathing based on a metal profile
They are made from wooden slats or metal C-profiles, see fig. Insulating mats can be laid in the cells. They are fixed to the wall with self-tapping screws in dowels, through or through with clamps or mustaches. The latter is more troublesome, but cheaper: all the work can be done on self-tapping screws - "fleas". Level with a plumb line and bubble level 2, also see fig; rubber or plywood scraps will go to the gaskets.

The battens are quite simple linear, without intersecting logs, with a step of 300-500 mm. But an important condition: the perimeters of both the wall and the openings in it must be completely framed, see the crate diagram. There should be no hanging ends of the log, the exception is the protrusion of the window sill, under it you will have to cut a notch in the panel adjacent to it.

Video: installation of plastic panels on a wooden crate
slopes
- a real headache for plastic finishers. "Dull" corners are not produced, and if they were, then where to get slopes with exactly the right angles for them?
Do-it-yourselfers and pros offer many ways to cover the slope with plastic, but they all come down to making the slope angle straight. However, SNiP with sanitary rules clearly and unambiguously say: the slope must have a so-called. dawn slope, expand inward.
Meanwhile, a very simple method of decorating slopes with plastic has long been practiced, see fig:

- We sew both sides of the slope to the corner; allow an indent of half the width of the corner shelf.
- We take an ordinary right angle and cut it along the length of the side of the slope with a margin of 40-60 mm in both directions.
- We cut one of the shelves of the corner equally at both ends exactly along the length of the edge of the slope angle, pos. BUT.
- From the slope angle, draw a line with a pencil at 45 degrees, pos. B.
- We apply a corner to the angle of the slope, press it strongly and, following the trace of the line, mark the cut line on it, pos B.
- We cut off the excess with a profile cutter or garden pruner.
- We cut the edge of the corner from the INSIDE with a mounting knife or a shoe-blade knife by about 1/3 of the thickness of the material.
- We apply glue or a home-made dichloroethane compound from the inside to the corner.
- Apply, press until it opens as it should, wait for setting - ready.
Soft crate

The installation of plastic panels on a soft crate seems flimsy, but in fact it is such sheathing, which came out from under the hands of the greenest, but neat beginners, that stand for 10-15 years without signs of damage. Why? Soft crate is made of double-sided foam tape, see fig. In terms of thermal deformation properties, it exactly matches PVC, and its adhesive layer is very viscous and elastic: it stretches for the board, and then returns it to its place.
In order for the sheathing on a soft crate to come out really reliable, three conditions must be met:
- Clean the wall from wallpaper, paint and level with a rough, durable putty (Hercules, Prospector, etc.) to within half the thickness of the adhesive tape, 2-4 mm. Sharp small protrusions and depressions are acceptable, so that the putty, which is already not difficult, is still simplified.
- Stock up on a high-quality finishing profile; without it, sheathing on a soft crate cannot be done. However, see penultimate section.
- As much as possible, to an instant, reduce the contact time of the adhesive layer of adhesive tape with air. This is what needs to be discussed in more detail.
Lathing installation
The crate scheme is the same as for the others. It is better to take the width of the adhesive tape from 25 mm, and best of all - from 60 mm. Technology:

Installing profiles
The principle is the same - the shortest possible contact of "bare" tape with air:
- The long tails of the protective tape are pulled back and the strips are stuck to the "back" with ordinary, narrow and cheap, stationery tape;
- They impose the upper installation profile (horizontal), carefully pull out the protective tape from under it by the tail, immediately sticking the profile with pressure, the assistant supports it;
- The bottom mounting profile is also glued;
- The starting profile (vertical) is applied, the assistant holds it, and the master pulls out the protective tape from under the profile, immediately pressing the profile to the tape, the operation goes from the bottom up so that the profile does not even hang on the tape for a short time;
- The finishing profile is also set.
Panel mounting
Panels are mounted similarly to profiles, but with some subtleties.
Plastic panels are today considered a universal material for decorating wall surfaces. Such a finish can be installed in almost any room - with high humidity, low temperature, high traffic, etc., the choice of places for installation is huge. At the same time, every time there is an opportunity to create an absolutely unique interior, thanks to the widest range of this product. The article will talk about do-it-yourself plastic wall decoration.
Plastic wall panels are extruded products made from polyvinyl chloride (PVC). The process consists in the fact that the molten dense mass of a substance is squeezed out with the help of special equipment through profiled holes that correspond in shape to the panel being produced. The blanks are then cooled certain temperature and cut to size.

- There are two standard panel thicknesses - 5 mm and 8-10 mm. The second size option, although it differs by several millimeters from each other, is still considered the same, since the same components are made for it, in particular moldings.
- The width of sheet plastic for wall decoration can vary from 20 to 37 cm. standard height products - 260, 270 and 300 cm. There is also such a variety as plastic lining, the size of which is 10x300 cm, a sheet version, up to 120 cm wide and up to 245 cm high, and panels in the form of square or rectangular tiles, with dimensions of 30x30 cm, 30x60 cm or 90x90 cm.
Choice of plastic panels
Before proceeding to the direct installation of products, they must be purchased, firstly, in the right quantity, and secondly, in decent quality. In order to make the right choice, you should take into account the features of different types of plastic panels.
- So, for example, when planning wall decoration with plastic in the bathroom, in the kitchen or in the corridor, it is worth giving preference to moisture-resistant products, with a high degree of strength and without protruding elements or ornaments.
- For balconies, panels that are immune to sudden changes in temperature, as well as resistant to mechanical stress, are suitable, since due to the small space, frequent collisions with the plastic surface cannot be avoided.

Advantages:
- long service life;
- good moisture resistance, and due to the reliable connection of the panels to each other, water also does not get between the seams;
- the material has increased soundproofing qualities;
- resistance to mechanical stress and abrasion;
- there are heat-insulating properties due to the internal cellular structure, in addition, it is possible to install an additional layer of insulation under the panels;
- manifold design solutions, including imitation various surfaces(wood, ceramics, leather);
- easy installation that does not require special equipment and special knowledge, in addition, when working with products, dust and dirt are practically not generated;
- easy maintenance, it is enough to wipe the decorated walls with a damp cloth or cleaning cloth once a month, and if heavily soiled, wash with warm soapy water, do not use abrasive detergents or solvents;
- it is possible to install on any surface, regardless of the degree of its evenness and smoothness (due to the installation of a frame crate), it also practically does not matter what kind of lining was used before;
- can be used as a finish in unheated rooms (for example, on loggias or balconies), as well as in rooms with elevated temperatures ( interior decoration baths, saunas);
- increased fire resistance (withstand temperatures up to 400 degrees);
- during operation do not emit harmful substances;
- low price of plastic for wall decoration.
Of course, there are also disadvantages, and the most important one can be called a ban on use in places intended for evacuation of people in cases of fire, since when burned, plastic emits caustic substances and strong smoke. These places mainly include stairwells and landings.
Types of plastic panels for wall cladding
The top layer of PVC panels can be made in one of three main ways.
- lamination. The method involves gluing a special film onto the surface of plastic panels using a two-component adhesive, which, due to its special texture, can imitate many natural materials - wood, marble, leather. The film is resistant to moisture, light and abrasion, so that even after long-term use, the products look like new.

- Offset printing. A two-stage printer is used to apply the image. The first stage involves printing a pattern with paints, and in the second stage, the panels are covered with an antistatic varnish. Most often, using this method, drawings are applied that imitate a marble surface. The main advantage of the offset method is that the resulting product is moisture resistant, resistant to physical impact and chemical agents.
- Thermal transfer / thermal printing. Transfer to the surface of drawings and patterns from a thermal film, which is pressed against the panel, and then rolled with a hot silicone roller. The temperature at which the process takes place is in the range of 150-180 degrees, under the influence of heat, the varnish and the colorful pigment on the film are transferred to the PVC blank. The film becomes transparent and is wound on reels for subsequent application. This method does not provide an additional protective layer of varnish. At the same time, the resulting surface is resistant to external influences, UV rays, has a rich color and original design.

Accessories for plastic panels
- starting bar;
- finishing bar;
- profile for the inner corner;
- profile for the outer corner;
- connecting strip;
- plinth ceiling and floor;
- F-profile;
- corner soft universal (for an internal and external corner).

In order to install moldings (accessories), galvanized nails or self-tapping screws are used. At least 5 mm recede from the edge of the element. Buy accessories should be the color of the panels. Such elements are easily cut with a conventional construction cutter. External accessories are simply glued to the lined surface, while you should not press the products too hard against each other, as you can damage the plastic and form a dent that is almost impossible to remove.
What to look for when buying plastic panels
- Product appearance. It is best to purchase products from the same batch and, if possible, check products from different boxes for compliance. color scheme. The paint must be applied in an even, continuous layer and the surface smooth and without damage.
- The condition of the stiffeners and their number. The more partitions inside the product, the stronger it is, while the stiffeners should not be deformed or damaged, in a quality product they are even and often located. If it is difficult to visually determine the number of internal partitions, then you can rely on the weight of one panel - it should be large enough, but not too heavy.

- lock connection. The tongue and groove must fit exactly together and not form gaps or unevenness when connected, and also connect easily without applying superfluous force.
- Price range. You should not purchase products at the lowest price, you definitely won’t be able to achieve high quality from it, which means that in the near future it will need to be replaced and, as a result, an overpayment of money. You should not give preference to a product that is too expensive, most likely an additional payment for the brand is included in the price. Most panels produced by lesser known European manufacturers have a decent price / quality ratio.
- Raw material. If possible, find out the content of chalk in the manufactured product, so if it is too much, then when the product is bent, a noticeable mark will remain, and sometimes dents.
Material Quantity Calculation
In order for the repair to be minimally problematic, the required material should be purchased based on the calculations made.
Calculation of the profile for the crate
- There are several ways to make calculations, the simplest one is considered on the example of a wall with a height of 245 cm and a length of 400 cm. The optimal distance between the profiles to be installed is 30-50 cm. and vice versa.
- Having decided on the position of the cladding, you can calculate the required number of profiles. To find out how many racks you need with a vertical arrangement of the crate, you need to divide the length of the wall by the distance between the racks and add one extreme profile, that is, 400/50 + 1 = 9. This means that you need to purchase 9 racks 2.45 m long.
- Do not forget that the crate is made along the perimeter, respectively, we add at least two guides, the length of which corresponds to the length of the surface to be decorated. In this way, the total length of the required profiles can be known. To this figure, be sure to add 5-10% to take into account any undercuts or errors.
- With a horizontal arrangement of the crate, calculations are made based on the height of the ceilings. In addition, you need to take into account door and window openings, if any, their area is subtracted from the resulting figure.
Calculation of fasteners
- Installing the crate on concrete or brick walls, you will need to calculate the number of dowel-nails. The calculation is based on the total length of the wall. For every 50 cm, 1 dowel-nail is consumed. You should also add a few percent in reserve.
- If installation is carried out using clamps, then it is recommended to use 20 pieces of fasteners per 1 m2, as a rule, manufacturers supply them in packs of 100 or 200 pieces.
Calculation of PVC panels
- First, the length of the wall is determined (in the example 400 cm), and then the resulting figure is divided by the width of the bar (for example, 20 cm), that is, 400/20 = 20 pieces, the height of which corresponds to the height of the ceiling. This amount of material will be needed for wall cladding, mounting the panels vertically.
- When installing panels in the form of separate tiles, it is easier to calculate according to square meters, not forgetting to add 5-10% to the amount of material each time. The calculation around windows and doorways is best done separately, subtracting this value from the total figure.
Calculation of components and accessories
- As a rule, the length of most components is 3 m. If corner profiles are used during installation, then it is necessary to count the angles encountered on the surface to be decorated, and it is this number of components that should be purchased.
- The calculation of the ceiling and floor plinth is based on the perimeter of the room, the size of which is divided by the length of the plinth (3 m) and rounded up.
- Also, do not forget about the connecting inner and outer corners for skirting boards, which are calculated based on the number of corners.
Methods for mounting plastic panels
Almost no construction process is complete without the use of certain tools, the installation of plastic panels will not be an exception.
Materials and tools:
- PVC panels;
- solid crate or frame (depending on the option chosen, you may need: wooden blocks, slats, metal profiles, chipboard or fiberboard);
- accessories for plastic panels;
- insulating material (if it is planned to arrange an additional layer of heat and sound insulation);
- glue, screws, nails or staples (depending on the chosen method of fastening);
- sealant;
- yardstick, building level; ruler, pencil;
- screwdriver, hammer, hacksaw with fine teeth;
- screwdriver, puncher, construction stapler.
There are several various ways installation of plastic panels. Each of them has its own advantages and features. In some cases, you can choose the simplest and least time-consuming, in other cases there is no such choice and you can mount products using only one specific method.
Mounting on a crate
Preparatory stage
- This stage involves taking measurements and making marks for the subsequent fastening of the crate. You also need to make sure that all the required materials are available in the proper quantity. You can prepare profiles for the frame, but each plank should be numbered, since the height or length of the walls may not always be the same in each specific place. If the plastic panels were just purchased, then it is necessary to let them lie down for 12 hours in an unpacked form.
- When installing panels on profiles or wooden planks, it is not supposed to strip the wall, but if there is serious damage, mold or fungus on the surface, then it must be treated properly.

- If installation is planned wooden frame in damp rooms, then all parts should be treated with special compounds that prevent the development of bacteria and wood decay.
Lathing installation
The crate is necessary when the wall has large differences in height and unevenness, and an additional layer of insulation can be laid between the wall and the panels. It can be performed in three main versions: from wooden slats, from plastic profiles and from metal guides. In general, the difference between them is only in the way the cladding is fixed on them.
Tip: when fixing panels in a vertical plane, the crate is performed in a horizontal direction. The smaller the distance between the guides, the stronger the whole structure. A step of 30-50 cm is considered optimal.
Wooden crate

- For the installation of a wooden frame, bars with a section of 4x4 cm or 4x2.5 cm are used. Reiki to the base can be attached to self-tapping screws or dowels.
- When installing panels vertically, the installation of the crate begins with the installation of the right and left rails. Then horizontal crossbars are installed between them, observing the same distance between them.
- For greater structural rigidity, additional vertical racks can be mounted. Each installed bar is checked with a level so that the location of the entire crate is in the same plane.
Metal crate

- This type of crate is somewhat more expensive than wood, but it is considered the most reliable and durable. Profiles are made of aluminium.
- The U-shaped starting profile under the ceiling is installed first, then the same one is installed near the floor. Perforated guides are fixed in them, on which the panels will be attached.
- The guides are attached to the base with dowels or self-tapping screws with a pitch of no more than 90 cm. It is allowed to increase the pitch of the frame crate up to 80 cm.
- To save money, it is recommended to combine aluminum profiles and wooden ones (metal perimeter and wooden racks).
plastic crate

- This is modern look frame, a little more expensive than wood and more demanding on surface evenness. Due to the fact that plastic does not rot, mold or fungus does not form on it, and due to the special method of fastening, the installation of panels occurs in record time, this type of crate is increasingly gaining popularity among consumers.
- The plastic guides have special fasteners that snap the panel and securely hold it, this also allows for quick dismantling of the cladding and reuse of the panels, as they are not damaged by staples or screws.
- When installing a plastic profile, special attention should be paid to the location of the racks in a single plane, since even a small deviation leads to the fact that the clips simply do not snap into place. Most often, this design is used for wall decoration with plastic in the kitchen, bathroom or sauna.
Panel installation
- Installation of panels starts from the corner where a special corner element (or finishing profile) is installed into which the panel is tightly inserted and screwed with self-tapping screws or fixed with a construction stapler to staples to a wooden crate and with the help of clamps to a metal frame. Then, precisely connecting the groove and the ridge, the second panel is docked and so on until the end of the wall or corner.

- When completing the installation or moving through the corner to the next wall, special accessories should be installed so that the tiled surface looks as harmonious as possible.
- The last panel is not attached to the batten, it snaps onto the finishing element, which holds it securely. If there are switches or sockets on the wall, then the plastic is simply cut through and a box is installed on top of it.
- The installation is completed with the installation of accessories, such as ceiling and floor skirting boards and plugs for them, as well as corner elements that are glued to the surface of the plastic panels. If necessary, the joints between the panels can be treated with sealant.
Wall decoration with plastic video
Mounting directly on the wall with adhesive
In the presence of smooth walls you can install PVC panels directly on the base. It is allowed to fix the lining on liquid nails. It should be remembered that the adhesive for plastic should not contain solvents.
Preparatory stage
- This stage involves cleaning the wall surface from the existing cladding (wallpaper, painting). After that, the walls are puttied with antibacterial putty or additionally covered with a layer of primer, which contains protective components against mold and fungi.
Panel mounting
- After the wall has been properly prepared and dried, you can begin to decorate the walls with plastic. The adhesive composition is diluted clearly according to the instructions. The solution is applied to the wall with a roller, brush or notched trowel (depending on the structure of the adhesive). As an adhesive composition, tile glue or liquid nails are used.
- It is undesirable to apply the product at once over a large area, it is enough to cover with glue an area equal to 1-2 panels.

- First of all, the corner elements are installed, then the first panel is inserted into them and pressed tightly against the wall, for a time sufficient for the glue to set. Next, all subsequent slats are installed. The installation ends with a finishing element.
- If plastic panels are fixed on a drywall base, then they can be mounted on small galvanized nails or self-tapping screws.
- At the final stage, the decorative elements and, if necessary, the seams are smeared with a special sealant.
In addition to the basic methods of fastening, there are several less popular methods. So, professionals use a method in which the panels are not fixed directly to the crate. Finishing or corner elements are mounted on the screws to the frame and all panels are tightly inserted between them. Then the ceiling is mounted and floor plinth, which also press the panels to the crate. This installation takes a maximum of 2 hours in a room of 45-50 m2. Of course, this method is more suitable for office buildings than for the walls in the bathroom or in the kitchen.
Summing up, we can say that self-assembly plastic panels, the matter is quite simple, the main effort has to be applied when installing the crate. Observing all the basic requirements and rules, cladding takes place in record time and with minimal cost.
The modern market offers a huge number of varieties, sizes and design options for PVC panels, so they can be matched to any interior style. PVC panels are inexpensive, quickly mounted, operated for a long time, and most importantly, they will help to equip a unique, unlike anything room design. How to fix plastic panels to the wall: on glue, on screws, on the crate? Which panels to choose and which installation method to prefer, we will analyze all these issues in detail in our article.
Why PVC bathroom panels have become the number one competitor to tiles? It's all about ease of installation. Put tile even on the most even basis, it is beyond the power of a person who has never done this. You will need the services of a specialist to level and strengthen the base, mark the wall and lay out the tiles row by row, observing the levels and width of the tile joint. In addition, the cutting of tiles itself, if necessary, requires special tools and certain skills.

With PVC panels, everything is much simpler. They have a lot of advantages:
- Light in weight: their transportation to the house and installation do not cause any difficulties.
- Exist several mounting methods from simple wall stickers to purlin systems, each of which can be handled even by a layman.
- Panels biologically sustainable and during operation, the appearance of fungus on them is excluded.
In addition, it is possible to note such advantages of plastic products as moisture resistance, hygiene, duration of operation and inexpensive cost. Of course, they also have their own characteristics. For example, despite the presence of stiffeners in the design of the product and the thickness of the plastic, which is quite large for some manufacturers, the panels are quite brittle material. and with an accidental strong point impact, they can break through. Therefore, when buying, you need to choose the most durable products of European manufacturers.
However, if the lining is of good quality, then when bathing, for example, you can rely on it as much as you like: it has sufficient flexibility and elasticity to support the weight of a person.

When choosing products, you should look at such specifications, as:
- plastic thickness (the more, the more reliable);
- the presence and number of stiffeners;
- when viewed under artificial lighting on the front plane, transverse ribs should not be visible;
- the surface must be intact, undamaged, not scratched, the film on the front plane must not be damaged;
- plastic from the ends should not be with burrs and microcracks.
There are several types of PVC panels, differing in size and other parameters.
Table 1. Types of PVC panels.
| Name | Peculiarities | Dimensions |
|---|---|---|
| Ceiling | Thinner thicknesses up to 5 mm | |
| Wall | Thicker and tougher up to 10mm thick | width 15-50 mm, length 90-300 mm |
| Rack | Narrow planks with shaped edges, similar to lining, have a thorn-groove locking connection | width 13-50 mm, length 90-300 mm |
| leafy | Large rectangular sheets with a relief or pattern on the outside | width 50-122 mm, length 30-98 mm |
| Tiled | Tile | width 30-98 mm, length 30-98 mm |
| Sandwich | Double-layer, with a heat-insulating layer, the thickness can reach 4 cm | width 90-150 mm, length 300 mm |
In width, standard wall panels are most often found 25cm and 37cm, length - 2700cm, 3000cm. Different manufacturers may produce products of different sizes. The difference in price depends on various factors: the quality and thickness of the plastic, the type of decor printing, its complexity, etc.
Polyvinyl chloride panels are divided into several types according to their coating. They are:
- monochrome;
- colored, with a dye added to the mass;
- mirror;
- with an image pasted on a thermal film;
- with a pattern applied by offset;
- with one image spaced into several panels, forming a panel.
According to the method of connection, the products can be seamless and with a recess. Of course, when joining seamless panels, the seam still remains visible, but hardly noticeable. If the products are chamfered, then the seams are more highlighted and create a certain geometry of the room.
In addition, a wide range of accessories for fastening elements is offered: start and F-shaped profiles, internal and external corners, joint profiles, skirting boards. The use of fittings allows you to give an aesthetic appearance to the joints, and of course it is used for a more reliable and simple fastening.

Find out what types, and also check out step by step instructions for finishing, in a special article on our portal.
Prices for popular finishing wall panels
Wall panels
Mounting
To carry out the calculation, you first need to determine the direction of installation. Products can be attached horizontally and vertically. Vertical placement is preferred for small spaces such as hallways, kitchens, and bathrooms. With this method of finishing, the ceiling visually rises due to vertical lines. Horizontal installation is more often used for finishing spacious rooms, for example, at camp sites, in hostels. It resembles a traditional horizontal finish, especially if the panels are matched, for example, under a tree.

Panels can be fixed in three ways:
- on any adhesive composition;
- on self-tapping screws;
- on the crate.
The first method is the easiest, simplest and fastest, but only applies if the base is sufficiently level. The second is also not particularly difficult, but requires skill in handling a screwdriver. In this case, the panels can be dismantled over time and moved to another location. The method of fastening to the crate is the most durable, time-consuming and capital. Thus, the cladding can be firmly mounted on uneven surfaces.

The selected mounting option does not affect the order of events when mounting the plates directly:
- fittings are installed: initial and finishing strip, internal and external corners;
- fittings are installed along the openings;
- the panel is inserted with a narrow shelf into the fastening element. Fastened from the side of a wide shelf with self-tapping screws. Elements must be mounted tightly;
- the final panel must be squeezed between the one in front of it and the finishing element of the row. The excess can be trimmed neatly along with a knife;
- joints with the ceiling are covered with ceiling, joints with the floor - with floor plinths.
How to glue panels
Bonding - most easy way finishing the room with panels, which is allowed either in the event that when the wall is perfectly flat or when the leased premises are being renovated according to the principle and so it will do, clean and okay. It will be quite difficult to dismantle such a finish in the future and it certainly will not be possible to use it for re-assembly.
The panels are glued to a flat or slightly uneven base. Previously, to improve adhesion, it is necessary to remove and clean out all the bumps and weak layers of the previous finish. Then plaster and putty uneven places. Then prime the surface to improve adhesion. The finished base for gluing the cladding must be even, dry, clean.
Apply the adhesive to the wall, spread it evenly with a notched trowel and gently press the panel against the wall. The duration and force of pressing usually depend on the adhesive and are indicated on the packaging or in the instructions for use. Also apply glue to the next panel, then it should be carefully docked with the previous one and pressed to the base. Thus, you can quickly get a beautiful decorative coating.
Video - Installation of PVC panels with glue
As for the adhesive for panels, modern manufacturers offer just a huge selection of adhesives. You can list the most popular:
- quality liquid nails;
- liquid nails and Titan Wild glue;
- Emfikol 34012A;
- Kleiberit 636.
Prices for liquid nails
Liquid Nails
The above adhesives are resistant to high humidity and temperature fluctuations. glued on them facing materials will last throughout the life of the product.
Advice! If there is a choice, it is better to choose the most quickly setting adhesives - for example, liquid nails. Then you don't have to wait for a while until the first panel grabs to start gluing the second one.
Installation of PVC panels on self-tapping screws
This mounting method also includes a sufficiently level base. Although the requirements for the surface condition are less than when working with glue. No need to remove greasy stains from the wall and treat it with a primer to increase adhesion. However, to improve the quality of work and increase the speed of installation, a screwdriver is required. However, today screwdrivers can be bought even for one and a half thousand rubles, so this installation method can be called quite budgetary.
As for self-tapping screws, you can opt for wood screws with a wide notch. Length 16 mm will ensure proper fixation to the wall. If finishing is planned bathroom, you should opt for galvanized, that won't rust during operation. Do not choose self-tapping screws with a wide hat, it can interfere with docking.
The process itself is extremely simple. From the inside, the screws are screwed into the bottom of the lock, where they will not interfere with the fixation of the next panel. The next strip is inserted into the lock, pressed and fastened with self-tapping screws with inside. All subsequent parts are attached in the same way.

Attention! Be sure to check where the wiring goes in the wall. To do this, you can use inexpensive devices such as indicator screwdrivers, signaling devices or metal detectors.
Prices for popular models of screwdrivers
Screwdrivers
How to fix panels to an uneven wall on a crate - step by step instructions
If the wall is very uneven, and living in the apartment is supposed to be long, you can’t do without crates. There are 3 types of crate systems: wooden, metal and plastic. Wooden - this is an option for the most extreme case. The tree is not suitable for the bathroom - it will swell from moisture, for the same reason you should not use it on the loggia. So the best way- galvanized profiles for plasterboard width 40mm.

The only drawback of the traditional crate fastening is that it eats 3-4 cm of usable area at each wall. But under it, you can lay communication cables, as well as make a soundproof layer in the apartment or a heat-insulating layer on the loggia.

A good variety of a convenient and easy-to-assemble crate system is plastic mounting strips and plates - kleimers. This is a special fastening system designed for PVC cladding. Fastening is carried out as quickly and simply as possible: the plate snaps into the groove on the profile with clamps. No other fastener is used. If necessary, such a finish is instantly disassembled: just pry it with a screwdriver. Installation of the entire cladding in a room of 15 squares with such a system will take no more than a day.
The advantages of plastic crates are obvious. Firstly, in case of damage to one panel, it can be pulled out and replaced for this no need to disassemble the whole structure. Secondly, if the house shrinks, or if it is a country house, and also during seasonal shifts cladding will retain its solidity. Thirdly, such a crate eats only 1 centimeter from every wall.

For bathrooms and kitchens, the best option is a ready-made plastic crate system sold in construction departments. It does not deform due to high humidity and temperature fluctuations, does not rot or crack. Galvanization is also a great solution to the problem. It is also permissible to use wood blocks, but before starting work, they must be treated several times with special impregnations from decay.
Let's take a step-by-step look at how to mount the crate:
Step 1. We clean the wall from crumbling old finishes. You don't need to level it.

Step 2 We process the surface of the wall with antifungal compounds.

Step 3 We mark the places for the slats of the crate structure. They should be perpendicular to the PVC panels. If they are mounted vertically, then the crate is mounted horizontally. The spacing of the bars should be 30-35 cm.

Step 4 We fasten the bars at the beginning and at the end of the wall, around openings, niches and other structural elements rooms. Then the rest. The whole system is attached to the dowels. AT concrete put 6*40mm, in brick 6*60mm in increments of about 60cm.

Step 5 We align the crate with a plumb line in one plane. To do this, at first the fasteners are not completely twisted, and if necessary, thin plywood is stuck under the planks to the required level. After alignment, the fasteners can be tightened. For attachment, you can use hangers for plasterboard. With them it is easier to level the surface of the crate.

Step 6 If the system is assembled from plastic elements, it is necessary to check their perpendicularity to the PVC panels, otherwise there is a risk that the locks will not snap into place. It will be more convenient to work with a plastic crate if wooden bars are installed around the perimeter of the entire wall being trimmed along the thickness of the guides.

Prices for building levels
Building levels
Now you can consider how the panels are attached to the crate:
- Starting and ceiling plinths are placed and fastened with appropriate fasteners to the system. The result is a frame. It is necessary to strictly check the verticality and horizontality of this frame, and then the plane of the cladding in terms of level, since even a millimeter deviation can cause a blockage in the future.
- Elements are cut to length with a hacksaw. A protruding spike is cut off from the first panel, then the cut side is inserted into the corner, and the edges are tucked into the profiles. The bar is driven all the way and fixed to each crossbar.
- Joining subsequent panels.
- The latter is cut to width and inserted into profiles.
Video - Installation of PVC panels on the crate
Note! Some craftsmen prefer to work without corner profiles. The panel that goes into the corner can be cut from the back and gently bent so as not to break. This usually succeeds the first time, since plastic for the manufacture of panels is used quite flexible and elastic. From the front side, such a fold will look nice and neat.
Features of fastening in different rooms
Pay attention to the article - where we sorted out interesting options for mounting panels in the restroom.
Can be distinguished the following features finishing devices in different rooms:
- In the bathroom and high humidity and temperature changes often occur, so it is better to take a crate system made of plastic or stainless steel. If the wall is without special bumps and pits, you can glue the cladding on liquid nails or even mounting foam. Mounting on self-tapping screws (also made of stainless steel) is acceptable.
- For decoration loggias or balconies it is better to take sandwich panels and lay them on the crate, under which you can place a layer of thermal insulation.
- For decoration living rooms take decorative panels with patterns, drawings or with a 3D effect. Installation should be carried out taking into account the condition of the walls. If there are a lot of wires in the room, it is better to use a crate for which they can be hidden. In the rooms, you can arrange a more economical wooden crate, since the humidity drops are small here.
- For decoration rooms country houses , used only in the season, as well as terraces and verandas, you should use any crate, except for wood, since during an unheated period, humidity may increase in them.
- In addition, the panels are used for finishing administrative premises, offices, trade departments and supermarkets.


Chocolate biscuit: the secrets of cooking in a slow cooker and oven
Chemical composition and nutritional value
Apple chips at home
Braised cabbage with white beans, recipe
How to reduce the ass, hips and stomach at home?