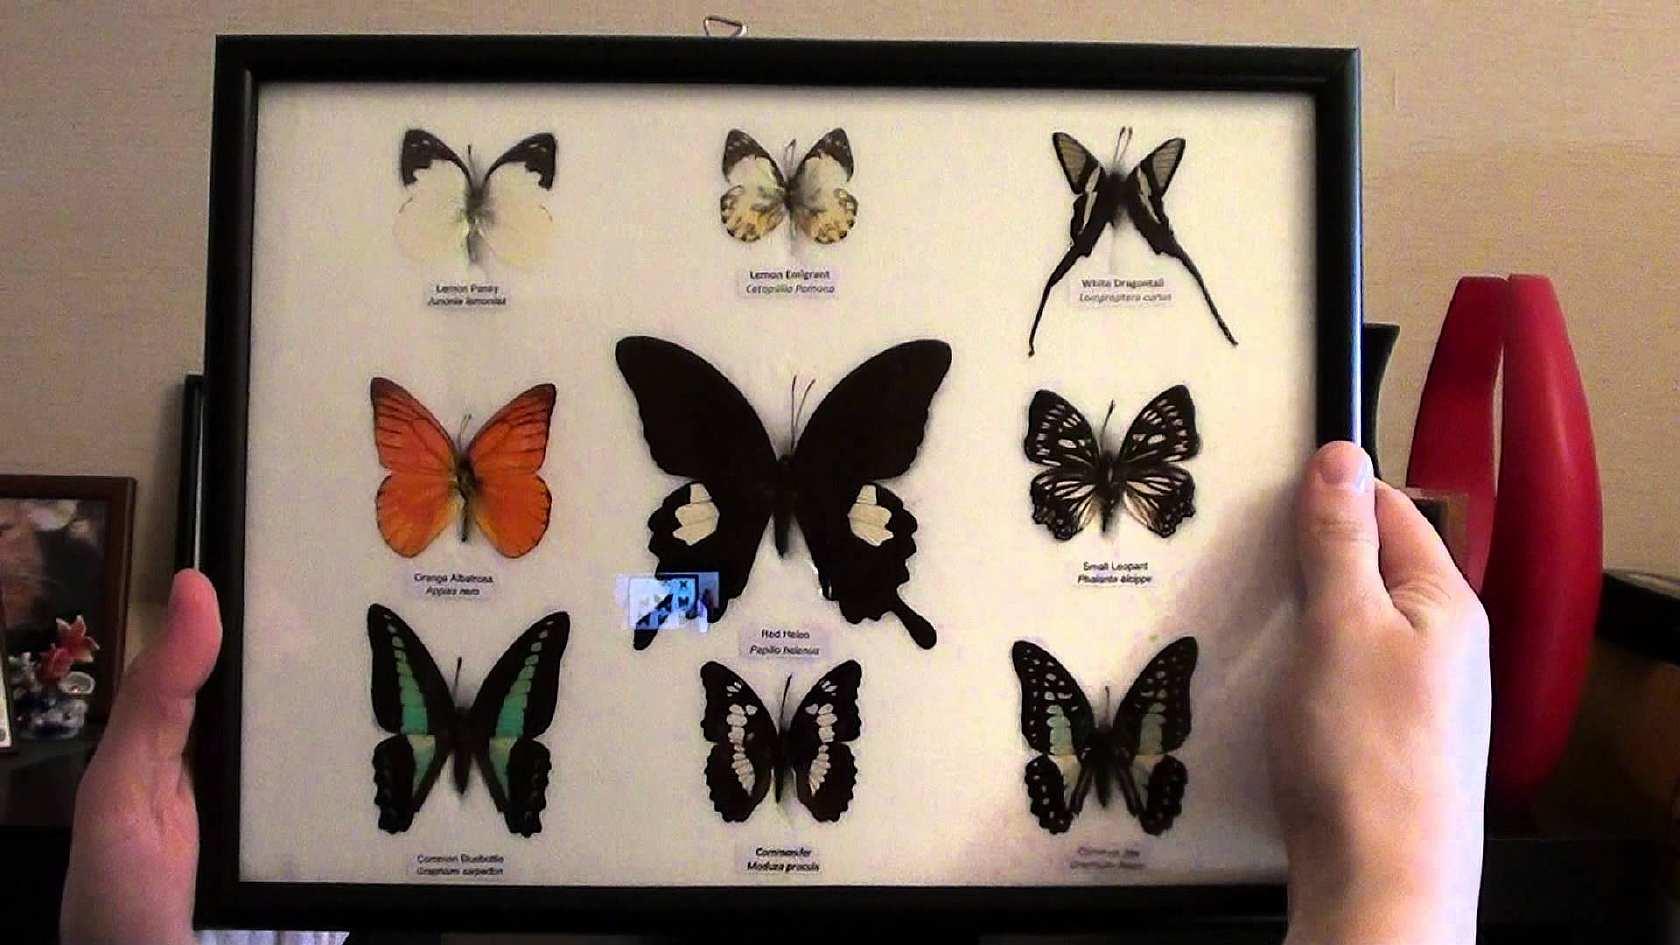
The beauty of the apartment is the most important, as it is the small details that make it more attractive and comfortable. Not a bad option for decorating a living space would be a panel of butterflies with your own hands. It is butterflies that are considered the most fashionable trend of the last season, and regardless of the time of year, a panel of butterflies will look perfect.
Butterflies are called winged flowers and therefore they will be a great addition to any interior. A panel of butterflies on the wall adds airiness and lightness to the room, and also fills it with charm. And according to popular beliefs, moths, whether alive or artificial, can become a symbol of good luck, joy, love and luck. That is why it is far from surprising that on the walls of many houses one can observe panels with butterflies made of paper and not only.

Making a panel of butterflies with your own hands is far from being so difficult, you just have to start and it will immediately become clear that this is a simple and entertaining process.
For such work, you will not need professional skills or attending such a meeting as a master class, but just scissors, glue and the desire to create.
It is important to note that the manufacture of such a panel will help not only create a beautiful picture with your own hands, but also have a pleasant rest emotionally, as psychologists recommend just such a pastime to relieve stress.
The composition of butterflies is mainly made on plain walls. For example, you can place a family of butterflies on a plain decorated wall.
Flocks of butterflies can be located in different directions and groupings, and such butterfly paintings are considered especially chic, such as:
- Vortex;
- A heart;
- Spirals;
- Chaotic order.

If the background for placing butterflies is colored, then the butterflies themselves should be bright, but not in the same tone as the wallpaper, otherwise they will merge and will not be visible. Before work, you should definitely sketch out a sketch according to which it will be carried out, and to be more precise, on the wall itself, using chalk, you should make notes on the location of the butterflies so that after they are made you do not spend extra time on marking.
What material to choose for a panel with butterflies
A butterfly stencil on the wall can be made from cardboard or plain paper, and it can be the remains of boxes or simply unnecessary materials left over from previous work. Also not a bad option would be compacted stationery film and fabric.
Ideas for making paper butterflies are the most optimal and simple, as it is easy to handle, so there will be no problems with such a process as cutting templates, regardless of their shape and dimensions.

Also, paper stencils can be very simply symmetrical. Paper has one more great advantage, and this is the availability of this material, as it is sold in many stores and at the same time at a fairly reasonable price.
It is important to remember that making stencils from cardboard will allow you to use them much longer than from paper, as it is denser and stronger:
- The cardboard perfectly retains the shape given to it, but it will take a lot of effort to cut out the butterfly.
- The result of a long and laborious process will be a strong, durable stencil, on which you can cut a huge number of butterflies for room decor.
Quilling is the way to decorate a room that does not require stencils, because it is prepared immediately on the panel without preliminary preparations.
Thicker film can be stronger and more attractive than cardboard, which is simple and easy to work with. A variety of butterflies are cut out of the film, regardless of their type, and they are attached using ordinary glue, and even a glue stick can be used for this.
In order to create a beautiful original picture or, in other words, a panel of butterflies, you should use a combination of glossy and matte films, and if you place them under a certain slope, then a 3D effect is quite possible.
If you purchase already prepared stencils from the film, then small squares of adhesive web are attached to them at the factory, and to decorate the wall with them, you just need to remove the protective layer.

The system of moths is sometimes created as one fluttering wing, but it all depends on how the wings are bent, how the light falls on them, and even what shade they are. It would seem that such trifles, but they can become important point when decorating a room with your own hands. Some budding designers set up butterflies to catch the draft in the room and bring them to life, which delights anyone who watches.
How to make a panel with paper butterflies (video)
How to attach butterfly panel ideas to walls
You can install ready-made stencils on the wall in different ways, since it all depends on the personal preferences of the decorator. In particular, the pannoquiling butterfly is attached with glue, and for other types of decor, pins and polystyrene can be used. Glue is considered the ideal way to create panels on the wall, but it is important not to overdo it with the dosage so as not to spoil the look with the remnants of the material peeking out from under the base of the butterflies.
Pins can be used in cases where the canvas on which the panel is attached is made of soft material, since the mace will need to be stuck into the wall so deep that the wind currents do not tear them out and scatter them around the room, which can be far from safe.

Not many people know that you can decorate a wall with butterflies through the use of foam.
Fixation occurs by gluing pieces of foam on the moth, after which it is smeared back side and attached to the wall. Thus, it is possible to make the panel more voluminous than to fix it simply on the wallpaper. It is important to know that only lightweight structures can be fixed with foam.
How to make a panel of butterflies in stages
Before you start cutting out butterflies, you should choose a specific pattern, which will be an important component of the application. To select, you need to carefully examine the wall on which the panel will be located, as well as assess the scale of its location. Naturally, if the wall is wide, then you can make the most voluminous drawing, but in small rooms you should not overdo it with such decor, as it will put pressure on the psyche and is unlikely to help you relax.

After that, it is worth moving on to the development of butterfly decor, to the choice of color and material.
It is worth remembering that this panel should become the brightest and most memorable spot on the wall, but it should not violate the overall harmony and atmosphere.
It all depends on the space, on the adjacent interior items, and also on how large the composition will be.
Creating a panel of butterflies (video)
The very creation of templates or, in other words, cutting out moths, must be done with the help of a clerical knife. The shapes of the moths must be kept symmetrical for the picture to be truly chic. The last step is to attach the moths to the wall using the previously described methods.
Examples of panels from butterflies (photo)


Today on the Internet you can often find a request on how to make a butterfly out of paper or other improvised material, because there is not always a desire and funds for capital and even redecorating, but I want to change something in the interior.
This decor is an application made from sheet material using special templates. You can make and fix such a panel on the wall in various ways, and the final result depends on how to do it.
Butterflies in the interior will please the eye every day, attracting the attention of guests. Let's get acquainted with how to make such a craft with your own hands. There are several original and uncomplicated ways. 
Where to begin
In the world design solutions relatively recently, such a trend as decorating walls with butterflies has appeared and gained popularity. These crafts create an atmosphere of sophistication, fill it with romance and lightness. However, as in any process, do-it-yourself interior decoration is preceded by preparatory work:
- Initially, you need to decide on the surface where you want to place the intended panel or image.
- You should calculate the shape and total area of the pattern, whether it will occupy a certain area or be distributed over the entire wall.
- Important on preparatory stage choose the material from which the decorative elements will be created. It is also worth remembering about compatibility with the interior of the room.
- Consider the shape, size and color of crafts. A colorful composition on a light surface is the best solution. As for the size, it is better to make wings of different sizes and shapes than to stick to one pattern. Butterflies made with asymmetry turn out to be as realistic as possible. There is no need to observe strict mirroring; upon completion, slight deviations will add volume and dynamism to the composition.
- It should be thought up in advance, but it is better to draw a sketch of the overall composition on paper. It can be a descending stripe, a flying circle of moths, a heart of butterflies of the corresponding color, etc.
 Depending on the solution, prepare necessary tools and the material from which the wall decor will be made.
Popular and accessible materials
You can create decorative butterflies from various sheet materials, the main of which are the following:
- paper;
- cardboard;
- the cloth;
- film, including self-adhesive.
Each of the presented materials is good in its own way.
 Using paper, you can later color it in any suitable color, which will stylishly place butterflies in the interior. You can immediately use colored paper, which is sold in any stationery store. If you want to make multi-colored wings, you can use already unnecessary glossy magazines, which in the end will allow you to get a colorful and beautiful composition. Paper crafts can be attached to the wall in any convenient way, while they will not protrude significantly above the surface level.
If paper products are too thin and fragile, you can use cardboard as a base. This option will be many times more reliable and stronger, although working with cardboard is somewhat more difficult. The advantage of cardboard is that it easily takes a given shape and retains it. So, wings or other parts can be rounded or bent, thereby making a voluminous butterfly. This is done by wetting the cardboard, giving the desired shape and drying in a given form. However, along with the advantages, cardboard has a significant drawback - if paper butterflies are easy to fix with your own hands, then you will have to tinker with cardboard. 
Butterflies made of vinyl records and plastic film look original. Such crafts will delight the eye with shape and color. It is as easy to cut crafts from film as it is from cardboard. You can fix plastic film butterflies like plain paper, and with vinyl crafts it’s completely easy - just peel off the protective layer of the film in the right place.
Another practical option is to make fabric wall butterflies. You can make a composition on the entire wall or select a separate panel. In any case, the fabric craft looks no less “soulful” than the previous options. It is better to fasten the fabric to the wallpaper with glue, and completely cover the craft with it. And you can form a three-dimensional composition - soak the fabric in adhesive solution, let dry, and then attach the product to the wall. 
Butterflies made of paper or cardboard: step by step instructions
Paper or cardboard butterflies are the most budgetary, but at the same time original option on how to decorate a wall with your own hands. They can be multi-colored, decorative, openwork, silhouette, solid and even fluttering - it all depends on the creator's imagination.
One of the main advantages of such butterflies on the wall is the variety of colors and the possibility of additional transformation with the help of paints.
You can attach, as mentioned earlier, cardboard and paper moths both with double-sided tape and glue, and with a pin. 
So, let's start making a butterfly on the wall on our own. This will require the following:
- paper or cardboard;
- pencil;
- scissors;
- eraser.
The whole technique for creating crafts comes down to how to cut a butterfly out of cardboard or paper. First, a square of arbitrary size should be cut from the base material, and then folded in half. Then draw a sketch of a moth in all details. For these purposes, there are various templates on the Internet. Of course, you can draw butterflies yourself, guided by own fantasy, but it is unlikely to get a large number of exactly the same pieces. That is why it is better to use ready-made stencils, which are enough to circle around the contour with a pencil and cut out. 
After the required number of products has been made, you can start decorating the walls with butterflies with your own hands. To do this, first on the surface you need to mark with a pencil the places where the crafts will be attached. After that, using glue or tape, you can fix the butterflies on the wall.
If cardboard butterflies are used in the interior, you can bend their wings to create a fluttering effect. For these purposes, the edges of the wings should first be wetted, then the desired bend should be given. When the craft dries, the given shape will be preserved. Origami butterflies can also be made from cardboard, and children can be involved in this process. 
Fabric butterflies: step by step instructions
Butterflies come out of fabric in a very original way, and you can use different materials. A predetermined pattern is cut out of thin fabrics, and then soaked in a soapy or adhesive solution. As soon as the products dry, start decorating the wall.
If you need to make a small number of crafts, then the option of a felt butterfly is suitable. For this you will need the following material:
- felt;
- decorative ornaments(beads, buttons, beads, etc.);
- tulle;
- glue;
- ribbon.
 Initially, you should draw a stencil on paper, then cut and transfer the workpiece to the main fabric. Separately, 6-8 petals need to be cut out of tulle. The rest is a matter of everyone's imagination. With the help of glue, decorate the fabric blank with decorative elements, and drape the wings with petals (2 for each wing), and for the lower ones, the tulle blanks will need to be folded in half. A ribbon should be sewn to the butterfly so that it can be hung. In general, the process of creating a bright felt butterfly is shown in the photo.
With such a craft, you can not only decorate a wall or other surface, but also use it as a souvenir, present and christmas decoration.
Photo gallery
In our gallery you will find 32 more photos of original butterfly ideas for decorating your interior.
When all repair work the house is finally completed, the most exciting time is coming: the time to restore beauty! Wall decor with butterflies is one of the most fashionable trends in interior decoration. Butterflies, also called winged flowers, fit perfectly into any type of room, giving it airiness and extreme charm. In addition, for folk beliefs these moths - albeit artificial ones - bring joy, love and good luck to every home. Therefore, it is not surprising that many owners spare no time to create original wall panels with my own hands.
How and from what are such panels created? Let's take a look together.

Materials for making butterflies at home
You can create stencils of winged flowers at home from ordinary stationery, cardboard, thickened plastic film and fabric.
Decor with paper butterflies is the easiest and most affordable option for decorating walls. Paper is easy to process: you can cut a template of any shape from it, give it a natural asymmetry. In addition, stationery can be bought at any store, in unlimited quantities and in any color. This allows you to fantasize without limits: combine butterflies of one or more colors and formats in one composition.


Cardboard ornament is more durable, but less malleable. Cardboard is a fairly durable material that retains its shape well. To cut a moth of the required shape, you will have to work hard. The result of painstaking work will delight you with the elegance of the curves and the originality of the positions.


Decorating walls with butterflies made of thickened film (or vinyl film) is a real pleasure. From the film, you can cut a stencil of absolutely any shape and fix it on the wall with ordinary glue. The combination of moths with a matte and glossy surface will help to make the composition more expressive. Glossy elements will shimmer like a chameleon when changing lighting.


Special stencils made of vinyl film have a self-adhesive backing; to attach the ornament, it is enough to remove the protective layer - an unusual panel is ready! You can not glue the whole moths to the wall, but create the effect of "fluttering wings". To do this, the film is glued to plain paper, which is used as a rigid base, the wings are bent and the butterfly is fixed in the bend of the wings. The slightest breath of air - and the butterflies flap their wings together. A unique spectacle!


Fabric butterflies will be appropriate on the walls, in the design of which fabric elements have already been used (for example, draperies or liquid wallpaper imitating fabric). The fabric ornament looks very warm and cozy.


Methods for attaching stencils
You can attach the finished stencil to the wall with glue, special pins or foam. PVA glue or wallpaper mix is the perfect fixative for butterflies made of any material. Despite the ease of use, it is necessary to dose the amount of glue applied to the base so that it does not protrude beyond the edges of the template.

Pins are a more sophisticated way of attaching templates. This is because to fix it on the wall, you will need to bend the pin at an angle of 90 degrees with pliers (or pliers), and then put the bent part under the wallpaper or other finish. It is easiest to glue the hairpin to the stencil itself. For greater decorativeness, it is better to choose studs with beautiful heads made of stones or beads.

Finally, you can use pieces of foam to decorate the walls with butterflies. Fixing the foam to the wall, like the moth to the foam, is done using glue. This method of fastening is only suitable for light paper ornaments, since heavier items will quickly fall off.

Stages of creating decor with butterflies
Before you start cutting out butterfly patterns, you should decide on the pattern of the future application. To do this, take a look at the wall and evaluate how much free space can be allocated for the panel, and then fantasize. For an idea, you can take finished projects, but your own application will look more impressive. As soon as you decide on a drawing, fix it first on paper, and then on the wall with a chalk or pencil.


The next stage is the development of the design of butterfly patterns, the choice of colors and manufacturing materials. Remember: such an unusual ornament should be a bright spot against the background of the interior, but at the same time, it should harmoniously fit into the environment. Depending on the allotted space on the wall, the number of elements in the composition can vary from 10 to infinity.


Next, you can start creating templates. It is better to cut moths with a clerical knife. The shape of the moth does not have to be symmetrical; on the contrary, a certain asymmetry adds volume and dynamism to the application. The last step is to directly attach the butterflies to the wall.


Surely many would like to modify or simply update the look of their home. Most often, the transformation of an apartment involves repairs, at least cosmetic. However, since creativity can be given to a room and an apartment the new kind and without tedious and costly repairs. It is enough to recall such a magnificent way of decor as creating a panel. And last but not least, a simple option for decorating walls with butterflies can help.
With a little diligence and effort, you can easily give a stunning look to familiar walls. Having familiarized yourself with the main points of decorating the walls, and choosing the right application for yourself, you can fix the butterflies on the wall with your own hands.
What is a butterfly decoration?
This type of decor is an application or, more correctly, a panel of butterflies, made of various sheet materials and fixed in elegant applications on all walls or on any one. There are many ways to make and fix butterflies on the walls, and the final result and the effect that this decoration will produce will depend on how to do it.
Just imagine that on your wall, for example, from the center, a whole whirlwind of butterflies different size and colours. They spin in a round dance and flutter their colorful wings. All this, of course, will please the eye, and attract the attention of others. Naturally, these are not real butterflies, and not even dried ones.
Video: examples of interior design with butterflies
To decorate the walls, carved from suitable material butterflies of various sizes and shapes, as well as colors. A lot depends on how to approach the issue of implementing such an enchanting spectacle. If you choose hard cardboard for making butterflies, then you can try and give them a wide variety of shapes and positions, they will be durable and will not lose their shape. If you choose light fibrous paper or film and fix the butterflies only in the middle, then they will flap their wings from any movement of air, from which the spectacle will only improve.
Where to begin?

Butterfly stencil examples
First of all, it is worth deciding on the form of the future application. If your own ideas do not seem as spectacular as you would like, you can always search the net and find suitable options for ready-made applications. After that, you can proceed to the choice of colors and shapes of butterflies. Each apartment is decorated in its own way. It is necessary to choose the most suitable option colors of the future decoration, so that it best fits into the existing interior. Do not forget that the butterflies should be bright and noticeable against the walls or ceiling, and not merge with them into one spot.
Form should also be considered separately. There is, of course, the opportunity to purchase ready-made stickers in the form of multi-colored butterflies of the desired palette, which are full on order on the Internet. Their form can be both the most intricate and primitively simple. However, now we are talking about the option of a completely independent execution of the scenery. And this is precisely the main advice for novice masters. It is necessary, using any image editing or drawing program that you understand, to create a sketch of future butterflies. According to the sketch, templates of different sizes will then be made for cutting butterflies from the required material. In principle, you can even do it by hand on plain paper or tracing paper.

You should not chase grace by increasing the number of ruffles and bends on butterfly wings. Remember that later all this will have to be carefully cut out with scissors or a scalpel with a template.
Advice: It is best to get away from the strict symmetry of butterflies. So try not to mirror the right and left wings, but draw them in slightly different sizes, literally by a little. This will add some dynamism and volume to the final look of the application, regardless of how they are attached to the wall.
You should also not go too far with the last advice, after all, everything should be in moderation.
Once the sketch is ready, you can proceed to the next steps. After the format of the future decoration is determined and it is known how and in what quantity the butterflies will be fixed, it is possible to multiply the prepared butterfly pattern in several sizes and print it. After that, butterfly stencils are made. It is best to impose a printout on a sheet of cardboard and cut out the inside along the contour.
One of the options to decorate the walls with butterflies is origami. In this case, there is no need to cut butterflies, you just need to learn how to assemble origami. It's simple enough. There are many ready-made lessons on the master class of forming a wide variety of origami, so this should not be a problem. Below we consider the features of fastening and distribution of such figures on the wall.

An example of the formation of butterflies for decorating a wall using the origami technique
We form a common picture
As mentioned earlier, you can pick up the shape of the big picture by looking at various options posted on the Internet, or you can come up with it yourself. This can be either an image of a whirlwind, or a scattering of butterflies in suitable places so that they are combined with an existing pattern or pattern on the wallpaper, decorative plaster or other material that decorates the walls of your room. You can imagine everything in the form of a flock of butterflies that tend to fly from one side of the room to another, or to distribute them in small groups over the surface. Even a small cluster in the form of a heart or a flower will already greatly decorate the situation.
As soon as the idea has matured, it is necessary to fix it first on paper, and then on the wall. To do this, use either a pencil or a piece of chalk, with thin lines mark the main lines along which the butterflies will be fixed. The main thing is not to direct the lines too much, so that they do not subsequently catch the eye and do not spoil the view.

Material selection
You can cut butterflies from a wide variety of materials:
- paper;
- cardboard;
- film;
- vinyl self-adhesive film;
- the cloth.
Paper
Each of these materials has its own advantages. Paper can be decorated with any accessible way, and it is easiest to cut butterflies from it. In addition, it is not so important how much paper is needed in the end, it is the cheapest. You can use colored paper, which you can buy at any office supply store. If there is no desire to make butterflies of the same color, you can completely turn your eyes towards the already read glossy magazines with pictures. The result is colorful and colorful butterflies. Alternatively, after that you can arrange them according to the prevailing colors and use this when forming a picture on the wall.
The paper version can be easily mounted on the wall in any of the possible ways. Fully glued paper butterflies will not protrude significantly above the level of the wall, and those that are attached at a distance and from the wall will be able to flutter their wings from air currents.
Cardboard
Butterflies cut out of cardboard will be much stronger and more reliable. Although it will be more difficult to cut them, you can shape them however you want. Cardboard will easily take the desired shape and keep it. You can not only bend the wings or their parts, but also make them rounded. To do this, it is enough to slightly wet the cardboard and bend it as required with the help of a load. After drying, it will remain exactly as it should be. Due to the fact that the cardboard is much heavier, then it will have to be fixed somewhat more reliably.

The original version - butterflies from vinyl records
Film
thick polyethylene film various colors and a special self-adhesive vinyl film are ideal for decorating walls. They can be glossy, from which the butterflies will not only delight in shape and color, but also sparkle, shimmer, depending on the lighting in the room. Cutting butterflies from film is quite simple, just like from thin cardboard. An ordinary color film can be fixed in the same way as paper, and there will be no problems with a vinyl film at all, just peel off the protective layer and stick the cut-out butterfly in the right place on the wall. In order for the butterfly to be able to twitch its wings, it is enough to remove the protective layer not from the entire butterfly, but only in the central part, in the form of a strip.
Textile
The fabric can be perfect if plain liquid wallpaper, drapery, or just any base that is soft to the touch or look is used on the walls. Butterflies cut out of fabric will also have a “warm” look, thus not violating the design created originally, only improving it.
It is better to attach fabric blanks, of course, completely to glue. However, it is possible to form a three-dimensional picture. For this, PVA glue diluted with water or a soap solution is used. The second option is only suitable for very thin fabrics. As in the case of cardboard, it is enough to soak the fabric cut according to the template in the solution and let it dry in the desired shape.
We fix the scenery
In order for the prepared butterflies to stay on the wall, you can use one of the following options:
Glue
Fully or partially glued butterflies will stick firmly to the wall. You can use both ordinary PVA and wallpaper glue. The main thing is not to overdo it with him so that he does not protrude beyond the edges of the butterflies. This is the easiest way to decorate a wall with butterflies.
pins
You can use a variety of pins. As an additional element of decoration, you can choose pins with beautiful heads in the form of a variety of jewelry or just small balls like pearls. In materials such as plastic or wooden lining, the pins will go in without problems, the same applies to cork and even drywall.
If the walls are covered with wallpaper, then you can do it differently. Using pliers or pliers, bend the tip of a pin about 1-2 cm long at an angle of 90 degrees. After that, the bent part is brought under the wallpaper, and thus the butterfly is fixed. It is easiest to glue the pins to the butterfly itself with Moment glue.

Styrofoam pieces
On one side of the piece, glue the butterfly on the glue, and on the other side to the wall. The option is bad only because the foam itself is not a very durable material, and if it breaks, then it will be difficult to remove the rest from the wall.
Hang on threads
This option is best suited when using origami. With thin threads or a colorless fishing line, butterflies are hung from a cornice under the ceiling or directly to the ceiling. This method allows you to fully form three-dimensional solutions.
Finally
This way of decorating the walls, although it takes a lot of time to implement and perseverance, however, will undoubtedly bring a lot of new bright emotions into your life. Any design of the interior decoration of the apartment can be diversified with the help of butterfly applications on the walls and ceiling. Choose the option that suits you and start this exciting creative process.
Video: butterfly wall decor master class
(No ratings yet)
Discussion:
Anna said:
Great idea for a kid's room, I think so. Personally, I did such a decoupage for my daughter, in her room. There are a lot of templates on the Internet, choose any. Then I picked a color thick paper and sent it to the printer. That's all! It is important to correctly attach the whole thing to the wall. It all depends on what the wall is covered with. Since I have simple wallpaper Butterflies are perfectly glued with double-sided tape.
Svetlana said:
If you make decor, be sure to involve children in this process. Soon New Year, there is a reason to do cutting. When you work with children, in no case be nervous, give them more independence.
Natalya90 said:
We have already pasted little animals in the kitchen, now we will make butterflies in the nursery! The child is already at the age when you want to do everything yourself. And decorating a room with homemade butterflies is both interesting and useful!
It has now become possible to transform the interior in your home with the help of improvised materials, and home-made decor elements will look no worse than finished designer products.
Because in modern interiors maximum attention is paid to natural themes, great way butterflies of various sizes will decorate any surface: panels and original compositions from such elements will help create a warm and spring atmosphere in any room.
DIY wall decor with butterflies is a very simple process, and to create such figures, you can use a huge number of materials that, if desired, can be moved to other areas of the room.
DIY paper butterflies on the wall, photo
Jewelry materials
Of course, you can limit yourself to purchased decorative butterflies, but by making the figures yourself, you can use any decorative materials which you will like.
In addition, this way you do not have to look for colors or materials of products that will be in harmony with the style and colors rooms: do-it-yourself butterflies on the wall according to ready-made templates and drawings can be made for every taste.
Before you start making butterfly stencils for decor, you need to prepare all the materials that will be useful in the process of creating butterfly patterns, cutting out figures and attaching them to the walls.
At this stage, it is extremely important to decide which materials are best suited for your room, because not all options are able to withstand the special conditions of the premises.
Butterfly stencils can be made from the following materials:
- paper;
- cardboard;
- adhesive backed vinyl;
- plastic;
- cans;
- ordinary fabric;
- felt;
- capron;
- disks, etc.

Butterflies on the wall with their own hands, photo
Paper and cardboard are considered the most common materials for creating decorative butterflies, as they allow you to create a template for a figure along the contour quickly and without special efforts. In addition, sketches from such materials are enough just paint and stick to the surface, which means that none of the steps will cause you any difficulties.
Butterfly patterns on the wall for cutting, you can draw yourself or print a finished sketch, for example, as in the photo:

Butterfly stencil on the wall - scheme, photo
In the photo below - the easiest template for cutting paper butterflies:

Stencils of simple butterflies for wall decor, photo
In addition to simple patterns, openwork silhouettes of decorative butterflies can also be made from paper. Having drawn the outline of the image, proceed to cutting holes for the air wings.

Photo of the process of cutting a paper butterfly stencil on the wall
However, cardboard and paper can spoil their appearance from mechanical stress, contact with water and steam, so these butterflies will not last long.

Decor - butterflies on the wall, photo
If you don’t want to cut butterflies with your own hands, you can purchase ready-made vinyl stickers with this form. All that remains for you is to place them on the wall in the desired sequence, creating the intended composition.
Such stickers are distinguished by their durability, but deprive you of the opportunity to use additional decorative materials to decorate the figures.

DIY wall decor with butterflies, photo
Durable butterflies that can hold out on the wall for a long time and retain their appearance can even be made from discs, tin cans or plastic bottles. It is enough to cut the wings of the required shape and provide secure fastening to the surface.
Fabric butterflies are quite popular. A variety of textile materials allows choose absolutely any shade for such figures, and thanks to the special structure, beads, beads or other decorative elements can be sewn onto the fabric. By the way, when combining fabric and cardboard, you can create more durable figures that will last you a long time.
Pay attention to materials such as felt. Due to the durability of the material, the wings can be molded into any shape, and your composition will be perceived more realistically.
To create butterflies, you can also use nylon: just pull it over the wire of the desired shape and secure it with threads. Such butterflies will be distinguished by their lightness and airiness.

Advice: although decorative butterflies are usually hung on the wall for a limited period of time, it is still necessary to take into account the specific conditions of some rooms. For example, for a kitchen or bathroom, it is desirable to choose materials that are as durable as possible, which are not adversely affected by moisture (for example, plastic).
As auxiliary materials, you may need scissors or a clerical knife, threads, glue, wire, as well as beads, beads, paints, sparkles and other materials for decorating such jewelry.
Features of creating decorative butterflies
To ensure the harmony of the composition of butterflies on the wall surface, it is advisable to think in advance how many figures you will need.
If you want butterflies to not differ from each other in appearance, prepare auxiliary stencils of the same or different sizes.

To create stencils, it is desirable to use durable materials (for example, cardboard or plastic).
Butterflies can be completely glued to the wall or made voluminous by bending the wings outward. Depending on the design method, plan how the figures will be created and what materials will be used to make them. Do not forget that the butterflies should stand out on the wall, and not merge with the shades of finishing materials.
Advice: when placing a large number butterflies, it is not at all necessary to observe the correspondence and similarity of the shades used: even multi-colored options will look bright and interesting. But in this case, decide in advance whether bright shades will be in harmony with the interior of the room.

Butterflies should look like real insects, so you need to carefully approach the process of creating blanks for future decorations. With the help of stencils, it will be much easier to observe the symmetry and harmony of such elements.
You should not dwell on the usual solid options: the more patterns are cut on the wings, the brighter and more unusual the resulting composition will look.
The process of creating standard decorative butterflies consists of the following steps:
- creating stencils;
- transferring the drawing to desired material with a pencil or pen;
- cutting out several figures of different sizes;
- drawing markings on the wall for the correct placement of figures on the surface;
- gluing the central part of each butterfly to the wall or attaching figures with pins.

Advice: If you have the skills to fold origami, then a large number of unusual butterflies can be made in this way.
Do-it-yourself wall decoration with butterflies can be implemented in any form: regardless of the style in which you arrange the composition, such a plot will emphasize the atmosphere of spring freshness in your interior.
Decoration methods
Finished butterflies can be placed on the wall in several ways. Some prefer to be symmetrical when attaching the figurines to the surface, while others like more free and arbitrary options that mimic the real flight of butterflies.

A great way to symmetrically place butterflies on a wall is to creating a composition that starts from one point. Butterflies, as it were, fly out of one place at the bottom of the wall - and scatter throughout the room. Such compositions will look most successful if an entire wall in your room is allocated for decor.
Butterflies can place in the form of a vortex, spiral, create an imitation from a cluster in various parts rooms or generally paste in random order.
Quite often, butterflies are glued in such a way that the resulting plot matches the patterns on the finishing materials.

Advice: in order for the resulting composition to meet your expectations, draw in advance the trajectory of the "flight" of butterflies on a sheet of paper, taking into account the particular layout of the room and the arrangement of furniture.
If you do not want to spoil the surface of the wall with glue, needles, pins or other fasteners that keep butterflies on the surface, then you can implement another equally interesting way: butterflies can be sewn at different levels to a thread attached to the ceiling right next to the walls. Then the illusion of flight will be created, and Decoration Materials will not be used to ensure the desired effect.

Do not forget that the entire interior should correspond to the spring theme you have chosen. If desired, butterflies can be used as other decorative elements: it can be photos, textile materials with butterflies, used as curtains or tablecloths, etc.
Advice: attached to the back homemade butterflies a small magnet, you can even decorate the refrigerator and other interior items.

Wall decoration paper butterflies can be an interesting and entertaining activity for any member of your family: the ease of making and attaching such figures allows you to decorate any room in spring style.
Thanks to this idea, the interior will not only be filled with warmth and light, but will also cheer up each of you at any time of the day.
Video
How to make a butterfly stencil with your own hands - watch the video:


The meaning of the name diamond is sonan
Pirantel instructions for use for
What is a genetic passport What does a genetic passport include
Nebilet - a powerful tool in the fight against hypertension
Solution, aerosol Berodual: instructions for use for inhalation