When are peppers planted outdoors? Approximate terms
Even if pepper seedlings outgrow, do not rush to plant it in open ground. This is a heat-loving crop, so it can only be planted when the threat of frost has passed, and the air temperature at night will not fall below 13-15 degrees.
Typically, these conditions occur somewhere around mid June(). But if suddenly after planting the temperature dropped for a while and there was a threat of frost, it is necessary to cover the plants at least for a while nonwoven fabric or by some other means at hand.
Age of seedlings ready to move to open ground, 60-65 days. Usually the first bud already appears on each bush.
All buds formed before transplantation are recommended to be removed. This usually happens in overgrown, older than 65 days, seedlings.
This procedure is necessary to stimulate new flowering and fruit formation. The fact is that a feature of this culture is undulating fruiting. Having tied the first fruits, the plant stops flowering until they grow to commercial size.
Only after that, new flowers begin to appear. If the first buds are not removed, fruit development will slow down..
Removing the first few buds will result in abundant leaf production, which is good for the pepper. Unlike tomatoes, a large number of leaves are only beneficial, as it increases the yield.
Site selection and preparation
When choosing a landing site, it should be taken into account that this heat-loving and very demanding culture. If he does not receive enough sunlight for the maximum time during the day, good harvest you won't wait. Therefore, any areas that fall into the shade of buildings or trees during the day should be immediately excluded.
It is also important protect the pepper from the wind, especially the north. Any, even the most temporary hypothermia during the day, is contraindicated for him. You should also not plant pepper in a draft.
The best predecessors of pepper are carrots, zucchini. You can not plant it in those areas where they grew in the previous season, or. In no case should it be planted in the same place two years in a row.
 This is due to the fact that during development, each culture consumes certain minerals, pulling them out of the soil.
And planting the same crop in one place will lead to the fact that each subsequent generation will not receive enough elements for nutrition, which means it will grow poorly.
For growing peppers suitable areas with light soil of low acidity. If the acidity is increased, it is recommended to lime it before autumn. Prepare for landing high ridges to keep the root system warm. The direction of the ridges is west-east. When digging the soil in spring, add humus, compost and superphosphate to it.
Effective for growing peppers use a "warm garden" on biofuel. To prepare it, a trench is dug 40-50 cm deep. Manure mixed with chopped straw or compost must be laid on the bottom. A layer of soil is poured over this mixture.
A few hours before planting pepper, the bed is watered hot water, and the biofuel begins to release heat. Pepper roots in such a bed will be warm and will not suffer even from some cooling. In addition, the bottom layer will serve as additional nutrition for plants. Different varieties in the same garden.
IMPORTANT! You should not plant tomatoes and potatoes next to peppers, they are bad neighbors for him.
To prevent sweet pepper from becoming bitter
Pepper is a self-pollinating plant, and this must be taken into account when planting. If you plan to grow a bitter, sweet and pungent variety, you need to plant them in different places.. When planting them close to each other, pollination will occur, and the taste of each variety will change. Sweet will start to taste bitter or become spicy.
How to prepare seedlings?
 Do not immediately take out boxes of pepper and plant pepper in the beds. If the seedling was at home, it will not tolerate a sharp change in conditions and will die.
Before planting pepper in open ground seedlings need to be hardened.
Landing preparations begin two to three weeks before the expected date. Seedlings need to be taken out for several hours a day and installed in a shady place. In the first days, the walk should be short, only 3-4 hours from noon to 4 pm.
Gradually increase the time. At night, be sure to bring the seedlings into the house. In the last two or three days before disembarkation, leave the boxes overnight for 24 hours a day.
IMPORTANT! Make sure that the direct rays of the sun do not fall on the seedlings so that the leaves do not get burned.
In addition to hardening, it is necessary to provide seedlings with protection against fungal infections in advance. 7 days before her landing must be treated with a systemic fungicide(Bordeaux liquid, blue vitriol, Oxyhom).
The day before removing from the box, the soil must be well watered.
How to plant seedlings of pepper in the ground?
- For planting pepper, beds are prepared with a width of 80-100 cm.
- Holes 15-20 cm deep are made at a distance of 40-45 cm from each other, 50-60 cm between rows.
- At the bottom of each hole, you need to pour a handful of well-rotted humus and pour at least 2 liters of water.
IMPORTANT! The size of its fruits depends on the planting pattern of pepper. If the bushes are planted at the distance described in the previous paragraph, there will not be very many fruits, but they will be large. Thickened plantings (25x30 cm) will allow you to get a large number of medium or small fruits.
If each specimen was grown in a separate container, landing is carried out. When removing a plant along with a clod of earth, you need to try so that it does not fall apart. With this method of transplanting, the roots of the pepper will not be affected, therefore, the plant will quickly take root.

To protect the plants as much as possible from damage to the root system, before planting in a box with a sharp knife, longitudinal and transverse cuts are made to the full depth.
The stem of each bush is buried in the soil to the same level at which it was in a box or pot. It is impossible to plant it deeper for two reasons:
- With a deep planting, the roots will fall into the cold soil, and will also experience a lack of oxygen.
- The pepper stalk does not form additional roots, like a tomato. Therefore, part of it, which is in the ground, may begin to rot.
A plant with a clod of earth is placed in a hole. The soil is compacted. If the bushes are already high, you need to put pegs next to them for tying. As long as the stem is not thick enough, it can easily break in gusts of wind.
After planting the plant well, the soil around the stem is carefully mulched to prevent it from drying out. As mulch, you can use humus or peat. The next watering is best done in 1-3 days. so that the roots can take root and do not begin to rot.
Disembarkation must be carried out in the evening hours so that the sun does not burn the plants. For the same purpose, in the first days after planting, it is desirable to shade the plants.
ADVICE! To smooth out the consequences of stress when transplanting pepper into open ground, spray it the day before with a solution of the Epin-extra preparation. Carry out the same treatment a day after disembarkation.
How to prevent overcooling of plants?
 It is impossible to delay the planting of pepper in open ground until the onset of stable warm days. There are two reasons for this:
- In the heat, planted plants will not take root well and may even burn out.
- Overgrown bushes, on which buds have already begun to form, will drop them. And you will lose part of the crop.
Therefore, landing has to be carried out when night temperatures are not yet ideal for pepper. And the threat of return frosts exists almost until the end of June. Temporary shelters for planted peppers will help solve the problem.
For their preparation, arcs are placed above the bed and covered with a film or non-woven covering material. This method, in addition to heat, also makes it possible in the first days after planting to protect seedlings from the scorching rays of the daytime sun.
Shelter thrown over the arcs is fixed at the bottom with heavy objects or sprinkled with earth. During the day, you need to open such a mini-greenhouse from one end.
ATTENTION! Do not open both ends of the tunnel cover at the same time from both sides. At the same time, the plants will be in a draft and begin to freeze.
A few days after planting pepper seedlings in the ground, when the plants take root, you can remove the covering material for a day. At night, it needs to be thrown over the arcs again, since the night temperatures in June are not yet comfortable enough for pepper. When hot weather sets in, the temporary greenhouse can be dismantled and pepper cultivation can be continued in open ground.
Despite its capriciousness, pepper is popular among gardeners. Among all agrotechnical requirements, the most crucial stage is planting seedlings. The future of the crop depends on how to plant pepper seedlings in the ground.
Planting pepper in open ground with seedlings is carried out at a temperature of + 15-16 ° C. By May 20-30, frosts are already unlikely, so plants can be planted without fear. At an earlier date, planting seedlings of peppers in open ground is not worth it. Otherwise, the plant will be stressed and the chances of a quick harvest will be in jeopardy.
If pepper seedlings are planted in open ground at a low temperature, then this threatens with hypothermia and, as a result, a small harvest. By the time of planting, seedlings should have up to 12 leaves. Before planting in open ground, it is desirable that the seedlings be about 3 months old. Seedlings should not be overgrown, otherwise they will not bear fruit later. It will be correct to sow late varieties - in early March, and early ones - in the second half of the month. In this case, the seedlings will be in perfect condition for planting in the ground. Seedlings for the greenhouse are planted in the ground on May 1-15.
Site selection and soil preparation
Peppers need light, so the site for planting them should be sunny and protected from drafts. In autumn, it is necessary to remove garbage, fertilize the soil with manure and phosphorus. Pay attention to what garden culture grew on this site earlier: if it was potatoes, eggplants or tomatoes, then look elsewhere; if cabbage, cucumbers, pumpkin, beans, then this is the right place, you can safely plant peppers.

A bucket of manure and peat is added to the loamy soil, mixed with ½ a bucket of rotted sawdust. Sand is also added to clay soil. In peat soil - humus and clay soil in equal proportions. Recipe for fertilizing sandy soil: two parts peat and clay soil mixed with two parts of humus and one part of sawdust. The weed-free and fertilized soil must be well-drained to retain moisture. During the week, the garden, on which the soil was fertilized, is watered abundantly.
Now you can plant seedlings. The holes are made slightly larger than the container where the seedlings grew. The distance between bitter and sweet varieties should be greater to eliminate the possibility of cross-pollination. It is best to plant them in separate beds. Sharp varieties can be planted tightly at a distance of 25 cm from each other.
Step-by-step instruction
Note that agricultural technology depends on the climate and soil characteristics. Not every soil is suitable for growing this crop. For example, before planting pepper in open ground in Ukraine, you need to feed the ground with humus, it would be nice to add more sawdust and peat.

Before planting, it is also necessary to mark the beds. The distance between peppers when planting in the ground is from 30 to 60 cm. Let's figure out at what distance pepper seedlings are planted in the ground, and what it depends on. Between seedlings of undersized varieties there should be a distance of 30-40 cm, and between seedlings of tall varieties - 60 cm.
So, how to properly plant seedlings in the ground? We offer the following step-by-step instructions:
- First you need to prepare the seedlings. Spill the sprouts with water and spray with a special solution that will protect the plant from aphids. After this procedure, carefully remove the seedlings from the cups.
- Before planting pepper seedlings in open ground, add compost to each hole and pour warm water to the very edge. When the water is absorbed, you can lower the seedling without deepening it.
- Fill the hole again with water, holding the sprout with your hand. Water is poured onto the walls.
- Now you can fill the hole with earth and mulch with peat.
- In the future, the seedling will need to be tied up. To do this, place a peg next to each seedling.
- When the planting is over, the bed will need to be covered with a film. Shelter is removed after favorable weather sets in.
Don't worry if the pepper looks sore for the first 10 days. This is a normal reaction to a transplant.
Further care

It is important not only to know how to properly plant pepper seedlings in open ground, but also how to care for the plant later. For the first week, it is advisable to monitor the soil moisture every day. You can add a little water to the soil near the stem. It will be really possible to water in 7 days. But mineral fertilizers are added only after two weeks.
In order for the seedlings to quickly start, you can loosen the ground a little near the root. When the seedlings reach a height of 20-25 cm, it is desirable to remove the top from it. This procedure will lead to the appearance of side shoots, on which flowers with an ovary will grow.
Video "Planting pepper in open ground"
From this video you will learn how to properly plant pepper seedlings in open ground.
Planting pepper in open ground is the most important step towards a rich harvest of this crop. Mistakes made by a beginner at this stage can nullify all efforts to grow high-quality seedlings. In the article, I detail and in simple terms I will tell you how to plant peppers in open ground with minimal effort on your part and as comfortable as possible for the plants themselves.
Preparing pepper seedlings for planting in open ground

When grown on a windowsill, pepper plants need additional lighting.
About a week before the planned planting, pepper seedlings begin to “walk”, taking the plants to Fresh air. At first, walks should be short, 15-20 minutes each, but each time their duration is increased by 50%. At a temperature not lower than +14 ... 15 degrees, the plants will harden perfectly and better transfer the transplant to an open garden bed.
How to choose a place for pepper

If there is no space in the garden, then peppers can also be grown in bags filled with nutrient soil.
A bed for pepper is placed on a site with moderately fertile, light soil with a neutral or slightly acidic reaction. This culture does not grow well in places with close occurrence ground water- then it is better for her to take a high warm bed. Read about how to build such a garden bed.
Pepper just hates the shadow. Therefore, plants must be under the sun all day, otherwise their development will slow down and the harvest will be very meager.
Another important condition when choosing a site for this crop is that it must be reliably protected from the wind.
To do this, at some distance from the garden, you can make a partition or arrange a wattle fence from any available materials. Alternatively, around the plantings, at a distance of 70-100 centimeters, you can arrange 1-2 rows of rock plants - beans, corn, sunflower, Jerusalem artichoke, chard. Plants are a must sown or planted seedlings in advance, 2-3 weeks before planting the pepper itself. If you plan to keep the bed under the film for the whole season, then you do not need to build any additional protective barriers.
Legumes, onions, beans, pumpkins, squash, squash, root vegetables and cabbage- here is the list the most successful predecessors for pepper. I do not recommend planting pepper after any nightshade, for example, potatoes, tomatoes, eggplant, and also after any kind of pepper. You need to wait at least 3-4 years before placing pepper in such a place.
Preparing a bed for pepper

The first (crown) flower of a pepper seedling is best removed. This will significantly increase the branching of the bush and productivity.
Any soil can be improved and made suitable for planting peppers by adding various organic materials to it:
- in the case of medium loamy soil- this is peat and well-decomposed manure, one bucket per square meter beds, as well as half a bucket of old sawdust per square meter;
- in the case of clay, heavy soil- this is peat or well-decomposed manure at the rate of a bucket per square meter plus coarse sand (or semi-rotted sawdust) at the rate of 1 bucket per square meter;
- in the case of peat soil- this is humus and sod (or clay) earth, one bucket of each type of soil per square meter;
- in the case of sandy soil- these are 2 buckets of humus (garden compost), 2 buckets of peat and clay soil and 1 bucket of rotted sawdust;
- in all cases, it is recommended to put one tablespoon of superphosphate and potassium sulfate into the soil (this is done in the fall), as well as one teaspoon of urea or nitroammophoska (in spring) per square meter of beds, for convenience, “mineral water” is mixed with organic matter;
- if you don’t use mineral fertilizers at all on the site, then just add wood ash to the soil at the rate of 1 glass per square meter of beds (this is best done in spring)
To determine the mechanical composition of the soil in your area, conduct a simple test. You can find a description of it in .
Consider the following when preparing the soil for this crop:
- it is desirable to fertilize the soil for pepper in the fall, but it is permissible to postpone this work until spring;
- if you have light loam on the site, then you only need to fill the soil in the garden under the pepper with compost or humus at the rate of 1 bucket per square meter of its area;
- a bed for this crop cannot be filled with fresh manure, otherwise the plants will give a lot of greenery, but few fruits.
Planting peppers in the garden

Spring soil preparation for planting peppers in full swing)
In central Russia, pepper is planted in open ground not earlier than the last decade of May, and in case of a protracted spring, it is better to transfer this work to the beginning of summer.
By the time of planting, pepper seedlings should have 7-9 well-developed leaves, as well as short, strong internodes and several well-formed flowers. Early ripe varieties are allowed to be planted even with an ovary.
On the eve of landing in a permanent place, hardened pepper bushes are watered abundantly so that they are not sluggish. Otherwise, they will lag behind in growth and throw off the first buds.
Planting sweet peppers in open ground is carried out in 9 simple steps:
- The soil in the garden carefully loosen and align. When growing pepper in two rows, its width should be 90-100 meters, and with a three-row planting, the width of the bed is increased to 120 centimeters. It is also highly desirable that the bed be extended in the direction from north to south.
- Between the rows leave a distance of 50 to 60 centimeters, between individual landing pits - 40-45 centimeters. The pits are best placed in a checkerboard pattern. More dense fit scheme 20-25 x 50 centimeters leads to a decrease in the size of the fruit, but increases their number.
- The wells are filled with 200-300 grams of biohumus (humus, compost), 1 tablespoon of ash and the same amount of crushed eggshells are added, and 1-2 liters of a light pink solution of potassium permanganate are poured in.
- Arcs are installed above the bed, and so that the film does not sag, twine is pulled between the arcs on both sides.
- Planting seedlings is carried out in the afternoon or in cloudy weather at any time of the day.
- Pepper bushes are planted at the same level at which they grew in pots (allowable depth - no more than two centimeters). At the same time, tall varieties are placed in the central row, and undersized and dwarf ones - along the edge of the garden.
- When planting, pegs 50-60 centimeters high are attached to each plant for further garter. After that, the roots of the plants fall asleep and squeeze their hands around the stems for better contact with the soil.
- The soil in the garden with planted seedlings is mulched with peat or dry soil. This is optional, but highly recommended.
- Throw a film on the arcs. If the weather is cool, then the landings are additionally insulated with lutrasil or any other non-woven fabric.
You can reduce the need for watering, weeding and loosening by planting pepper seedlings directly in a black film or non-woven covering material. To do this, the soil in the garden is fertilized, moistened, mulched with peat and covered with a film or non-woven fabric. Pepper plants are planted according to the scheme 40-45 x 50-60 centimeters in cross-shaped holes made in the selected material.
Pepper care after planting in the ground

This pepper clearly does not want to be eaten))).
Peppers take root slowly in a new place, so the plants need to be helped to acclimatize. To do this, the first one and a half - two weeks they are watered every 2-3 days under the spine, using 1-2 liters per plant.
During dry and hot periods, watering is carried out on a daily basis.. During this period, the soil between the rows must be loosened, but with great care, to a depth of no more than 3-5 centimeters. This avoids any damage to the roots of plants until they finally take root.
Until the temperature at night exceeds +16 degrees, the peppers should be under a film cover. In the daytime, if the air under the film warms up above +28 degrees, it is slightly opened or even completely removed.
But if, according to the forecast, return frosts are expected - this sometimes happens in early June - the soil in the garden with planted seedlings should be shed with water at a temperature of + 35-38 degrees. Then, in addition to the film, throw a dense non-woven fabric on top and your plants will be reliably protected from the cold.
One of the most common problems that a novice gardener faces when growing peppers is when the plants begin to shed their ovaries en masse. The main reason for this trouble is flaws in care and weather surprises, which are especially dangerous in an open garden. To more fully understand what exactly caused the fall of the ovary in your situation, I suggest reading.
For you, we shot a short video in which we shared our experience in growing pepper seedlings and planting them in open ground.
Plant chilli pepper (lat. Capsicum annuum) refers to a species of herbaceous annuals of the genus Capsicum of the Solanaceae family, widely cultivated in agriculture. The pepper vegetable comes from Central America, it came to Europe in the 15th century and, despite the demanding care and increased thermophilicity, it quickly became the most popular garden plant. There are about 2,000 varieties of capsicum today, but most of them belong to the sweet pepper subspecies, while others belong to the bitter pepper subspecies. In this article, we will tell you about how to plant peppers, how to dive peppers, how to water peppers, how to fertilize peppers, how to grow pepper seedlings and when to plant sweet pepper seedlings. Hot pepper will be the topic of a separate article.
Planting and caring for peppers (in a nutshell)
- Landing: sowing seeds for seedlings - in February or March, planting seedlings of peppers in the garden - at the stage of formation of the first buds, at the end of May or at the beginning of June.
- Lighting: bright sunlight.
- The soil: light, neutral, well-drained and pre-fertilized.
- Predecessors: good - cucumbers, zucchini, carrots, green manure, pumpkins; bad - all nightshade crops, including peppers.
- Watering: before flowering - once a week, during the period of fruit formation - 2 times a week with a consumption of up to 6 liters of water per m².
- Top dressing: twice in the seedling period: two weeks after picking and at the stage of development of the second pair of leaves, then twice after planting the pepper in the ground. Both organic and mineral solutions are used as fertilizers.
- Reproduction: seed.
- Pests: spider mites, aphids, slugs, wireworms.
- Diseases: verticillium, bronze (or spotted wilt), phytoplasmosis (or stolbur), late blight, fusarium, blackleg, vertex and gray rot.
Read more about growing peppers below.
Pepper vegetable - description
Sweet pepper, or bell pepper, is an annual vegetable plant, which in nature is a perennial shrub. Its leaves are simple, petiolate, collected in a rosette or single, the color of the leaves, depending on the variety and variety, can be of different shades of green. Pepper flowers are axillary, large, bunched or solitary, with a white, purple or greenish corolla. The fruits are false hollow multi-seeded berries of yellow, red, brown or orange color of various shapes, weights and sizes.
Growing peppers from seeds
Sowing pepper seeds
Sweet pepper in our latitudes is usually grown by seedling seed method. The timing of sowing seeds for seedlings depends on climatic conditions however, in any case, the sowing of sweet peppers is carried out no later than the beginning of March.
Planting pepper seedlings begins with pre-sowing treatment of seeds: first, they are dipped for five to six hours in water at a temperature of 50 ºC to swell, then, wrapped in a damp cloth, they wait 2-3 days at a temperature of about 20 ºC, when the seeds peck, and only after that they are sown in the ground. Such preparation of seeds accelerates their germination, and seedlings can appear within 2-3 days after sowing.

The soil for seedlings of pepper is prepared as follows: 2 cups of garden humus are mixed with 1 cup of sand, one cup of garden soil, add a spoon or two of wood ash, stir well and sterilize this mixture in the oven or in the microwave, after which it is still hot, laid out in boxes, leveled , allow to cool to 40-45 ºC and lay out the seeds on it at intervals of 5 cm from each other with a depth of 1.5-2 cm. But it is better to spread the seeds in peat pots, since pepper does not tolerate picking well. Crops must be watered and then cover the seedling containers with polyethylene or glass and place in a warm place - the temperature required for seed germination is 21-22 ºC.
Growing seedlings of pepper
Growing seedlings of pepper is not much different from growing seedlings of any other vegetable. As soon as the first sprouts appear, the room temperature is raised to daytime up to 26-28 ºC, and at night the seedlings need coolness - 10-15 ºC. Keep an eye on the soil moisture in containers with seedlings - it should be moderate, because in too wet soil, plants can get sick with a black leg. However, drying of the soil should not be allowed. Seedlings are watered with settled warm water - approximately 30 ºC, the seedlings get sick from cold water, wither and die.

Seedling care involves the creation high humidity indoor air, so seedlings should be sprayed from time to time. In addition, regular ventilation of the room is necessary, but do not let the seedlings get into a draft. You may need to provide seedlings with additional lighting, as they need to be in the light from 7 am to 9 pm.
Pepper pick
In the development phase of the seedlings of the first pair of leaves, it dives. If you sowed the seeds in peat pots, then you don’t need to pick, but if your seedlings grow in boxes, when picking, the seedlings are placed from the boxes into 8x8 cm peat pots and buried in the ground along the cotyledon leaves.

The pickled peppers, after they take root in cups, begin to develop intensively, and shortly before the solemn moment of planting the seedlings in the open ground, they begin to accustom them to the environment in which they will find themselves: the seedlings are taken out into the fresh air daily, at first for a short time, but gradually the time spent in new conditions increase, preventing seedlings from falling into a draft or under "frost" below 13 ºC.
Before planting seedlings in open ground, pepper is fertilized, and at least twice: two weeks after picking or in the phase of formation of the first pair of leaves in the seedlings, and then after another two weeks, or when the seedlings develop the second pair of leaves. Top dressing is best applied in liquid form. The best fertilizers for seedlings are Agricola, Mortar, Krepysh, Fertika Lux.

Growing peppers on a windowsill
In order to grow sweet peppers at home, you will need self-pollinating seeds, a good substrate, a phytolamp and a place in the apartment where the sun shines at least 3-4 hours a day. Once your potted pepper is in flower, shake it at least once a day to ensure successful pollination. Large fruits take a lot of strength from the bush, so leave 5-6 ovaries for ripening, and remove the rest.
Fruit-bearing crops quickly deplete the soil in which they grow, so it is necessary to feed a pepper bush once every 2-3 weeks, adding to upper layer soil a teaspoon of agrolife or watering the soil with a solution of one capful of the Growth preparation in two liters of water.
Sweet pepper at home is a perennial plant, and it will not be superfluous to pour fresh vermicompost into the pot every two months, as long as the capacity allows, or transplant the bush into larger pots when the need arises. To prolong the life of the plant, it is advisable to carry out a small annual spring rejuvenating pruning of pepper, and then you are guaranteed a fruit harvest for several years.
Planting pepper in open ground
When to plant peppers in the ground
The grown, strengthened and hardened seedlings at the stage of formation of the first buds are planted in open ground when the air temperature reaches 15-17 ºС. Usually planting pepper in the ground occurs in late May - mid-June.
ground for pepper
Sweet pepper loves light, non-acidic soils, but you need to prepare a plot for pepper a year before planting. Moreover, it is not at all necessary that nothing grows in this place for a year, it’s just that the soil is being prepared for crops that precede pepper, the best of which are cucumber, zucchini, carrots, onions, pumpkin or green manure. But after crops such as eggplant, potatoes, tomatoes, peppers, physalis - in short, after nightshade, peppers are not grown.
When preparing soil for spring planting predecessors for a year for digging, 5 kg of organic matter is applied per 1 m², and in the fall, after harvesting, the site is dug up with the addition of 50 g of phosphorus and potash fertilizers per unit area. In the spring, in the year of planting pepper, 40 g of ammonium nitrate are added to the top layer of soil for each m², and five days before the seedlings are planted, the area is shed with a disinfectant solution, adding a tablespoon of copper sulfate to a bucket of water.

How to plant peppers outdoors
Holes are made in the garden at a distance of 40-50 cm from each other, and the distance between the rows is about 60 cm. The depth of the hole should be such that the root neck of the seedling after planting is flush with the surface of the plot. Place one tablespoon each of a complete mineral fertilizer containing nitrogen, potassium, and phosphorus into the holes, and thoroughly mix the pepper fertilizer into the soil at the bottom of the hole.
If seedlings grew in peat pots, then lower the seedling into the hole right with it, and if you grew the seedlings in a common container, then carefully remove the pepper from it, trying not to destroy the earthen ball, and lower it into the hole. Fill the hole halfway with fertile soil, then water each plant generously, spending one bucket of water on three seedlings, and when the water is absorbed, fill the holes with earth to the top. It is advisable after planting to mulch the area with sweet pepper peat. If the temperature drops below 13 ºC at night, the planted seedlings will need shelter.
Growing peppers in a greenhouse
There are varieties of pepper for open ground, and there are those that can only be grown in greenhouses. Pepper varieties include Arnes, Accord, Alyonushka, Vesper, Bonus, Atlas, Pinocchio, Orange Miracle, Tenderness, Swallow, Night and others. First, the seeds are sown on seedlings, and when it grows and undergoes hardening procedures on a balcony or terrace, it is planted in greenhouse soil. We have just described the sowing of seeds and the stages of growing seedlings.
Planting peppers in a greenhouse carried out when the seedlings reach a height of 25 cm and an age of at least 55 days, it forms a thick green stem and 12-14 leaves each, in the axils of which buds have already formed. The soil in an unheated greenhouse should be warmed up to 15 ºC by the time the seedlings are placed in it, so transplanting is unlikely to take place before May 15.

The soil for pepper in the greenhouse before planting is fertilized with potash and phosphate fertilizers at the rate of 30 g of the first and 40 g of the second per m² and watered abundantly. The planting density of seedlings depends on the variety: between seedlings of vigorous varieties, it is necessary to leave 35 cm, between medium-sized seedlings, an interval of 25 cm is enough, and early-ripening, undersized varieties are planted at a distance of 15 cm from each other. The distance between the rows is from 35 to 60 cm. After planting the seedlings in the holes, the soil is compacted and mulched with peat.
Pepper Care
How to grow pepper
Growing pepper in open ground involves timely watering, weeding and loosening the site, garters and plant nutrition. Professionals recommend removing the central flower from the first branch on each bush - this should increase the yield of pepper. Also, to increase the yield, the bushes are formed into 2-3 stems, for which it is necessary to remove the resulting lateral shoots - stepchildren - in a timely manner. Do it in hot and necessarily humid weather. On one plant, you can leave no more than 20-25 fruits.
When planting seedlings of high varieties of pepper in the ground, drive in a peg immediately next to each seedling, to which, if necessary, you will tie a bush.
For successful pollination of pepper, it is necessary to attract pollinating insects to the site, for which the bushes are sprayed with boron-sugar syrup, dissolved in a liter hot water 2 g boric acid and 100 g of sugar. And refuse to treat the garden with pesticides from the moment the pepper blossoms, otherwise the insects that pollinate the pepper may die.

Watering pepper
After planting in open ground, the seedling looks somewhat lethargic, but this is quite natural, so it is very important not to overdo it with soil moisture at this time. Peppers should be watered once a week before flowering, and during the fruiting period, they will have to be watered twice a week at the rate of 6 liters of water per m². After watering, you need to very carefully loosen the soil between the rows, trying not to damage the surface root system of plants.
Peppers are watered with warm settled water from a watering can by sprinkling. From a lack of moisture, pepper slows down growth and can shed flowers and ovaries. To keep the soil moist, experienced gardeners recommend mulching the pepper area with a ten-centimeter layer of rotted straw.
Pepper dressing
After top dressing in the seedling stage, pepper in the open field is fertilized twice with a solution chicken manure at a concentration of 1:10, and also apply foliar top dressing of a solution of a tablespoon of nitrophoska in a bucket of water. Twisted pepper leaves with a dry border around the edges will tell you that there is not enough potassium in the soil, but do not use potassium chloride as a fertilizer - pepper does not tolerate chlorine.
From nitrogen deficiency the leaves acquire a dull, gray tint and gradually become smaller, and from an excess of this element, the plant sheds ovaries and flowers. When the pepper lack of phosphorus, the underside of the leaf plate becomes rich purple, the leaves rise up and cling to the trunk.
From magnesium deficiency sweet pepper leaves become marbled. Be attentive to the plant, and you will be able to help it in time by making the necessary feeding.

Pepper processing
The fight against diseases of peppers during the period of fruit ripening with pesticides is undesirable, since all beneficial features plants are leveled by nitrates absorbed after treatment and other chemicals harmful to humans. At proper care and compliance with agricultural practices such as problems with diseases or pests in pepper should not arise, but if they do appear, let's consider what measures will help get rid of them and at the same time keep the quality of the fruit at a high level.
Pests and diseases of pepper
Readers often ask questions about what pepper is sick with. Most often, sweet peppers are affected by diseases such as verticillosis (wilt), bronze (spotted wilt), phytoplasmosis, fusarium, late blight, vertex and gray rot, black leg.
Verticillosis – fungal disease, which exists in three forms: brown, green and dwarf, each of which manifests itself in its own way. Since the destruction of pathogens by pesticides on vegetable plants is undesirable, only preventive measures: destruction in autumn of all plant residues and cultivation of varieties resistant to verticillium.

Phytoplasmosis, or stolbur, manifested by the fact that the roots of the plant begin to rot, dwarfism develops, the fruits grow small, thin-walled and tasteless, the leaves twist, harden and turn yellow, as a result, the pepper dries. Carry cicada disease. The fight against phytoplasmosis is carried out by treating Akara pepper at the time of planting and three weeks after it - spraying the vegetable at this stage of development will not cause harm. In addition, it is necessary to regularly loosen the soil in the area and remove weeds.
Fusarium- a fungal disease in which the pepper turns yellow: the leaves become poisonous yellow. Sick specimens are destroyed, the rest of the plants are diligently cared for: moderately watered in the morning, do not allow weeds to appear on the site. Keep in mind that in next year on a site infected with Fusarium, it is better not to grow pepper.
late blight- a common fungal disease that affects peppers and tomatoes. Symptoms of phytosporosis are the formation of hard spots on the fruits that capture the pulp. Destroy pathogens with drugs Oksikhom, Zaslon, Barrier, but only before the beginning of flowering pepper. By the way: hybrid varieties much less susceptible to disease.

Blackleg affects the basal part of the stem of pepper seedlings as a result of too dense sowing and maintenance at high soil and air humidity. Over time, the stalk softens, and the seedling dies. To avoid disease of seedlings with a black leg, you should sow seeds spaciously, dive seedlings in time and monitor the level of humidity in the greenhouse. If you find diseased shoots, immediately remove them, dry and loosen the soil in which the seedlings grow, and sprinkle it with wood ash. At this stage of plant development, it is permissible to spray the seedlings with a Barrier solution in the ratio: 3 caps of the drug per 1 liter of water.
Blossom rot occurs on the plant, oddly enough, in the case of a lack of moisture and manifests itself as shiny or black deep spots on the fruits. Sometimes the cause of the disease can be an excess of nitrogen and calcium in the soil. Infected plants are burned, and the rest are sprayed with calcium nitrate.
Gray rot can affect every plant at any stage of development with putrefactive spots and gray mold. Usually rainy weather provokes its appearance. Affected fruits and parts of the plant must be removed, and the bushes in the area should be sprayed with fungicides if it is not too late.

Signs of bronze or spotted wilt, look like brown spots on the leaves, acquiring a bronze or purple hue. These necrotic spots are located mainly along the main vein of the leaves. As a result of the development of the disease, the top of the plant dies, the fruits in the stalk area become covered with green, brown or pale yellow annular spots. To save the crop, ripe fruits are cut off, and the soil is no longer watered. The fungus is destroyed by Fundazol, however, before you treat the pepper with a fungicide, once again weigh all the pros and cons of such spraying.
Of the pests, aphids, spider mites, wireworms and slugs annoy the pepper. Nut shells, ground hot peppers or mustard powder can help protect the plant from slugs. You can also place bowls of dark beer here and there, to which the clams will crawl from all over the site. And do not forget to loosen the soil between the rows to a depth of 4-5 cm in the heat.
Click beetle larvae, or wireworms, remaining in the soil for five years, they gnaw on the roots of plants. To get rid of wireworms, in the fall they dig up the ground on the site, and in the spring, before planting pepper, they arrange several baits on the site, burying pieces of sweet root crops in the ground and marking these places for themselves. Nutcracker larvae will surely crawl to these baits. Every two or three days, the baits are dug up, the larvae are collected and destroyed.

Spider mites they start on plants in dry land, they settle on the underside of the leaves and suck out the cell sap from them. If you don’t know how to treat pepper from a tick without resorting to insecticides, we offer you a recipe for a solution that is non-toxic to the human body: a tablespoon of liquid soap or dishwashing detergent along with a glass of finely chopped onion or garlic, as well as chopped dandelion leaves are mixed in 10 liters of water, let it brew and spray pepper with this composition at any stage of its development.
From aphids get rid of wood ash or tobacco dust infused in 10 liters of hot water in the amount of one glass. You can also, if necessary, use the treatment of pepper with a solution of rapidly decomposing insecticides such as Karbofos or Keltan at the rate of: one tablespoon of the drug per 10 liters of water.
Collection and storage of pepper
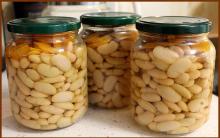
Peppers have two types of ripeness - technical and biological (or physiological). At the stage of technical maturity, all peppers are usually green in color - from dark green to greenish-whitish. If the peppers on the bush are yellow, red, orange, purple or Brown, then we can say that they are already at the stage of biological maturity, which means that the fruits taken from the bush must be used immediately - canned or eaten, since such peppers are stored for a very short period of time.
The fruits collected in a state of technical maturity in suitable conditions can be stored up to two months. The time difference between technical and biological ripeness is 20-30 days. The readiness of pepper for harvesting is determined by the cod of the fruit during a light pressure on it. And one more landmark: peppers are harvested at about the same time as eggplants and tomatoes.
Usually, the first fruits are harvested in early or mid-August, and peppers continue to be harvested until frost. That is, ripened fruits are removed selectively every 5-7 days. To better store the pepper, it is cut along with the stalk. During the growing season, three to five collections are carried out. Before the onset of frost, all fruits are removed from the bushes, and their further ripening takes place indoors, after sorting by size and degree of maturity.

Before storing the fruits, the stalk is cut off, leaving a segment of only 1-1.5 cm. Only healthy thick-walled fruits that do not have mechanical damage. Thin-walled varieties are stored in the refrigerator. Varieties with juicy walls can be kept in plastic bags with a thickness of at least 120 microns, it is desirable that they have a membrane with perforations on the side wall. Peppers keep better if each fruit is wrapped in paper. You can store peppers in baskets, shallow boxes with 1-2 rows or on shelves in the basement with a temperature of 8-10 ºC and an air humidity of 80-90%.
Because peppers absorb odors quickly, make sure nothing in your basement is moldy or decaying. Storing peppers in the right conditions allows them to stay fresh for a month and a half to two months. You can store sweet peppers for a month in the refrigerator at a temperature of 9-10 ºC. Many housewives prefer, after washing the fruits and removing the testicles, put the peppers one inside the other and store them in the freezer all winter so that they can cook their favorite dishes from it at any time or add a slice or two to borscht or salad.

Those fruits that are not suitable for storage can be processed. They make excellent marinades, fragrant winter salads, borscht dressing.
Types and varieties of pepper
We have already mentioned that vegetable peppers can be sweet and bitter. We promised to tell you in detail about bitter pepper in a separate article. Sweet pepper is divided into the following varieties:
- bell pepper;
- tomato vegetable pepper;
- cone-shaped vegetable pepper;
- cylindrical vegetable pepper;
- bell-shaped vegetable pepper.

Popular varieties include outdoor peppers, greenhouse peppers, and container varieties that grow and bear fruit on a balcony or windowsill. Varieties also differ in terms of ripening: early varieties reach maturity in 80-100 days, mid-ripening ones need a little more time to ripen - from 115 to 130 days, and late ones will need 140 or more days.
- Early peppers include varieties Zdorovye, Dobrynya Nikitich, Snow White, Swallow, as well as hybrids Atlantic, Orange Miracle, Montero, Cardinal, Denis.
- Of the mid-season varieties, Prometheus, Ilya Muromets, Korenovsky, Belozerka, Maxim and Vitamin hybrids are considered the best.
- Of the later varieties, the Golden Medal variety and the Nochka hybrid have proven themselves well.
By the way, What is the difference between "variety" and "hybrid"? Hybrid seeds do not retain varietal characteristics, so it is pointless to collect seeds from hybrid varieties; you will have to buy the seed material of the hybrids you like every year. But hybrid varieties are characterized by high yields, large fruits with excellent taste, in addition, they are very resistant to diseases.
Pepper varieties also differ in size and shape of the fruit, and this is very important, because for stuffing, for example, you need a thick-walled pepper of a large size, oval or spherical, and for salads, you can use other varieties with thinner walls and smaller sizes. In shape, sweet pepper fruits are elongated, cuboid, cone-shaped, oval, spherical and cylindrical. They can be both smooth and tuberculate.

And, of course, pepper varieties differ in the color of the fruit in the phase of biological ripening. Varieties such as Alyosha Popovich, Red Elephant, Swallow, Ilya Muromets, Winnie the Pooh and hybrids Dawn, Latino and Red Baron have red fruits. Yellow-fruited peppers are represented by varieties Katyusha, Yellow bouquet and hybrids Raisa, Isabella, Indalo. The Maxim hybrid has a purple color during technical maturation and dark red during biological. The hybrid Cardinal has fruits purple, in the Bonus variety, fruits from ivory to dark red, in the Apricot Favoritka variety and the Chanterelle hybrid, ripe fruits are bright orange.
We offer you several popular varieties of pepper, among which you will surely find those that you want to grow at home.
- fat baron- an early ripe variety with sweet red cube-shaped fruits weighing up to 300 g. 8-9 fruits ripen on a spherical bush 50-60 cm high.
- red shovel- a bush up to 70 cm high, on which up to 15 red sweet fruits weighing up to 150 g and wall thickness up to 8 mm ripen.
- California miracle- A well-deserved mid-early variety that has been tested for decades, which needs about 75 days to ripen from the moment the seedlings are planted in the ground. The height of the bush is up to 80 cm, the fruits are red, thick-walled, weighing up to 250 g.
- yellow bell- one of the earliest disease-resistant varieties, which needs only 65-70 days to ripen. The height of the bushes is 70-80 cm, the fruits are golden yellow, cuboid, up to 12 cm in height and diameter, the wall thickness is 8-10 cm.
- Hybrid series Star of the East with thick-walled fruits weighing from 150 to 350 g, mostly early term ripening with fruits of white, white with red, golden and chocolate color.
After this article, they usually read


Sun skirt: types and how to wear it Black sun skirt with a T-shirt how to wear
Ground bird cherry Ground bird cherry cook
Own business: production of chips
How to care for your skin in spring Face masks in spring
Seizures in the corners of the mouth: causes and treatment in adults and children