Soviet furniture often has enough good quality to serve their masters for years. You can throw it away only because the interior has become old-fashioned or tired. Many items are made of natural wood, and could still perform their functions for a long time, but this design! Fix it appearance grandmother's dresser or mother's wall, getting something really interesting.
There are several effective tricks that will completely change the appearance of the Soviet headset and allow it to last longer. Pick one or a combination of them all.
Repair and preparation for rework
If the table or chest of drawers that you got was not particularly popular, its design can be left unchanged. After all, it will not necessarily be furniture that has set the teeth on edge, and in combination with a modern setting it will look quite appropriate. But without repair work is unlikely to succeed. Over time, the furniture dries out, and some parts will have to be re-adjusted to fit each other.
Be sure to pay attention to the following operations:
- Cleaning furniture from dirt, dust and soot (pay special attention to the corners);
- preventive lubrication of locks;
- fitting parts (if the furniture has dried out or warped during transportation);
- grinding and puttying of damaged surfaces;
- change of furniture fittings
In some cases, restoration of damaged surfaces and a thorough repair will be sufficient. If you decide to completely change the appearance of a particular item, this stage will be preparatory.
Restoration of damaged coatings or application of new varnish
The least radical way of alteration, which borders on restoration. You can slightly update the damaged coating, or completely change the look of the furniture. It all depends on the type of varnish and processing methods.
It is most appropriate to use in cases where furniture made of good wood species falls under restoration. Classic design, which will be appropriate in any interior, needs a delicate attitude.
Some useful tips:
- The easiest way is to use oil-based varnish, it was they who processed old furniture. In some cases, you can do without removing old layers.
- Apply varnish with a sponge, not with a brush, so you prevent the formation of stains and villi on the surface.
- Dry each layer for at least 12 hours.
- If you want to completely change the appearance of furniture, use a two-component craquelure varnish. It will create the effect of cracking on the surface, and will make the furniture look like antiques.

Some pieces of furniture do not need to be radically redone. It is enough to restore the old layer of varnish and restore the fittings a little.

Craquelure varnish goes well with painting, decorative painting and decoupage.


Painting old furniture
Choose this technique if you want to completely change the design. Be that as it may, but the furniture from natural wood may look a little bulky and heavy. And if for a spacious office this can be a plus, then in a small apartment you want lightness and air. Repainting will help make the design more democratic.
Some useful tips:
- Use this type of alteration also where the wood is badly damaged, or we are talking about inexpensive wood species.
- Be sure to remove the old coating from the surface.
- Sand the wood well, then apply putty and a coat of primer. So you will significantly reduce paint consumption and achieve a better result.
- After applying the first coat of paint, dry the furniture and go over it with a sander and sandpaper. This process may seem ineffective, because a significant part of the paint will be removed. But with repeated coloring, you will achieve the perfect result.
- Work with matte paints simpler, they better hide surface defects.
- Use art painting or ready-made templates to apply interesting drawings.
- Combine painted details with natural wood.

Light shades and laconic fittings will make the furniture more democratic.

White color and weightless fittings completely transformed the old chest of drawers.

Monochromatic paint that hides the texture of wood looks light and modern.

In some cases, a light background works great in combination with contrasting fittings.

It is good to apply bright accents with masking tape.

As a stencil for applying paint, you can use an old curtain with an ornament.

Another version of the "lace" painting.

Learn the decoupage technique
This type of decoration has long been adopted by needlewomen. But why not apply it on a more serious scale? Use ready-made images, and apply them to a painted or sanded surface.
Some useful tips:
- Be sure to prime the surface before sticking images on it.
- As a material, use any drawings printed on thin paper, napkins, or even newspaper clippings.
- Thick paper must be soaked in water or decoupage solution before gluing;
- Do not limit yourself to surface treatment with glue. After the decoupage coating has dried, cover the furniture with a durable varnish.

Decoupage works great in combination with matte paint.

A large drawing can be printed on thin paper.

Decoupage combined with craquelure varnish and painting.
Did your grandmother leave you antique Soviet furniture from the 1930s? Did your parents reward you with an old closet from the 60s? Do not rush to get rid of them! In this article, you will learn how to do the restoration of Soviet furniture with your own hands, or rather, how to update old furniture so that it becomes pleasing to your eye again. Photos of successful experiments are attached. So…
Stage 1: replacement of furniture fittings
Most of all, in old furniture, poorly closing doors are annoying. If you are going to take on such a thing as reworking Soviet furniture with your own hands, then first you will have to buy new fittings, find material for sealing loose holes (you can use putty, dowels or corks), get a screwdriver and a screwdriver, and then work hard on fixing doors.
We advise you to also take a closer look at the rest of the fittings. Sometimes simply replacing old-fashioned handles can be enough to make a big difference in furniture. As for the staggering legs of chairs and tables, they can be put in order in any workshop.
Stage 2: furniture cleaning
Before proceeding to the alteration of Soviet furniture, it should be thoroughly cleaned. Do-it-yourself restoration of Soviet furniture begins with the removal of dirt and soot, which is recommended to be done using an ordinary sponge, soap made on the basis of any vegetable oil, and warm water. To clean the most problematic places - corners and cracks - use a soft toothbrush, for narrow gaps - a wooden dowel, pointed at one end.
Stage 3: Renovation of old furniture
Worn and upholstered surfaces of Soviet furniture must be put in order. For grinding, use sandpaper or a special grinding tool (whoever has what). Any cracks can be carefully repaired with putty, after which this place has dried, this place will need to be sanded again.
Advice: before puttying and painting, the surface should be treated with a primer - then the adhesion will be better, and the applied paint or putty will lie more evenly.

Stage 4: decorating furniture with your own hands
The fourth stage of the restoration of Soviet furniture with your own hands is decorative trim. Coloring, varnishing, painting, furniture decoupage, decoration with stickers - here you will have to dream up and choose the most suitable option. You may be inspired by the ideas in this article.
How to update old furniture - furniture painting
Let's start with the most popular and easiest way to update old furniture. Here you will learn how to paint Soviet-era furniture.
Painting furniture should only be done if it is made of cheap wood (pine, etc.). If your Soviet furniture is made, for example, of oak, then painting it is highly discouraged, as this will permanently reduce its value.
Do-it-yourself restoration of Soviet furniture is usually carried out with oil paint. How to paint furniture correctly:
- Apply the paint with light strokes in a thin layer along the wood fibers.
- Let dry for about 12 hours.
- Clean the surface with sandpaper, wipe off dust and apply a second coat.
If you are restoring Soviet furniture of the 50s-70s, which was made in a minimalist style, then black and pastel light colors are perfect for painting it. With this finish, it will be a great accessory for a modern interior.
If you want to be more creative in painting furniture, but you don’t own hand-painted, then use templates. They are sold in stores, they can also be printed from the Internet and cut on thick paper. Before applying the pattern to the furniture, the stencil must be fixed with adhesive tape.
Painting furniture - photos of old furniture before and after:
Do-it-yourself chest of drawers restoration:


Also read:  How to update old wardrobe:
 How to redo an old bedside table and chairs:


It has become very fashionable to paint furniture with thin lace. Just fix the lace fabric on the surface of the Soviet furniture, then apply the paint. The result is amazing!

Alteration of old furniture through varnishing
If Soviet furniture is made of precious woods, then, as we said above, it is better to cover it with a fresh layer of varnish than paint over it. How to update old furniture through varnishing?
Firstly, when reworking or restoring Soviet furniture with your own hands, it is best to use oil varnishes. They are suitable for all types of wood and form very durable, shiny and moisture resistant coatings. The only negative is the long drying period (up to 12 hours). For comparison: shellac varnish dries in 1-2 hours, and nitro-varnishes in 30-40 minutes.
General rules for reworking old furniture:
- Varnish can be applied with a brush or a piece of dense, lint-free cloth folded 2-3 times;
- The varnish is applied in 3-5 layers, and after applying each new layer, the drying time should be increased;
- Excess varnish should be squeezed out on the edges of the jar, the brush can sometimes be washed in an alcohol solution.


How to update old furniture with craquelure varnish
We also want to give you an example of a special varnishing method, which is performed using a special varnish - craquelure.
Today, there are many varieties of craquelure varnish for reworking old furniture: with the effect of patina, gilding, etc. The most common one is applied in a thick layer over the main layer of paint, after which it is covered with a different color to highlight cracks. Also, craquelure varnish can consist of two components: the first is applied to age the treated surface, the second to create decorative cracks.

Restoration of Soviet furniture with the help of craquelure is perfect for lovers of antiquity and country style. As, however, our next method is decoupage.
Mastering the decoupage technique will help you turn old Soviet furniture into a real design masterpiece. Decoupage of old furniture is performed using the following tools:
- Sandpaper fine grit;
- Alcohol;
- Primer;
- Brush and glue for decoupage;
- Roller or sponge;
- Decoupage material - newspaper clippings, old postcards, letters, drawings, book pages, etc.
In search of inspirational ideas and materials for decoupage, the Internet will help you. For example, we especially like these 2 examples of how to update old chest of drawers decoupage method:

- Surface preparation with sandpaper;
- Cleaning with a cloth soaked in alcohol;
- After the surface dries - applying a primer (3-4 layers);
- If decoupage materials will be used only in places, then the furniture must first be painted to make the background;
- If the furniture will be glued completely (for example, with newspapers), then immediately after the primer dries, you can start applying glue;
- Thin paper can be immediately applied to the glue, while thicker paper should first be thinned with sandpaper and soaked in water;
- Wet paper is blotted with a towel on both sides and applied to the glue;
- After gluing all materials, you should walk on the surface with a roller or sponge to remove glue residue;
- The last step is to apply varnish to the dried surface.
Original furniture in Provence or vintage styles is ready!
Photos of old furniture before and after decoupage:


 How to update an old wall
Those who are interested in reworking furniture with their own hands - here are ideas for you on how to update an old Soviet wall with decoupage and new paint:


Liked? Then read: !
Do-it-yourself Soviet furniture restoration updated: October 27, 2015 by: Margarita Glushko
Do you want to create a unique interior without extra costs?
Old furniture will help you with this, a photo of the alteration of which you can find with us. There are many ways to transform old, familiar items for you.
The choice of method depends on the purpose of the furniture and the type of coating, as well as its condition at the time of repair.


You can find a step-by-step photo-master class for making furniture with your own hands from old interior items on our website. The process of updating furniture includes two main stages:
- repair;
- decoration.
Let's take a closer look at what you should focus on.
Table repair
Tables are distinguished by their functionality into writing, dining, kitchen and coffee tables. Depending on their purpose, their structure also differs, and, consequently, the restoration process. Usually, dining tables consist of 4 legs, a bow and a tabletop. They can be solid or folding. When altering such furniture, special attention should be paid to the condition of all elements, as well as their fastening. The legs should be the same, without damage. If necessary, they can be replaced.
The tabletop, in turn, is the main part of the table. Its surface should be smooth, free of grooves, cracks and corrosion. If necessary, wood putty can be used to achieve the desired effect. With its help, you can easily and quickly eliminate all surface imperfections. If necessary, it can also be used in the repair of legs. The same scheme is used in the repair of coffee tables.


Kitchen tables have their own characteristics. Before proceeding with the repair, it is necessary to carry out a complete inspection this subject interior. An important role is played by the strength of the countertop. It must withstand heavy loads and physical impact. In this regard, the foundation on which it is installed must also be strong.

An example of using putty on wood, which will help fix all the bumps in the old countertop
Note! Kitchen tables are not only a place to work, but also used to store kitchen utensils. To do this, they have built-in drawers, shelves and doors. They should be given special attention.
If the table is equipped with shelves, then you should pay attention to their fasteners. If necessary, in furniture store you can purchase special bonnets made of wood or plastic, and a thin, durable one can also be used as a shelf mount metal corner. Pay attention to the condition of the canopies with which the door is attached. It is best to replace them with new ones, since with frequent use this part lends itself high wear.

Freshness natural wood give special polishing agents that can be found in any hardware or furniture store
If the table is equipped with drawers, then check how firmly their walls and bottom are connected. To facilitate their use, you can replace the fittings with which the drawers are pulled out. You can buy it at a furniture store. You can also buy there various types comfortable handles.
Advice! When replacing canopies, choose those that are designed for furniture. They will provide more convenient and reliable operation of the doors.
When repairing desk it is worth paying attention to all of the above. After watching a detailed master class on reworking old furniture with your own hands, you can repeat it yourself.

Repair of cabinets and bedside tables
Each house has furniture that is designed for storage. As a rule, this different type and size of cabinets and cabinets. They can be different in height, depth, spaciousness. Moreover, each of them can become a real decoration of your apartment. To do this, see how to restore old furniture with your own hands further.

A rather extravagant and extraordinary element of the interior - a bedside table from an old suitcase
First of all, it is worth inspecting all the fastenings of the shelves and, if necessary, replace them with new ones. You can also replace the drawer mounts with more functional and modern ones.
Depending on the size, the methods of fastening the doors may vary. Sheds are used at cabinets and small cabinets. They wear out quickly, so when carrying out repairs, it is best to replace them with new ones.
If you are remodeling a large wardrobe and it has movable doors, then over time its fittings may also wear out. In a furniture store you can find special fasteners for sliding doors closet.
How impressive the restored old furniture looks in this case, see the photo below.


Chair repair
It is hard to imagine any home without chairs. Today it is so commonplace that few people pay attention to it. This can happen in two cases - either with the proper design of the chair as an interior item, or if it breaks. We will consider how to come from the second option to the first.

The option of restoring old chairs with covers in vintage style
The chair consists of three main elements:
- legs;
- seats;
- backs.
All of them can fail sooner or later. If the legs are the cause of the breakage, then they must be firmly fixed, otherwise the use of the chair becomes dangerous. If the seat is broken, then it can be replaced by cutting out the appropriate piece from plywood or fiberboard. The same can be done with the back. Also, if desired, the chair can be made soft. To do this, it is necessary to attach to the seat and back soft upholstery based on foam.
Advice! If you decide to install or replace the upholstery on a chair, it is best to use fabric stitched to the foam. You can find one in a textile store, and it is worth fixing it with a construction stapler.

Old furniture: photo design options using painting
As you know, any piece of furniture should be not only functional, but also attractive. Therefore, when old furniture is updated, the photo of which you can see below, it is necessary to break the work into several stages. The first step is surface preparation.


Furniture needs to be cleaned old paint, varnish, and also from pollution. After that, it is necessary to putty the cracks, if any, and then apply a primer. Next, you can apply the foundation. To do this, you need to choose the paint of the appropriate color.

New life of the frame of an old bed made of natural wood - painting in delicate turquoise
Advice! Best to use acrylic paint water based. It does not contain toxic substances, does not emit a strong odor and dries quickly. This gives the surface a glossy finish. But if you are good at using an aerosol can, then it will do.


decoration
Restoration of old furniture, photos of which are presented below, includes decor. You can use different techniques and combine them. The most common is decoupage. For this you will need the following:
- the desired image printed on paper;
- PVA glue;
- brush for glue;
- varnish, preferably water-based acrylic;
- brush for applying varnish.

Decoupage is a fascinating activity, and furniture made using this technique looks very gentle and unusual.
Advice! It is best to use large colored napkins with appropriate motifs as an image.
Lubricate the surface with glue, gently attach and smooth the picture. Let everything dry a little, then open it with varnish. It is worth noting that there is no doubt about the effectiveness of using this method during the restoration of old furniture with your own hands.


Another no less interesting method of decorating is applying patterns using lace. For this you will need:
- lace;
- paint of the corresponding color;
- Scotch.
Take a piece of lace and attach it to the place you plan to decorate. Secure the ends with tape. It is advisable to cover the rest of the area with paper or film. Apply paint with a brush or use aerosol cans. Let the product dry. Remove tape, paper and lace.
Advice! If you want to decorate a large area, then it is best to use a piece of guipure of the appropriate size.
Both of the above methods are quite effective. Instead of lace and guipure, you can use paper templates. As a rule, often when decoupage and restoration of old furniture, wallpaper left after repair is used.
Padding of upholstered furniture
Over time, the upholstery of sofas and armchairs not only loses its attractive appearance, but can also sag a lot, become not as soft as before. But if you don’t want to throw away your favorite piece of furniture or don’t have the money to buy a new one, you can do the upholstery at home.


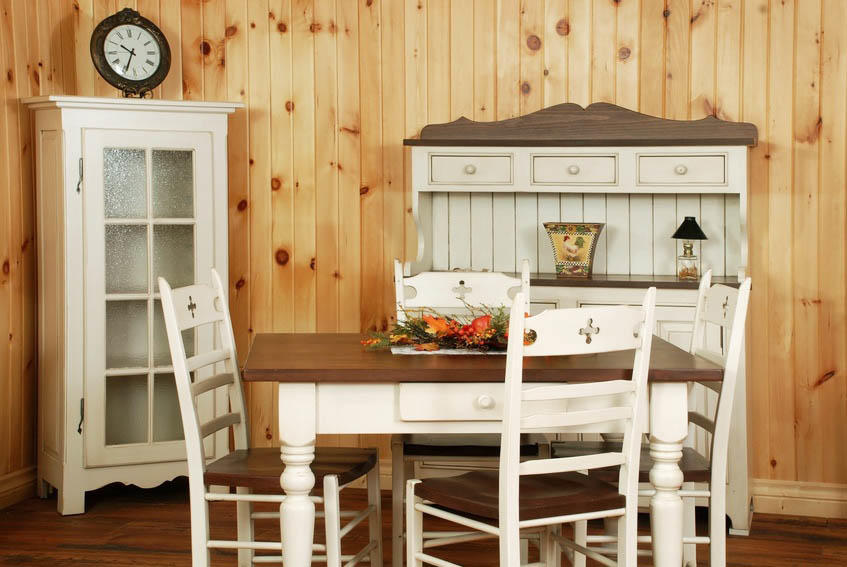
Refurbished shabby chic dining room

Detailed master class how to remake furniture with your own hands, and photo examples are presented on our website. You need to purchase the appropriate fabric from which the new upholstery will be made. It could be:
- barakan;
- velours;
- leatherette;
- crepe;
- alcantara;
- leather, etc.
The choice of material for upholstery depends on your financial capabilities. You can buy it both in a textile and in a specialized furniture store. Also you will need construction stapler and staples to it.
It is best to get rid of old upholstery. It can be fixed with glue. In this case, you will need a construction knife or (if stapler brackets are attached) you will need to use a flathead screwdriver. After removing the old cover, begin to install a new one.
A small master class on replacing the upholstery of an old pouffe
Cut off the necessary piece of upholstery, attach it so that the edges go to the place where the old one ends, and attach with a stapler. You can carry out such manipulations both with the soft part, and with the back and the former.
If upholstered furniture has lost its volume and softness, they can be returned by replacing the foam rubber. It is necessary to fix it with the help of special small carnations. If you are afraid that such manipulations are beyond your power, then you can stick foam rubber over the old upholstery and fit it with a new one. But it should be borne in mind that the furniture should not lose its functionality.

We give new volume to the seat of an old chair
You can give any volume to your product. To do this, you need to choose foam rubber of the appropriate thickness. If there is a folding mechanism, then after the constriction it should function as before.
Advice! If you need to replace the upholstery and renew its volume, it is advisable to use fabric stitched to the foam. You can purchase it at a specialized store or stitch both materials yourself.

Upholstered furniture upholstery decoration
If you change both layers of upholstery, you can apply different types of decorating options that will give your furniture a more aesthetic look. There are many ways to do this. We will look at the two most common:
- The fabric used for the upholstery can be sewn on with patterned seams. This will create a special decorative effect.
- Purchase buttons or textile clips and use them to tighten the fabric and foam rubber, connecting them together.
Renovation of upholstered furniture with a cover
more economical and in a simple way hide stains is sewing covers. To do this, you can choose any fabric you like. It is important that it is durable. The most commonly used for this purpose are:

- barakan;
- velours;
- velvet;
- jeans
- coarse calico;
- other.
After taking measurements according to the size of the sofa, you can sew a cover that will cover the back, seat and, if necessary, the former of your sofa.

A small master class on sewing a removable cover for a pouffe
When making a cover, you can use various decor techniques. You can place embroidery in a certain place. If desired, you can sew an application. To do this, fragments of the pattern are cut out of pieces of fabric and sewn to the base, forming a single picture.
You can also use the currently popular patchwork - the art of making products from patchwork. In this case, you can use pieces of old unnecessary things to make a cover.
We update the past with plywood
Scuffs, stains and even broken upholstery on the former can be hidden with a special lining. To make it you will need:
- plywood;
- small metal corners;
- the smallest furniture screws.
You can cut plywood yourself or seek help from specialists where you will purchase it. You will need 5 pieces according to the size of your bull. The overlay should cover its outer, inner, back, front and top parts. After taking measurements, simply make 5 corresponding rectangles and fasten them from the inside of the structure using corners and self-tapping screws.

Further, it is enough just to put the design on the former. It can not only serve as a decor, but also be quite functional. You can use the overlay as a mini table. If necessary, apply paint or decorate it in any way convenient for you.
Advice! After making the plywood lining, sand it on both sides with sandpaper.
Many owners of old solid furniture, which has been used for its intended purpose for many years, and unfortunately by today needs restoration, do not know how to properly perform this procedure without significant costs. Often, families with pets or small children also face the problem of damage or damage to the skin, the frame of new furniture. In this article, we will try to consider in more detail on several illustrative examples step by step process restoration of old and damaged furniture.
Example 1. Sofa restoration
Corner sofa upholstery restoration.
Tools used:
- wire cutters;
- round nose pliers;
- screwdriver;
- staple remover.
Stage 1.
Visual inspection of the condition of the upholstery and load-bearing frame of the sofa.
Stage 2.
Remove sofa upholstery. To do this, first remove the legs with a screwdriver. After that, using a special staple remover, starting from the corner and moving along the perimeter, we remove the mounting clips.
Stage 3.
We check the condition of plywood, chipboard, and other elements of the supporting frame of the sofa. This example shows that the core is in excellent condition and does not require replacement.
Stage 4.
After evaluating the state of the frame, we remove the old covers, make a template according to their model and sew new covers for the sofa.
Stage 5.
They replaced the old sagging foam rubber and synthetic winterizer with a new one. After that, we move on to the upholstery of the sofa. new fabric. Using a special tool, we fix the new upholstery around the perimeter with staples.
The final stage.
Installation of decorative overlays and legs of the sofa in their installation places.
The new sofa is ready for use.
Example 2. Making a bench and table from an old cabinet
Tool used:
- screwdriver or screwdriver;
- electric jigsaw;
- ruler;
- yardstick;
- marker or pencil;
- wood screws.
Stage 1.
We remove the curtains with doors using a screwdriver or a screwdriver.
Stage 2.
For the future table, we measure the dimensions on the old cabinet. In this example, a distance of 80 cm is selected for the table.
Stage 3.
According to the line marked on the side walls and the back wall, we cut with a jigsaw. Thus, two absolutely equal halves of the cabinet are obtained.
Stage 4.
Using the remaining scraps and shelves, we connect the two parts of the sawn cabinet. This will require wood screws and a screwdriver.
Stage 5.
In order for the table not to look so massive, we will make beautiful curly legs. To do this, we make indents from the top and bottom of the side legs of the future table and draw an arc. We cut out the decal along these lines using a jigsaw, which will be used as a stencil for the second side.
Then we turn the table over to the other side and make a similar cutout for the stencil on both sides of the legs. As you can see, the restoration and decoration of old furniture requires an author's approach. Thanks to this author's approach, we have a stylish modern table.
Stage 6.
For a finished new table, you need chairs or a bench. It was for these purposes that the cabinet doors removed in advance were saved. We lay out three doors next to each other, dismantle the old hinges. We mark the first door in half, which will subsequently serve as the legs for the bench.
Stage 7.
For the stability of the future bench, we make a cutout on the legs, which we mark with a regular bucket, as shown in the figure below. Then, using a jigsaw, we cut out a semicircle on each leg.
Stage 8.
For the rigidity of the design of the bench, we connect two legs with a special bar.
We use the third door from the cabinet for the base of the bench, which is fixed with self-tapping screws. In order to eliminate irregularities and burrs, it is necessary to make a melt for self-tapping screws. The table and bench are ready.
Example 3. Restoration of an old cabinet
Tool used:
- Sandpaper;
- goggles and respirator;
- screwdriver or screwdriver;
- brush and paint.
Stage 1.
We clean the entire surface of the cabinet from the old varnish. To do this, you can use ordinary sandpaper with large crumbs. It is necessary to clean the surface to the wood layer. To prevent dust from entering the lungs and eyes, we use protective goggles and a respirator.
Stage 2.
Using sandpaper with fine crumbs, we process the surface of the cabinet so that it is perfectly smooth or has
Stage 3.
Using a damp cloth, wipe the entire surface of the cabinet from dust.
Stage 4.
Painting. It is best to use enamel paint, which has a glossy color. For this example, black glossy enamel was chosen. It is best to apply the paint with a medium brush in a uniform thin layer without smudges. Once the first coat of paint has been applied, the cabinet must dry for 24 hours. After that, a second coat of paint is applied so that there are no gaps.
Now the restored cabinet is ready for use.
Example 4. Restoration of old chairs
Tool used:
- screwdriver or screwdriver;
- staple gun and staples or hammer and small nails;
Stage 1.
Using a screwdriver, unscrew the seat.
Stage 2.
We take the selected new upholstery for the chair prepared in advance in size and spread it with the outer side to the top. In the center of the new upholstery we put the seat with old upholstery. Using a staple gun, we attach a new upholstery to the center of the seat (mark it). Make a mark on each side of the seat.
Stage 3.
Stretching the fabric, stepping back from the center, we begin to fix the new upholstery to the seat with staples. To securely fix the fabric at the corners, it is best to use fixation with several staples.
The final stage.
Using zigzag scissors, cut off the excess ends of the new upholstery.
We install the seat with a new upholstery in place and fix it with the screws unscrewed earlier.
New chairs are ready to use.
Example 5. Restoration of an old chair
Tools used:
- Sander;
- three sets of sandpaper;
- staple gun;
- screwdriver or screwdriver.
- respirator and goggles.
- new upholstery.
Stage 1.
Using a screwdriver or a screwdriver, we will disassemble the old chair into its component parts.
After the repair in the apartment, it is pleasant to the eye, and it is easier to breathe. But returning old furniture to its original place can spoil the impression of fresh renovation. If getting rid of ancient interior items is not included in your plans, reworking old furniture can fix the situation - be it a closet, shelves, or even updating an entire kitchen set.
A little imagination and effort will help update your interior with small material costs. The main thing, Before starting work, decide what you want to do:
- Choose a style.
- Sketch out a sketch.
- Make a list of required materials.

And, of course, study the technology of remaking those interior items that you decide to change with your own hands. Remodeling furniture that has lost its appearance with your own hands is not as difficult as it might seem.
For work tools required:
- screwdriver or screwdriver;
- sandpaper;
- putty for wood;
- brushes or rollers;
- glue;
- paint for wood;
- furniture varnish.
Preparatory work

Regardless of which style of remodeling is used, old furniture will need to be given time for preparatory work. For example, if an old cabinet becomes the object of alteration, it will be necessary to dismantle it. For the cleaning:
- remove all doors;
- take out drawers and shelves;
- unscrew the fittings;
- remove decorative elements.
If the case does not need repair, the cabinet does not have to be completely disassembled by hand. It is wiped with a damp sponge with a solution of laundry soap. After that, the cabinet is wiped from moisture and allowed to dry.
Getting rid of excess
The next important step preparatory work- removal of old varnish. Things will go faster if you use a grinder.


Rare furniture should be cleaned of varnish with more gentle means. To do this, use special washes. It is more convenient when the surfaces to which such gels are applied are in a vertical position.
You can remove a layer of varnish from furniture with ordinary sandpaper. To make it more convenient to hold it in your hand, a bar is wrapped in a sheet. An old cabinet based on chipboard must not only be sanded, but also degreased.
If necessary, change the old rusty bolts and screws. Small cracks are coated with wood glue. More significant faults are masked with putty to match the wood.
Painting old furniture: one-color classic or two-tone modern?
The easiest way to give old furniture more modern look by refreshing the surface with new paint. for closet good choice will be acrylic. Among its advantages:
- lack of smell;
- having thickened, it is simply diluted with water;
- you can adjust the shade by mixing color;
- easy to rinse if necessary;
- dries quickly.

Before painting furniture, the surface must be primed. The primer is applied in a thin layer. To do this, use a roller.
The paint is applied in 2-3 layers. The next one is applied only after the previous one becomes completely dry. Brush movements on the surface are made in one direction.
When painting a cabinet for the first time with your own hands, for starters, you can stop at one color of paint. Monochrome design in ivory or natural wood tones will look organic in any interior.

If plain furniture seems boring to you when the main color is applied, individual details can be emphasized by others. Having chosen a pattern, sticky paper tape is glued to the cabinet along its contour. So you will avoid irregularities and errors while painting details.
Alteration will not be completed if the product is not varnished. It dries quickly, forming a transparent film. This kitchen cabinet can be washed warm water and mild soap. It remains only to add accessories.
Exquisite shabby chic
A popular trend in furniture design today is shabby chic. This original style combines objects in pastel color scheme with a touch of antiquity, artificial wear and cracks. It is used in the interior of bedrooms, children's rooms, kitchens.
It is not difficult to create an exclusive thing with your own hands in this style. Especially if you are going to experiment on old furniture.
Surface aging
To redo the kitchen cabinet with your own hands in the style of shabby chic, you will need:
- PVA glue;
- varnish for one-step crackle;
- sandpaper;
- paraffin candle;
- dark acrylic paint;
Paint to create the effect of artificial wear is applied to the cabinet with a special technique:
- One coat of paint is applied to the surface.
- When the product dries, you need to walk on it with fine sandpaper.
- The next layer is applied across the previous one.
- This procedure is repeated 3-4 more times.
- To achieve a texture with the effect of scuffs and cracks, dark paint is applied to these places.
- From above, such spots are varnished for one-step craquelure.
- Varnish can be replaced with PVA glue, which is applied in a thick layer on a dark spot.
- When the glue dries a little, apply the main tone and immediately dry it with a hairdryer.

By rubbing the surface with a paraffin candle, you can create the effect of an "old surface"

It is easy to achieve the effect of antiquity with your own hands in another non-standard way. For this place with dark paint, rub with a paraffin candle where you want to see cracks. After full painting and drying, these areas are rubbed with sandpaper. The light tone will be removed, and dark cracks will break through it.
Decoupage of old furniture: floral motif
Decoupage decoration is the best way to design furniture in the shabby chic style. To do this, use paper napkins with patterns of flowers:
- Separate upper layer picture napkins.
- Carefully cut off the pattern along the contour. If you use scissors, sharp transitions of the cut edges will be visible on the surface.
- Apply a napkin front side to the office file.
- Humidify with salted water from a spray bottle.
- Apply a file with a wet napkin to the surface of the furniture.
- Straighten the pattern through polyethylene with a rag.
- The file is removed, and after 1-3 minutes the napkin is smeared with PVA glue.
Decoupage chest of drawers in shabby chic style (video instruction)
If the drawing looks too bright, it is easy to age it with a hard-bristled brush and base paint. The brush with paint should be blotted with paper and with light movements go over the drawing. When the strokes dry, the pattern is rubbed with fine sandpaper.
Coating the work with varnish
The final touch of the work will be varnishing the product. If the cabinet will stand in the kitchen, it is better to choose a waterproof one. Parquet can be used for furniture in other rooms.

It is important to take into account that different varnishes create a different effect on surfaces. They can be glossy and matte, silky. For a shabby chic style, the coating should not give a strong shine.
It is more convenient to work with varnish in a spray bottle. It is applied several times in a thin layer. Drips and bumps are easily removed with moistened fine sandpaper.
Conclusion
As you can see, remodeling furniture is not only a saved budget, but also a very exciting activity. Look at your old closet from a new angle. Surely you will see in it a wide scope for creativity, which will be limited only by your imagination.


Mixed Personality Disorder: Causes, Symptoms, Types and Treatments
GTA 4 control settings
FAQ on Smuggling in GTA Online
LSPDFR - welcome to the police
The huge map of Grand Theft Auto San Andreas and its secrets