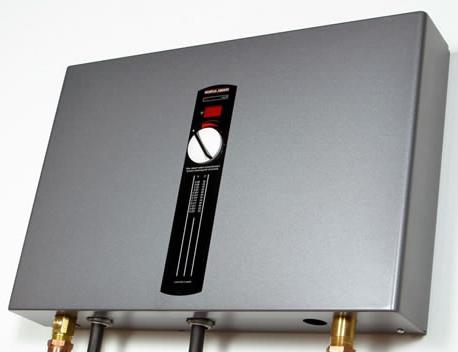
Flowing gas water heaters, or geysers, reviews are very different. First of all, they are designed for very fast heating of water using gas. Most often they are used in private houses, for example, located outside the city. Modern (reviews about them are very positive) are safe and comfortable for daily use. It is also worth paying attention to those citizens who are used to using matches that were lit up - they are practically gone.
In the 21st century, columns have a thermostat. This is what helps without much
Labor to maintain the required temperature of the water. In addition, they have multi-level security systems, as well as an elegant look and feel. stylish design. However, it is required to carry out at the first sign of a malfunction.
Geysers (consumer reviews confirm) can be not only simple, having two handles on the body for adjustment and a display, they can also be equipped with a button that is designed to switch modes, for example, “winter-summer”. You can find speakers with electronic control. It is these geysers that reviews have
Positive (in most cases). They are in constant demand among consumers. With the help of an additional knob, you can easily adjust the temperature and water pressure. For Everyday life such a mechanism is more practical.
Geysers (reviews and surveys show their relevance) may differ in ignition methods:
1. Piezo or spark that ignites the igniter.
Such a device is very convenient and quite economical, despite the fact that the igniter is constantly on fire (gas consumption is low for it). Nevertheless, such speakers most often cost a little more than their counterparts, which can also come with automatic ignition.
2. Electronic ignition. In this case, the burner ignites with ordinary batteries when the tap hot water open. In this case, you will need to change the diet once every six months. This model on the Russian market is very popular.
3. Hydrogenerator. Here the burner is activated by a small turbine driven by a stream of water. This type of speakers is the least common because they are more expensive.

It is worth noting that gas columns are practically not dangerous. When the flame of the pilot burner goes out (due to a malfunction, for example), the operation of the device will be blocked. The room that is equipped with such a device must have adequate ventilation. It is unacceptable to use a household gas column if there is no draft in the chimney. Also, you can not make structural changes to a faulty model and leave it unattended. In a house where there is a gas water heater, there should not be the slightest sign of a gas leak.
A specialist must install the column, since the installation of such a unit requires certain knowledge and skills.
Which column is considered old? Given the improving models that appear on store shelves almost daily, last year's modification is already ancient. That is why in this article we will consider the features of ignition of a column with an ignition wick - such burned in the middle of the last century, and in some modern houses(the function is provided in newer "old" modifications of the columns). Recall that the wick is ignited by the flame of a match or the sparks of a piezo lighter.
Security level of old speakers
Until recently, kitchens of high-rise buildings and entire neighborhoods were equipped with gas water heaters. Today, in the face of increased requirements for the safety and reliability of units, users are concerned about the safety of their “out of fashion” speakers.
On the one hand, they, of course, lack super fancy features, such as, for example, a gas trap, auto-off, automatic ignition, protection from everything in the world. At the same time, rumors about the insecurity of devices appear in the media and online platforms every now and then. We decided to find out how they have the right to exist.
Our verdict is this: if possible, and live in peace, but in the absence of what you want, the geyser will normally “work out” your requirements.
Operation - ignition: everything is simple, but not at all as we thought
For users accustomed to the wonders of technology, the procedure for setting fire to the column, which your grandmother apparently resorted to, may seem strange. Do not succumb to difficulties! Since the older generation has mastered it, we will not lose face, we will cope with old technology! We tell you how to turn on the geyser, which belongs to the modifications of the old model:
1. If it has not been turned on for a long time, check the level of air exchange in the kitchen. Traditionally, this was solved very simply: a gap of several centimeters was left under the doors to the kitchen. Let the sound and smell insulation leave much to be desired, but safety is guaranteed!
2. Test the chimney draft that releases carbon monoxide. Stagnant phenomena in the chimney can be triggered by alterations during repair work, the accumulation of debris, and even a plug created from cold air. In the first two cases, the help of a specialist will be required. In the latter, it is enough to direct a stream of warm air into the chimney. For example, you can restore traction by simply turning on the hair dryer and directing the flow of hot air emanating from it into the pipe. Chimney columns are still widely used by users today.
3. Check the operation of the gas cock. After the valve is opened, no characteristic odor should be felt. Connections can be checked by treating with soapy water. Starting to bubble? There is a leak somewhere. Call the master.
Advice: Are you in doubt about the correctness of the unit? Never use technology! It would be much better to call a gasman who will check the health of the gas column, fix the breakdowns and demonstrate how to properly use it for its intended purpose.

No faults found? We light:
|
Examine the wick to determine where you need to bring an open fire and what, in fact, to set fire to |
|
|
First open the tap with water and on the gas supply pipe. |
|
|
If the design has a valve button, press down on it with all your strength. |
|
|
If this element is missing, just count up to 20. |
|
|
Bring a lit match to the wick. The first time it will be more convenient to use matches with a long handle, which are called fireplace matches. |
|
|
Open the water faucet. |
|
|
Move the second lever, which is responsible for the operation of the main burner, sharply to the left. |
Advice: note! The degree of water heating is controlled directly in the gas column. The use of a mixer provokes clogging and failure of the heat exchanger.
We hope that the information provided has helped you to understand how to light a geyser belonging to old-style models.
Gas equipment is a convenient and economical attribute of a modern home. But it is also an object of increased danger, which requires heightened attention and compliance with operating standards.
Those who have gas water heaters should first of all know how to turn on the gas column and what rules must be observed when using it.
- gas node;
- Water node;
- Hood;
- Heat exchanger-radiator;
- burner;
- Automatic control of work.
- When supplied, water fills the system;
- The pressure formed by it stretches the membrane, which opens the gas supply;
- The burner is ignited, which warms up the water circulating throughout the radiator system with an open flame;
- Residual products of gas combustion are removed through the hood.
- Near the place of installation of the gas unit, the presence of ventilation is mandatory, where the combustion residues exit. And also free access of air should be provided.
- Before igniting the gas column, it is imperative to make sure that there is draft.
- The equipment is strictly forbidden to be used in the absence of traction.
- It is forbidden to leave a lit gas burner unattended.
- It is not allowed to leave the gas supply open when the column is not working.
- If the gas supply suddenly stops, it is necessary to immediately close the supply valve.
- And it is strictly forbidden to arbitrarily produce repair work or installation of gas equipment.
- 1. At the point where the hood enters the ventilation shaft, it is necessary to remove the section of the exhaust pipe. The paper cut into strips is fixed at the hole. And according to their movement, the quality of traction is checked.
- 2. A lit match is placed in the viewing window of the column. If the flame deflects, then this indicates the presence of air flow.
- Bosch units. Equipment from the German company Bosch is characterized by intuitive operation. Models equipped with electric ignition are identified by the letter "B". In order to turn on the Bosch geyser, it is necessary to open the gas valve and supply water. You should also check the batteries for 1.5 volts and type "R". On the front panel of the unit there is a button, thanks to which you can light the Bosch geyser.
- Neva. Apparatuses from the domestic company "Neva" are produced already fully tuned to a certain gas pressure and type of fuel. And if in order to light the Bosch column, you just need to press a button, then here the situation is different. To begin with, you will have to install LR20 batteries in a special compartment. Further, all available toggle switches are turned on at a minimum. And also opens the water and gas valve. The control knob on the front panel is moved to the ignition position, after which it is sunk to the maximum. And after that, the start button is turned on.
- Models from Astra. The equipment from this company is not very convenient, because before using the column, you will have to move the special handle to the left, press and hold the start button for 5 seconds, set fire to the igniter. But the main inconvenience is that here the burner is located under the central fitting.
- Systems from Junkers. The launch of systems from this company may differ depending on the marking. So, if the column is equipped with piezo ignition, it will be denoted by the letter "P". Automatic models are ignited by batteries and are marked "B". If “G” is found in the model, then such heaters have a fully automatic Hydro Power system, that is, a built-in hydrodynamic generator.
Show all
The device and principle of operation of the water heater
Being an object of increased danger, gas water heaters are installed by specially trained personnel. They also connect and check the operability of the equipment. But in order to understand how to use a gas column, it is necessary to have at least a general idea of \u200b\u200bthe device and the principle of operation of such units. After all, here the responsibility lies directly with the user.


Despite the many models and their differences design features, the principle of the device will be the same for almost everyone. So, every column contains:
from different manufacturers and various brands each node may have its own characteristic differences and technical characteristics, but the very principle of operation of the unit itself will be the same. And he looks like this:
Such a simple device and principle of operation allow you to effectively heat the water and maintain its constant, set temperature.
Modern models have in their design a number of automatic systems that help make the use of the unit the safest. These are different levels of protection that allow you to control and, if necessary, interrupt the operation of the device. The pressure of gas, water, the quality of the hood, the presence of a flame - all these parameters are fixed by the automatic water heater and, if necessary, are able to respond to any deviation from the working norm.
Geyser Electrolux GWH 265 ERN NanoPlus. #Browse and #Connect


Terms of use

 In operation, gas equipment is unpretentious and capable of long time perform their functions without maintenance. But in order for everything to work smoothly and safely, you need to know how to properly use the gas water heater and what precautions should be taken.
The rules of use are very simple, but extremely necessary to comply with safety standards:
Installing a gas stove


Traction test

 Due to the fact that gas water heaters have an open combustion chamber, special attention is paid to draft in order to prevent poisoning. carbon monoxide or not create a dangerous emergency. To do this, it is important to correctly install the chimney and regularly check the presence and quality of draft.
Modern models of gas water heaters are equipped with sensors that, in the absence or low thrust indicators, simply will not allow the equipment to start. But to turn on the old gas water heater, you will have to make sure that there is traction, since such sensors have not yet been provided for in it.
To correctly measure the presence of air flow, it is necessary to use special devices. But can be done without special tools:
If the gas equipment is already working, but there is no draft, it is recommended to open the window for air flow.
Gas column setting.


Ways to start gas water heaters
Depending on the design features, you can start the gas column in different ways. But it is mandatory for any type and brand of equipment to first turn on water and gas supply. Further actions can be divided into manual, piezo and automatic ignition. For units of different designs, different types of start-up are also used.


Manual start. Old models of gas water heaters are started only in manual mode, since such structures do not contain any automation, and if they do, then for minimal protection. The very principle of ignition is to ignite the wick with any source of open fire: matches or kitchen lighters.
Manual ignition technology implies the discovery of water and gas, after which the control knob is set to the ignition position and after ignition of the wick it opens to operating modes. Depending on the pressure of the water, its temperature may also change. However, if the water is completely turned off, then the old units do not extinguish the flame, so they must also be turned off manually.
Although the whole procedure does not look complicated, it is not completely safe. With a deterioration in traction, especially in wet weather, flames may slam into the room, which already looks menacing. Therefore, if there are children or elderly people in the family, then it is not recommended to use such systems.
Piezo ignition system

 Gas equipment with piezo ignition looks a little better. Such units are easier to manage and maintain. Here, in order to ignite the column, it is necessary to put the gas supply regulator in the ignition position and ignite the wick with a special button. When a spark appears, it ignites.
Gas water heaters with piezo ignition can not be turned off completely, and when the water is turned off, only the wick will burn. But this also leads to increased gas consumption. Therefore, it is worth turning off the equipment completely.
Auto power on

 Among the huge selection of water heating equipment, fully automatic models of columns (Beretta, Ariston, Bosch and others) are in special demand, which are able not only to maintain and regulate the work process, but also ignite the wick and fuse completely independently.


But the inclusion of water heating equipment, depending on the manufacturer and model, may differ to varying degrees.:
Gas water heaters are an excellent alternative if the house does not have a central hot water supply. Modern models are quite safe and reliable in operation.
The instructions supplied with such equipment may not always answer your questions. Therefore, when purchasing a column, it is preferable to ask the seller about everything, as well as to consult what and in what cases the equipment will be most effective and useful.
Geysers with instantaneous water heaters regardless of the manufacturer and model, according to the principle of operation, they do not differ from each other. The difference lies only in the appearance, design and a set of additional options, for example, auto-ignition of the burner, the error in maintaining the set temperature of the heated water, the presence of a digital display for setting and indicating the water temperature.
The geyser works as follows. Water flows through the heat exchanger, which is a copper tube with fins. The gas burns, which heats the heat exchanger and, as a result, the water is heated. Depending on the set water heating temperature and its pressure in the water supply, the gas unit regulation system connected to the water unit ensures safe operation. In the event of a lack of water pressure or draft, the protection system automatically shuts off the gas supply.
In October 2006, I bought a NEVA LUX-5013 gas water heater (pictured above) manufactured by Gazapparat OJSC, St. Petersburg. I did not want to buy an imported manufacturer, sooner or later everything breaks down, and problems with spare parts become an insurmountable obstacle.
The previously installed model Neva-3208 served 6 years (continues to work in another place even now). The only drawback of this model is that it was necessary to change the rubber membrane in the water unit every year. It deformed over time, because of this, the amount of gas supplied to the burner decreased and the water began to warm up insufficiently. Over time, the gas supply stopped completely.
I accidentally saw a silicone membrane in a gas equipment store. I replaced the rubber membrane in the water unit with it, after which there were no problems with the geyser.
I was inclined to choose NEVA LUX-5013 by high reliability (as I thought), compatibility of supply pipes, a water-gas regulator from Mertik Maxitrol (Germany), the presence of all types of protection, a stainless steel casing.

For three years (warranty period), the geyser worked perfectly, but as soon as the warranty ended, water began to drip from it. At first I thought that one of the rubber gaskets I'll replace it and everything will be fine. But everything turned out to be much more complicated than I expected, and the repair turned out to be difficult. Opening the gas column showed the presence of a fistula in the heat exchanger, from which a thin stream of water was beating.
A separate page of the site is devoted to the repair of heat exchangers and boilers of flow-type gas heaters Do-it-yourself soldering gas column heat exchanger repair.
How to disassemble and assemble the NEVA LUX gas water heater
Before starting repairs, be sure to turn off the gas and water supply valves.
To remove the casing of the geyser, you first need to unscrew the two self-tapping screws located in the right and left corners of the lower part of the rear wall using a Phillips screwdriver from the bottom, from the side of the pipes inlet.

The left handle of the piezoelectric ignition of the igniter and the coarse adjustment of the gas supply cannot be removed. The right handle for fine adjustment of the gas supply is held only by the casing with two clamps. You can also not remove it. But I usually remove it before removing the casing. In addition, so that the handle rotates easily when adjusting the temperature, I sawed it around with a file along with the clamps in a circle where the handle touches the casing. Now it no longer clings to the casing and rotates easily.

Next, you should pull the casing towards you until the handles are drowned and, when the casing does not touch them, move it up. The upper slots of the casing will come out of the hooks located on the base of the gas column, and it will easily separate.
The casing of the gas column is installed in place in the reverse order. First, put it with slots on the upper hooks, for which you will have to stand on an elevation, then get the hole on the adjusting knob and at the same time make sure that the holes located above the holes for fastening with self-tapping screws fall on the guides. Screw two screws into place.

The photo shows appearance geyser NEVA LUX-5013 without casing with a new heat exchanger.
Troubleshooting a geyser
The gas in the igniter goes out
Such a malfunction is inherent only in gas water heaters with an automatic protection system. The gas in the igniter must always burn, regardless of the position of the handles or valves of taps and water supply mixers. The simplest system automatic protection gas column consists of only three elements: a solenoid valve, a thermocouple and a thermal fuse. The geyser may go out during operation in case of operation of the protection elements or a malfunction of the elements themselves.
NEVA LUX geyser protection electrical circuit
Evidence of the failure of the automation elements is the extinction of the gas in the igniter after the end of holding the gas adjustment knob. To repair an automatic protection system, you need to understand how its components work.

A thermocouple is two conductors made of different metals welded together (I assume it is chromel and alumel), operating on the Seebeck effect and generating an EMF of about 30 mV when heated. Used to power the solenoid valve. It fails only after many years of operation. The bottleneck is the loose center conductor emerging from the housing. Although it is insulated, the insulation may wear out over time, and the conductor may short to the case, and the gas water heater will go out.
If the contact at the welding point of the thermocouple is broken, then it is not permissible to restore it by soldering with solder, since the junction point in the thermocouple is a current generator, and not a simple eclectic connection of wires. The thermocouple should be replaced with a good one or repaired.
The solenoid valve is a coil copper wire, inside which there is a metal cylinder (solenoid), mechanically connected to the valve for shutting off the gas supply to the gas column burner. When the thermocouple is heated, it produces electricity, which, flowing through the coil, creates a constant magnetic field that draws the solenoid into the coil.
Since the solenoid is mechanically connected to the valve, the valve is displaced and gas enters the burner. If the gas in the wick does not burn, the thermocouple cools down and does not generate current, the spring-loaded solenoid returns to its original state, and the gas supply to the burner stops. So in a simple way ensured safe operation gas column.
The thermal fuse is a bimetallic plate, which, when the temperature reaches 90 ° C, bends so much at the place where the thermal fuse is installed that it breaks the power supply circuit of the solenoid through the stem. In addition, the thermal fuse itself is connected to the circuit mechanically, terminals. Due to the complexity of the design and operating conditions, it sometimes fails. I had to replace it once due to the fact that the geyser randomly went out.
Thermal fuse check
It is necessary to check the thermal fuse if the column goes out, despite good draft in the gas exhaust ventilation and sufficient air flow. If the plastic windows are tightly closed in the room where the gas water heater is installed, and the hood over the gas stove is also included in addition, then even with good draft there will be no air flow. The geyser will start to overheat, the fuse will trip from heating and open the voltage supply circuit to solenoid valve. After cooling, the fuse closes the circuit again.

To check the thermal fuse of the geyser (installed in its upper part and accessible without removing the casing), you need to remove the terminals from it (in the photo Pink colour) and short them together with any metal object, such as a paper clip.

If the gas column starts to work normally without overheating, then the cause of the malfunction has been found. Temporarily, until a new thermal fuse is purchased for replacement, you can leave a paper clip, just make sure that it does not touch metal parts geyser, and do not leave a running geyser unattended. The thermal fuse is attached to the adapter made of heat-resistant plastic with two screws. The adapter on the gas column body is fixed with a latch.
Checking the gas column solenoid valve
If the clip did not help, then you need to check the operation of the solenoid valve. It has a resistance of about 0.2 ohm and consumes about 100 mA in operation. You can check it by applying a voltage of 20-30 mV to the winding at a current of 100 mA. This mode is easy to create using any finger-type battery or accumulator and a 10 ohm resistor. The battery must be fresh.
The connection is made as follows. The negative terminal of the battery is connected to the column body (for a valve and a thermocouple, one terminal is connected to the body, in the diagram there is a blue wire), and the positive terminal through a 10 Ohm resistor to the thermal fuse terminal (terminals from the thermal fuse must be removed beforehand), the wire from which does not go to thermocouple (left red wire in the diagram). Light the wick and immediately remove your hand from the gas control knob. The wick should continue to burn. If you disconnect the battery, the flame should go out immediately. If so, the solenoid valve is OK. Therefore, the thermocouple is faulty. If an external inspection fails to find bad contacts or a short circuit in the wires, then the thermocouple will have to be replaced. It is sold complete with wires and terminals.
The geyser goes out during operation
no traction
One of the most common cases with the advent of autumn is a tightly closed airtight plastic window in the room where the gas column is installed. There is no air inflow - the column overheats and the bimetallic relay of thermal protection of the column against overheating (self-healing thermal fuse) is activated. If after 10-15 minutes the column lights up normally and no longer goes out when the window is ajar, then the reason is the column overheating. If the wick can be lit immediately after the gas goes out, and it will continue to burn after the throttle control knob is released, then the draft is good.
Traction may be insufficient due to clogging with soot or getting into ventilation duct foreign objects, such as bricks, from which the channel is made. To check the draft, you need to remove the gas outlet pipe from the gas column from the channel, and with the window open, close the channel with a sheet of paper. If the paper holds, then the traction is sufficient. You can bring a lit lighter and if the flame deviates to a horizontal position or even goes out, then the draft in the channel is sufficient. Otherwise, cleaning of the channel is required.
Faulty water unit
Also, the burners in the column, both with and without automation, may go out due to insufficient water pressure in the water supply system or a malfunction of the water unit.

If the pressure cold water has not changed, and the pressure of the water coming from the column has become weak, which means that the strainer at the inlet of the water unit is clogged. This often happens after turning off the water and supplying it again. For cleaning, it is enough to unscrew one union nut on the water supply side, remove and clean the screen and the pressure difference calibration hole.
If a water unit is installed in the gas column as in the photo, and the water pressure has not visually changed, then it is necessary to check the condition of the rubber membrane in it. To do this, unscrew the two union nuts from the water unit, then unscrew the three screws that hold the water unit in the gas unit by the cone. Disassemble the water unit by unscrewing the eight screws. Disconnecting the assembly halves from each other, you will see a rubber membrane.
If the gum is not flat, but deformed, with deflections, then it is the case and you need to replace it. At the same time, the filter mesh and the cavities of the water unit should be cleaned of dirt. I advise you to put a silicone membrane, it will last for many years. When assembling the water assembly, first tighten the screws until they stop, and then tighten them diagonally to ensure that the rubber is evenly clamped.
In the old days, when I lived in an apartment on the top floor, where the water pressure was a sluggish trickle of water from a tap, I had to conjure with a water regulator to wash. With a round needle file, I increased the diameter of the calibration hole to 2 mm, removed the filter mesh and annealed the conical spring of the gas assembly. If he missed the size of the hole, then he inserted a copper wire into it to reduce it. Of course, this is a gross violation and the working column had to be constantly monitored, but there was simply no other way out. But there was always hot water.
How to fix a leak in the gas column connections
The left pipe is used to supply water to the gas column; a tap is always installed on it to shut off the water supply to the column. This pipe is connected by a branch pipe to a water-gas regulator. From the regulator, water is supplied to the heat exchanger with right side. Hot water is transferred to the water supply through the middle pipe of the geyser, and it is connected through a pipe directly to the heat exchanger on the left side. The right pipe in the gas column serves to supply gas and is connected through a copper tube to a water-gas regulator. It is also mandatory to install a gas shut-off valve on it.
Water connections in the gas column are made by means of union nuts (American women) sealed with rubber or plastic gaskets. Over time, due to temperature changes, gaskets lose their elasticity, become hard, crack, and water leaks occur. To replace the gasket, you need to unscrew the cap nut with a key 24, remove the worn one and install a new one. It happens that one gasket is not enough, the union nut is screwed up to the stop, and the water still oozes. Then you need to additionally install another gasket. Silicone gaskets are now available. They are more expensive, but last longer and are more reliable.
How to replace a copper water supply pipe with a heat exchanger
When connecting the copper pipe, through which water is supplied from the water supply to the heat exchanger, I encountered water leakage from under the union nut. Replacing the gasket only made the water leak worse.

Upon careful examination of the nozzle at the point of contact of the flange with the gasket and cleaning the surface sandpaper, a crack was found, which increased upon reattachment. Repair by soldering cannot be applied in this case, since when tightening the union nut, a lot of force is applied, and the solder is soft, and the crack will appear again.

There was no such pipe in the gas equipment store, it turned out that this was a scarce item. The seller offered to replace the cracked pipe with a corrugated stainless steel gas hose, claiming that it was no less reliable. Since there was no choice, I had to take his advice. These hoses are available in different lengths, and can be selected for any replacement case.

The gas tube, selected along the length, was installed without difficulty. Thanks to the corrugation, it curved well. When checking the geyser, it turned out that the water, passing through the new tube, made a loud unpleasant sound. I had to tie the tube to the base of the speaker with wire (as in the photo in the middle), and the unpleasant sound disappeared.

A year later, water dripped from the gas column. It turned out that the stainless gas pipe recommended by the seller had rusted at the junction of the pipe with the flange, and a fistula had formed in it. Again, the task arose of finding a suitable replacement tube.

There was an idea to try to use a flexible water supply instead of a copper pipe. By technical specifications she fit perfectly. Working pressure withstood up to 10 atmospheres, temperature up to 90°C. True, the inner diameter was smaller and amounted to 9 mm, but there was no other replacement option.

A 40 cm long flexible water connection perfectly took the place of the copper pipe. The smaller inner diameter did not noticeably affect the pressure of water from the tap. Yes, and it should not, because water is also supplied to the mixer using a flexible eyeliner with an inner diameter of 9 mm.
How to remove and clean the gas column igniter NEVA LUX
Sometimes it becomes necessary to remove the igniter assembly, for example, to clean it from dirt. Over time, the igniter nozzle in the gas column becomes clogged with soot, the wick flame becomes insufficient to instantly ignite the gas coming out of the burners when the water is turned on. Gas accumulates, and when a larger volume of gas ignites than it should, an explosion occurs, accompanied by a loud pop. This is dangerous, and it is imperative to clean the igniter burner as a matter of urgency.
It happens that the igniter burner burns not with a pure blue flame, but with half yellow. Yellowness appears when the gas is not completely burned due to a lack of oxygen in the mixture. In this case, soot is released, which is deposited on the heat exchanger. It is required to clean the air supply holes in the burner from dirt.

In the photo above - a view of the igniter from below. The igniter assembly consists of three parts mounted on one bar - an igniter, a thermocouple and an ignition electrode. The thermocouple is installed on the left side. On the right side of the igniter is an electrode for piezoelectric gas ignition.
Turning the left knob counterclockwise opens the valve for forced gas supply to the igniter and the trigger mechanism for squeezing the piezoelectric element is triggered, which in turn generates high voltage, about 15,000 volts. A spark jumps from the electrode to the igniter, and the gas coming out of the igniter ignites.

This photo shows the top view of the igniter with the casing and heat exchanger removed. To remove the igniter for cleaning, you need to unscrew the nut that fixes the gas supply pipe (in the photo in the center), then unscrew the last two screws. Pull the bar towards you and lift it up. The jet is clamped in the igniter by a gas supply tube and falls out when it is released. Look, don't lose. It remains only to clean the nozzle with a thin wire and the air supply holes.
In some models of gas water heaters, an automatic electric gas ignition system is installed. As soon as the hot water tap is opened, gas is automatically ignited in the burner. But such models have significant drawbacks: they work unstably with low water pressure in the water supply system and require periodic replacement of electric batteries.
If the batteries are not replaced in a timely manner, the geyser will be impossible to ignite. The last drawback can be eliminated by connecting instead of batteries an adapter that converts the voltage of a household electrical network into a constant voltage of the required value, equal to the number batteries multiplied by 1.5 V. For example, if you are replacing two batteries, you will need a 3 V adapter.
Cleaning the heat exchanger, descaling
One of the common malfunctions of geysers is insufficient water heating. As a rule, the reason for this is the formation of a scale layer inside the heat exchanger tube, which prevents the water from warming up to the set temperature and reduces the water pressure at the outlet, which ultimately leads to increased gas consumption by the gas column. Scale is a poor conductor of heat and, having covered the heat exchanger tube from the inside, forms a kind of thermal insulation. The gas is open to its fullest, and the water does not warm up.
Scale is formed in case of higher hardness of tap water. What kind of water you have in the water supply is easy to find out by looking into the electric kettle. If the bottom of the electric kettle is covered with a white coating, then the water in the water supply is hard, and the heat exchanger is covered with scale from the inside in the same way. Therefore, it is periodically necessary to remove scale from the heat exchanger.
Available for sale special devices for removing scale and rust in hot water systems, such as Cillit KalkEx Mobile and flushing fluids. But they are very expensive and home use not available. The principle of operation of cleaners is simple. There is a container in which the pump is mounted, as in washing machine for pumping water out of the tank. Two tubes from the descaling device are connected to the tubes of the gas column heat exchanger. The flushing agent is heated and pumped through the heat exchanger tube, even without removing it. The scale dissolves in the reagent and the heat exchanger tubes are removed with it.
To clean the heat exchanger from scale without the use of automation tools, it is necessary to remove it and blow through the tube so that no water remains in it. Descaler, ordinary vinegar or citric acid (100 grams of citric acid powder is dissolved in 500 ml of hot water) can serve as a cleaning agent. The heat exchanger is placed in a container with water. It is enough that only a third of it is immersed in water. Completely fill the heat exchanger tube with reagent through a funnel or thin tube. It is necessary to pour into the heat exchanger tube from the end that leads to the lower coil so that the reagent displaces all the air.
Put the container on the gas stove and bring the water to a boil, boil for ten minutes, turn off the gas and let the water cool. Further, the heat exchanger is installed in the gas column and is connected only to the pipe supplying water. A hose is put on the outlet pipe of the heat exchanger, its second end is lowered into the sewer or any container. The valve for supplying water to the column opens, the water will displace the reagent with scale dissolved in it. If there is no large capacity for boiling, then you can simply pour the heated reagent into the heat exchanger and hold it for several hours. If there is a thick layer of scale, the cleaning operation may need to be repeated several times to completely remove the scale.
Gas burning in the wick makes a loud noise
After installing the gas column Neva-3208, an unpleasant phenomenon appeared that did not affect the quality of the column. The gas, when burning in the wick in standby mode, made a rather loud sound, which was unpleasant for hearing and created discomfort. After thinking and experimenting, we managed to get rid of the noise in a simple way. He suggested that a jet of gas in the burner under pressure, escaping from the jet and hitting the wall at the bend of the burner, creates the conditions for burning with noise.
To test this assumption, I put a strip of tin approximately 3 cm long and 5 mm wide into the burner, the main thing is to fit inside the burner. The noise is gone. If your gas water heater is also noisy, then you can take any metal strip, for example, cut it out of tin from a tin can, make a hole in it at the edge, put the strip on a paper clip that is aligned and bent at the end with a hook and put it into the burner. Looks like a fishing lure. The paper clip is needed in order to be able to remove the strip of metal back from the burner if the noise does not disappear, although if it burns normally, then you can not remove it. This experiment can be carried out without even removing the casing from the gas column.
The water from the tap is very hot
In the warm season, when the water in the water supply is warm and its pressure is small, a problem arises that seems to be related to a malfunction of the geyser. When the gas supply knob is set to the minimum water heating position, the water from the column still comes out very hot. This is not a malfunction, just this model of the geyser is not designed for this mode of operation. The operating instructions usually indicate the minimum water pressure at which the geyser ensures normal operation.
Solving the problem is very simple: it is enough to limit the gas supply by slightly shutting off the gas supply valve installed on the gas pipe in front of the gas column.
Installation and operation instructions for gas water heaters
Before undertaking an independent installation or repair of a geyser, I strongly recommend that you read the installation and operation instructions.
Instructions for use of geysers.
Flowing gas water heaters are a traditional attribute of old housing stock. This type of equipment is little known to owners of apartments in high-rise buildings with centralized hot water supply. However, the owners of Khrushchev are still actively exploiting it. Not all of them know how to install a gas column in an apartment.
Agree, this issue needs a thorough analysis. Illiterate installation of a gas processing unit will result in a serious threat. The information presented in our very useful article will help eliminate the slightest risks. We will acquaint you with all the subtleties and details of the installation process.
The carefully checked and systematized information presented by us is supported by photo collections and videos. Here you will receive full answers to all possible questions that arise when connecting gas units.
In a house where the installation of gas equipment, such as a stove, is allowed, installation of a column may be prohibited. This restriction applies to houses with more than 11 floors. Not a single regulatory authority will issue a permit for installing a column in such an apartment, as this is dangerous for residents.
In addition to the number of storeys, redevelopment may become a reason for refusal. Studio apartments are not suitable for the installation of gas equipment, as the devices must be installed in non-residential premises.
If the kitchen is combined with the living room, then this makes the use of gas appliances illegal. Before redevelopment, these restrictions must be taken into account. The same can be attributed to apartments where the kitchen is missing or is shared.
Image gallery


If the house does not fall under these restrictions, then it is necessary to collect a package of documents for registering the device.
The procedure is as follows:
- Write an application to the gas distribution company.
- Get a plan from BTI or Rosreestr.
- Provide an extract from Rosreestr confirming ownership.
- Contact the relevant organization to draw up a project.
- Find certified specialists from an organization that has a permit for gas work.
After that, specialists will make a tie-in into the gas pipe, connect the device and put the water heater into operation.


Ventilation and chimney requirements
An air vent is required to circulate the air in the room. It should not be clogged, air should pass through it calmly. If you neglect this rule, then in the event of a gas leak, the tenants of the apartment will get poisoned with serious consequences.
The risk of household gas detonation will increase significantly if it is not removed naturally, since a leak can occur at night, when a person is not able to detect it.
For the normal functioning of the gas column, you need additionally. It can be brought into the general house system or directly to the street. When constructing a chimney, it must be taken into account that it cannot have more than two bends at an angle of 90 degrees.
The total length of the chimney must not exceed three meters. Three options for the location of the chimney pipe are allowed.


Chimney device in an apartment with wooden walls
In houses made of wood, the use of a blue fuel water heater is allowed, but must be observed fire regulations gas column installations. The chimney cannot come into contact with wood; non-combustible material must be placed between them.
As thermal insulation, basalt or mineral wool. It is allowed to use heat resistant polyurethane foam.
This is necessary to prevent fire in case of strong heating of the chimney. As a rule, in wooden houses old building chimneys are not provided, or they are intended for stove heating. It is forbidden to install gas equipment in emergency houses.
Image gallery


Column layout rules
The water heater cannot be located on the bearing wall of the building. This is expressly prohibited by the requirements for the installation of gas water heaters. In the event of an explosion, this may cause damage to the building or its partial destruction.
To clarify the possibility of installing the device, you need to take information from the cadastral passport of the apartment and the general plan of the house. This information can be clarified by calling specialists.
There are space requirements from the column itself to the opposite wall. The distance should not be less than one meter. This is necessary for free access to the device for its maintenance and inspection. Also, you can not mount pipes for gas supply to the walls.
This makes it difficult to inspect communications and search for gas leaks in the apartment. If this violation is detected, an order to eliminate it will be issued and information will be explained on how to properly install the gas water heater and where to turn.

The wall where the column is to be installed must be prepared accordingly. Combustible materials such as wallpaper and PVC panels must be removed from it.
The column must be located at a distance of more than 10 cm from the wall. Installation is not allowed gas water heater on the wooden wall without prior preparation. A steel plate equal to or larger than the rear wall of the instrument must be installed at the installation site.
It is not allowed to install a column above a gas stove. These devices must be at least 1 meter apart. Also, it cannot be used as an outlet for combustion products. It is impossible to use one chimney for an extract and a geyser. This is expressly prohibited by the safety regulations.
Image gallery


Specifics of gas supply installation
The pipes located in the apartment are the property of its owner, but unauthorized changes in the gas supply system cannot be made. For any changes, you must obtain permission from the gas service, otherwise a fine will be issued.
If it has already been installed in this place, then this will not cause significant changes in the project. It is enough to turn off the gas valve on the pipe and replace it. If the water heater is installed for the first time, then you need to do the wiring.
At self-assembly pipes must comply with the following rules:
- Shut off the gas before starting work.
- Carry out work with an open window.
- Remove debris from pipes that have arisen during installation.
- Do not pass pipes through door and window openings.
- Do not use the ventilation shaft for pipe laying.
- Do not mount the gas pipeline in the wall.
- Do not use flexible hoses longer than 3 meters.
- Paint metal pipes.
Particular attention should be paid to sealing the connecting elements of the gas pipeline. To do this, you need to use a sealant and sealant. After the wiring is completed, you can proceed with the installation of the device.
Checking the tightness of gas channels
After installing the water heater, check the gas pipes for leaks. If there is, this greatly simplifies the procedure and improves the quality of the check. If this device is not available, then you can use the old method.
To do this, you need ordinary soap, a jar and a brush. Soap is dissolved in a jar to the state of a liquid emulsion. Then, successively, using a brush, the emulsion is applied to the junctions of the pipes. As you apply, you need to monitor the appearance of bubbles in the treated areas. In case of their appearance, it is necessary to eliminate the leak.

Before checking for leakage, the necessary safety measures must be taken. Be sure to turn off all electrical appliances
Under no circumstances should a gas leak be tested with fire. This is dangerous and may cause an explosion. Do not risk your life and the lives of your neighbors.
Gas equipment needs regular inspection and periodic cleaning. you can do it yourself, but if you have absolutely no experience in servicing such systems, it is better to contact the company that has concluded an agreement with you for the supply of gaseous fuel and the maintenance of the devices involved in this.
Analysis of the most common installation errors
The most common mistake is installing a geyser in the bathroom. In this room, as a rule, there is no window. It is especially dangerous to install columns without a chimney. There are models of water heaters in which carbon monoxide exits through holes, and its removal from the room occurs through a vent in the wall.
The second most common mistake is the desire to hide the device so that it does not visually stand out from the interior. Often the geyser is installed in a cabinet. This leads to a violation of the correct functioning of the gas column.

Even if a distance of 10 cm from the walls of the cabinet is observed and there is no bottom bottom, the air flow will still be insufficient to cool the device. It will cool down longer, which will significantly shorten its life.
The third error that is often encountered is a confused connection. gas pipe in a collumn. This causes water to enter the pipeline. The liquid enters there through the gas column and then moves down the pipes. So water enters the gas equipment of the neighbors from below, completely disabling it.

Fluid removal is done gas services. After a source is found in the owner's apartment, the gas will be turned off and a fine will be issued. This is what the order to turn off the gas looks like
It is impossible to prevent employees of GorGaz from performing a shutdown. In case of refusal, a police squad will be called, as people's lives are endangered.
Liability for unauthorized installation
If the tie-in into the pipe for connecting the column is made bypassing the meter, then such an act falls under Art. 7.19 of the AC RF. For this, administrative liability in the form of penalties is provided.
For individuals fines range from one and a half to two thousand rubles. This is the least possible measure for illegally connected to gas system. How the official connection to the centralized gas main is made is described in detail, which we recommend that you familiarize yourself with.
In addition to the administrative code, unauthorized tie-in and installation of gas equipment is subject to Federal Law No. 69 “On Fire Safety”. According to the text of the document, the owner of the property bears administrative or criminal liability, depending on the severity of the consequences.
If the actions cause property damage to third parties, the owner will be obliged to compensate it in full. In addition, a fine of 80,000 rubles may be imposed for violation. If significant harm was caused to the health of neighbors, the owner may be taken under arrest and imprisoned for up to two years.
Conclusions and useful video on the topic
Roller #1. How to properly connect and seal pipes:
Roller #2. What is the danger of connecting a column without complying with fire regulations:
Roller #3. In the video, a summary of the standards for installing a geyser with a detailed examination of the main points:
If it was decided to install a water heater in the apartment on your own, then it is necessary to do the installation in accordance with all the rules. It is strictly forbidden to save on materials for installation. This is the case when it is better to play it safe and overpay. Otherwise, the consequences can be tragic. It is better to invite a specialist and make a one-time payment than to constantly pay fines from the gas service.


Chicken in kefir - recipes for marinated, stewed and baked poultry for every taste!
Simple Chicken Recipe in English (Fried) Recipes in English with translation
Chicken hearts with potatoes: cooking recipes How to cook delicious chicken hearts with potatoes
Recipes for dough and fillings for jellied pies with mushrooms
Stuffed eggplant with chicken and mushrooms baked in the oven with cheese crust Cooking eggplant stuffed with chicken