A wardrobe for a balcony is a convenient and useful thing, but buying or ordering is expensive, so there is only hope for yourself. Today we will talk about how to make a cabinet on a balcony with our own hands in 2 versions, plus I will talk about assembling front panels for such cabinets.
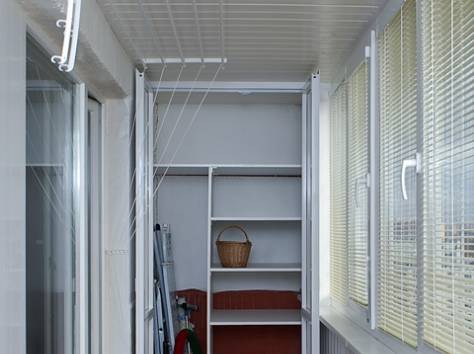
Built-in wardrobes on balconies are not only beautiful, but also convenient.
Naturally, before you build yourself a beautiful wardrobe on a balcony or loggia, this room must at least be glazed and all the cracks must be repaired, and ideally, it must also be insulated with high quality.
We decide on the model and prepare the tool
There are not so many models of balcony cabinets, but the choice often takes more time than the construction itself. I recommend that you gather the whole family and, with a tape measure, decide on the spot what you need.
Common patterns
Many of the drawings and sketches presented below contain the exact dimensions and dimensions, but each balcony is individual, so I advise you to take all these options as recommendations and draw a sketch of your cabinet according to your dimensions.

A simple open pencil case.
Such a pencil case is relevant for a very tiny balcony or if you don't want to mess around with the assembly for too long. The diagram shows a portable model with a perimeter front cover.
If you mount such a cabinet on a loggia or balcony, then instead of a front cover, you can install doors, plus the bottom, cover and back wall will be superfluous.

Classic two-section layout.
This model is ideal for a wardrobe on a balcony. The arrow in the diagram shows a small gap of 100 mm from the edge of the structure to the beginning of the shelves, this is exactly the gap that can be used for installing sliding doors.

Drawer model.
This model is practically the same as the previous one, the only difference is that there are two drawers for tools, of course you can make such blocks with drawers as much as you want.

Corner wardrobe on the balcony or loggia.
Such a corner cabinet is suitable for those owners who do not want to part with part of the window frame, closing it with the side wall of the cabinet. It turns out that the wide back panel is bordered by the facade of the house, and the narrow side wall is adjacent to the side wall of the balcony.
Its capacity is of course more modest, but such built-in furniture looks very impressive, plus only sliding doors are mounted here, which significantly saves space.

The combined model looks impressive, but more labor will have to be invested.
Any combined option it's always more work. If you look closely, here we see 2 cabinets on one frame, but the result of such work is worth the time and effort spent, your balcony furniture will clearly differ for the better.

Trade rack is a simple and quick solution to the problem.
For dessert, I suggest you think about purchasing a ready-made shopping rack. In this case, you do not have to build a frame, the rack is assembled in 15 - 20 minutes. But here a good front panel is “asking for”, because the appearance of store shelves will clearly not decorate your balcony.
The big disadvantage of such retail shelves is the lack of alternative options, you will have only solid horizontal shelves, no drawers, niches and other interesting solutions.
A few words about the tool
Do-it-yourself work requires a certain set of tools. The figure below shows a standard set of home wizards.

A standard DIY tool kit.
In addition, it is advisable to have a jigsaw in your arsenal, miter saw, hand-held milling cutter, grinder and sander.
Since we will be talking about two design options, I see no reason to list all the necessary material now, you will understand everything yourself in the course of the story.
Two options for assembling a balcony cabinet
After choosing a suitable design, you should not procure and cut all the parts at once. The fact is that our balconies and loggias are far from ideal, the corners are crooked, the walls are not even, and it is better to measure each cabinet node in place.
Option number 1. We assemble a structure from wooden bars
| Illustrations | Recommendations |
 |
Preparing a place
The walls, floor and ceiling do not require special preparation, the only thing that needs to be done is to remove the baseboards.
|
 |
· We will assemble the frame from wooden blocks, the optimal size is 40 × 40 mm; · If a front panel is provided, then the shelves can be anything, chipboard, OSB, lining or planed board 20 mm thick. I will talk about the options for the facades a little later. |
 |
· Begin with the markings for the front panel. Usually cabinet doors are placed perpendicular to the front wall of the house; · Accordingly, you need to attach a square to the wall and draw a perpendicular on the ceiling; · Now you just have to connect these two markings on the walls.
|
 |
· We attach only to the capital foundations, that is, the floor, ceiling and facade wall. On the loggias, we fasten the bars to the back wall; · Mark the holes on the bars (step 50 cm); We apply the block to the base and make holes with a thin drill so that the markings remain on the wall; · We drill holes in the walls and insert dowels into them (drill diameter 6 mm); · We fasten the bars with self-tapping screws. |
 |
Vertical stand
On balconies that do not have a side wall, you will need to install the farthest upright for anchoring. There is nothing complicated here, the photo shows the principle of such an installation.
|
 |
When installing the frame, you will have to connect the bars together. The diagram shows 3 options, I recommend using the corners, it is much easier. |
 |
Shelf markings In order not to measure the shelves with a tape measure, I recommend using the hydro level, it is much faster and more accurate. |
 |
There are often no problems with the installation of shelves, just lay sheets or boards on the bars and fasten them with self-tapping screws. |
Option number 2. Wardrobe on the balcony from laminated chipboard
In this case, we will make the cabinet from solid laminated particle boards. In my opinion, it is much easier to assemble this cabinet on the balcony with your own hands.
| Illustrations | Recommendations |
 |
The vertical slabs are installed first on the level. For these purposes, it is best to take standard furniture boards with a thickness of 16 mm.
|
 |
The vertical slabs are attached in much the same way as the vertical bars in the previous version. · Install spacers between the slab and the floor / ceiling; · Mark and drill holes for fasteners; · Fix the slab with self-tapping screws. Do not forget to check the verticality of the installation with a level at each stage. |
 |
Stops for the shelves are marked using a hydro level. The stops themselves are easier to buy in furniture store, although if beauty is not the main thing for you, then you can use ordinary metal corners. By the way, the normal distance between the shelves is 35cm. |
 |
Now we put the plates on the stops of the chipboard and fix them with self-tapping screws. If the span is too wide, and a large load is planned on the slab, then a transverse wooden bar OK. |
 |
It is better to attach the doors to furniture sheds. To install such a canopy you need to buy a round crown and cut a groove for the canopy. |
 |
The awnings themselves are attached with a pair of self-tapping screws. Place the canopy washer in the groove and screw in the screws. When the cabinet is assembled, you just have to screw the handles to the doors and use it. |
How to make a wardrobe on the balcony video
Choosing a front panel
Nowadays, you won't surprise anyone with a facade made of laminated chipboard or lining, they look beautiful, but everyday. There are 2 options for arranging the facade more in an original way, and you can do everything yourself.
| Illustrations | Recommendations |
 |
Option No. 1. Louvered doors This idea is more than one hundred years old, but in our country such doors are rarely assembled, therefore they look fresh and original. |
 |
As you can see in the diagram, grooves for thin wooden lamellas are cut in two side strips. The louvres themselves are installed at an angle. The lower and upper frame planks are attached to the side furniture dowels. |
 |
You can see the main dimensions in the diagram. From myself, I can add that the angle of inclination of the louvres should be less than 45º, otherwise the contents of the cabinet will be partially visible. The grooves for the lamellas are made up to 10 mm deep. |
 |
The grooves for the lamellas are cut hand milling cutter, the cutter diameter is equal to the strip thickness. In order for everything to work out smoothly and in parallel, you need to buy or assemble a special holding frame with your own hands, professionals call such a device a "conductor". |
 |
All bars and lamellas must be sanded before assembly. The diameter of blind holes for furniture dowels should be 1 mm less than the diameter of the dowels themselves. All elements are glued with ordinary wood glue. |
 |
Such shuttered doors are finished in the same way as any wood: · First, open the wood with wood stain to give the desired tone and texture; · Then cover with varnish, and the more layers of varnish you apply, the better your doors will look, but at least 2 layers are applied. Such doors are hung on simple butterfly hinges, however, for such a facade it is desirable that the cabinet frame be assembled from bars, they are an order of magnitude stronger than laminated chipboard. |
 |
Option number 2
The price for a good sliding mechanism is much higher than for the same doors made of laminated chipboard, but from a technological point of view, it is much easier to install doors for a sliding wardrobe. The diagram shows one of the most common models. Here you need to fix the upper and lower rails strictly horizontally to the cabinet frame, and then cut the middle plate into the frame and insert into the rails. By the way, it is not necessary that such doors be made of wood or chipboard, a mirror or frosted glass is perfect here. |
Conclusion
Now you know not only how to make a wardrobe on the balcony with your own hands, but you can also choose between several facade options for such a wardrobe. If some points in my story are not clear, write in the comments, I will try to clarify.

Trade racks for balcony cabinets are the most democratic and fastest way out.
A whole lot of items and necessary things are often stored on the balcony. In order to make the best use of the space, it is worth installing the cabinet on the balcony.
Such a solution will help to make practical use of space, free from unnecessary workload.

In order to figure out how to choose the right cabinet, read the selection criteria and recommendations.

Criterias of choice
They are essential when buying, because not every model will fit in size or service life. So, important criteria choice.

The size
With a small balcony, the cabinet should be selected in accordance with this. Measure in advance the indicator of height, width, so as not to miscalculate. Thanks to timely measurements, you will save yourself not only time, nerves, but also money.

Consider protruding window sills. This will help you to correctly approach the installation and placement of the cabinet. Just a few millimeters can play a cruel joke on you.

A corner cabinet on the balcony is a great option for placing a cabinet in the corner. Thus, it will take up part of the space, compactly fit all the necessary items.

Term of use
The temperature regime of the balcony is different from that of the apartment. Therefore, due to changes in the weather, furniture suffers. Therefore, it is so important to take this fact into account when choosing.

Depending on your location, the weather, which is typical of the region, choose such a built-in wardrobe on the balcony that will withstand changes and instability in temperature conditions. The material must tolerate moisture well.

Materials (edit)
Suitable for manufacturing wood materials, MDF, chipboard. These are quite popular materials in the manufacture of furniture.
Before buying directly, pay attention to the properties of the material, its resistance to high moisture and low temperature conditions.

Note! A correctly selected item, as you can see in the photo of the cabinet on the balcony, will not only be a place for compact and functional arrangement of things, but also decorate the space and become an interesting interior decoration.

DIY wardrobe
If you have ever thought about how to make a wardrobe on the balcony, then you should familiarize yourself with the following points.

If you have the required amount of material and basic skills, you can easily do it yourself, without the help of specialists.

It is also worth saying that by buying separate materials for making a beautiful cabinet for the balcony, you will significantly save money.

Think over the sketch in advance future furniture... Consider the dimensions, the weight that will fit on the cabinet.


Having selected all the necessary materials and tools, proceed to the assembly. For this process, you will need nails, or self-tapping screws.

The first option is quite convenient when disassembling the structure, available to everyone. The second is more pleasant from an aesthetic point of view, but special tools are required to use them.

If it is not difficult for you to create a drawing and then do a good job, then you can certainly do it.

If you are doing this for the first time, it is better to ask for help, or still buy a ready-made wardrobe for the balcony.
The positive side of choice
There are several positive sides cabinet selection:
- you save space. Indeed, the design of the cabinet itself implies a compact room for many items for comfortable operation;
- low price, it all depends on the model you choose, or on the independent execution of the product;
- suits absolutely everyone, because you can make a wardrobe for the balcony to order. This choice is suitable for those who want to add their own flavor to the furniture, complement it;
- from the aesthetic point of view, the right combination of colors and appearance will decorate your interior.

Minuses
It is also worth talking about the disadvantages of choice:

- difficult location. It is necessary to calculate in advance the dimensions, height, width to be able to fit the cabinet onto the balcony;
- the ability of the material to withstand high or low temperatures, the presence of high moisture and resistance to heavy loads must be taken into account.

conclusions
For the right choice cabinet, it is worth considering its size and criteria such as moisture resistance and resistance to temperature extremes. You don't have to buy, you can make a piece of furniture yourself.

The wardrobe, selected according to all the criteria, will serve you for a long time without creating unnecessary inconveniences.

Photos of cabinets for the balcony


Even in a large apartment, you can face the problem of insufficient storage space, especially if we talk about housing with a small area. Do-it-yourself installed wardrobe on the balcony is considered the right decision allowing you to free up space. To preserve the appearance of the room, you should choose the right shape and design. A variety of materials will help make the wardrobe a functional and attractive part of the interior.
In any apartment, regardless of area, it accumulates over time a large number of various things that do not need to be constantly used, but nevertheless they take up a lot of space. A self-made wardrobe built into the balcony will allow you to neatly store winter or summer things, homework and other items that are rarely used.

The idea of \ u200b \ u200bmaking cabinets for the balcony became popular in the last century and still has not lost its relevance. Regardless of the size of the balcony, there is always space on it that can be used to great advantage.
It is considered convenient that it is not required to select facades that match the color of the rest of the furniture in the apartment, because the balcony is isolated from the rest of the area. And also you can not adhere to the general style of furniture in the apartment. This allows you to carry out any ideas for the balcony with your own hands, as well as choose convenient shapes and designs. The main thing is that the design is roomy and meets the needs of the owner.
Useful advice! Making furniture for the balcony with your own hands, you will be able not only to save money, but also to practice your design skills.
A spacious wardrobe in the room creates additional storage space for various items, which makes it possible to free up space in the apartment. At the same time, the balcony does not lose its attractiveness and even acquires a more neat and well-groomed appearance.

Do-it-yourself wardrobe on the balcony: basic design options
Before assembling the cabinet with your own hands, you need to decide on the desired design. This furniture is divided into built-in and free-standing, in addition, the following options for cabinets on the balcony stand out:
- open;
- sliding;
- hinged.
The open version of the cabinet consists of a row of shelves stacked one above the other. At the same time, it can equally well be placed in the room as a prefabricated version the right size and built-in cabinet model. It is important to note that a self-made cabinet built on the balcony will cost a little less, because the balcony walls can be used as a frame, especially if there is no adjacent window.
In many photos of balcony cabinets, you can see that, to reduce the cost of the structure, curtains or blinds are installed instead of doors, which hide the contents of the shelves from general availability.

Useful advice! The number of shelves is determined at the discretion of the owner. It is better if the uppermost shelf is located at arm's length so that you can reach it without using additional devices.
A swing cabinet, just like an open one, can be made built-in or solid, but in this case the presence of doors is considered mandatory. Depending on the area and size of the balcony, one or two doors are made. If the space is very limited, you can stop at the sliding door option.
You can also make a wardrobe with your own hands. combined type... In this case, one part of the furniture remains open, and the second is closed by doors. In this case, it is allowed to leave open both the side and the upper or lower side. Boxes with small household kitchen appliances can be stored on open shelves, and items that cannot always be stored neatly are folded behind a closed door. Another option for using open shelves is to grow flowers or prepare seedlings for the garden season.

How to make a wardrobe with your own hands and choose the optimal type of construction
The standard option for balcony furniture is a wardrobe with three independent compartments. If you supplement the furniture with sliding doors that move along runners, this will turn the product into a wardrobe. If the space allows, you can equip the furniture with swing doors. This design takes up considerable space, but nevertheless allows for neat storage of a large number of things on the balcony.
With a small area of \ u200b \ u200bthe room, it is better to make not a three-, but a two-winged cabinet, which will not be so roomy, but will leave enough space for free movement and make it easy to get the things you need. In order to make a wardrobe on the balcony with your own hands, you do not need any special tools or skills, because the design of the furniture is quite simple. How to decorate a balcony? Consider other popular product options.
A do-it-yourself corner cabinet for the balcony is perfect for a small room. In addition to the fact that the structure does not take up much space, it is considered easy to manufacture. Another advantage of the corner piece is that it takes up space that otherwise cannot be used functionally. The photo of corner cabinets on the balcony shows a large number of options that differ in application various materials to create the frame and sheathing. If you look at their internal equipment, you can notice a significant number of useful compartments.

Other popular types of lockers on the balcony: photos of good options
A pencil case is installed if it is not possible to allocate space for a wide structure. Most often, furniture is equipped with a large number of small-sized shelves, compartments or drawers, which allows you to distribute a significant number of necessary things. To add space structures, the cabinet is made to the full height of the wall. As for the doors, it is permissible to choose any convenient option. Another advantage of the pencil case is the ability to install it in any part of the balcony, where there is a convenient place for it.
A do-it-yourself cabinet on the balcony is considered the best option for a balcony in which there are niches or recesses. In this case, the size will depend on the dimensions of the room. It is a wardrobe made with your own hands according to a certain size that will be able to ideally fill a niche.
Important! Whichever cabinet design is chosen, the main thing is to ensure reliable insulation of the balcony so that the temperature in the room, regardless of the weather conditions outside, remains constant. You should also take care of the presence of blinds on the windows to protect the material of the frame and doors from burning out.
If you do not want to fill the space with a large wardrobe, you can limit yourself to making your own cabinets for the balcony. The optimal solution is to install this furniture option under one of the window sills, which is enlarged if necessary. The resulting table top is used either as a work table or for arranging plants. There is plenty of light on the balcony, making it an ideal place to grow flowers, and the curbstone will not block any of the windows.

How to determine the optimal cabinet size on the balcony
Before starting work, you should first complete the drawings of the cabinet on the balcony with your own hands in order to approximately calculate the amount of materials, fasteners and others Supplies... You can draw a drawing of the cabinet yourself or find a suitable option on the Internet. If you want to do it yourself, it is better to use special programs for this, which make it easy to calculate even minor details and create a structure optimal sizes... According to the finished drawing, it will not be difficult to assemble a suitable furniture option.
Useful advice! When drawing up a diagram on your own, it is recommended to immediately make it as specific as possible, so that after combining all the details, you get a holistic version of the furniture. Using a detailed drawing, even a novice master can make a cabinet on his own.
If we consider the layout of the cabinet, a height of 2.5 meters is considered optimal, but in general this parameter depends on the height of the ceilings on the balcony. It is recommended to choose a lower cabinet when the balcony is completely filled with windows and you do not want to close up or block the opening. In this case, it is best to make shelves, the height of which reaches the window sill and does not block access to the windows.

The optimal width parameter is considered to be 120-150 cm, but this indicator is also determined by the dimensions of the balcony or niche in which it is planned to be installed. As for the depth, it is most convenient to use a cabinet, the depth of which does not exceed 45-60 cm, otherwise it will be difficult and inconvenient to get things from the far part. It is best to leave 35-40 cm between the shelves. These parameters are considered universal, but everyone can adjust them for himself based on the characteristics of the room and the purpose of the structure.
Which is better to install the cabinet on the balcony: plastic or wooden
It is better to purchase the material for the manufacture of the cabinet after the balcony is fully equipped, and the facades are selected depending on the general design style. In this case, it will be possible to create a holistic space and a single interior. For example, if the balcony is sheathed with clapboard, it is also better to make the facades plastic.
A wooden cabinet always looks expensive and attractive, but it must be borne in mind that all solid wood parts must undergo special treatment against pests and be covered with fire-fighting agents. It should also be borne in mind that wood is a whimsical material that does not like too dry or humid air. Nevertheless, a do-it-yourself wooden cabinet will be reliable and will last a long time.

A wardrobe for a balcony made of plastic will cost several times cheaper, because the material itself is not as expensive as wood. But if wood can be used both for creating a facade and for making body parts, then plastic is recommended only for cladding. If you make plastic shelves, they will not be able to withstand heavy loads. The main advantage of clapboard cabinetry is the ability to choose any color and facade design, which will competently complement the interior of the balcony.
Useful advice! The disadvantage of a lining cabinet is that the material fade very quickly in the sun. Therefore, if there are a large number of windows in the room, care must be taken that the facades are closed from direct sunlight.
After completing the facades, you need to select the material for the interior equipment and the creation of the frame. Before you make shelves and a frame in the closet, you need to know what you plan to store in it: the heavier the contents, the stronger the material should be.
The optimal material for creating a frame is a wooden beam with a cross section of at least 40x40 mm. If not suitable option timber, it is allowed to use a metal profile instead, which is subsequently sheathed with panels or any other material corresponding to the interior of the room. In addition to plastic sheathing, you can also choose a wooden lining, the main thing is that its thickness is at least 0.8 cm.

Some owners, in order to reduce the cost of the structure, make cabinets from chipboard with their own hands. You need to understand that chipboard with high humidity or temperature extremes can quickly lose its appearance, and the material does not differ in strength. If you choose for the manufacture of chipboard, you need to take care that all corners are well laminated, because otherwise moisture will penetrate inside and the part can swell and change shape.
Sheets with a thickness of at least 10 mm will last the longest. It is not considered correct to completely make a plywood cabinet with your own hands due to its low strength, but using material to create the back wall will be justified and the cheapest option.
What you need to prepare to make a wardrobe or shelves on the balcony with your own hands
In addition to the choice of material for the frame, you should also worry about the accompanying details that will help create an integral structure. To assemble a reliable frame, you need to use high-quality furniture blanks and fixing elements. You don't have to make fasteners for balcony boxes with your own hands, because there is a large selection in retail outlets different options... You should also take care of the presence of screws, dowels and nails to secure the elements. Before you make the cabinet yourself, you should purchase the following components:

- Shkant. The detail prevents displacement of the panels and gives the cabinet rigidity. It is not considered an independent part and is used only in conjunction with an eccentric coupler. The dowel is made of natural wood, has a cylindrical shape and low cost.
- Screw tie. A fastener consisting of a screw and a barrel, the main purpose of which is to attract one element to another, for example, to attach a shelf to the side of a cabinet. The main disadvantages of using are the visible screw head on front side walls and complex installation process.
- Conical coupler. Suitable for fixing thick wood or chipboard panels, unlike the previous version, it does not have a visible head on the front side. Among the shortcomings of such fasteners, a small tightening stroke stands out, which means that under heavy loads, over time, the tie will loosen and cease to perform its function.
- Furniture corner. Without this element, making a cabinet with your own hands will not work. It is important that you do not need to make additional holes in the panels to install such fasteners. Metal or plastic corners are installed on the shelves, depending on the load. The disadvantages include only a not very aesthetic appearance of the part.
- Euro screw. Inexpensive fasteners used to reduce the cost of construction. To install the screw, a hole must be pre-drilled. The downside is that the hats will remain on the outside of the side of the cabinet.
- Eccentric. The most popular type of fasteners for assembling cabinets and drawers on the balcony with your own hands. Joint installation with a dowel allows you to endow the furniture with strength (due to the strengthening of all nodes). On the side, it can be easily closed with a plug that matches the color of the facade.

If you plan to install doors and drawers, you need to determine the principle of opening and select high-quality systems. To carry out the assembly, you will need the following tools:
- jigsaw;
- drill;
- screwdriver and screwdriver;
- hacksaw with different teeth;
- hexagon;
- Sander;
- chisel;
- building level and plumb line;
- tape measure, pencil and ruler.
Useful advice! In order not to spoil the materials, you should not rush to change the size of any part. If it was decided to reduce the size of the shelf or other part, it is better to re-measure everything several times.
Do-it-yourself wardrobe on the balcony: a step-by-step photo of the actions performed
Do-it-yourself wardrobe for a loggia or balcony should be done after preliminary insulation and wall cladding. Therefore, it is recommended to determine the location of the cabinet even at the stage of repair, so that nothing interferes with the reliable fastening of the side parts to the walls.

The easiest method to manufacture is considered to be the method of fixing internal parts on a common frame. Work begins with the execution of markings on the walls based on a previously thought out design drawing. The lower border of the cabinet is outlined in accordance with the upper markings using a plumb line. This action must be carried out to ensure a level base in order to prevent skewing of all furniture.
The top and bottom boundaries are connected by vertical lines applied to the walls using building level... After marking the boundaries of the frame, horizontal lines are drawn to determine the location of the cross parts. To keep the shelves level, they should also be fastened with a level.
Important! The reliability of the cabinet installation and the appearance of the furniture depend on competent installation frame. Therefore, marking must be done carefully.
Further, using a drawing of a cabinet on the balcony prepared by their own hands, they begin to form a frame. If a wooden beam was chosen for its manufacture, the elements are adjusted to the required dimensions using an electric jigsaw, and the base from a metal profile is cut using sharp metal scissors. After the preparation of the parts, the ceiling and floor parts of the cabinet are fixed, which are connected by vertically arranged racks. Fastening to the wall takes place with self-tapping screws, and the recommended step between them is 35-40 cm, but not more than 50 cm.

At the next stage, intermediate horizontal beams are installed along pre-marked lines, which will then be used for laying and fixing the shelves. Horizontal fixings also increase the overall rigidity of the cabinet. The crossbeams are mounted using self-tapping screws and corners, which are attached to the bottom of the horizontal crossbars.
If a bar or profile of the required length is not available, filling the entire height of the wall, you can use several short segments that are fixed to each other. In such a situation, the vertical and horizontal parts must be installed at the same time. It should be borne in mind that this assembly method is only suitable if the structure frame is attached to the wall.
Instructions for fixing shelves and other cabinet elements
The shelves of the cabinet can be made from a solid sheet of plywood, chipboard or MDF, the thickness of which is at least 12 mm, and for this purpose, solid boards, laid flush and screwed to the timber, will also work. In any case, the edges of the parts should be well processed with a fraser or grinder.
Useful advice! Using plywood or chipboard for interior decoration will help to reduce the weight of the assembled structure, because the mass of solid wood is much greater than the weight of other materials.

If the walls and shelves of the cabinet are made of chipboard sheets, then they are fastened together with the help of furniture corners. The fasteners are also used to attach the shelves to the frame. When planning a chipboard cabinet, you can calculate the required size, number of parts and order their production in retail establishments that sell components for creating cabinet furniture.
In this case, all parts will differ in the correct cut, and most importantly, reliable edging is performed at the factory, which protects the inner part of the sheet from moisture penetration. At home, it will not work well to process the edges.
It is better to do the doors for the cabinet after assembly, taking into account the size of the opening and having completed the markings for installing the hinges. When planning a swing cabinet of two doors, their size is adjusted at the same time so that they do not rub in when opened. Doors in the form of blinds look beautiful, as well as structures assembled from boards installed vertically or horizontally.

In this case, use wooden lining 5-6 cm wide. A self-made cabinet made of lining on the balcony will look appropriate when the whole room is decorated in a similar style. Benefits plastic doors are considered:
- a light weight;
- no need to make a massive frame from a bar.
Another popular door design option is tongue-and-groove boards or wall paneling. The parts are assembled with glue and tightened with a clamp until completely dry. For greater reliability, the finished shield is reinforced with jumpers installed on inside across the glued lining. It is important to ensure that the jumpers do not rest against already installed shelves.
For the installation of doors, butterfly hinges are most often used, which, with the help of a chisel, are deepened into the base for the entire thickness of the plate. This is done so that there is no large gap left between the opening and the door, and also so that one part does not rub against the other.

If chipboard was chosen for the manufacture of the cabinet, furniture hinges with a round groove are used to install the doors, into which the bowl of the part is then mounted. The hole for the hinge is drilled with a special nozzle installed in a screwdriver or drill. Whatever hinges are chosen, they are fixed to the cabinet walls using self-tapping screws, for which holes of a smaller diameter are preliminarily prepared.
The last stage of the assembly is the installation door handles... For this, holes are made in the doors, into which a screw will then be inserted, screwed in from the other side.
Some interesting ideas for creating a balcony design using a cabinet
It is possible to properly organize the use of the balcony area for any size and shape of the room, the main thing is to take into account all the features. A built-in monophonic wardrobe with rich interior equipment, which consists of a large number of shelves and drawers, will help to arrange any, even the smallest details.

Useful advice! Do-it-yourself drawings of toolboxes that you plan to add to the cabinet are recommended separately from the general design scheme, but taking into account the size of the frame. Thus, it will be possible not to forget about all, even the smallest elements.
A swing cabinet with two outer doors to the full height of the furniture is also considered convenient, opening which, you can immediately see all the contents. This saves time on checking individual, closed elements.
If the balcony is an extension of the kitchen, the doors are complemented with frosted glass inserts that match the design of the kitchen facades. In this case, it will turn out to visually connect two adjacent rooms. By installing a self-made wardrobe on the balcony equipped with mirrored doors, it will be possible to visually increase the size of the room. Installation benefits different types storage facilities on the balcony:

- A spacious bedside table that takes up all the space under the windowsill. Almost invisible, but at the same time very roomy.
- Cabinet with louvered slatted doors. Not only looks light and aesthetically pleasing, but also allows air to circulate freely inside the cabinet. This prevents moisture build-up, mold and odor formation.
- Built-in work space. With the doors closed, the design is no different from the cabinet, but everything inside is located in such a way that you can put a laptop or desktop computer and arrange organizers for the necessary documents.
- Wall cabinet. This option is good only with a large balcony area; its structure resembles a standard room wall. Here you can place many shelves and a wardrobe for storing winter outerwear in the warm season.
- Open shelves. They can be located both over the entire surface of the blank wall, and only in its upper part with a small room, so that you can easily move around the balcony.
- Curbstone sofa. Installed under the windowsill, equipped with either double-leaf swing doors or a top cover. If you throw soft pillows upstairs, the structure will act as a great place to relax on sunny days.
A balcony is an integral part of an apartment, the area of which must be used as correctly as possible. The cabinet installed in this room will free up the area of living rooms from rarely used items. To make a wardrobe yourself, it is not necessary to create complex structures. A large number of drawings and special programs are available on the network that will make it as easy as possible preparatory stage work. Even a person without much experience will be able to assemble a cabinet with the necessary parts.
Wardrobe on the balcony - convenient device compensating for the lack of space in small apartment... It is easy to buy it, but it is not a fact that the product will exactly fit the size of the loggia / balcony.
Another option is to order a locker for the master, then it will surely fit into the parameters of even the most non-standard balcony, but it will not be cheap for the owners.
It's best to do it yourself from the most suitable materials: natural wood, plasterboard, moisture-resistant plywood, laminated chipboard, plastic. It is important that the material can withstand temperature extremes and outdoor humidity.
On the balcony, compact furniture is appropriate, not blocking the light and repeating architectural forms. It is desirable that the cabinet occupies the space from floor to ceiling or otherwise fits into the interior (for example, reaches the level of the glass). In contrast to shelves with shelves, a closed structure will provide better preservation of products, things and a more attractive appearance.
The presented article describes how to make a wardrobe on the balcony with your own hands in stages - from drawing and choosing materials to decorating finished furniture.
Preparatory work
 Before making a wardrobe with your own hands, evaluate the technical situation:
- the balcony must be glazed;
- be sure to additionally insulate and insulate it: coat the cracks, check the tightness of the glazing;
- using a level, find out if the floor is even enough, and if necessary level it (even a slight slope makes installation much more difficult);
- cover the floor with linoleum, tiles or alternative insulation;
- check the reliability of the structure so that the balcony does not collapse under the weight of the future structure;
- Provide a dry, warm microclimate in the room.
If you do not observe these precautions, under the influence of precipitation, sudden temperature changes, the material will soon deteriorate and lose its aesthetics.
Prepare the tool in advance:
- tape measure / meter,
- a ruler,
- pencil,
- level,
- screwdrivers / screwdriver,
- hammer drill for drilling concrete, drills and drills for wood and concrete,
- screws, dowels,
- hammer,
- hacksaw / jigsaw,
- special stainless fittings (hinges, locks, handles, magnets, corners), materials for covering / painting.
Drawing making
 To build a beautiful cabinet of the correct shape, you need a blueprint. It can be a coupe or a corner version, free-standing / built-in (optimal solution). The latter is preferable because it is easy to install on loggias of any size and layout.
The main thing is to accurately measure all distances with a tape measure. Mark all sections on paper indicating parameters (total length, width and height, distance between sections and shelves). Think over the places of joints and connections, the location of the doors, their type (on roller shutters / swing doors). It is also necessary to take into account the future load on the shelves, depending on which their thickness is calculated.
The first time you solve this problem, make a cardboard layout. So it is elementary to avoid miscalculations and once again make sure that the doors are convenient to open and the structure fits well in the chosen niche, without interfering with the passage and opening of the balcony windows.
The layout is easier to cut and assemble all the parts, but creating the model will take extra time.
To make your work easier, buy ready-made blanks and accessories in a building store. Pay attention to their parameters, and you will not get any flaws.
The finished, verified and, if necessary, corrected drawing is transferred to the purchased material.
Material selection
The most solid and noble material - natural wood, impregnated with linseed oil, painted. An alternative to wood is drywall sheets, plywood, plastic, chipboard.
 Benefits of wood:
- environmental friendliness;
- high strength;
- attractive appearance;
- durability;
- fastening reliability.
Cons of wood:
- severity;
- the complexity of processing the wood itself and construction details;
- tendency to erosion and swelling under the influence of moisture, mold;
- high cost.
 Advantages of drywall:
- ease of processing, cutting;
- quick installation;
- ease of construction;
- resistance to deformation;
- low cost.
The disadvantages include low strength compared to wood - drywall will not withstand heavy loads.
The main disadvantage of plywood and laminated chipboard is that it is very difficult to cut them evenly, without chips, using a jigsaw. Therefore, it is better to take the products for cutting to a hardware store.
Stages of cabinet making
1. Installing the mounts
 At the place where the cabinet will be located, you need to make a preliminary marking and fix the fasteners along it. For this purpose, use wooden / metal beams, forming, respectively, a frame under a corner, rectangular (square) wardrobe.
If the compartment is made of drywall, it is better to make an additional stiffener - to fix the transverse profiles with slats.Using a punch and dowels / self-tapping screws, you need to securely fix the bars so that the built-in structure is strong and does not collapse under the weight of things. If you plan to make a compartment, suspensions are attached to the bars, and to them - vertical slats, which will be installed in the guide profiles.
2. Fixing the walls
The walls are attached to the frame with screws / self-tapping screws. The back wall also needs to be covered with a sheet of plywood, chipboard, drywall. At the points of contact between the sheets, you need to install screeds so that they do not diverge in different directions. As a result, the basis of the future coupe is obtained in the form of a box without shelves and doors.
If you use chipboard, all unprotected areas must be processed, otherwise the destruction of the structure will begin from them.
3. Installation of shelves and rods
 The size and number of shelves varies depending on what things (products) will be stored in the compartment. To fix the shelves, corners and screws of such length are used so that they do not come out from the outside. When it is supposed to put heavy things on the shelves, banks, shelves must be made of wood, if these are light items, it is allowed to use drywall. For the shelves, it is permissible to use fragments of old furniture, since they will not be visible behind the doors. But only new material is suitable for the supporting structure and doors.
If you plan to fill the furniture with clothes, use special fittings to install the bar.
4. Fastening the doors
Doors can be fixed different ways... The classic version on hinged hinges is popular. When installing the hinges, follow the instructions. First check if the doors close / open correctly, if they fit well together. Then mark the hinges and screw them to the sashes, and then to the walls.
At the very end, handles are installed.
Roller shutters are an alternative to swing doors. This format allows you to save space on the balcony and make the operation of the cabinet more convenient. But installing them is a little more difficult. At the stage of forming the frame, you need to install suspensions, and guides on them. The main thing is strictly vertical and horizontal installation at the level of the guides and the box. Check how smoothly and freely the structure functions.
The only drawback of hinged sliding doors is that they don't give full access to the entire shelf at once.
Sliding doors are easy to make from plasterboard, and on the sheet you need to fix the reciprocal rollers to slide the doors.
5. Finishing
 To build a reliable corner wardrobe, compartment, all joints, gaps and seams must be carefully processed: sealed with a special tape or primed and putty in 2 layers, and then cleaned with sandpaper. Even drywall should be coated with a water emulsion.
Most a budget option- glue the entire structure with self-adhesive film or wallpaper. In this case, you need to select a special glue that is compatible with a specific material.
Door handles can be decorated at will.
6. Installation of the lamp
Since the cabinet for loggias is illuminated only in daytime, it will not be superfluous to spend on the balcony electrical cable and connect the lamp. If you do not want to do this painstaking work, use a battery-powered lamp, for example, one that will react to cotton.
Nuances
 1. For a narrow balcony, a built-in compartment with a mezzanine to the width and height of the entire wall is ideal. If you have a spacious loggia, it is recommended to use freestanding cabinets with rounded edges and shelves, ledges for flowers, vases and small items.
2. Choose special fittings for furniture that is not afraid of corrosion.
3. For fixing drywall, use metal profiles, fix the rest of the materials on wooden blocks.
4. When deciding to use wood, choose a pine that is easier to handle.
5. To keep the design both beautiful and functional, mark under the shelves in accordance with the dimensions, for example, jars of pickles and other items.
6. Without experience in carpentry, buy hinged doors in the store - it is very difficult to arrange them beautifully on your own.
Following these tips, it is quite possible to create a balcony cabinet for storing pickles, “storing” various items, accessories, clothes, hats and shoes with your own hands.
Additionally
More instructions for creating a balcony (from lining, corner, wardrobe);
How to do it is the same as a wardrobe, only without doors, so it can be useful.
Was this article helpful?
Furniture can only be installed on glazed balconies. No, even the most reliable, protection wooden structures will not allow them to be used outdoors for a long time. For a maximum of several years, the furniture will have to be thrown away and new ones made. This is the first condition that everyone who wants to install corner cabinets on the balcony needs to know. The second important condition for the success of the business is that you must have at least minimal practical experience with wood and a set of tools. And the third condition is patience, attentiveness, accuracy and perseverance. If all three requirements are met, then you can start making your own corner cabinet for the balcony.

We will not consider the original options for the manufacture of cabinets made of aluminum, stainless steel and glass, such furniture is expensive and difficult to make. For self-production, you need to be fluent in several specialties and have a professional set of tools for working on glass and metal. And the balcony is not the place where it is advisable to install cabinets made of aluminum and glass. Consider materials that are cheaper and easier to process.
- ... Great stuff in every way. As for the relatively high price, this is not a problem, only a few boards are required for a corner cabinet, any consumer can afford to buy them. To increase service life and improve appearance lumber is processed special formulations and varnishes, you can decorate the front surfaces with separate decorations.

- ... The wardrobe will be made quickly and with minimal cost... The plastic does not rot, it is easy to clean, and does not require periodic "refreshing" of the outer surface. The disadvantage is low strength indicators.

- ... Excellent material, plywood does not warp as a result of moisture changes. Material for universal use, has many different types and varieties. In the implementation there are laminated sheets, they are used for the manufacture of furniture by specialized companies. A laminated sheet cabinet will look great. The cost of the material is above average.

- OSB and particle board... For all quality indicators, the material is inferior to natural lining. Another problem is pretty heavy weight significantly complicates the manufacturing process and requires durable fittings. External surfaces must be additionally finished to improve the design look. We do not recommend using fiberboard plates for the manufacture of the cabinet, they are too short-lived.


- ... There are recommendations to make corner cabinets from this material. We strongly advise you not to use drywall to make any furniture. Even for the production of construction work, this material is in last place in all characteristics. Construction companies use it because of its low price and manufacturability. Drywall has no more advantages.

The article will give step-by-step instructions for making a corner cabinet from natural lining - the highest quality and most beautiful material.
Preparation for making the cabinet
Select the basic model of the corner cabinet.
- The furniture is fixed, the frame is attached to the ceiling, floor and side surfaces, only the doors need to be made. This option greatly simplifies the work, you do not have to separately make the frame and upholstery it on all sides with clapboard. Doors can be made hinged or sliding. These cabinets must be made before the balcony is upholstered; it is impossible to move to another place.
- Mobile furniture, a full-fledged corner wardrobe is being manufactured... It is more difficult to do, but on the other hand, the possibilities are much expanded, the cabinet can be installed not only in various corners of the balcony, but also used for interiors.
We will focus on the second universal option. For work, you will need a block of 50 × 50 mm, lining, corners, screws and fittings. Of the tools, you need to have a hand-held power saw or jigsaw, a plane, a chisel, a wood chisel, a hammer, a screwdriver, a tape measure and a pencil.


Step-by-step manufacturing instructions
Step 1. On a piece of paper, draw some sketches of the bedside tables. Search good examples on the Internet, adapt them to your conditions. Do not rush to accept the final version, try to look not only to the present day, but also to the future. The more versatile the bedside table is, the more convenient it is to use, the more different items can be placed. It is recommended to take into account not only the height and width, but also the number of shelves and the distance between them. Another important point- for each element, make a margin of safety, do not count on storing only light items.


Step 2. After the final version has been selected, you can determine the nomenclature and quantity of fittings, hardware and assembly fixtures. It is recommended to fix the frame with corners, this is much easier than making a spike / groove connection or in half a tree. Although, of course, this is the work of the master, everyone must decide for himself what to do.

Step 3. Measure the cabinet. Take measurements from the walls and ceiling, but when calculating the frame elements, these values need to be reduced by double the thickness of the lining, plus another centimeter or two for the gap.

Practical advice. It is imperative to draw sketches of all the elements of the frame, check the dimensions again. Count the number of parts, some of them will have the same parameters in length.
Prepare a template for each element, all the rest should be cut along it. Pay attention to the corners, it is better to cut the bars at the corners with a special tool. If not, then use a square. The tighter the frame bars will adhere to each other at the joints, the stronger the frame will be. Do not hope that all mistakes can be corrected by corners, they are not. If the density of fixation is violated, the stability of the frame will significantly decrease.
Step 4. Start assembling the frame. First, the upper and lower parts are connected. Attach them to each other, they should be exactly the same. Fix with corners on self-tapping screws, tighten tightly. The length and diameter of the self-tapping screws are selected in such a way that they provide the required strength of the connection and at the same time do not split the bars.

Step 5. After the top and bottom are assembled, you can attach the side uprights to them. The work is easier to do on a flat surface, it is advisable to have an assistant. Together, it is much easier to control the strength and accuracy of the frame assembly. Once the uprights are locked in place, replace the frame and check the position and shape again. Do not forget about the gaps between it and the walls for the lining. Problems found - it's not too late to fix everything.

Step 6. Screw the horizontal shelf bars to the frame. It is better to make the distance between them different, it will be possible to store items of various sizes in the closet.


Step 7. Now you can start lining the top, bottom and sides with clapboard. If you did everything correctly, then the dimensions of the lining will be the same. In the lower part, you need to make legs, the surface must be ventilated. Legs can be made from pieces of a bar or bought ready-made.
Practical advice. Work only with sharp and serviceable tools, otherwise the cut of the lining will be fleecy, you will have to grind it by hand.
If, due to a lack of practical experience, the ends of the lining turned out to be ugly and uneven - not a problem. Buy thin decorative wood or plastic trims from the store and use them to frame your wardrobe.
Below is a gallery of photos of lining cabinets. Illustrative examples help to choose the best way exactly for your closet on the balcony.


Manufacturing of doors
Step 1. Take measurements and draw a sketch. You will need two identical doors, although the dimensions can be changed at your discretion.
Step 2... Cut the required amount of lining to size, use a template. Check the cut pieces for height. To do this, put them on a flat surface, if there is a difference in height, then correct the mistakes.

Step 3. For each door, you should prepare two horizontal bars of the same length and one diagonal bar. The frame will have the shape of the letter Z, this configuration ensures the strength of the connection, the door will not break the geometric shape during lateral loads.

Step 4. Check the length of the horizontal bars, they cannot protrude beyond the perimeter of the door. Lay them on a flat surface, carefully fold the prepared lining blanks on top. Check the dimensions and angles again, if everything is fine, then you can start fixing.
Step 5. First, fix the outer boards. If the structure moves a little during operation, put it in the correct position. After that, you can fix all the other pieces of the lining.
Step 7. Try on a diagonal block, mark the cuts with a pencil. Fit it as tightly as possible to the horizontal elements. Everything is fine - screw each lining to a diagonal bar. The second door must be made identically to the first.

Step 8. Cut to size the boards for the shelves, set them in place. There is no need to screw it on, the main thing is that they lie tightly to each other.
Now you can start varnishing the bedside table. The operation is simple, but it has its own secrets.
Varnish coating rules
Buy only high-quality varnish, poor-quality varnish raises the pile during drying. We'll have to grind it, and on the lining it is long and difficult to do, it has an uneven surface. Every groove and protrusion must be carefully sanded. Some profile turns have a small radius, which requires manufacturing special devices for grinding. Before applying varnish, the surfaces should be thoroughly cleaned of dust and, if necessary, dried. It can be varnished both on both sides and only from the front.


Work with a brush, make sure that no drips appear on vertical surfaces. If traces remain from the brush, then the varnish should be slightly diluted. You need to cover at least two times. If there is no practical experience in applying varnish compositions on wooden surfaces, it will not be superfluous to cover in three layers. Each subsequent one is applied only after the previous one has completely dried. If desired, the lining can be impregnated with stain before varnishing.

It is recommended to lay the doors on a horizontal surface before varnishing, this will greatly simplify the work and will make it possible to cover with a thicker layer of varnish. Just do not get too carried away, the varnish can accumulate in the grooves of the lining. If the balcony is cold, then you should purchase varnish for external work, it can withstand sub-zero temperatures and does not react to condensation.
Installation of hinges and fittings
Remember that there are left and right hinges, select the appropriate pair for each door. In order for the doors to close tightly, you need to drown the metal plates of the hinges. You will first have to do the markup.
Practical advice. It is much easier to first install the hinges on the doors, and then make the markings on the vertical posts.
Along the marked lines, cut the tree a little with a chisel, carefully remove the wood over the entire area with a chisel. The chisel must be held in such a position that the part sharpened at an angle is directed towards the wood to be removed. If this is not done, then the edges of the groove will be crumpled, and this is a cosmetic defect indicating the low qualifications of the master. The depth of the groove must match the thickness of the hinge. Check the depth constantly, do not go too deep, otherwise it will be difficult to open / close the doors.


The handles are attached according to the manufacturer's instructions. If you wish, you can install a lock, it should only be applied, the mortise does not allow you to put the thickness of the lining. The fittings are fixed on the installed doors. Today in the implementation there are many different decorative elements made of plastic and wood. You can use them to give a corner cabinet a completely exclusive look.


 Future marriage of Prince Harry year NTV")


Energy drinks: give vigor, but take away health What will happen if you drink 4 energy drinks
Mustard for weight loss: how to use the seasoning with maximum benefit Is it possible for children to have mustard
The benefits and harms of mustard for the human body Table mustard benefits and harms
How to treat the ear after piercing: types of antiseptics, their composition, rules and features of the treatment of a pierced ear
Sistine Chapel in the Vatican: description, history, architectural features