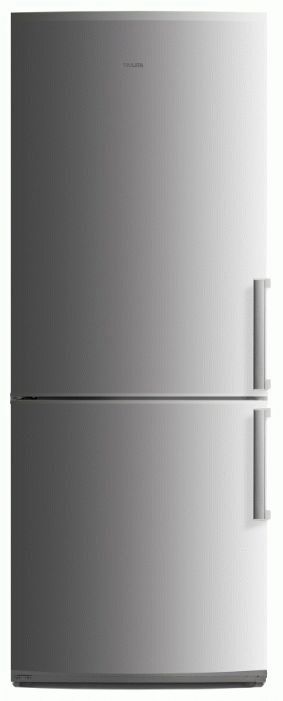
Prudent Engineers modern models refrigeration equipment provided the opportunity to move the doors to the other side. As a rule, such manipulations are included in the warranty service of the equipment you purchased, but with the proper skills and capabilities, you can do everything yourself.
Features of moving the door
There are a number of situations when it is necessary to move the refrigerator door to the opposite side:
- The owner is left handed.
- The layout of the kitchen does not allow the use of a refrigerator, the door of which opens to the right.

As a rule, the instructions attached to the technique indicate in detail not only specifications unit, but also how to move the door fasteners.
If the instruction manual is lost, then you just need to inspect the equipment for the presence of special plastic plugs on the side opposite to the hinges. If there are any, then the possibility of reversing the doors is provided in this model.
Self-replacement of the refrigerator door
We will need:
- adhesive tape (painting or ordinary wide);
- Screwdriver Set;
- wrench.
How to move the door to the other side:
| Image | Description |
 |
Step 1
Switch off the power supply by removing the plug from the socket. Food and freezing must first be transferred to another cool place. |
 |
Step 2
Carefully remove the plastic plugs from the mounting points with a flathead screwdriver. |
 |
Step 3
To prevent the door from suddenly falling or deforming the fastener during the repositioning process, it is advisable to attach it to the body using masking tape. |
 |
Step 4
When rearranging the doors, it is necessary to start removing the fasteners from top to bottom, and fix them in the reverse order. Therefore, the top mount is disconnected first. To do this, just unscrew the fixing bolts with a wrench or a screwdriver. |
 |
Step 5
Remove the top door by carefully lifting it up. Don't forget to remove the masking tape first. |
 |
Step 6
The middle mount contains an axis of rotation for the upper and lower doors (see photo), so you need to be careful with dismantling. Remove the rotation pin and carefully remove the bolts from the middle hinge. |
 |
Step 7
Remove the last bottom fastener by unscrewing the corresponding bolts, remove the door, after removing the masking tape. |
 |
Step 8
Place the plastic plugs, if any, into the vacated holes in the refrigerator body. |
 |
Step 9
If the design and shape door handle provide for a change in its location for convenient closing / opening when moving the hinges, then it must also be transferred to the opposite side of the door. Locate the plastic plugs with inside handles and remove them. Unscrew the screws, remove the handle. Do the same manipulations, but in reverse order, when you install the handle on the other side. |
 |
Step 10
screwing door hinges side, reverse steps 4-7. You need to start by installing the bottom mount, then install the middle mount with the rotation mechanism, and finally mount the top hinge. |
 |
Step 11
When everything is ready, check the tightness of each refrigerator door. Visually inspect the rubber band for cracks. |
The doors of single-chamber refrigerators are more difficult to change than two-chamber models. If you doubt your abilities, it is better to contact the service center.
How to change the hinges on the LCD door
How to rearrange the door on a refrigerator with an electronic display is known only to experienced specialists and those who are familiar with the device of modern household appliances good enough. Therefore, if you doubt your abilities, then in this case it is better to entrust the matter to specialists.

The complexity of the whole procedure is that in the upper part of the case there is a special loop of wires, which must be very carefully transferred to the right side.
Briefly describe the process,:
- unscrew the protective cover in the case, which protects the wire cable;
- disconnect the part that powers the door display;
- remove the door, guided by the advice above;
- at the top of the door will plastic cover hiding the wires, you need to remove it;
- throw the wires that go through the loop to the opposite side. The loop must first be disassembled;
- assemble the door mount back, installing it from the right side, do not forget about the wire loop;
- fix the protective cover on the door;
- after installing the door, connect the cable loop to the rest of the wiring in the upper part of the refrigerator body;
- close the wiring with a protective cover;
- check the performance of household appliances.

Carry out all manipulations very carefully. The doors, although they look impressive, are rather fragile, and careless movements with a screwdriver or wrench can damage the coating.
Conclusion
Transfer door hinges refrigerator is necessary in cases where the standard opening / closing of the door is impossible or extremely inconvenient. It is quite possible to carry out this process on your own, if you have some ideas about the structure of technology, have a number of skills and necessary set tools.
The recommendations described above will help you cope with this task yourself, saving on the services of service centers, and the video in this article will make the process more visual. If you have any questions - ask them in the comments.
How to adjust the refrigerator door with your own hands? One of the most common local problems associated with a refrigerator is the deformation or lack of a snug fit of the seal to the door or body. In this regard, the question of repairing the door arises. Most often, this can be done independently, because. calling the master to the house is an expensive service.
Few people know that the complete replacement of the rubber seal on the refrigerator door in most situations is associated with damage to the material or destruction of its base. In all other cases, if the seal is deformed or there is no tight fit to the door (or body) of the refrigerator, repairs can be carried out by yourself, without involving specialists in this process.
It is quite easy to determine the malfunction, which is a consequence of a worn seal:
- The refrigerator hums and does not keep a stable temperature inside, thereby consuming excessive electricity.
- There is constant frost, moisture inside and outside the refrigerator, i.e. it is depressurized.
Identification and self-correction of seal failures
Local identification and correction of breakdowns associated with the refrigerator door, which are quite realistic to eliminate on your own, can be identified by several points. Firstly, during a visual inspection, when the refrigerator door does not stick well and then opens easily or sags heavily, you will need to carefully remove the protective cover from the hinges (if any) and tighten the door to the required level. It is possible that the gap that appeared is associated with subsidence of the refrigerator door.
Secondly, if the loose fit is due to the deformation of the rubber seal, because the material loses its elasticity over time, it can be returned to its previous state by heating. To do this, you need to heat (pour) the deformed area of the seal with a heating device (industrial or household hair dryer) or a thin stream of boiling water from a kettle, and while it is elastic, give it its original shape by placing a spacer under the heated area (a piece of rubber, paper or dense foam rubber) .
Attention! When fixing (heating) a deformed rubber seal on the refrigerator door with your own hands, you must follow the rules personal protection, i.e. use gloves and lay a rag on the floor so that the flowing hot water did not flood the room. In this case, the rag will periodically need to be squeezed out of excess water into a bucket, and then the waste water can be drained into the sewer. It is recommended to give the "elastic band" its original shape with soft hand movements. Be careful not to burn your hands when adjusting the seal.
Thirdly, before adjusting the refrigerator door and trying to restore the damaged seal, you will need to pull off its edge with a thin screwdriver and consider the method of attachment. It happens on bolts, glue, special clips or in slots (grooves). The replacement of the seal on the body (or door) of the refrigerator, in whole or in part, is carried out by measuring the old element and gluing it instead of the new one into magnetic strips prepared in advance, which are inserted into the cavity of the gasket profile. In the absence of a native seal, you can try to order and buy a universal one. A similar repair of a worn or damaged rubber seal is most often performed only if it is installed on a refrigerator such as Atlant, Minsk or Oka.

Other problems, in addition to replacing the gum seal, when a small one is required, is the creaking of the door or its reinstallation. You can eliminate the appearance of a creak in the following way:
- Identify a loop (or several loops) that creaks when opening / closing the refrigerator door.
- Eliminate the defect with a drop of engine oil by dropping it into the door hinges (in no case should vegetable, i.e. edible oil be used for this purpose).
Thus, simply adjust the hinges by raising them (as far as free play allows) and dripping a few drops of oil onto the axle in order to get rid of the unpleasant creaking sound.
Other, no less hard work on self-repair refrigerator - this is the adjustment of the door when it is reinstalled or sagging, which is carried out using plastic adjusting washers. Depending on the size of the door sagging, such washers will need to be purchased from 2-4 pcs.

In order to adjust the refrigerator door with your own hands when sagging, you need to carefully remove the door by unscrewing the refrigerator panel and removing its fasteners at the top. Then you will need to put adjusting washers (1-2 pcs.) on the bottom bracket pin and adjust the door horizontally. Next, it remains to “put” the refrigerator door in place, checking it for distortions and cracks, as well as for a tight fit of the rubber to the body (or door) and the operation of the light switch in the refrigerator.
Before you start repairing the refrigerator door with your own hands, it is strongly recommended not to load the refrigerator door with products from the inside.
If a break in the landing hole is detected, the door will simply need to be hung on the opposite side, where it is intact. Similarly, adjust the door for distortions (see description above) using adjusting plastic washers. If the hole is broken in two places and it is impossible to hang the door, it will be necessary to strengthen the plate on the damaged surface using " cold welding". Then prepare a hole for the axis of the bracket of the appropriate size and hook the door to its original place.
V modern world the refrigerator, if it is impossible to outweigh the door to the other side, has little chance of withstanding the competition. Let's say the piece of furniture is supposed to be placed near the window. Opposite was a chair. The place is good - easy to read. The refrigerator door opens: you have to go past the rider, reaching the window. Uncomfortable? The answer is yes. Let's see how to hang the refrigerator door.
Solution to the issue: moving the refrigerator door
It's easier to type a search query, looking for something that resembles what is at hand. Today we will consider the process, enlisting the example of Atlant refrigerators. Stop hoping that the sequence of actions unambiguously resembles an arbitrary model. Read the recommendations above (YouTube).
So, the door usually just starts to open to the other side. It may seem unusual. Previously, street light fell into the freezer of the refrigerator, now you have to be content with the kitchen. Otherwise, the ability to move the door to the other side is difficult to overestimate.
We outweigh the door of the refrigerator Atlant
An approximate sequence of actions awaiting the owner, who is puzzling over, planning to outweigh the door of the refrigerator:
- External inspection of the refrigerator in order to determine access, fasteners. If necessary, you will need to remove excess things. Applies to products that decorate door trays.
- Usually top decorative panel blocks access to the top loop. You will have to dismantle the interfering (decorative) parts.
- Dismantling the upper hinge, rearranging the plugs. Removing the top door.
- Dismantling the central hinge, working with plugs. Removing the bottom door.
- Rearrangement of the lower loop.
- Assemble the entire structure in reverse order.
And now let's see how it all looks on the example of Atlant two-chamber refrigerators, where the freezer is on top.

Dismantling the doors of the upper decorative panel of the Atlant refrigerator
The process begins with the top decorative panel of the refrigerator. Hiding bracket that forms the upper hinge of the freezer door (located at the top). The decorative panel of the refrigerator is held with two self-tapping screws, the heads can be easily found by bothering to look. Unscrew "barrel". Screwdriver equipped with a thick short handle. Those who use the “barrel” do not move the refrigerator away from the wall. The distance is small, but a screwdriver will fit there.
We remind you: at Atlantes, wall stops are attached to a decorative panel. It seems absurd, in practice it works. To remove stops or not, decide for yourself. First, the top of the refrigerator must be freed from all sorts of women's stuff, jewelry. Flowers, tablecloths, TV. We suggest taking photos from several angles of the refrigerator before starting work. Believe me, it helps to arrange back.
Self-tapping screws are unscrewed, you need to pull decorative element refrigerator forward. The trailing edge rises. You have a chance to see a sheet of foam under the panel. Refrigerator insulation. Proceed with caution for fear of harm. The panel must be carefully removed to the side. In many refrigerators, you can see a frontal steel threshold that acts as a support for the panel. There is usually no need to remove, the part is powerless to prevent the dismantling of the freezer door.

Dr. Aibolit finalizes a medical refrigerator
Dismantling the upper hinges of the refrigerator Atlant
The upper hinge is represented by a plate with a pin screwed in at the corner that holds the door. On the opposite side of the refrigerator we see a completely similar detail. The pin is missing, but the thread is present. In the video instructions, it is recommended to stick the refrigerator door with tape. We add that in most cases it is enough to hold it with your hand. The door is well stuck with a rubber seal to the refrigerator body.
The bolts holding the plates are completely ordinary. Take both. The pin needs to be unscrewed, the design is not symmetrical. Under the circumstances, do necessary operations. You will need a hex wrench. It is time to move the door hole plug from the previously unused area. Make it easier with a thin slotted screwdriver. Please note that the hole is thicker on the developed side, you will have to seal the plug with a layer of paper. It is important to drive the decorative element completely, preventing the door from clinging to the top panel of the Atlant refrigerator.
To remove the top door of the refrigerator, open it wide open with both hands, lift it up.
Dismantling the central loop of the refrigerator Atlant
The center hinge is held in place with Torx bolts. Two pieces for each. The loop is not symmetrical, it is not necessary to disassemble. Just flip. It's time to talk about gaskets. They look like pieces of plastic of arbitrary configuration, dressed on a central loop. Remove carefully and set aside. Each set is formed by two bottom spacers, the same number on top. Total, four.
Enlisting the help of gaskets, the master adjusts the height of the refrigerator door suspension. Although the original purpose is to reduce the friction force. The hinge is laid aside, when removing, hold the bottom door of the refrigerator. Surely it will start to fall, the eggs that have mastered the trays will fall out differently. Hold the door constantly, removing the central hinge. Excluding an unexpected fall.
The lower door of the refrigerator is removed from the hinge, set aside. Pay attention, hides the next set of gaskets. Set the parts aside, you will need them later. Now we take out the plugs from the opposite side, we stick the loops instead. There are no problems. The plugs are still removed with a thin screwdriver. With the bottom door of the refrigerator, you will have to apply the previously tried newspaper trick. Otherwise, the plug will refuse to stand up.
Dismantling the lower hinge of the refrigerator Atlant
The lower hinge of the refrigerator is represented by a single threaded stud. It is fixed on the bracket from below with a nut. To get there, remove the decorative panel. Retained with two Torx bolts. The size often repeats the central loop. Look for access from the front.
The end of the stud is shaped like a hexagon, hold until the nut opens from below. The nut is typical. Use any type of key. The limitation is caused by the proximity of the floor - it is difficult to crawl.
Installation of the lower hinge of the Atlant refrigerator and the door
Move the pin to the other side of the refrigerator (similar bracket) strictly symmetrically, screw it in, holding the hexagonal end from above. Get a firm tightening, then replace the plastic spacers removed earlier. Put the door on top. It is advisable to fix or immediately start ...
Installation of the middle loop of the refrigerator Atlant
When flipping 180 degrees, the geometry of the relative position of the hinge and doors remains the same. The lower gaskets are below, the upper ones are still where they were. With one hand, insert the hinge into place, with the other, begin to align the door with the refrigerator body, achieving a strictly vertical position. Clear, building level will be of little help here. Make sure that the top and bottom edges of the door protrude the same distance from the side of the case.
Take your Torx screwdriver and start tightening the bolts while keeping the door in position. Make the final adjustment with a key.
Installation of the upper hinge and the door of the refrigerator Atlant
- Put the spacers on the middle loop
- Install the freezer door.
- Close the sash with a push. To make the door stronger.
Now the door is stuck with the "suction cup" of the seal, we begin to put the top hinge. Let's agree that we have already collected, tried on, as it was said at the beginning. We put on the gaskets, stick the pin into the door, begin to tighten the bolts. Far - hard, near - slightly. We align the position of the door so that in the future it does not cling to the upper decorative panel. Tricky moment… the panel will be crushed by the weight of the flowers that were removed earlier. When trying on, press on top with your hand as it should.
There will be a lot of warm words from our readers at different addresses, try to avoid breaking the foam sheet. Keep away from refrigerator while trying on. It will be easier to put the decorative panel in place. They forgot to glue the foam sheet. Just put it aside. Below is reflective insulation, try to save.
It remains to hoist the decorative panel back. Guided by the photograph, we put flowers, lay tablecloths, align the TV. Headache on the subject of how to outweigh the door of the refrigerator, you can forget. The review will help readers to solve the issue simply, as the authors did with the Belarusian Atlant.
In most cases, the question of how to hang the refrigerator door arises when a kitchen needs to be remodeled and appliances should be moved to a new location.
If the position of the refrigerator does not allow the door to open properly, it becomes necessary to rehang it in the opposite direction for greater convenience.
Sometimes such a need arises if one of the owners is left-handed, and he wants to install everything in the kitchen as he wishes.
This is also done if the refrigerator door does not close well due to the fact that the rubber seal on the side of the handle has worn out. In this case, the door does not fit snugly against the body, and the device loses its tightness.
Sometimes you have to change the entire seal, but in most cases it will still be better to just re-hang the refrigerator door, because this does not require financial costs.
It is not difficult to check this - just cover the refrigerator by pressing a sheet of plain paper with the door, and then pull the sheet.
If it slips out easily, then the gap between the housing and the seal is large enough. And this means that the tightness is broken, and you should either change the entire seal around the perimeter, or outweigh the door.
In some models of refrigerators, this can be done without much difficulty, because there are already holes for handles and hinges on the opposite side of the door.
Before starting this work, we advise you to make sure that these spare holes are available in your refrigerator.
If you do not find them, then you will not be able to outweigh the refrigerator door on your own - the factory design of the device does not provide for this, you should not even try!

Of course, some owners themselves can drill the necessary holes if they are not available, but it is still better to use the services of a professional craftsman, especially if your refrigerator is equipped with a display or an opening sensor
Some stores include the service of hanging the door in the warranty package, so it is better to contact their service center.
If the warranty period of your refrigerator has expired and its factory assembly provides for the possibility of hanging the door yourself, then it will not be difficult to do it yourself, it is enough to follow the safety rules.
List of required tools
Here is the optimal set of tools that you will need for the job:
- a set of wrenches - different models of refrigerators may require different wrenches;
- flat and Phillips screwdrivers or a screwdriver;
- Scotch;
- instruction.
If you have kept the instructions for the refrigerator, then it will be most welcome - it may contain a good guide on how to hang the door yourself. But if there is none, then it does not matter - the work can be done without it.

In order to cope with the fasteners of the door, it will take quite a bit hand tools that can be found in every home
It would also be nice to enlist someone's help, because the process requires some skill and it will be difficult to cope alone.
Step by step process of changing the position of the door
Before you hang the door of the refrigerator with your own hands, you should unplug it from the mains..
Then you need to remove all products from the shelves located on the inside of the door, and a variety of magnets from the outside. Be careful not to scratch glossy surfaces.
Step 1 - dismantle the top door
The vast majority of refrigerators are two-compartment, with a freezer located above / below the main compartment. Therefore, it is better to start outweighing from the top door.
It is necessary to attach the door to the body with adhesive tape so that it does not fall during disassembly. You need to do this in several places.
As a rule, the door is attached to the body using hinges that are screwed with two bolts.
They must be removed first, after removing the plastic plugs from similar holes on the opposite side of the door, where we are going to screw the removed hinge.

The two bolts on the top hinge, which must be unscrewed with wrench. At various models refrigerator hinges can look different
Plugs should be removed carefully so as not to scratch the surface, using a flathead screwdriver. If decorative panels are screwed on the front, they can be removed using a Phillips screwdriver.
Some models of modern refrigerators are designed so that to dismantle the door in order to gain access to the top hinge, you must remove the top cover of the device.
Dismantle it and put it aside. It is better to put all removed parts in a separate container..

It is required to dismantle the panel first in order to get to the main fastening parts. The shape and size of the mounts for equipment from different manufacturers differ
We unscrew the bolts of the upper hinge, dismantle the hinge. Then you should remove the top handle, after removing the decorative caps. If the handle is not bolted, then you do not need to touch it, its design already includes the possibility of reinstalling the door.
After all the screws are removed with a wrench and the hinges are removed, you can remove the tape and remove the top door by lifting it up to separate it from the middle hinge. Removed door set aside.
We rearrange in advance removed plugs on the opposite side to empty nests. For greater convenience, they can not be removed before dismantling, but rearranged already with the door removed.
Step 2 - remove the bottom door
We proceed to the next step: we repeat all the steps with adhesive tape - we fasten the lower door to the body. Using a wrench, remove the middle loop, first removing the gasket from the pin.

This is what the middle hinge looks like on the doors of most models of two-chamber refrigerators. But there are models in which there are two middle hinges for the top and bottom doors
Then you can remove the adhesive tape and, slightly lifting the door from the bottom pin, remove it and also set it aside.
We remove the plugs from the holes in the middle part of the refrigerator for the subsequent installation of the dismantled middle loop and rearrange them into the holes formed.
Now we just have to dismantle the bottom hinge, which remained after removing the door on the refrigerator body.
This is done with a wrench or screwdriver. The pins and fastening bushings are removed, the screws fastening the lower loop are unscrewed.
Then the part is removed, and plugs from the opposite side of the body are transferred to the place of the holes formed.
Everything, the stage of dismantling work is completed, it is the turn of the direct transfer of all dismantled parts to the other side in a mirror order.
Step 3 - transfer the loops to the opposite side
All sets of dismantled fasteners should be transferred without any replacement, because when rearranging interchangeable hinge elements, installation problems may arise.
Incorrectly installed doors slam shut and hang badly, as the hinges have a run-out and should not be broken.
The procedure for moving the door is as follows. First of all, we install the lower loop removed last in the opposite place. We tighten the bolts with a wrench or screwdriver. Install the bottom pin and gasket.

Rearranging the bottom hinge on the refrigerator door is not always easy - some models may lack one or two of the necessary holes on the bottom opposite side
Then you should carefully install the lower door with the handle previously transferred to the opposite side on the pin and fix it with tape.
A little trick - instead of using adhesive tape, the masters suggest simply tilting the refrigerator case back a little, then the door will hold tighter and not move.
Then, in the same way, install the upper door of the refrigerator on the pin of the middle hinge. Do not forget about insurance - secure the door with tape or slightly tilt the refrigerator back.

The topmost hinge is mounted last in the process of hanging, then it remains only to install the top decorative panel, of course, if your refrigerator has it
Next, install the top hinge pin into the bushing on the top door, align the holes and bolt the part with a wrench or screwdriver. Everything, new door ready. It remains to check it for tightness.
It is easy to do this - you need to open the doors one by one and, having attached a small strip of paper to the body, slam them shut so that the paper is sandwiched between the door and the rubber seal.

It is imperative to check the installed doors for leaks, because after re-hanging the refrigerator door, it may require additional adjustment.
There are two-chamber refrigerators with separate fasteners, that is, their doors are installed on separate hinges, and not on a common middle hinge.
Reinstalling the sashes of such devices will also not be a big hassle. Dismantling is carried out in the same order, only instead of one fastener in the middle - two for each sash.
You can even outweigh only one door, leaving the second in its original position. Sometimes it is more comfortable, especially if there is not enough space in the kitchen, and the arrangement of furniture is not very convenient.
You can very stylishly beat such an innovative move, especially in the built-in version of the kitchen.
If your refrigerator is single-chamber, then the work becomes a little more complicated due to the presence of decorative panels in many models.
Before dismantling the door, the top panel must first be removed to gain access to the hinge mount hidden underneath.
After the top hinge is removed, the same must be done with the bottom panel and hinge. This operation, although more laborious, is generally simple.

Sometimes, to dismantle the sash of a single-chamber refrigerator, you need to remove the top cover, and if there is a display on the front panel, then this must be done.
It should be taken into account the fact that not all models of refrigerators are ideally designed for self-hanging the door.
For example, in the refrigerator "Atlant" the top mount can be moved to the left without any problems, but there is no hole for one bolt in the lower left corner.
Therefore, you will need to either purchase a left-hand hinge for the bottom, or drill the desired hole yourself.
The nuances of hanging the door with a display
Changing the position of the door can only be done in models whose design allows it.
In addition, such a service is sometimes included in the warranty service package, then contacting a service center will be much more profitable and expedient.
But if you are firmly convinced that you can handle it yourself, and at the same time you have good experience and skill, then here short instruction about how to do this work with your own hands.
One or more cables run to the display on the front of the refrigerator, usually through a top loop.
If the door of the unit is designed to be reinstalled, then this cable or group of wires is provided with a special connector for disconnection.

This is what the cable going to the display on the refrigerator door looks like. If the design of the device provides for the possibility of rearranging the door, then the cable is equipped with a connector
The steps to be taken to turn off the display, after de-energizing the device:
- First you need to dismantle the top decorative panel, if it is available on your refrigerator model.
- Next, unscrew the bolt on the upper hinge of the refrigerator, and then remove the cable and disconnect it from the connector.
- Then you need to completely unscrew all the bolts on the upper hinge, remove it, and slightly lifting it, remove the sash from the middle hinge.
- Then you need to dismantle the top cover of the refrigerator in order to gain access to the control panel. The connecting cable with the connector must already be led out of the opposite opening of the panel, specially designed for this purpose.
- Loops should be transferred in the same way as described above. Be sure to check the instructions, because the installation of fasteners in different models may have different subtleties and nuances.
- The cable on the door is connected last to the connector brought out from the opposite hole in the control panel; the loop is fully secured.
The top cover of the refrigerator is put in place.

All parts are transferred to the opposite side one by one, while it is recommended not to confuse the connecting elements of each fastener, since the doors may warp after installation
The top decorative panel is fixed, and the removed plugs are moved to the opposite holes.
The work is finished, and if you did everything correctly and according to the instructions, then you should not have any problems.
Conclusions and useful video on the topic
In conclusion, we present a video on how to outweigh the door of your own refrigerator.
Outweighing the refrigerator door on your own, the design of which allows this, is not such a difficult matter. The main thing is to act wisely and be careful, as well as safety rules.
Hanging the door was originally intended for users, so it makes no sense to spend money on calling the master.
Having bought and installed a refrigerator, you find that the door is inconvenient to open? In this case, you can use the services of a master for free: he will rehang the door to the other side. But what if you have made repairs or want to move the refrigerators to another place, and the warranty period has already expired? Calling in a specialist can be expensive, so knowing how to hang a refrigerator door yourself will come in handy.
In what cases is it necessary to rehang the door of the refrigerator "Nord", "Electrolux", "Biryusa" and other brands? There are three main reasons:
- Kitchen refurbishment and refurbishment. If the door cannot open normally to the right in the new space, then action must be taken.
- If you notice that the door does not fit snugly against the body, this is also a reason to change. The constant ingress of warm air into the chamber leads to an increase in temperature. Then the compressor starts to work with a vengeance to compensate for the difference. This leads to its rapid wear.
In the event of a loose fit, first inspect the sealing rubber. It may be worn, dirty or deformed. Then it is enough to replace the seal.
- You are left handed, not right handed. Then it is more convenient for you to open the refrigerator to the left.
Hanging Features
Do-it-yourself repairs are easier to carry out with two-chamber refrigerator Samsung, Haier, Beko, Pozis than single chamber. In the first case, you take turns removing first one and then the other door. In the second, you will have to dismantle the whole door with inner part freezers. In addition, they can be more difficult to disassemble.
Check if the door can be hung on your Bosch, LG, Indesit or other brand. You can see this in the user manual. It should also describe the stages of the work.

But if you suddenly cannot look into the manufacturer's instructions, inspect the case. On the other side of the door there should be additional mounting holes that can be closed with plugs. If there are any, then the permutation is possible.
Handles can be located symmetrically to each other in two-chamber models - in Indesit these are plastic recesses. Overhead fittings are easy to turn over, new holes are located opposite those involved now.
Required Tools
You will need:
- Screwdrivers (slotted and cross, depending on the size of the fasteners).
- Open-end key.
- End key.
- Masking tape.
Upon purchase, additional bolts, nuts, hinges could be attached to the refrigerator. It's time to use them.
Start repairing.
How to re-hang the doors yourself
We will describe the general repair steps for two-chamber units. The process is simple, the main thing is to act consistently:
- Unplug the appliance from the mains by pulling the plug out of the socket.
- Take masking tape and secure the door to the side with it so that it does not fall during dismantling.
- Remove the plugs from the mounting holes with a screwdriver or knife.
- Unscrew the bolts of the upper hinge, dismantle the fasteners. If you can’t get the loop, you will have to remove the top panel (it happens with Biryusa manufacturers).
- To prevent the fasteners from deforming, hold the door from below. Loosen the bottom bolts at the same time. On some models, you can remove it by simply lifting the door up.
- If there were no spare parts in the kit, use the ones on the other side. Remove the plugs from the top and place in the vacated holes. Position the upper loop also oppositely, turn it in a mirror.

- Go to the second part - the bottom. Fasten it with masking tape, as in the first case.
- Remove the seal from the pin and unscrew the hinge fastening with an open-end wrench.
- Peel off the tape and remove the door from seat, lifting up.
- Prepare the mounting holes on the other side by removing the plugs. Install the latter in the free channels.

- If necessary, change the handles by prying them with a screwdriver or a sharp object.
- Move the bottom mount and pin from one side to the other.
- Use tools to move the fasteners on the doors from one side to the other.
- Reassemble in reverse order, only on the other side.
It remains to check the tightness of the fit to the body. If gaps or crevices are visible, the refrigerator door will need to be adjusted. Helps to check more accurately thin sheet paper (tracing paper). Insert a sheet between the body and the seal, close the door tightly. Then pull on the leaf: if it falls out easily, the fit is loose. If you can't get it out, it's ok.
For refrigerators with display
If you have Atlant, Samsung, Stinol, Bosch, Hotpoint Ariston with a display, then the permutation is performed a little differently:
- Remove the top panel of the case by unscrewing the mounting bolts.
- Disconnect the wiring from the inside of the case.
- As soon as you remove the top part, disconnect the cover with wires with a screwdriver.
- Remove the wires from the cover and rearrange the mounting loop to the opposite side. Throw a loop over there.
- Once the door is in place, connect in reverse order. Don't forget to install the top panel.
On Hotpoint Ariston models, spare parts are not included, so you will have to rearrange the ones that were mirrored.


How to cook ham in the oven at home
Pain in the lower abdomen during pregnancy, reasons for what to do Can the lower abdomen hurt if pregnant
Protein for muscle gain
The best vitamins for men according to customer reviews
How to lose weight on a vegan diet?