14573 0
Venetian plasters
Among all types of decorative plaster, Venetian is rightfully considered the most spectacular and sophisticated, and therefore costs more. Despite the fact that the technology for applying Venetian plasters is well known, it is not so easy to cope with it. This material requires a certain skill and a steady hand, otherwise all efforts will be in vain.


The plaster itself is a thick translucent mixture, which is sold ready-to-use. It is tinted in different colors, and when applied with compositions of two or three shades, it forms a coating with a marble effect. The more layers, the deeper the color, and the more luxurious the finish looks. The gloss gives the plaster a special expressiveness, which refracts the rays of light and makes the coating play in different shades. To enhance the gloss, the surface is coated with a special wax and polished.


Plaster composition
The plaster mixture consists of a finely dispersed filler, a binder, organic and inorganic additives, and stone chips. As a filler, gypsum, lime, marble, quartz and granite flour are most often used, and as a binder - latex and acrylic emulsion, slaked lime. The final finishing result depends not only on the composition, but also on the particle size: the finer the grind, the softer the pattern is.
Properties and characteristics
There are two main types of Venetian plaster - embossed and smooth. The first type contains small granules up to 2 mm in size, due to which the coating acquires a certain texture. The second type forms a perfectly smooth transparent surface that allows you to achieve an indescribable play of light. In turn, smooth plaster is divided into glossy, semi-matte and matte, and each variety is attractive in its own way.


Venetian plaster has the following characteristics:
- high strength - during the drying process, a very hard carbon film forms on the coating, which provides protection from scratches, abrasions and other mechanical damage;
- plaster can withstand temperature extremes ranging from -50 ° С to + 80 ° С;
- the coating is waterproof, therefore it perfectly tolerates wet cleaning and even washing with soapy solutions;
- there are no substances hazardous to health in the composition of such plaster, therefore it can be used in bedrooms and children's rooms;
- a properly applied coating lasts 15-20 years without loss of external qualities.
Despite its strength and moisture resistance, "Venetian" is not intended for external surfaces. Prolonged freezing, exposure to precipitation and wind will lead to cracks and rapid destruction of the finishing layer. And the price of such finishing is very high considering how much material is required for the facade. True, some manufacturers have already begun producing special formulations that are suitable for both indoor and outdoor use.
To achieve a marble effect, the mixture must be applied in layers - from 3 to 10 layers. There are strict requirements for the substrate: it must be perfectly smooth, even, dry and clean. Despite the multi-layer structure, the coating is very thin, so the smallest irregularities will be clearly visible. And the transparency and gloss will emphasize these defects even more. As for the base material, it can be brick, wood or concrete.

Popular types of plaster
The high demand for Venetian plaster contributes to the constant expansion of the range. Each manufacturer is trying to lure customers with something new and unusual. This is how formulations with gold pigments, coatings with a metallic sheen and bronze veins, shining from the inside and a velvety-looking surface appeared. Products of such brands as “San Marco”, “Clavel”, “Candis”, “Croston”, “Alpina”, “Optimist Elite” are distinguished by a special variety and quality.
Classic plaster is divided into types depending on the composition, since it is this criterion that determines the external characteristics of the finishing layer. Let's consider the most popular varieties.
| Name | Main characteristics |
|---|---|
| Water-soluble compound with polished marble effect. Odorless, ready to use, filler - marble flour. The operating temperature range of the coating is from +5 to +35 ° С. It takes 24 hours to dry, consumption is 0.350-0.5 kg / m2 with a three-layer application |
| Depending on the method of application, it allows you to create the effect of cork and polished marble with terracotta splashes. Contains limestone filler and aged hydrated lime. Drying time - 24 hours, consumption 0.7-0.8 ml / m2 for two-layer application |
| Composition with effect natural stone with colored splashes. Contains stone flour, lime paste, terracotta granules, inorganic dyes. Does not require dilution with water, has antiseptic properties. Complete drying time - a day, before operational loads - 20 days. Consumption 0.6-0.8 / m2 |
| A water-resistant, shiny-veined compound for a velvety finish with chopped edges. Complete drying time - 24 hours, consumption per layer - 0.350 g / m2 |
| Synthetic compound with a mirror effect. Forms a very decorative, non-cracking coating. Does not require thinning, drying time is 24-36 hours. Material consumption - from 170 to 200 g / m2 per layer |
| Lime composition containing gold pigment. Forms a coating with a metallic sheen and fine gold veins. Cannot be thinned. Drying time - 24 hours, mixture consumption - 200 g / m2 per layer |
| Acrylic composition imitating roughly finished marble with gilding and mother-of-pearl sheen. The coating has an incredibly luxurious look. Complete drying time - from 12 to 24 hours, material consumption 0.6 kg / m2 for the base layer and 0.2 kg / m2 for the finishing layer |


Prices for popular types of plaster
Plaster
Venetian plaster wall decoration technology
Tools and materials

Wall decoration is preceded by thorough preparation, and first you need to stock up on the necessary tools:
- a trowel with rounded edges;
- metal spatulas;
- construction mixer;
- foam roller;
- sandpaper;
- paint brush.


Depending on the condition of the walls, you may need a plaster mix, putty, cement mortar, primer. You can take one primer for all stages of work, and is best suited acrylic primer deep penetration. Professional craftsmen recommend using a special primer as a base for the finishing layer, for example, SuPrim100. This composition covers the color of the base, so that the walls do not show through the layers of plaster, and the coating acquires a deeper color.

It is very important to correctly calculate the volume of the mixture for Venetian plaster. Since a mixture of different shades is usually used, the amount of each of them is calculated separately. That is, first find the total surface area and multiply the plaster consumption by square meter... Now you need to determine how many layers of the same color are needed and multiply the resulting volume by this amount. In the same way, the volume is considered for the rest of the compositions of a different color.
For example, it is planned to take white and black plaster for finishing. We will apply black in 2 layers, white in one, intermediate. The total wall area is 10 m2, and the average plaster consumption is 0.350 g / m2. We multiply the area by the consumption:
10 x 0.350 = 3.5 kg will be needed to apply one layer. That is, you need to buy 3.5 kg of white plaster, and 2 times more black plaster - 7 kg. Additionally, you need to add 5-10% in reserve.
As for tinting: as a rule, plaster mixes are supplied in three versions - color, base for light tones and base for dark tones... Basic mixtures are much preferable, since they can be given absolutely any color and shade, while the color palette of ready-made compositions is very limited. Choosing a base, you can order tinting from specialists or do it yourself at home. It's not difficult at all, the main thing is to follow three rules:
- plaster and tinting paste must be from the same manufacturer;
- mix plaster and pigment just before application;
- so that individual sections of the same plane do not differ in tone, the proportions of the components must be the same for each batch.
Deep penetration primer prices
Deep penetration primer
Surface preparation
The configuration of the base does not really matter for a Venetian; such plaster is successfully used for finishing arches, columns, semicircular niches and arched walls. But the quality of the surface means a lot, because the appearance of the finished coating largely depends on it. The base must be strong, without defects, voids, as smooth and even as possible.
So, first, they remove all unnecessary from the walls, carefully examine the surface. Especially carefully you need to check the plaster, which may visually seem strong, but in fact has already begun to flake off. Tap the walls lightly with a hammer - if the sound is dull, you need to clean off the old coating and re-plaster.

Be sure to seal through holes and cracks, cover deep grooves with mortar. For better leveling, use dry building mixtures, which, unlike cement-sand mortar, lay down more evenly and do not crack.

After the base layer has dried, the surface is rubbed sandpaper, dust is removed and a finishing layer is applied - a cover, which allows you to eliminate the smallest irregularities. The mortar is smoothed with a polyurethane or metal float to perfect condition and left to dry.
Plasterboard walls also require preliminary preparation.

The seams between the sheets are filled with putty, a reinforcing tape is applied on top and, using a spatula, gently rub it into the solution. The surface must be primed to increase the adhesion of the mortar to the drywall, and then a rough layer of starting putty is applied. The layer should be uniform, thin, if possible without sagging and scratches. After drying, sanding, dusting and priming are performed. If the irregularities on the walls are no longer visible, you can apply a finishing putty, otherwise you will need another intermediate layer.
Video - GKL seams
You can start decorative finishing only after the leveling solutions are completely dry. Then the walls are once again wiped from dust and treated with any waterproof deep penetration primer.
If you have never dealt with decorative plasters before, practice first on a piece of plywood or drywall about 70x70 cm in size. The material must be fixed on a flat surface so that it does not move during operation. Or you can try your hand at the section of the wall that is planned to be sheathed with wood or plastic: this way you will quickly decide on the application technique, and the sheathing will hide the trial results.
Step 1... To create a background, a pigmented primer is applied to the walls with a roller in 2 layers. The composition must be well rolled over the surface in one direction. The second layer is applied 8-12 hours after the first one. Complete drying of the soil takes 24 hours.


Apply the primer with a roller

Step 2. Dry walls should be sanded with fine-grained emery paper, then thoroughly wiped off the dust. The base should turn out to be a uniform white color, smooth, silky to the touch.
Step 3. Add color to the plaster mixture and stir well with a mixer until smooth. The color can be added gradually to find the optimal shade of the plaster. Just keep in mind that after drying, the color will become slightly lighter.


Mix color and base


Step 4. Gain a little mass on a trowel (about a tablespoon) and apply it to the base with strokes.


You need to start from the top corner, the tool should be held at an angle of about 30 degrees to the surface. Strokes are made with slight pressure, in a chaotic manner, rubbing the layer as thin as possible. Do not try to cover the base, it should show through the solution.


Draw up the solution in small portions all the time, working section by section. You cannot return to the places you have already passed - this will break the structure of the coverage. Use a narrow trowel instead of a trowel at the joints and grooves, being careful not to catch the layer with sharp edges.

Advice. To avoid leaving streaks from the tool, the trowel should be moved from a dry surface to a wet one. So the composition is leveled faster and more evenly. If you do the opposite, the solution will begin to reach behind the trowel, and noticeable traces will form. In the process, often wipe the tool with a damp, clean cloth, since dried crumbs of solution and accidentally trapped grains of sand also leave ugly marks that shine through the coating.
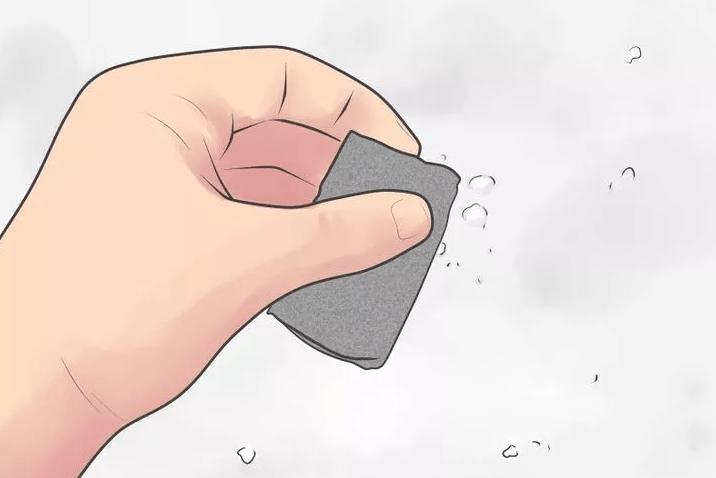
Step 5. After completing the application of the first coat, wash the instrument thoroughly and pause for 6-12 hours. After that, you need to treat the walls with "zero" sandpaper in order to eliminate possible protrusions and nodules, and to clean them of dust.
Step 6. For the second layer, you will need a different shade of plaster. They apply it in the same way, but it is desirable that the new strokes do not coincide with the previous ones where it is visible. Try to maintain the same pressure when rubbing, as if compacting the layers with even movements. After completing the process, the walls are again left to dry for 8 hours.

Step 7. The third layer should be the same color as the first, or have a different shade, as long as it is different in color from the second layer. The plaster is applied as described above, carefully leveled. Since this layer is our last, there is no need to wait until it is completely dry. Manufacturers recommend starting polishing about 2-3 hours after application, since wet plaster can come off the base, and completely dry plaster can no longer be polished.


Step 8. So, we begin to polish the coating. By this time, the surface should be slightly porous and dull, like an untreated stone. Take a clean and dry trowel, apply it flat to the base and, with pressure on the front of the tool, rub the plaster layer in a circular motion. Here it is very important to correctly maintain the given rhythm and pressure, then the coating quickly acquires a glossy shine, becomes smooth, and the pattern appears. Make sure that the edges of the trowel do not damage the coating. After polishing, allow the plaster to dry completely and gain maximum strength. This usually takes about 7 days.


Step 9. The final stage is waxing.

The walls must first be wiped with a dry cloth from dust. The wax has a thick consistency, it is most convenient to apply it with a flexible spatula or sponge. The composition is taken up in small portions and spread by smears over the surface. Try to rub it as evenly as possible, as the thick wax layer stays darker than thin wax after drying, and the finish appears to be spotty.

Step 10. After 2 hours, when the wax is dry enough, it should be polished with a suede cloth, with intensive circular movements.
Depending on the brand of plaster, the finishing process may have some differences. First of all, this concerns the drying time and the number of layers. Before starting work, carefully read the manufacturer's instructions on the packaging of the composition - this will help you avoid application errors and ensure a high-quality result, subject to all conditions.
The described technology makes it possible to obtain the simplest classic drawing. If you use plaster of three colors, the shades of the coating will be richer and more expressive. To create a more sophisticated drawing, increase the number of layers and apply strokes in a specific order. A lot depends on the artistic flair, experience and skill of the one who is engaged in finishing.


Venetian plaster in the interior will serve for a long time, with time it will become more beautiful and stronger. You will love the variety of effects it can do. Find out about all possible options for its use in more detail later in the article.
Material features
Venetian plaster (also known as "polished") is a wall covering that imitates a variety of noble surfaces - from polished marble to natural stone effects - for a luxurious decorative design... Its application was a laborious process that required patience and skill, so the work was mostly limited to craftsmen.
Today, even a beginner in DIY craft can create impressive results. The finish mimics the look of plaster or polished marble typical of Old World European architecture. The modern version of Venetian plaster has a multi-dimensional appearance with a textured, slightly raised surface that results from two or more layers.
This interior decoration gained popularity in the 1550s in Venice, hence the name. It includes several layers of plaster applied with a trowel to create a three-dimensional effect. The final coat is smoothed out to create a shiny look.
Plaster facts you didn't know
Polished plaster is a versatile, elegant decorative wall decoration used since the 1st century BC in traditional Italian architecture. Known for its durability and beautiful finish, the method creates a stunning decorative effect that inspires, motivates, adds value to any building.
Venetian is a special type of polished plaster mixed with marble dust, quartz or kaolin and applied with a spatula to the walls in a special way. It is dyed to give the surface a wide range of colors. Depending on the method of application, there are methods called:
- marmorino (marmorino);
- scagliola (scaliola);
- sgraffito (sgraffito).
It is applied in thin layers, which are then polished to create smooth surface with the illusion of depth, texture. When used correctly, Venetian plaster can be used to create polished, stone, marble finishes. It is especially useful on surfaces where marble panels are difficult to fit, as well as surfaces that which would imitate natural marble, for example:
- columns;
- protrusions;
- curved walls.
Venetian plaster can be painted over with natural or synthetic dyes. The special play of her shadows is especially useful when a certain “marble” color is desired, or when an illusion of volumetric color is needed.
Venetian plaster is one of the oldest building materials known to mankind.
The Romans learned to mix it with:
- marble dust;
- coarser lime;
- sand aggregate.
This same technique is used today by us.
There is no standard name for Italian decorative plasters. Titles can refer to composition, style, or simply branding, or some combination of the three. The people have established the term "Venetian", as a definition of any types, methods.
Story
The Roman method became popular in Venice in the 15th century, where it was well adapted to classical architecture, which was prized among the wealthy Venetians. In the local brick, tile industries, there was a lot of terracotta waste, which was crushed to serve instead of sand, mixed with hydraulic lime.
It was then applied to walls to achieve a surface with significant breathability in buildings. They were naturally exposed to moisture due to their location next to the Venetian lagoon.
The stucco coverings were made from excavation waste from nearby marble quarries, which were mixed with lime to create a style called Marmorino. It could be left white to mimic the trendy local stone, or it could be painted over to make it look like solid marble. The lighter weight of the plaster was a significant advantage for construction on volatile land in Venice.
Fashion changed and the use of Venetian plaster dropped markedly until the architect Carlo Scarpa revived it in the 1950s. Some of the simpler modern plasters are made from synthetic acrylic resins - this option only mimics the famous recipe.
While true Venetian plaster still belongs to the age-old formulation of marble powder with lime, it now contains the addition of some adhesives to make the structure more suitable for use on modern building materials.
Plaster varieties
Polished plaster can have many looks, including marble, slate or stone, include stencils, logos, and even glitter. Can be applied in any color, with almost any effect.
Applied directly to walls, ceilings, windows - it is truly versatile, suitable for private homes or commercial buildings. It can be used in any room, even a nursery, as it does not contain toxic compounds.
Marbled
The famous marbled plaster is called "Marmorino". Literally means "small marble" in Italian: tiny marble particles are mixed with lime to create a smooth, polished plaster.
Its surface is smooth, shiny, and has a gradual movement between light and shadow thanks to craftsmanship, which gives a sense of depth and reflects light well. To the touch, such a wall will be smooth and cold.
Marmorino can be applied to indoor and outdoor surfaces and is suitable for modern as well as historic interiors. It has mold resistant properties, excellent waterproofing, antibacterial properties, making it highly desirable for luxury bathrooms and other wet areas. The finish becomes stronger with age.
It is the most versatile of Italian plasters and can be used to make many textures, from polished marble to rustic, rough, natural stones such as Travertine. It can be finished to a smooth or marbled look. It can have a variable degree of gloss depending on how long it has been polished. The finish can be enhanced with color pigments.
Marmorino is available in a variety of grains, resulting in many shades and decorative effects:
- thin marmorino;
- classic marmorino;
- matt marmorino.
Fine marmorino is suitable for achieving a smooth polished surface with a glossy effect and a noticeable play of light and shade.
Suitable for modern and traditional interiors, recommended for use in places with low level movements such as bathrooms, kitchens, stairs, corridors or bedrooms and should be handled with the same care as wood or soft stone floors.
The final effect also depends on the protective treatment. Flaxseed oil gives it its most natural look and is commonly used as a finishing product. The polyurethane varnish gives the surface a stronger finish that is harder to scratch and that has a more satin, closer to glossy finish. This is naturally a non-slip surface, but sometimes special anti-slip treatments are used. Cleaning is very easy.
Shiny
This is a polished plaster with a true "WOW" factor. Made from very fine marble dust, it is applied in thin layers and the final layer is polished to create a stunning high gloss and deep reflection.
Shine like a flawless mirror, this plaster is cool and sensual to the touch... Unlike paint, this product is highly reflective from the corner and hardly reflects from the front.
It is a wall and ceiling finish suitable for almost any interior space, suitable for both modern and classic spaces, as well as residential and commercial.
Textured
It is a plaster that is very similar to Marmorino, but with more sand and a coarser aggregate, which makes it evenly rough with little color variations. It is the ideal plaster for achieving a natural stone effect and is available in fine and rough textures. A tough, grainy appearance is combined with a less polished surface to create the look and feel of a chiseled or lightly polished limestone.
This finish is suitable for different interiors and is of high quality. Although visually dull over large areas, it can be used as a rich background for combination walls and is often used in horizontal stripe wall designs to achieve variety in textures, as well as to work with emblems.
It is also used for external façades as it has durability and functionality. The sand's breathability allows it to dry quickly and has a high pH, so it is also resistant to mold and bacteria. As a natural lime-based plaster, it has strong adhesion and is suitable for use on non-uniform surfaces such as brick, stone and concrete. It is resistant to cracking and is self-healing, which means it will perform well under adverse conditions.
This polished plaster has a sleek look, a subtle velvety finish that changes depending on the refraction of light from the surface and the point of view.
Metallic Venetian plaster personalizes any modern room, looks especially organic in high-tech high-tech design. They also look great in a dining room, office, restaurant, salon or bathroom. On the other hand, you can use it on the walls in your living room, or in combination with antique furniture, to create amazing contrast.
Travertine
This finish imitates the famous travertine stone - a special form of light-colored limestone - and can be found in white, brown, cream, even rusty colors, and has a fibrous or concentric appearance.
Travertine effect plaster has a subtle stone-like effect with a soft texture of varying degrees, depending on the grain size and the method of application.
It is suitable for antique effect, for finishing and painting decorative items such as pearlescent or metallic wax.
Venetian polished plaster can certainly create the right factor that you are looking for. Whether it's a compact bathroom, a huge open plan, or a outside wall high profile, its color, texture, craftsmanship guarantee the desired impression.
Smooth or textured, with broad or petite strokes, modern or traditional - Venetian polished plaster will add style, sophistication to your walls, creating the backdrop you've always wanted for your home.
Venetian stucco evokes an old world ambiance, suitable for a romantic bedroom or a unique dining room. It is more labor intensive than traditional paint and therefore costs more, which is why most homeowners use it selectively rather than throughout the house.
It imitates the classic architectural style of the Renaissance when this finish became so popular. Perfect for an upscale library or accent wall in a gourmet kitchen.
Designer plaster from more modern materials- for example acrylic - creates a soft, earthy texture for the living room, bedroom, which fits into the style of rustic decor, will look good in a large room or dining room with high ceilings. It takes much less time to apply than the classic Venetian, but additional colors are needed to create the effect.
Acrylic glaze reproduces such effects as:
- artificial antiquity;
- weathered walls.
These walls have only one drawback - it is difficult for a layman to achieve the effects that this technology is capable of. Of course, these projects have artistic prowess, require experienced hand craftsman or professional artist. Such advanced techniques really need an expert touch to achieve good results. They may appear simply due to uneven application, but achieving that look requires knowledge, skill, and specific experience.
The coating also has waterproofing, antibacterial properties, and, together with visual effects, it has become desirable for bathrooms and other wet areas. It is an ideal alternative to floor, wall tiles. The plaster is not only resistant to water, but also has an A1 fire resistance, therefore it is suitable for kitchens and other areas with a source of open fire.
Advice
Not limited to indoor use, it can be seen on the outside of many buildings. When natural limestone-based Venetian plaster is applied, it will eventually return to its original original condition lime with marble or stone.
Venetian plaster is easy to clean, withstands steam, mold, mildew, and serves as an alternative to tiles.
Venetian wall decoration in the kitchen
Venetian stucco adds texture, variety to kitchen walls with its warm, earthy appeal. Since it resembles the characteristics found in stone, marble, it works well in kitchens that have rustic, Mediterranean or modern motives. Due to the neutral tones for most Venetian plaster walls you have many color options for the kitchen, but you need to make sure that your walls match, coordinate with your accessories, appliances, accent colors.
Elegant earth tones
While you can paint or apply Venetian stucco in almost any color, it appears most authentic when it contains soft earthy tones such as brown, bronze, beige, gold, taupe, or dark green. These colors are very reminiscent of the shades found in natural stone.
Advice
Choose a coordinated kitchen color that matches one of the shade options. For example, opt for light green accessories or soft gray-green accent colors if your Venetian walls are reminiscent of green marble.
Choose a taupe or beige accent color if your plaster looks like brown stone. The earthy tones in Venetian plaster also look attractive when combined with stainless steel appliances, natural wood.
Lighter shades of gray can be used almost everywhere - cabinets, fittings, floor coverings, devices, tiles, lamps, accessories. The mix of earthy Venetian walls and gray accent colors is contemporary, edgy, often with a slightly masculine vibe.
Living room
What could be more expressive for a living room than a stone wall? It's amazing how a material so cold and heavy can turn into a warm and inviting feature in a room. No matter what texture and color you choose, you can combine it with many design styles. This finish will add a solid, reliable appearance to an elegant, modern living room. it's the same perfect combination for a spacious dining area. An accent Venetian stone wall adds dynamism to a room and is an ingenious way to hide damaged plasterboard or plaster surfaces.
Combination of plaster and brick
Try combining plaster with different surfaces, such as brickwork to get a loft style in your living room. You can also choose a different architectural stone for interior decoration, which comes in a wide variety of organic shapes, surfaces and shades that will work with almost any interior color palette. Or maybe you will discover the possibilities of your living room to reproduce historical design with this combination - for example, Art Deco.
A brick wall partially hidden under a layer of plaster is a textured splash that can work on a design on its own to create a look and texture unmatched by any other interior wall surface.
Bedroom
Venetian plaster will certainly be relevant in any era, because it is a natural material that has depth and warmth that nourish the soul.
The type of texture you choose will have a decisive effect on the finish of the wall. Sandy textures can be used to simulate the look of granite or natural stone, while finer textures can give you the look of old plaster, marble, or even suede. The method used to apply the textured paint also affects the appearance of the finish. Using color and how it is applied to the wall will be the final step in creating the illusion of antique or aged plaster.
Creating a custom wall in your bedroom is a simple yet highly effective way to transform a room. If you have a fireplace, play it with plaster, with which it will always look great, as it itself is the central focal point in the room, more often than not.


Venetian plaster for interior wall decoration can be a wonderful decoration for any interior. Walls or surface areas with this finish look great, especially in classic interiors. You don't even need a lot of money for this, after all. The main thing is to properly prepare the base, use the right tools and follow the technology exactly.
Composition and history of appearance
How did Venetian decorative plaster come about?
The beginning of the application of the coating with mixtures based on natural binders lost in millennia. Theophrastus, who lived in the II-IV centuries. BC. describes the mineral gypsum, remarkable for its stickiness and warmth when mixed. It was crushed and moistened, and then stones were connected with it. The word gypsum was used for gypsum and lime. In the 1st century BC. Vitruvius describes the manufacture of a six-layer finishing coating that reinforces the wall, a marble-like plaster that was as strong as natural material. The antique technique was different from the techniques of creating stucco (stucco - the highest grade of plaster) Venetian of our time.
In archaic Greece VII-VI centuries. BC. marble stukko or stuk / stuk was used to decorate temple walls. The decoration imitated white marble and consisted of gypsum, powdered marble and lime. The Greeks spread this technique during the Hellenistic era. Stucco with a shiny glossy surface in white appeared among the Etruscans on the Italic Peninsula before the formation of the Roman Empire. The Venetians of ancient Rome had a thickness of 1.6 mm inside buildings, and up to 76 mm outside. Their main advantage was specularity, high strength, and resistance to weather changes. Often their surface was decorated with fresco painting. Later, the Venetians, who were the trendsetters of their time, took over the baton.
Since then, the composition of the Venetian has changed little, the components of the solution are:
- marble dust,
- fine-grained stone chips,
- lime dough,
- water.
In addition to classical components, natural or artificial dyes can be included in the composition, marble chips can be replaced with chips of other rocks, the solution can be mixed with a latex emulsion. There is also one composed exclusively of calibrated marble.
😀 Rumor has it that such coatings were invented by “armless” plasterers to hide the flaws of their work.
The Venetian plaster decorating the wall looks always luxurious, a little magical. Therefore, from century to century, it decorates the housing of wealthy individuals. Venetian plaster in the interior is always the uniqueness of the design of any room, because it is inimitable. Various untie the hands of designers. Today it can be seen in the apartments of people of very different incomes, because the composition can be prepared with your own hands, and knowing what it consists of, how to apply it correctly, and after practicing, you can make this coating yourself, ennobling the wall.

Advantages and disadvantages
Let's take a look at the main pros and cons. The primary advantages are high strength, longevity and beauty.
In addition to them, the decorative Venetian has the following advantages:
- unique decorativeness: the surface is given the appearance of natural polished marble or other semi-precious stones, valuable mahogany, metals, silk (this material imitates best of all),
- environmental friendliness,
- the ability to apply on various bases (the main thing is that they are aligned),
- easy to restore,
- resistance to various influences (temperature change, high humidity, withstands the stucco allow it to be used for the facade),
- crack resistance,
- fire safety,
- fast drying,
- provides a healthy microclimate (walls under the coating breathe),
- if desired, you can easily repaint it in a different color.
The multi-layer and structure of the coating, when light is incident at an angle, create a fascinating effect of internal glow, natural gems. Glossy Venetian marbled plaster does not tire the eyes, but serves as a relaxation for them.
The disadvantages are:
- high cost of work and finished compositions,
- labor intensity (physical strength is required for careful, painstaking work),
- the need to master the application technique,
- highlights irregularities and other defects in the base.
Preparing the plane of the walls
Finishing does not require haste, but meticulousness - careful work with each layer, and especially careful.

The foundation must be:
- impeccably aligned - align with the beacons and do not forget about the putty,
- reinforced with a reinforcing mesh if necessary (if the base is weak),
- fat-free - you can use a soapy solution for this,
- rid of stains,
- primed (often acrylic primer is used for work),
- processed with sandpaper with subsequent removal of the resulting dust - remove the dust with a clean broom or vacuum cleaner,
- dried (at least 6 hours).
When installing the mesh, remember to apply the adhesive before and after installing the mesh, not just on top of it.
The wall should be primed twice before finishing, to ensure good adhesion of the finish to the wall.
The tool and its features
Metal tools - trowels and spatulas, should be made of stainless steel and with rounded edges, and the working surfaces should be polished. To do this, the corners on the new spatulas are cut with metal scissors, the edges are processed with a file and fine sandpaper or get special. tool.

The trowel and spatula for work (in any of the techniques) should not have any chipping. The spatula must be sharply sharpened. During work, the surface of the spatula / trowel is regularly cleaned with a damp cloth so that, when dry, the remnants of the mixture do not interfere with the high-quality application of the solution to the wall.
Buy quality tools from reputable manufacturers. Thus, you will save yourself from a lot of trouble.
The right tool for working in Veneziano technique:
- narrow (60 mm), wide (200 mm) spatulas,
- 2 Venetian trowels,
- construction mixer,
- containers,
- roller,
- masking tape,
- skins No. 220, No. 120,
- ruler,
- brushes flutes, maklovitsa,
- clean rags,
- sponge,
- a thin brush to apply cracks.

Application technology secrets
Do-it-yourself application of Venetian plaster is a work of both artisan and creative work. Each stage of work is special, as the technique of applying Venetian plaster dictates to us. There are several different ways: with the achievement of the effect of marble, cork, textured surface, classic Venetian, and others. In most techniques, all, except for the basic, layers, in their own way, are finishing. Next, how to apply Venetian plaster correctly.
Very detailed and understandable video on marble imitation
Coloring the mixture
The mixes themselves for the Venetian are white. Therefore, to obtain the desired tone or shade, the desired color (natural or synthetic) is added to them before applying to the wall. It should be borne in mind that the solution, when it dries, brightens: without wax, two tones, - one tone. It is best to purchase a color scheme before work. the desired color and ready-mix from one manufacturer.
In order not to be mistaken with the color scheme, professionals use fans of colors, choosing the right shade in daylight at the place of future work.
The colors for this type of finish can be very diverse. It depends on the design. Most often, natural stones are imitated. In this case, the primary colors are gray, brown, yellow or emerald. Wood or silk paint has its own palette. It must be remembered that natural colors are always muted. Therefore, to bring the color of the mixture closer to natural, the brightness of the color is muted by adding a drop of black color. Color checking is done by smearing the paste onto a sheet of white paper.
Base coat application
The base layer for all Venetian techniques is applied in the same way. The mixture is applied to the edge of the trowel with a spatula. The trowel is pressed against the wall at a slight angle (the edge of the trowel is raised to the thickness of a finger). The mixture is transferred to the wall with arched movements of a trowel with thin strokes, with overlapping adjacent strokes by 5-10 mm.
The same rule for all layers: the mixture is applied in the direction from dry to wet. This way, no traces of the initial contact of the trowel with the wall are left on the surface.
When applying a coating with a natural marble effect, it is better to treat the walls diagonally, starting from one upper corner of the wall, ending with the opposite lower corner. Working platforms are obtained in the form of wide diagonal stripes with winding edges. If at the edges of the grips to make some thickenings at the joint, after the finish they create the desired effect of inclined folding of natural marble.
They work by filling wall sections with an area of about 1 m2 with a solution. In the corners, the direction of movement of the trowel from their top to the center. At the basic stage, a future drawing is formed with a solution. Therefore, the smears of the composition are applied more or less randomly. You can use the "put-take" technique, when the mixture is applied with the first movement, with the second (in the transverse direction) - its excess is removed.
The plastered wall is dried for about 6-8 hours (or left overnight).
Subsequent layers
The technique used to apply them may vary depending on the desired finishing effect of the finish.
Classic Venetian plaster is made in three layers using a mixture of the same color (different shades are possible). The finishing effect is created due to the layer-by-layer transmission of the texture. The shorter, more chaotic the strokes with a spatula, the richer the finishing pattern.
Similarly, a coating is made from mixtures of different colors. Moreover, colors can be applied one for each layer, or two or three in each.
A different technique for applying Venetian plaster is used for craquelure. The peculiarity of the base layer is that it becomes thicker (up to 2 mm). Where cracks are foreseen, it is dried with a hair dryer. The depth and width of the cracks depend on the temperature, coating thickness and drying time. The second coating is applied with a mixture of a different color (required to fill the cracks), the third - as in the classical technology.
Venetian wood plaster combines two techniques: craquelure and color mixing. Regular boards are imitated by another.
Cork finishing step by step:
- solutions of several colors are placed on the surface of the trowel with a small spatula,
- lightly mix them with a spatula right there on the trowel,
- transferred in a thick layer from the trowel to the wall, creating a spotted pattern,
- dry immediately with a hair dryer until cracks form,
- in a day, the resulting texture is covered with a second layer of Venetian of the color required for contrast, mother-of-pearl "metallic" or other water-dispersed compositions,
- processed with a grinder, changing the wheels to more and more fine-grained.
Finishing layer and rendering of marble veins
Imitation of marble or Venetian under malachite is performed in the following way... Apply small portions of mortar next to each other with a small spatula on the edge of the trowel different colors... When transferred to the wall with smooth, winding long strokes, beautiful stains are obtained, similar to the overflow of the color of natural marble or malachite. The decorative plaster of young marble with veins is also obtained. A drop of black is placed on a trowel between two masses of solution of different colors close to natural. The trowel is moved along the surface of the wall slowly, with a slight sway.

Crack pattern is applied with a thin brush in black water-soluble color. Lines are drawn at random in the desired directions. While the paint has not yet dried, with a small piece of clean, damp sponge, the crack line is gently shaded from one of its sides, leaving a narrow black strip in places. If you don't like the line, you can fix it by “removing” it with a damp, clean sponge.
Polishing and ironing
Each layer (except the first) is ironed with a spatula, this gives it mirror shine... Having processed about 1-1.5 m2 of the wall surface, they return back and, with a trowel or spatula, practically flat, pressing with force, they carry it along the wall several times. With each movement of the instrument, a glassy shine appears and intensifies on the surface of the wall. The trowel / spatula should be wiped off with a damp cloth. Masters advise to iron each layer. The marbled Venetian only benefits from this.
The finishing coat is polished with horizontal and vertical strokes. The top layer is polished with a suede cloth in a circular motion and resembles a rub.
Advice for beginners! Practice on pieces of drywall, fiberboard, or plywood before embodying your desires on the walls of the room.

Waxing
To protect the surface of the coating, it is coated with wax. The wax protects the coating surface from moisture and dust penetration. Venetian waxing is done with a spatula or sponge. Cover the wall evenly, without the formation of thickening of the wax layer, so that the color of the surface does not fade. After application, the surface of the wall is rubbed to a shine.
Can this finish be washable? Can. It is wiped with a damp cloth. In case of severe dirt, the walls are washed with mild soap solutions. Do not use solvents or abrasives.
Consumption and restoration
The manufacturer enters into the catalog or reports on the packaging the consumption per 1 m2. You can use a calculator to calculate the required amount of the composition. The consumption of Venetian plaster depends on the type of application technology used, the level of skill, the composition of the solution.
Consumption per m2 in layers looks like this:
1st - 500-600g / m2 (maximum amount),
2nd - 220-250 g / m2,
3rd - 80-100 g / m2 (minimum amount).
Stucco veneziano refers to repairable coatings. In this case, the entire wall does not need to be redone, and small defects or minor damage can be restored. In case of chips, scratches, dirt on a large area, detachments, the Venetian plaster is repaired. In this case, it is not necessary to remove the entire coating, it is enough to restore the suitability of the desired area.
Restoration of marble finishes step by step:
- With the cracks, tap the area to determine if there is peeling of the coating from the base. Anything that separates from the wall is removed.
- The vacated place is cleaned with a brush from the remnants of the previous finishing composition, from dust.
- The base is primed with a brush with the desired primer or a composition of PVA and water 1: 5.
- Plaster mortar or plaster putty (if the base is made of plasterboard) is applied to the base of the repaired area. The surface of the putty / mortar is rubbed to the desired smoothness.
- A decorative solution of the same brand is selected or an acrylic white composition is taken. The color scheme is selected and the composition is painted in the color of the wall decoration.
- A solution is applied with a soft spatula (with a large area of the repair site, they try to repeat the pattern of the strokes).
- Remove excess solution on intact surfaces with a damp cloth.
- After drying, wax is applied or glazed. Polished to a high shine.
Venetian from putty - perhaps?
Ready mixes are expensive. To reduce the cost of work, craftsmen invented a Venetian from ordinary putty. The main thing for the analogue is the presence of a smooth texture and the desired consistency. How to make DIY Venetian plaster? The recipe is simple - mix the usual plaster putty with acrylic varnish. To make a Venetian stucco from a putty with your own hands, you take:
- acrylic varnish for interior work with a water base,
- gypsum or polymer dry mix with microcalcite or marble flour as a filler (you can putty with white cement),
- color.
Lacquer is poured into a clean container and water is added - 10-15% of its volume. After stirring, add 2.5 kg of dry putty. Everything is mixed with a mixer, tinted, mixed again. The Venetian plaster from the putty is painted with colors for water-dispersed paints. Ultimately, the Venetian putty can be no worse than store-bought putty, it can be used not only in the apartment, but also for outdoor work. You can slow down the hardening time by adding a plasticizer - diluted PVA glue in an amount of 1% of the volume of the mixture.
However, a store-bought mixture will look much better, because it will not be possible to completely repeat the technology of the plant at home.
You can do without putty. For example, a simple composition of a Venetian in the proportions: 1 hour of white cement, 1.5 hours of lime, 2 hours of marble flour, 10 hours of marble sand.
Stucco Veneziano, which began as an imitation of natural marble, became the object of imitation itself. Wallpaper is produced on a different basis, imitating the favorite finish. Wallpaper painted with a Venetian is cheaper, has its pros and cons. Wallpapering, and the technique of such a decor is simpler and easier. However, they cannot fully replace the Venetian, and therefore she will again and again appear in the leaders of interior tops.
The Venetian plaster is developing and enriched, the application technology of which, with the advent of new finishing compositions, acquires more and more new ways of development. Compositions of finishes, new techniques are invented. Appeared on the market new material for finishing - super glossy decorative Pietra Lucida. By the manufacturers themselves, this killer of the classic Italian technique of imitating marble does not belong to Venetians, but to polishing masses. The work is more drawing, the imitation technique is also simple. Using the color scheme of natural tones, a mirror-smooth texture is obtained, similar to polished natural stone.
Decorative Venetian plaster has been used in construction for a long time. It is made in two versions, this is for outdoor and internal works... Today we will tell you how the Venetian decorative plaster is selected and then applied. You can see the most difficult moments in the video in this article and in the photo. So after that, do everything with your own hands and this will be a guarantee of quality.
Venetian decorative plaster has become a material for decoration in the homes of many people from all over the world. Effectively fitting into the interior (see Decorative plaster in the interior: beautiful, stylish, non-standard), it gives the rooms a unique style and creates an atmosphere of home comfort.
Pros and cons
Venetian decorative plaster video will tell you about the main advantages of this material.
Besides impressive durability, Venetian plaster has many other benefits:
- The composition of the mixture for plaster is environmentally friendly, it is based on natural and safe components that are not capable of harming human health.
- The wall covered with Venetian plaster will never crack and will retain its original appearance for many years.
- Venetian mix easily copes with all kinds of defects and irregularities in the walls.
- Walls covered with Venetian plaster are not subject to thermal effects and will not suffer from moisture ingress.
- Venetian plaster lends itself to restoration, in case of mechanical damage it can be returned to its original appearance.
- Using a Venetian mix of marble color, you can achieve a unique visual glow effect that will give the interior an unusual look.
- Up to 10 years venetian coating guarantee.
But decorative paints and Venetian plaster also have some disadvantages that make decorative work difficult:
- The high cost of material and wall covering.
- No easy preparation for plastering.
- Venetian decorative plasters and paints are easy to apply, but here you also need to be able to create the desired relief, and not everyone can do it.
For those who have not yet decided on the choice of decor for their walls, Venetian plaster will be an excellent option that will help create the interior of your dreams.
The composition of the mixture
In the manufacture of Venetian plaster, one of the essential materials is stone dust.

- The “Venetian” with the smallest fraction of dust, which includes granite, quartz and others, has a more aesthetic appearance.
- Instead of slaked lime, which is often used in the creation of plasters, a variety of synthetic materials are included in the composition. This mixture is very similar to that used by the ancient Roman builders.
- But modern masters argue that the best overflow effect is possessed only by that decorative plaster, the composition of which does not differ from the classical one.
- Decorative paint for Venetian plaster is sold separately from the main mixture, when choosing it, you must take into account the shade of the main coating and select the dye according to it.
Properties
Most hardware stores have in their assortment Venetian plaster in all colors and shades. Decorative paint and Venetian plaster can imitate marble, granite, jasper and other minerals. Such wall coverings will easily fit into the interior, created, for example, in the antique Greek style, and will complement the spectacular design.
Plastering work includes several stages:
- The material is applied to the walls in several layers.(8 or more), each of which has unique effects of overflow in the light. Properly applied Venetian plaster will be an excellent decorative solution for walls (see Decorative wall decoration: beautiful and modern) and will surprise you with its resemblance to real rocks, because it accurately imitates their play and natural radiance. Already from the third or fourth applied, the wall will look like a stone one, and the atmosphere of antiquity and luxury will hover in the house.
- Venetian plasters and decorative paints are quite durable and the coating will serve your home for at least 15, or even 20 years without losing its wonderful appearance. Such an impressive lifespan justifies the high price of the Venetian mixture. With all its subtlety over the years, the coating will only harden more strongly, acquiring high strength.
- When creating plaster, dyes of all existing shades can be used., so it's easy to find the style that's perfect for you. Many manufacturers of building materials are trying to make the range of the Venetian mixture as wide as possible in order to please everyone, even the most fastidious buyers.
Varieties
Decorative paints and Venetian plasters have not only many colors, but also a variety of types that differ in their composition.
Consider the three most popular types of plaster, each with its own unique characteristics:
- Craquelure, that is, retro coating... Houses decorated in the style of the past often use Venetian plaster in their interiors. The main difference between craquelure and other types is a special type of walls that imitate cracks and minor destruction. This effect is achieved when coating the applied plaster with a special varnish, which, when dry, "pulls" the outer layer of the mixture. Such an effect leads to the appearance of irregularities and cracks, which, by the way, will not in any way affect the density and durability of the coating. And the unique type of craquelure will give the room a unique effect of antiquity.
- Carrara marble, or the play of overflows. This type of Venetian plaster is famous for its similarity to the unique rock, which includes many natural shades. Nowadays, real Carrara marble is difficult to find, as it is almost never mined. But the Venetian mix can take on a look that is no different from real marble. In order for the coating to acquire the overflow effects inherent in the Carrara rock, the plaster must be applied extremely carefully, avoiding any irregularities. With such work, you need at least twelve layers, and each layer must have a certain shade. Plastering under Carras marble is a painstaking process, it requires a lot of patience and time. But the look that the walls will acquire is worth all the effort spent, because not in every house you will find a partition that shimmers in dozens of different colors.
- Marseille wax, which in fact is a simple plaster, except that wax is added to it. You can use such a coating in absolutely any room (even in the bathroom), since wax makes the mixture waterproof. Using the Marseille “Venetian” you can achieve a luxurious look not only in living rooms, but also in all corners of the house.
Coating
Decorative plaster Venetian plaster is applied according to proven technology and it has been tested by time.
You just need to follow all the points in the correct sequence:
- For working with Venetian plaster, it is preferable to use well-sanded trowels and trowels with rounded ends. This is done in order to avoid any mechanical damage to the layers of the mixture during their application. We must not forget that the pattern and texture of the coating will depend on the size and shape of the tools with which it was applied.
- After finishing with the soil for leveling, wait until it dries completely. Then gently begin to apply the first coat. Do everything in small strokes and gently level if necessary. Try to keep the tool at an angle of 15 °.
- Then wait until the first layer is dry and clean it from possible unevenness. Now you need to repeat the steps depending on the number of layers, constantly checking the accuracy of the coating. After complete drying, the final layer must be cleaned with sandpaper.
How to give the mixture the right shade?
Decorative Venetian plaster paint can give the desired shade, then you can make a truly unique coating.
To create an iridescent coating for the walls, the instructions must be followed, which is as follows:

- The first layer, applied to the entire wall, will form the base of the covering. The color of the main layer will determine the background shade of the overflow on the finished wall. After application, you need to give the mixture a few hours to dry completely, and then remove irregularities and dust from the surface of the layer.
- The second coat of "Venetian" should be applied in random strokes in all directions. It is necessary to monitor the condition of the tool, getting rid of the dried elements of the mixture on a spatula. Particles drying to the second layer can noticeably spoil the final picture of the coating, so you need to carefully monitor and prevent them from appearing.
- The third layer defines the future texture. The shape and application of the plaster strokes will form the basis for the drawing that will appear on the wall. In order to give the coating an effective gloss, you need to carefully grind the layer with a tool, applying pressure parallel to the wall surface. Next, you need to give the plaster about 24 hours to dry.
Attention: The reason for the appearance of gloss and gloss is the special composition of the first two layers of the coating. The technique of applying the top coat will determine the shape of the drawing. Do not be afraid to experiment with the final layer, simple strokes can provide a wall with a unique look.
It will be possible to cover the finished wall with colorless varnish or wax only after a few weeks, when the work is completely dry. Sunlight reflected from the waxed “Venetian” will be reflected in a thousand overflows, and the room will acquire a light shade of the coating.
Nuances and secrets
It is worth considering certain little things that should not be forgotten when working with decorative plaster:
- The more dye is added to the mixture, the more the final color may differ from the one indicated by the manufacturer.
- To give the Venetian plaster a certain shade, it is not necessary to use a factory dye, you can do with ordinary paints.
- The wax used when applying on layers of “Venetian” must not be diluted.
- Front decorative works it is better not only to level the walls, but also to cover them with paint for better application of the mixture.
- All these subtleties belong to the standard technology of covering walls with Venetian plaster. Other types of coatings, the style of which is closer to artistic, have a lot of their own peculiarities when applied.
Features of rare species of "Venetian"
Among the many varieties of Venetian plaster, a coating with a mother-of-pearl glaze takes on a very interesting look. Such plaster can be applied to absolutely any surface, depending on the building materials.
- The main stage in the creation of such a coating is the application of the third layer, which includes glaze. Layering technique - small strokes that need to be smoothed.
- It will not be superfluous to apply a colorless wax to the final layer, so that it was possible to use a mother-of-pearl coating in the bathrooms. There are at least 40 variations of shades for such a decorative mixture.
- An equally interesting type of Venetian wall covering is stencil applied plaster. This method will help you create a unique pattern for your wall without contacting a master artist. The stencil used to apply the mixture is a dense polymer film.
- The assortment of home improvement stores offers a variety of Venetian stencils with a variety of patterns and designs. Working with such materials is simple, but it has its own characteristics.
- The first step is to apply Venetian plaster using the classical method, without resorting to the use of a protective layer. After waiting for it to dry, attach the stencil to the wall surface and apply the mixture with a thin spatula into the space with the pattern.
Caution: Try to get rid of any excess plaster remaining on the tool, which may adhere to the main drawing.
- Next, carefully peel off the film and repeat the application process as many times as you think is necessary. And when, upon drying, the surface acquires a light matte shade, proceed to the final part of the work - grinding and polishing the resulting pattern.
Decorative Venetian plaster video will help you take into account the features of the application of the material. The most important thing is not to rush and do all the stages of work efficiently. Its price is not that big and in relation to the original look that you can create.
Despite its antiquity, plastering of residential and public spaces is still very popular. This is due to the practical advantages of such a wall design, and an unusually attractive appearance. Do you want to make your home more beautiful without resorting to third-party craftsmen? Then DIY Venetian plaster is one of the most preferable options for you.

Venetian plaster itself has been around for a couple of thousand years and appeared earlier than its current name. Back in ancient Rome, builders noticed that quarry waste in the form of dust and small fragments can be used to prepare a finishing mixture, which, with a certain application technique, is in no way inferior in appearance to normal marble.
Subsequently, the recipe for such plaster became very popular in Venice during the Renaissance, and from there it carries its current name, which in the original sounds like stucco veneziano... Now let's figure out what it is. finishing material and what it consists of.

The main component of Venetian plaster is very fine stone chips. Moreover, it can be not only marble, but also onyx, malachite, granite, quartz and other minerals. This stone crumb is bound together with the help of slaked lime. However, lime has recently been replaced by a synthetic component - acrylic. Such a Venetian plaster in its appearance is in no way inferior to the "classical" composition, but at the same time it is much more convenient to work with it. Various dyes, also called colors, complement the mixture. They give the Venetian plaster a certain shade required by the owner of the room to be finished.
Important! If you wish and have time, you can not only apply Venetian plaster, but also prepare it yourself. To do this, you need stone chips, which can be obtained from the marble and granite workshop. Slaked lime can be found in a home improvement store, and colors can be found in paint and plaster stores. But remember that the factory formulations already have a mature recipe and certain properties.

Venetian plaster - pros and cons
Separately, it is worth considering the advantages and disadvantages of Venetian plaster as a material for interior decoration. Among the advantages are the following.
- A texture that imitates many types of natural stone (depends on the technique used by the master plasterer).

- The effect of "internal glow" due to the high reflectivity of the material and the use of a wax coating.
- Long service life of at least 25 years (with the correct plastering technology).
- The absence of seams and joints on the decoration of walls and other surfaces.
- Long-lasting color retention thanks to the wax coating.
- Water resistance - Venetian plaster can be safely used in bathrooms or saunas.

As for the disadvantages of Venetian plaster, they include the high cost of the material, the complexity of finishing and high requirements for the base coat - it must be perfectly even and well putty, without irregularities and defects. Without the latter factor, you may face a problem when all the imperfections of the wall will be visible after finishing the finish.
A wall finished with plaster, depending on the type of material, can have a different texture, color, look modest and inconspicuous, or, on the contrary, very expensive. - This is one of the types of decorative surface finishing. It is used for various purposes, including for facades.
Tools for working with Venetian plaster
Before proceeding with the description of the techniques for applying Venetian plaster with your own hands, let's get acquainted with the list of tools necessary for this work.
Table. DIY Venetian plaster - tool list.
| Tool name | What is it used for |
|---|---|
| Applying layers of textured plaster and rendering veins on the material |
| Essential tool for the application of Venetian plaster and wax coating |
| Transference plaster mix from the container onto a wider spatula, mixing and tinting the material |
| Grinding and cleaning plaster layers, removing excessively protruding elements |
| Storage and mixing of white and colored plaster |
| Manual polishing of hard-to-reach or small areas treated with Venetian plaster |
| Machine polishing of a large area treated with Venetian plaster |
| Mixing large volumes of Venetian plaster |


Construction mixer price
Construction mixer
Video - Venetian plaster from A to Z
DIY Venetian plastering
From the description of Venetian plaster, its features, advantages and disadvantages, let's move on to considering the basic application techniques. But before that, check out how to prepare the walls for finishing works and how to independently obtain a composition of a certain color.
Important! As mentioned above, decorating walls and other surfaces with Venetian plaster is a complex process that requires some experience and skill. Therefore, before proceeding to construction works, take not a large number of composition and practice on white and smooth MDF panels. It is advisable to try several different plastering techniques and experiment with several colors.


Surface preparation for Venetian plaster
All plastering work begins with the preparation of the walls. If there is any old finish on the walls (paint, wallpaper or anything else) - remove it completely and as thoroughly as possible. Also, the walls are cleared of involuntary traces of repairs in the form of stains and construction dust.

After removing the previous finish, proceed to repair the large defects in the wall. Coat cracks and potholes cement mixture, remove the protrusions with a grinder, rub the rough places with sandpaper. As a result, you should get relatively Smooth surface without any special flaws, suitable for further finishing work.


Next, apply a primer, starting and finishing putty on the surface in succession. After sanding with the last sandpaper, you should have perfect smooth wall devoid of any flaws. Remember that all imperfections in the surface after finishing the Venetian plaster will be very noticeable.

Finish preparing the wall for Venetian plastering by applying two (and in some cases three) coats of primer. Moreover, its color should be either neutral white, or close in shade to the future finish.
Tinting Venetian plaster
Before starting to apply the decoration, the owner of the premises or the craftsman performing the work for him must select the color of the future Venetian plaster and "prepare" it using a basic white mixture and several different dyes. This process is called tinting, and from the step-by-step instructions given in this subsection, you can familiarize yourself with how it happens.
Step 1. Choose a suitable shade of Venetian plaster. When doing this, use a tinting fan. It contains not only the primary colors, but also their shades, the total number of which can reach several tens or even hundreds.

Tinting fan
Step 2. Prepare tinting tools - clean sheet thick paper, where you can see if the prepared Venetian plaster matches the selected shade, a small container for mixing the composition, a narrow spatula and a set of dyes.

Step 3. Prepare a small amount of neutral white Venetian plaster. Choose the right dyes. In this case, the master will achieve a dark red hue with an offset to brown. For this, basic red, red-brown, brown and black dyes are used. The latter is necessary to reduce the brightness of Venetian plaster and make it more similar to natural marble.

Step 4. Choose a container of base color (in this case, it's red), shake it and add a lot to the white plaster.

Step 5. Stir the plaster and paint with a narrow spatula until the compound is uniform in color.

Step 6. Using a narrow spatula, apply a small strip of plaster mixed with the base color onto a white sheet of paper. Compare it with the desired shade on a colored fan and determine which dyes and how much to add. In total, during the tinting process, several such checks will be made, with the help of which you can gradually achieve the color you originally intended.

Step 7. Add a second color scheme to the plaster, which will shift its shade to the previously selected one. In this case, we are talking about a red-brown color. As last time, stir the plaster until smooth, apply a small strip of the mixture to the paper and match the color with the selected shade on the fan.

Important! When giving color to the plaster, keep in mind that after drying it will be lighter than at the moment, by one or sometimes two tones.
Step 8. Add literally a few drops of black color to the plaster to make it more consistent with the natural stone and slightly reduce the brightness, which will be unnecessary for this finish.

Step 9. Apply a strip of plaster to the paper and match with your chosen shade. Adjust the mixture with dyes until it reaches the desired appearance. After that, the tinting can be considered complete - then you will prepare Venetian plaster according to the same principle, but on a large scale, for application to the wall.

Powder paint price
Powder paints
Application of classic Venetian plaster
Let's start by looking at the basic techniques for applying Venetian plaster. It is called classic and requires a mixture of only one shade. In this case, the Venetian plaster in the color of milk chocolate will be applied.
Step 1. Use tinting to prepare a certain amount of plaster of a certain shade and select the place where it will be applied. Note that the Venetian dries quickly, so work with small areas of about 1 m 2. Different places should overlap a little.

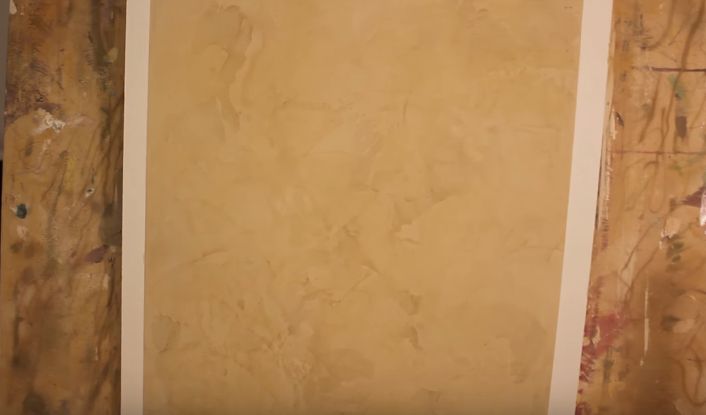
The example uses a training canvas
Important! If Venetian plaster is applied by two different people, then periodically they should change places - each has its own way of working, but at the same time it is necessary to achieve approximately the same appearance of the walls and their individual parts.
Step 2. Apply the first layer of Venetian plaster with smooth, rounded strokes using the trowel. It removes invisible wall defects, levels it and acts as a link for subsequent finishing layers. Remember to apply a small amount of plaster and a thin layer. At this stage, the presence of small bald spots is acceptable.

Step 3. Wait 60 minutes until the first layer of Venetian plaster applied is dry.

Step 4. Apply a second coat of Venetian plaster using a trowel. It should be as thin as the previous one, but at the same time form veins and other elements here, which in the future will become a "pattern" on the wall, imitating natural marble or any other stone.

Step 5. Apply the third layer of Venetian plaster, which is called "wiping" in the classic technique. For this work, use a Japanese trowel, while pressing it against the wall with considerable force. Using this tool, apply a small amount of plaster over the second layer, and immediately make movements to remove the excess.


Step 6. Without waiting for it to dry completely (but not immediately after application), sand the third layer of Venetian plaster with an abrasive sponge or very fine emery paper. Shake off any dust from the wall to be treated.

Step 7. After the finishing layer of plaster has dried, treat it with wax. A small amount of it is applied to the spatulas according to the same principle as in the previous operation - first, the composition is on the wall, then its excess is removed with pressure. The wax will make the Venetian plaster one shade darker, give it a shine and protect it from abrasion and moisture.

Step 8. 20 minutes after waxing, the area of the wall finished with Venetian plaster is wiped with a dry and clean cloth. Before that, you can "grind" it again with a Japanese spatula, removing excess wax.


Application of Venetian plaster in two tones
Now let's consider a slightly more complex technique for applying Venetian plaster - here we work with mixtures of the same color, but different tones - one lighter and the other darker.
Step 1. Using tinting, prepare a certain amount of plaster of the same color, but in different containers and with different shades. As mentioned above, the first composition is lighter, the second darker. Also define an area of 1 m 2, from which the application of Venetian plaster using this technique will begin.

Step 2. As in the previous technique, apply the first layer of Venetian plaster with a Japanese trowel in rounded strokes with medium pressure and without much removal of excess. When doing this, use a mixture of light colors.

Step 3. Wait for the first coat to dry and start applying the second. He will be responsible for the texture of the wall decoration with Venetian plaster. Apply the main part of the second layer in a light tone, drawing out veins and other elements small in height. Then take a small amount of dark-colored plaster with a Japanese trowel and leave small spots and streaks on the surface. Thus, form a certain pattern by copying the real stone.


Step 4. Apply a third coat of light-colored plaster. At the same time, work with a spatula with serious effort, in a semicircular motion, "on the scratch" of the newly applied plaster. Then polish these areas. The process is similar to what happens when describing the previous finishing technique.

Step 5. Wait until the third layer of plaster is dry and work on a section of the wall (or, in this case, a training canvas) emery cloth or a sponge.

Step 6. Wipe off the dust left on the plaster section of the wall after using the emery pad and apply a layer of wax. As soon as it dries up, wipe everything off with a dry and clean cloth. After that, the section of the wall can be considered as successfully plastered with a two-tone Venetian.

Important! Use a two-tone plastering technique, taking into account the size of the area to be trimmed. If it is large, then the difference between the shades should be minimal - otherwise the wall will “dazzle” and rather annoy than evoke positive emotions. But for small areas, it is allowed to use plaster with a difference of several tones.
Applying marbled Venetian plaster
And finally, let's get acquainted with the third technique for applying Venetian plaster - with an imitation of real marble. Please note that this is a rather complex finishing option that requires some experience in this area.
Step 1. Prepare the plaster of the base color (in this case, this is the red that was discussed in the subsection on tinting), as well as black and white mixtures, with which the imitation of marble will be performed. Apply the first layer of Venetian using the base shade composition. In doing so, lay the plaster on the surface diagonally from right to left, leaving characteristic stripes.


Step 2. Wait until the first coat is dry and apply a generous amount of base color plaster to the trowel, add some white mixture to it and stir gently. Then complete with black composition. An example of applying three shades of plasters to a trowel can be seen in the photo below.

Step 3. Apply a mixture of three different colored plasters in a second coat. When doing this, slide the trowel diagonally from right to left, drawing a streak of veins.

Step 4. Using the instructions from the previous step, continue applying the multi-colored mixtures of renders until the second coat is fully formed. Let it dry.

Step 5. Sand the Venetian marbled plaster with a fine emery cloth. Wipe off any dust generated during the work.

Step 6. Apply a layer of wax with a Japanese trowel to protect the plaster and give the finish a shine.

Step 7. After the wax dries, wipe the surface with a clean cloth or a special grinder attachment.


Marble plaster prices
Marble plaster
Now you know the basic techniques for working with Venetian plaster. Try this type of finish at the first opportunity - the difficulties associated with working with it will result in amazing results.


 Future marriage of Prince Harry year NTV")


Energy drinks: give vigor, but take away health What will happen if you drink 4 energy drinks
Mustard for weight loss: how to use the seasoning with maximum benefit Is it possible for children to have mustard
The benefits and harms of mustard for the human body Table mustard benefits and harms
How to treat the ear after piercing: types of antiseptics, their composition, rules and features of the treatment of a pierced ear
Sistine Chapel in the Vatican: description, history, architectural features