Modern plaster or stucco veneziano (this term is popular among professional craftsmen) has its distant progenitor, originating in ancient Rome. The walls were decorated with marble dust.
After a quality work done, it was difficult to distinguish between a wall decorated with real marble and such a surface. A revolutionary turn in the history of the creation of decorative plaster was made by Venetian masters. They added quicklime and dyes of natural origin to the marble dust. This coverage has more presentable appearance than marble. And the composition deservedly received the name "Venetian plaster". 
Fully natural coating? Certainly! One of the types of decorative plaster? Undoubtedly! But still, for a special artistic appeal and style, Venetian plaster is a separate item in the classification of decorative coatings.
Technology does not stand still. And now you can recreate the era of antiquity in your home much easier and with less labor. There is no need to crush and polish the marble. And even more so - to deliver it to the place of work. Isn't it a miracle to have a marble wall surface in your apartment? Imagine the interior of the Middle Ages in a modern setting, where instead of torches, glass and metal lamps cast light on the gloss of marble walls with gilded rustication. What colors did you provide? Light pink in rusty cracks or dark blue metamorphoses on a black background - any color scheme is possible with the material in question. Venetian plaster - the spirit of antiquity and wealth in your home.
The covering imitates valuable breeds (marble, jasper, malachite), expensive fabrics (velvet, silk), noble metals (gold, silver). Venetian plaster conveys the effect of deep glow due to the shimmer of the filler through a slightly transparent base. Thanks to this quality, the intersections of strokes look even more advantageous, forming a contrasting network of veins, like in real marble or polished charoite. The play of light and shadow enhances the perception of natural stone enveloping the walls of the room.
Features of Venetian plaster.
The color of the surface and the pattern of tonal overflows become brighter, more expressive when the finished dried "Venetian" is covered with a thin layer of special synthetic or natural wax. It gives the texture, imitating polished stone, not only naturalness and depth, but also protects against external factors (moisture, light, odors, mechanical stress). But in both cases, the finished decorative surface is ground (polished) with a special trowel. This achieves the effect of non-uniform gloss with haze in the recesses. Lacquer coating for the "Venetian" is not recommended, because under the cloudy film the texture will lose quality. Therefore, when choosing a wax coating, attention should be paid to transparency. Achieving the desired effect, of course, requires certain skills. The result is a smooth Venetian. It is the coating technique, tools, manipulations with the applied composition - all this is of considerable importance in working with Venetian plaster. The direction of the applied strokes, their width and randomness, the number of layers determine the uniqueness of the pattern, just as the pattern of marble, agate or onyx is determined in nature. For centuries, recrystallization and interaction with the composition of quartz and dolomite have taken place in the plates of the earth's crust. After all, all the beauty of stones that attracts our eyes lies in the uniqueness and unlimited variability of colors and lines. Classic Venetian plaster for tinting allows you to choose the color of the future surface yourself. Quite often it is used by purchasing the entire volume in one color.
Tones are achieved due to the multi-level intersection of the layers with each other. But it is quite possible to apply two or three shades to one surface. It is only necessary to choose the mutual combination of future shades. It is also important to understand that this material (like any other type of decorative plaster) cannot be left “for later”, suspending work in the middle of the wall. The entire application process should continue from corner to corner. Otherwise, surface uniformity will not be achieved.
About the properties of the "Venetian":
The natural composition of this decorative material meets the highest environmental requirements. This is one of the main indicators that all manufacturers of any materials used in construction and decoration have recently been striving for. We began to pay attention to the harm and benefits of composites, their safety for health, and fire performance. Venetian plaster meets the listed requirements in full.
The qualification of the master allows you to vary the color and even the texture of the Venetian. Matte Venetian stucco or fuchsia-colored Venetian stucco will surprise no one these days. As the application technique develops, the Venetian textured plaster is able to please the customer's eye.
This coating will last at least 15 years. Over time, this material becomes harder, like a stone surface. The only requirement of the manufacturers is the stability of the plane on which the Venetian plaster will lie. With displacements or vibrations of the wall, there is always the possibility of a crack in the superhard inelastic plaster.
Modern building materials delight with their diversity, ease of use and functionality. Decorative plasters have long been firmly established in the group of popular products for interior decoration - their choice is huge, there are many effects and it can be difficult to stop at any one option.
There are many beautiful effects and textures, with imitation of different materials, stone, fabric - when choosing, your eyes just run wide! However, for those who want to get a spectacular decor that will definitely not go unnoticed, the best option is Venetian plaster.
Why is she popular?
This type of plaster very skillfully reproduces the imitation of natural stone - marble, granite and other expensive rocks. This type of decoration was invented in ancient Rome and for more than two centuries continues to be popular as the most refined and expensive. Some pomposity is inherent in it, so Venetian plaster is not suitable for every interior.
It looks most appropriate in spacious living rooms or bedrooms, salons, pools and offices, this is a kind of sign of luxury. If the room is small, then it is better to limit yourself to partial decoration in the Venetian style.
Composition of Venetian decorative plaster?
Venetian plaster mixtures are made entirely from natural ingredients. As a rule, it is gypsum, marble, lime. Since the production does not use harmful and toxic additives, this type of material is considered environmentally friendly and can be used in children's rooms, kitchens, restaurants, bathrooms - anywhere!
Venetian-style decoration has many varieties, however, the main idea is the same: imitation of the cut of expensive stones, mirror shine inherent in natural material, appearance, as close as possible to natural.

This decorative plaster always applied by hand and this makes each specific performance unique, it is not possible to repeat it, even with a strong desire.

The visual Venetian effect is achieved not only due to the composition of the plaster - mainly an aqueous emulsion, to which finely ground marble flour and lime mortar are added - but also due to a special application technique.

It is possible for everyone to master the execution technology, however, for an accurate and effective result, some experience is required.
Photos of completed works


Venetian plaster technique
A mixture for making Venetian plaster is presented on the shelves of hardware stores in a ready-to-use form. Usually it is packaged in buckets or jars, depending on the volume.


The appearance of the finished mass is a transparent, thick, but elastic mixture. Before applying to the walls, it must be tinted in the desired color. The color range is extensive, almost any shade can be obtained! The most successful is the combination of several shades in one tone - so the design will be as similar as possible to natural stone.

Naturally, before applying decorative plaster, special surface preparation is needed. Initially, it should be completely clean and dry. There should be no traces of dust, dirt, old finishing materials or oil stains! The slightest defects on the surface will inevitably come out on the finished finish, your work will simply be wasted.
Previously, the surfaces must be coated with a primer in several layers. Acrylic paint can also be used as a primer. Before proceeding to further work, you need to wait for the complete drying of the soil.
Applying Venetian plaster is a painstaking and time-consuming task. To achieve the desired visual effect, you need to apply the mixture in small strokes, finely and tightly to each other.
The main task is the layering of the coating in order to get a beautiful imitation of the cut. natural stone, will have to be applied from four layers or more. The maximum possible layering is ten layers.
Real masters of their craft, skillfully alternate different, matching shades, thereby enhancing the resemblance to a natural coating.
To work, you need a special spatula for Venetian plaster, it is made of forged stainless steel and has a certain triangular shape. In addition to it, you will also need: a float, a simple steel spatula, a flexible spatula and soft flannel rags.
- It will be correct to visually divide the entire cultivated area into small sections, up to about one square meter and apply plaster in portions to each area.
- The first layer should be given special attention - it is a kind of foundation on which the entire finish rests, so it must be applied in a continuous, neat layer, avoiding gaps and rough irregularities.
- Each subsequent layer is applied only after the previous one has completely dried! Moreover, it is desirable to thoroughly clean the dried plaster so that the surface is even and as smooth as possible.
- All the layers following the first one serve as finishing ones, they form the necessary “pattern” typical for Venetian plaster. The drawing is formed with a flexible spatula, soft, slightly smeared strokes are applied with it.
- After layering the required amount of decorative plaster, it must be carefully smoothed and leveled with a medium-sized trowel.
- Very important point in achieving a beautiful surface appearance, is the wax coating. It is performed after all layers of plaster are completely dry and fixed on the treated surfaces. It is recommended to use natural beeswax or synthetic wax. Natural can give the finish a beautiful shine, transparency and enhance the depth of color.
It is important to use beeswax, and not varnish or any other material, they can easily spoil a half-finished work - it can become unclear and greatly spoil the final result.
Synthetic waxes are also used quite often, firstly because they are much cheaper than natural waxes, and secondly because of their water-repellent and protective properties. The use of synthetics is justified in rooms with high humidity- kitchens, pools, bathrooms.
Be sure to keep in mind that covering Venetian plaster with synthetic wax, you will get not a mirror-gloss, but a matte finish. Waxing is also best done in several layers - this way you will definitely avoid missed areas, even tiny ones.
We apply each layer on the already dry previous one, they dry pretty quickly, so there will be no problems. After applying the last layer of wax, polish it with soft flannel or special polishing cloths.

True, you can avoid the last, waxing stage by buying ready-made Venetian plaster, which does not require additional topcoat.
The technique of applying Venetian plaster is not an easy task and requires skill and experience. There are also some nuances: you need to carefully regulate the pressure on the trowel, maintain a uniform thickness of the coating, and this is not easy, given that there are many layers.
You need to do the work in sections and move on to the next one only after finishing the finishing on the previous one. But when the plaster is smoothed and coated with wax, then it is necessary to capture nearby areas during work - this way the coating will look uniform.
The plaster dries completely in about seven to ten days, however, it can be washed or subjected to any mechanical stress no earlier than a month after application.
As you probably already understood, it is best to entrust the work with the implementation of Venetian plaster to specialists with experience in such work.
It will not be easy to apply it on your own and the first time, the result is unlikely to turn out to be truly beautiful. Venetian plaster of a kind artwork, talent, a creative streak and a subtle sense of color are required here - then the finished finish will be spectacular and decorate any interior.
Benefits of Venetian Plaster
This type of decorative plaster has only one drawback - its cost. However, it is quite justified and is primarily due to the multi-layer application, that is, the high consumption of material, and secondly, the manual execution of the coating with the involvement of highly qualified specialists.

But the advantages of this type of finish are many and all of them are very significant:
- Appearance of Venetian plaster is her first and obvious advantage. This finish looks truly chic and will add a touch of luxury to any space. In addition, it is always individual and unique - like a work of art, and this is a direct way to distinguish your interior from millions of other options.
- Coating durability. The plaster is not subject to mechanical damage: it does not crack, does not shrink, it also does not tend to change color. Roughly speaking, high-quality work can retain its original appearance for several decades.
- Huge selection of shades, the possibility of coloring in different tones of the same color, performing smooth color transitions. It is possible to add pearlescent or golden pigments to the mixture, which makes the decor look truly fabulous.
- Good vapor permeability. Surfaces covered with Venetian plaster are able to "breathe". This means that the use of Venetian plaster maintains a normal microclimate in the room, allowing no accumulation of moisture and thus no condensation on the walls.
Venetian decorative plaster- one of those materials that can be used in almost any case. It can be used as an independent coating of the entire area, or as a decorative finish, covering only the ceiling, arches or columns with it.

It is suitable for rooms for various purposes and can even be used in children's rooms or kitchens, as it is completely safe for health.
If you want to get a strong and durable coating, be sure to pay attention to this type. This finish is truly luxurious, spectacular and practical.
Despite its antiquity, the decoration of residential and public buildings with plaster is still very popular. This is due to the practical advantages of such a wall design, and an unusually attractive appearance. Do you want to make your home more beautiful without resorting to third-party craftsmen? Then do-it-yourself Venetian plaster is one of the most preferred options for you.

Venetian plaster itself has been around for a couple of thousand years and predates its current name. Even in ancient Rome, builders noticed that quarry waste in the form of dust and small fragments can be used to prepare a finishing mixture, which, with a certain application technique, in its own way appearance in no way inferior to normal marble.
Subsequently, the recipe for such plaster became very popular in Venice during the Renaissance, and from there it bears its current name, which in the original sounds like stucco veneziano. Now let's figure out what kind of finishing material it is and what it consists of.

The main component of Venetian plaster is very fine stone chips. Moreover, it can be not only marble, but also onyx, malachite, granite, quartz and other minerals. Between themselves, this stone crumb is connected with the help of slaked lime. However, lime has recently been replaced with a synthetic component - acrylic. Such Venetian plaster in its appearance is in no way inferior to the “classic” composition, but at the same time it is much more convenient to work with it. Complement the mixture with various dyes, also called colors. They give the Venetian plaster a certain shade, necessary for the owner of the finished premises.
Important! If desired, and if there is time, Venetian plaster can not only be applied, but also prepared independently. To do this, you will need stone chips, which can be obtained from a workshop that works with marble and granite. Hydrated lime can be found in a building supermarket, and colors can be found in stores selling paints and plasters. But remember that factory formulations already have a seasoned recipe and certain properties.

Venetian plaster - pros and cons
Separately, it is worth considering the advantages and disadvantages of Venetian plaster as a material for interior decoration. Of the advantages, the following can be distinguished.
- A texture that imitates many types of natural stone (depending on the technique used by the master plasterer).

- The effect of "inner glow", due to the high light reflectivity of the material and the use of a wax coating.
- Long service life of at least 25 years (with the right technology for applying plaster).
- The absence of seams and joints on the decoration of walls and other surfaces.
- Color retention for a long time due to the wax coating.
- Water resistance - Venetian plaster can be safely used in bathrooms or baths.

As for the disadvantages of Venetian plaster, these include the high cost of the material, the complexity of the finish and the high requirements for the base coat - it must be perfectly even and well puttied, without bumps and defects. Without the last factor, you may run into a problem when all the imperfections of the wall will be visible after finishing.
A wall finished with plaster, depending on the type of material, may have a different texture, color, look modest and discreet or, on the contrary, very expensive. - This is one of the types of decorative surface finishes. It is used for various purposes, including for finishing facades.

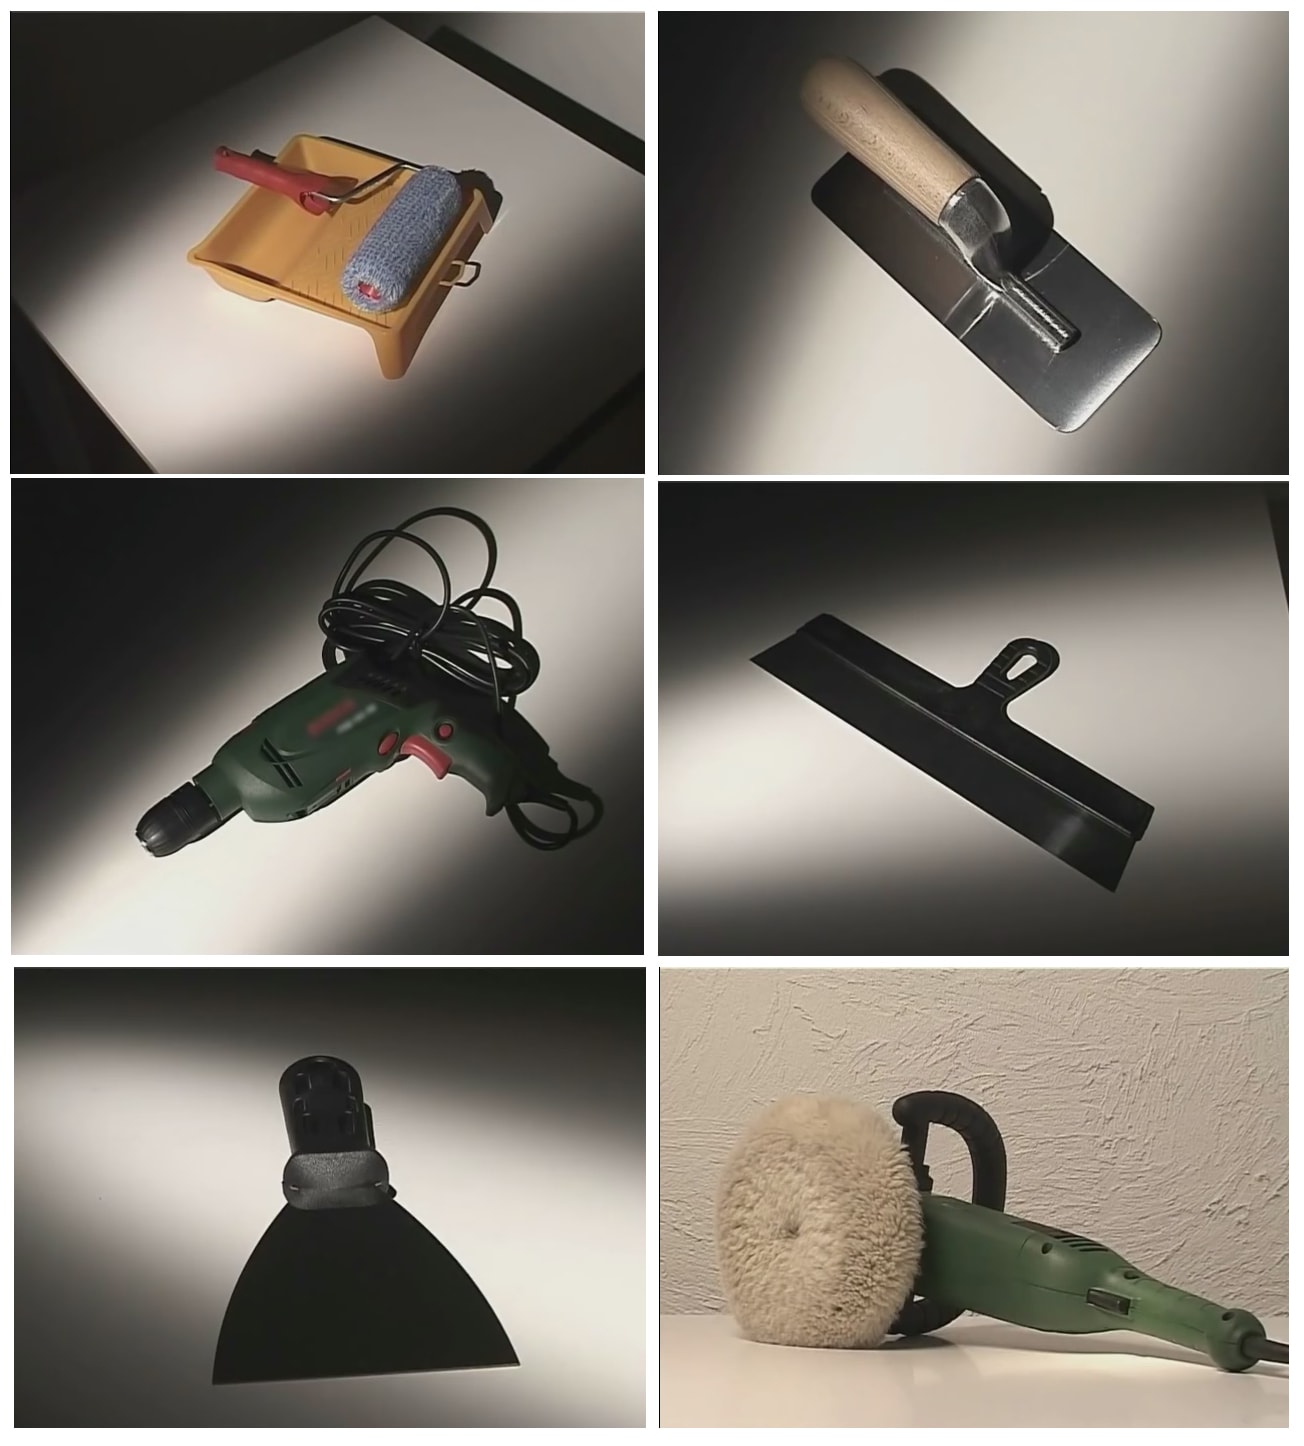
Tools for working with Venetian plaster
Before proceeding with the description of the techniques for applying Venetian plaster with our own hands, let's get acquainted with the list of tools needed for this work.
Table. Do-it-yourself Venetian plaster - a list of tools.
| Instrument name | What is used for |
|---|---|
| Applying textured plaster layers and drawing veins on the material |
| Essential tool for applying Venetian plaster and wax |
| Transferring the plaster mixture from the container to a wider spatula, mixing and tinting the material |
| Grinding and cleaning of layers of plaster, removal of excessively protruding elements |
| Storage and mixing of white and colored plaster |
| Manual polishing of hard-to-reach or small areas treated with Venetian plaster |
| Machine polishing of a large area treated with Venetian plaster |
| Mixing large volumes of Venetian plaster |


Construction mixer price
construction mixer
Video - Venetian plaster from A to Z
Do-it-yourself Venetian plaster
From the description of Venetian plaster, its features, advantages and disadvantages, let's move on to the consideration of the main application techniques. But before that, learn how to prepare walls for finishing work and how to get a composition of a certain color on your own.
Important! As mentioned above, finishing walls and other surfaces with Venetian plaster is a complex process that requires some experience and skills. Therefore, before starting construction work, take not a large number of composition and practice on white and smooth MDF panels. At the same time, it is advisable to try several different plastering techniques and experiment with several colors.


Surface preparation for Venetian plaster
All work related to plastering begins with the preparation of the walls. If there is any old finish(paint, wallpaper or anything else) - remove it completely and as carefully as possible. The walls are also cleaned of involuntary traces of repair in the form of stains and building dust.

After removing the previous finish, proceed to fix large wall defects. Cover cracks and crevices cement mixture, remove the protrusions with a grinder, rub the rough places sandpaper. As a result, you should get a relatively flat surface without any special flaws, suitable for further finishing work.


Next, apply a primer, starting and finishing putty. After sanding with the last sandpaper, you should get a perfect flat wall devoid of any flaws. Remember that all surface imperfections after finishing Venetian plaster will be very noticeable.

Finish preparing the wall for Venetian plaster by applying two (or in some cases three) coats of primer. At the same time, its color should be either neutral white or close in shade to the future finish.
Venetian plaster tinting
Before starting to apply the finish, the owner of the premises or the master who does the work for him must choose the color of the future Venetian plaster and “cook” it using a base white mixture and several different dyes. This process is called tinting, and from the step-by-step instructions given in this subsection, you can familiarize yourself with how it happens.
Step 1. Choose the right shade of Venetian plaster. In this case, use a tinting fan. It contains not only the primary colors, but also their shades, the total number of which can reach several tens or even hundreds.

Tinting fan
Step 2 Prepare your tinting tools clear sheet thick paper, on which you can see if the prepared Venetian plaster matches the selected shade, a small container for mixing the composition, a narrow spatula and a set of dyes.

Step 3 Prepare a small amount of neutral white Venetian plaster. Choose the right dyes. In this case, the master will achieve a dark red hue with an offset to brown. For this, basic red, red-brown, brown and black dyes are used. The latter is necessary to reduce the brightness of Venetian plaster and make it more similar to natural marble.

Step 4 Select a container of base dye (in this case, red), shake it up, and add a generous amount to the white plaster.

Step 5 Stir the plaster and dye with a narrow spatula until the composition acquires a uniform color.

Step 6 With a narrow spatula, apply a small strip of plaster mixed with the base color onto a white sheet of paper. Compare it with the desired shade on the color fan and determine which dyes and how much to add. In total, several such checks will be made during the tinting process, with the help of which you can gradually achieve the color that was originally intended.

Step 7 Add a second color to the plaster, which will shift its shade to the pre-selected one. In this case, we are talking about red-brown color. As before, stir the plaster until smooth, apply a small strip of the mixture to the paper and match the color with the selected shade on the fan.

Important! When giving the plaster a color, keep in mind that after drying it will be lighter than at the moment, by one, and sometimes two tones.
Step 8 Add literally a few drops of black color to the plaster to make it more in line with natural stone and slightly reduce the brightness, which for this finish will be unnecessary.

Step 9 Apply a stripe of plaster to the paper and match with your chosen shade. Adjust the mixture with dyes until it reaches the desired appearance. After that, the tinting can be considered complete - then you will prepare Venetian plaster according to the same principle, but on a large scale, for application to the wall.

The price of powder paints
Powder paints
Applying classic Venetian plaster
Let's start by looking at basic equipment applying Venetian plaster. It is called classic and requires a mixture of only one shade. In this case, Venetian plaster of milk chocolate color will be applied.
Step 1. With the help of tinting, prepare a certain amount of plaster of a certain shade and select the place where it will be applied. Keep in mind that the "Venetian" dries quickly, so work with small areas of about 1 m 2. Different places should overlap a little.

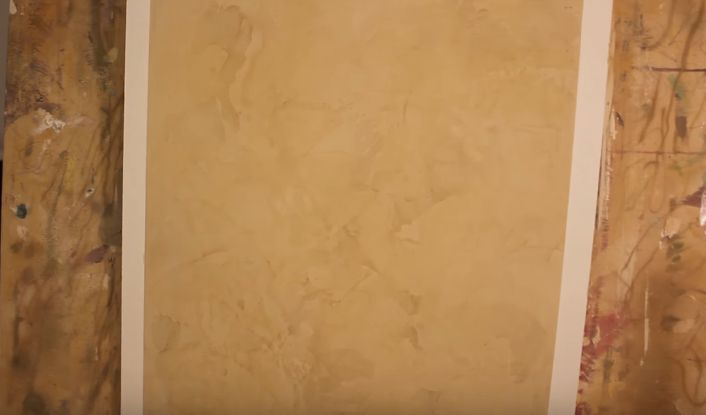
The example uses a training canvas
Important! If Venetian plaster is applied by two different person, then periodically they should change places - each has its own way of working, but at the same time it is necessary to achieve approximately the same appearance of the walls and their individual parts.
Step 2 Apply the first layer of Venetian plaster using smooth rounded movements with a spatula. It eliminates invisible wall defects, levels it and is a link for subsequent layers of decoration. Remember that you need to apply a small amount of plaster and a thin layer. At this stage, the presence of small bald spots is acceptable.

Step 3 Wait 60 minutes for the first coat of Venetian plaster to dry.

Step 4 Apply a second coat of Venetian plaster using a trowel. It should be as thin as the previous one, but at the same time form veins and other elements here, which in the future will become a “pattern” on the wall, imitating natural marble or any other stone.

Step 5 Apply a third coat of Venetian plaster, known in the classical technique as "rubbing". For this work, use a Japanese spatula, while pressing it against the wall with considerable effort. With this tool, apply a small amount of plaster over the second layer, and immediately make movements to remove the excess.


Step 6 Without waiting for complete drying (but not immediately after application), sand the third layer of Venetian plaster with an abrasive sponge or very fine sandpaper. Shake off the dust formed during this operation from the treated area of the wall.

Step 7 After the final layer of plaster has dried, wax it. A small amount of it is applied to the spatulas according to the same principle as in the previous operation - first the composition is on the wall, then its excess is removed with pressure. Wax will make Venetian plaster one tone darker, give it shine and protect it from abrasion and moisture.

Step 8 20 minutes after waxing, the section of the wall finished with Venetian plaster is wiped with a dry and clean cloth. Before that, you can “grind” it again with a Japanese spatula, removing excess wax.


Applying Venetian plaster in two tones
Now let's look at a slightly more complex technique for applying Venetian plaster - here we work with mixtures of the same color, but different tones - one is lighter and the other is darker.
Step 1. Using tinting, prepare a certain amount of plaster of the same color, but in different containers and with different shades. As mentioned above, the first composition is lighter, the second is darker. Also determine the area of 1 m 2, from which the application of Venetian plaster will begin using this technique.

Step 2 As in the previous technique, apply the first layer of Venetian plaster with a Japanese trowel in a rounded motion with medium pressure and without much wiping. In this case, use a mixture of light colors.

Step 3 Wait for the first layer to dry before applying the second. He will be responsible for the texture of the wall decoration with Venetian plaster. Apply the main part of the second layer in a light tone, drawing small veins and other elements in height. Then, on a Japanese spatula, take a small amount of dark-colored plaster and leave small spots and streaks on the surface. Thus, form a certain pattern by copying a real stone.


Step 4 Apply a third coat of light-colored plaster. At the same time, work with a spatula with serious effort, in semicircular movements, “on the peel” of the newly applied plaster. Then polish these areas. The process is similar to what happens when describing the previous finishing technique.

Step 5 Wait for the third coat of plaster to dry and work on the wall section (or, in this case, the practice canvas) sandpaper or sponge.

Step 6 Wipe off the dust left on the plastered area of the wall after using an emery sponge, and apply a layer of wax. As soon as it dries, wipe everything with a dry and clean cloth. After that, a section of the wall can be considered successfully plastered with a "Venetian" in two tones.

Important! Use the technique of applying plaster in two tones, taking into account the size of the finished area. If it is large, then the difference between the shades should be minimal - otherwise the wall will be "full" and annoy rather than cause positive emotions. But for small areas, it is allowed to use plaster with a difference of several tones.
Application of Venetian plaster with imitation marble
And finally, let's get acquainted with the third technique of applying Venetian plaster - with imitation of real marble. Please note that this is a rather complex finishing option that requires some experience in this field.
Step 1. Prepare the base color plaster (in this case, the red that was discussed in the tinting section), as well as black and white mixtures, with which marble imitation will be performed. Apply the first layer of "Venetian" using the composition of the main shade. At the same time, lay the plaster on the surface diagonally from right to left, leaving characteristic stripes.


Step 2 Wait for the first coat to dry and apply a generous amount of base color plaster to the spatula, add some white mixture to it and mix lightly. Then complete with black. An example of applying plasters of three shades on a spatula can be seen in the photo below.

Step 3 Apply a mixture of three plasters different color second layer. At the same time, move the spatula diagonally from right to left, drawing a strip with veins.

Step 4 Using the instructions from the previous step, continue applying multi-colored mixtures of plasters until the second layer is fully formed. Let it dry.

Step 5 Sand the Venetian marbled stucco with fine grit sandpaper. Wipe off any dust generated during operation.

Step 6 Apply a coat of wax with a Japanese spatula to protect the plaster and give it a sheen.

Step 7 After the wax dries, wipe the surface with a clean rag or a special attachment for the angle grinder.


Prices for marble plaster
Marble plaster
Now you know about the basic methods of working with Venetian plaster. Try this type of finish as soon as possible - the difficulties associated with working with it will turn into an amazing result.
Choosing a material for wall decoration is not easy. It must be beautiful, practical, durable and, preferably, inexpensive. Venetian plaster meets almost all of these requirements. It is beautiful - it looks like natural marble, it is practical - the waxed surface can be washed repeatedly, it is durable - if it is not scratched on purpose, it is not damaged, it can be applied to any surface - even, curved. Just the perfect finish. But, as usual, there is a "but". She is expensive. This is the first negative. The second is that it is difficult to apply it with your own hands. Rather, it is easy to apply, it is difficult to get a beautiful surface without experience. But you can try or hire a master. But before concluding a contract, ask for customer contacts. If you succeed, see the results of the work yourself, or call and ask about your impressions.
What is Venetian plaster and its composition
If the wall resembles a marble surface in appearance, but there are no seams on it, it is finished with Venetian plaster. This finishing material was invented centuries ago in ancient Rome. When someone came up with the idea of mixing marble dust and slaked lime. The result was an elastic composition that looked like natural marble on the walls. For a clearer pattern, natural dyes were added to the mixture.
Clay was the most popular. The walls had reddish or pinkish (depending on the color of the clay) stains, which made the decoration more similar to natural marble. To make the coating durable, the plastered surface was covered with a layer of wax, which was then polished. The walls were indistinguishable from marble. Only there were no seams.
And only centuries later, during the Renaissance, Venetian plaster appeared in Venice, where it began to be used instead of marble slabs. The technique of its application was not simple, but working with Venetian plaster is much easier than fitting and polishing marble slabs. Because this type of finish has become very popular. She trimmed walls, ceilings, columns in palaces. The finish was beautiful and durable, weakly reacting to changes in humidity and temperature, which, in the conditions of high humidity of the Venetian canals, led to the widespread use of this material. Contributed to the popularity and the fact that marble dust is easier to bring, and it costs less. The remaining components were added locally mined. The fame of the most beautiful finishing material was quickly spread by merchants, and they called it Venetian plaster. Since then, this has been the case.

The composition of Venetian plaster described above - marble dust, slaked lime and coloring additives - is still used today. Completely natural finish. But there are compositions in which synthetic dyes (acrylic) are added or modern binders are used instead of lime. There may also be rubber tree sap, crushed granite. All or some additives are contained - it depends on the manufacturer, but this material is also called Venetian plaster, since the main component - marble dust - remains the same.
Application technology
Applying Venetian plaster with your own hands is a difficult task. The problem is that this is a creative process and there are a lot of ways to apply it. From different movements, a surface of different appearance is obtained. Without experience, it is impossible to predict what you will succeed. To find out which movement will lead to which result is possible only experimentally, that is, one must try. But. Venetian plaster is not cheap at all, so the experience is expensive. Although, you need to study somehow ...

The only thing that can be advised is to plaster a piece of plywood with an area of at least 1 square, and preferably 2, sand it, cover it with a primer and try to apply Venetian plaster on this surface, honing the technique. It is not recommended to start finishing immediately. Most likely, you will have to remove everything and redo it again, which is insulting, expensive, long. If you're lucky, you can get to dealers who teach how to work with Venetian plaster. They provide material and a stand for work, show how to do it. But, this rarely happens.
Preparatory work
The base on which the Venetian plaster is applied must be perfectly even. It is pre-puttied and leveled to absolute smoothness. Use latex putty. If you apply the composition on an uneven wall, it will only emphasize the flaws and increase the consumption of the Venetian. Alignment can be done with a base layer, but such alignment will be very expensive.

A flat wall is coated with a deep penetration primer. Preferably two layers. This will ensure good adhesion of the finish, remove the dust that remains after grinding the plaster, and prevent the development of fungi. After the wall dries, work can begin.
Mixing and coloring
Sold Venetian plaster in buckets, the appearance is pasty. The basic version is white, colors are added to obtain color, for various effects there are decorative additives - mother-of-pearl, sparkles, etc. You can tint the composition in the store or on your own.
For self-tinting, you will need a drill with a mixing nozzle. In some cases, Venetian plaster is covered with a layer of water to prevent it from drying out. In this case, before using or tinting, the water is drained. Then, using a nozzle on a drill, the composition is mixed until a homogeneous state. And only after that, the dye is poured into the mass, mixed for several minutes (5-10) with a drill and a nozzle.

When mixing, be careful: near the walls of the bucket, the composition often does not stain. After removing the nozzle, take a clean wooden block of small section, run it along the walls. Most likely, there are places where the dye did not get. Run the bar several times along the walls, making sure that the walls have painted material. Re-mix the composition with a drill until a uniform color is obtained. This procedure can be repeated again - for greater certainty. There is one more nuance: some manufacturers recommend waiting 12 hours after staining.
When self-tinting, it must be remembered that in some compositions the color changes when dried (not all). Therefore, to determine the future color, it is necessary to make samples: apply a couple of strokes and wait until it dries. According to the results, either add a dye, or - an untinted composition.
Also remember that with manual tinting, the same color cannot be repeated. The new batch will be different. Therefore, the material must be painted in a larger quantity than the expected consumption: it is better to have something left than not enough.
Layer rules
Layers when applying Venetian plaster can be from two to a dozen. It all depends on the desired result. And the correspondence between the “desired result” and the actual one is a matter of experience.

You can make such beauty with your own hands ... if you practice before that
Layers are applied in different ways, but each of them is leveled and polished to smoothness, each must be allowed to dry. And only after applying and drying the latter, the surface can be covered with wax - bees or synthetic. Depending on the type of wax, either a glossy surface (beeswax) or a matte (synthetic-based) surface is obtained. Coated with synthetic protective composition walls also become water and moisture resistant, so if you want to finish the walls in the bathroom with Venetian plaster, take synthetic wax.
Base
The first layer is the base. It is applied evenly, according to the rules for applying ordinary plaster - it must be even. It can be tinted, it can not. Depends on what kind of background you want to have - white or colored. If 2-3 layers of material are applied, it will shine through them. If there are 5 or more layers, most likely it will not be visible (again, it depends on the type of composition).

Second and subsequent
The second layer of Venetian plaster, and all subsequent ones, are applied in chaotic strokes. The composition is taken on a flexible thin metal spatula or a special Venetian trowel. The composition is applied to the edge of the spatula / trowel, applied to the wall with small strokes in different directions. At the same time, one should try not to see the trace from the first touch of the surface tool. The subsequent smear, as it were, closes, lubricates this place. Moreover, it is not necessary to achieve uniformity. The whole point is in the randomness of directions, shapes, lines, bends. Approximately the same as in natural marble.

Application of the second layer - chaotic or in one direction - depends on the desire
Venetian plaster dries 1-10 hours - depending on the composition, manufacturer, temperature and humidity. See the packaging for the exact time. After drying, the surface is rubbed with a dry trowel. At the same time, all the differences that remain after applying the layer are smoothed out. The next layer is applied to the cleaned surface, dries, smoothes. And so on until you get the desired result. And the result - usually this - darker stripes shine through thin layers in those places where, during application, the composition lay more densely. The depth and brightness with which the stripes “shine through” depends on the number of applied layers.
Finishing
The last layer of Venetian plaster must be applied with a thin metal spatula. The technique is called "on a strip" and the layer is almost transparent. They take a little composition on a spatula, apply it to the wall, firmly pressing the blade, collect the composition from the wall back. At the same time, a very thin layer of material remains on the wall. Here at this stage it is necessary to try to make the surface even. Small irregularities will be removed during grouting, but you need to try.

This is a tool for applying Venetian plaster - a special trowel
Ironing
We do not completely dry the last thin layer of Venetian plaster. After 20-50 minutes, we begin ironing the surface. Please note that some compositions must be ironed in small sections. Venetian plaster was applied to a small area (about half a square meter), rubbed off. Other manufacturers allow a longer period of time. You should definitely look at the packaging or ask the manufacturers.
The ironing process itself is a grout with a dry, clean metal surface. We take a Venetian trowel clean, without stripes, scratches or other defects and smooth the surface in a circular motion. In the process, a pattern appears, shine appears, gradually the Venetian plaster acquires “depth” and layering, which distinguishes natural marble.

When ironing Venetian plaster, care must be taken to ensure that scratches and rips do not form. To do this, there should be no grains of sand, grains of material, etc. on the trowel. It is also necessary to iron the wall with the plane of the trowel, without touching its edges. We process a small area at a time, when a drawing appears on it, we move to another area, not forgetting to pay attention to the boundaries of the two areas.
Ironing Venetian plaster may be the last step. In this state, you can leave the walls or ceiling in the rooms. For corridors, baths, kitchens, a protective wax coating is required.
Wax application
Wax is applied after the Venetian plaster is completely dry. To be sure, it is better to wait a day. Wax is applied with a wide spatula in a thin layer “on the sdir”. A thick layer begins to flake off and peel off over time, so we leave a minimum on the wall.

Approximately 30-50 minutes after application, we begin to polish the wax. For this, a fleecy nozzle on a drill or grinder is suitable. The pile of the nozzle should be short and soft, should not crumble. We set the speed to no more than 3000 rpm. At higher RPMs, the wax is rubbed off rather than polished. Polishing lasts until you get the desired degree of gloss (depending on the type of wax).

Complete drying of wax - about two weeks. Only after this time it is possible to wipe/wash/rub. When it comes to the bathroom, it's best not to use it too much (if possible).
Several application methods
Self-stuffing cones with a case of Venetian plaster is an expensive business. At the same time, it is almost impossible to understand from the description what and how to do, how to apply strokes is incomprehensible, the phrase “in a chaotic order” explains absolutely nothing, because there is still no complete chaos. There is some order or bias of application. So, to make it easier to find your own way, we will tell you at what angle to apply strokes in each layer. So there is a possibility that after a couple of tests “on plywood”, self-laid Venetian plaster will please you.

Method one: the drawing is not too bright, not very clear, smooth lines, without sharp transitions. Apply layers like this:

A good option with a good effect. Not too heavy technique gives hope that the Venetian plaster will look normal even if it was applied by a beginner without skills. But first test everything on plywood.
Method two: with a color base, multidirectional strokes in each layer. The application order is:

This method is also not bad if you can master multidirectional movements. At the same time, do not forget that the strokes should be thin. In general, we try.
Venetian plaster: video tutorials on application techniques
Decorative Venetian plaster has been used in construction for quite a long time. It is made in two versions, this is for outdoor and indoor work. Today we will tell you how Venetian decorative plaster is selected and then applied. You can see the most difficult moments in the video in this article and the photo. So de do after that everything with your own hands and this will be the key to quality.
Venetian decorative plaster has become a material for decoration in the homes of many people from all over the world. Effectively fitting into the interior (see Decorative plaster in the interior: beautiful, stylish, non-standard), it gives the rooms a unique style and creates an atmosphere of home comfort.
Pros and cons
Venetian decorative plaster video will tell about the main advantages of this material.
In addition to impressive wear resistance, Venetian plaster has many other advantages:
- The composition of the mixture for plaster is environmentally friendly, it is based on natural and safe components that are not capable of harming human health.
- A wall covered with Venetian plaster will never crack and will retain its original appearance for many years.
- The Venetian mixture easily copes with all sorts of defects and uneven walls.
- Walls covered with Venetian plaster are not subject to thermal effects and will not suffer from moisture.
- The plaster from Venice lends itself to restoration, in case mechanical damage it can be returned to its original form.
- By using a Venetian marble color mix, you can achieve a unique visual glow effect that will give the interior an unusual look.
- Venetian coating guarantee up to 10 years.
But decorative paints and Venetian plaster also have some disadvantages that make decorative work difficult:
- The high cost of material and wall covering work.
- Difficult preparation for finishing with plaster.
- Venetian decorative plasters and paints are applied simply, but here you also need to be able to create the desired relief, and not everyone can do it.
For those who have not yet decided on the choice of decor for their walls, Venetian plaster is a great option to help create the interior of your dreams.
Composition of the mixture
In the manufacture of Venetian plaster, one of essential materials is rock dust.

- A more aesthetic appearance has a "Venetian" with the smallest fraction of dust, which includes granite, quartz and others.
- Instead of slaked lime, often used in the creation of plasters, a variety of synthetic materials are included in the composition. Such a mixture is very similar to that used by ancient Roman builders.
- But modern masters claim that only that decorative plaster, the composition of which does not differ from the classical one, has the best overflow effect.
- Decorative paint for Venetian plaster is sold separately from the main mixture, when choosing it, it is necessary to take into account the shade of the main coating and select the dye according to it.
Properties
Most hardware stores have in their assortment Venetian plaster of all colors and shades. Decorative paint and Venetian plaster can imitate marble, granite, jasper, and other minerals. In an interior created, for example, in the antique Greek style, such a wall covering will easily fit in and complement the spectacular design.
Plastering works include several stages:
- The material is applied to the walls in several layers.(from 8 or more), each of which has unique overflow effects in the light. Properly applied Venetian plaster will be an excellent decorative solution for walls (see Decorative wall decoration: beautiful and modern) and will surprise you with its resemblance to real rocks, because it accurately imitates their overflows and natural radiance. Already from the third or fourth applied, the wall will look like a stone one, and the atmosphere of antiquity and luxury will soar in the house.
- Venetian plasters and decorative paints are quite durable. and the coating will serve your home for at least 15, or even all 20 years, without losing its wonderful appearance. Such an impressive service life fully justifies the high price of the Venetian mixture. For all its subtlety over the years, the coating will only harden harder, gaining high strength.
- When creating plaster, dyes of all existing shades can be used. so finding the perfect style for yourself is not difficult. Many manufacturers of building materials are trying to make the range of the Venetian mix as wide as possible in order to please everyone, even the most fastidious customers.
Varieties
Decorative paints and Venetian plasters have not only many colors, but also a variety of species that differ in their composition.
Consider the three most popular types of plaster, each of which has its own unique features:
- Craquelure, that is, a retro coating. Houses decorated in the style of the past often use Venetian plaster in their interiors. The main difference between craquelure and other types is a special type of wall that imitates cracks and minor damage. This effect is achieved by coating the applied plaster with a special varnish, which, when dried, “tightens” the outer layer of the mixture. Such an impact leads to the appearance of irregularities and cracks, which, by the way, will not affect the density and durability of the coating. A unique look craquelure will give the room a unique effect of antiquity.
- Carrara marble, or play of overflows. This type of Venetian plaster is famous for its similarity with a unique rock, which includes many natural shades. Now real Carrara marble is hard to find, as it is almost never mined. But the Venetian mixture can take on a look no different from real marble. In order for the coating to acquire the effects of overflows inherent in the Carrara rock, it is necessary to apply the plaster very carefully, avoiding any irregularities. Layers for such work need at least twelve, and each layer must have a certain shade. Applying Carrara marble effect plaster is a painstaking task that requires a lot of patience and time. But the look that the walls will acquire is worth all the effort spent, because not in every house you will find a partition shimmering in a dozen different colors.
- Marseille wax, which is in fact a simple plaster, except that wax has been added to it. You can use such a coating in absolutely any room, (even in the bathroom), since the wax makes the mixture waterproof. Using the Marseille "Venetian" you can achieve a luxurious look not only in living rooms, but also in all corners of the house.
Coating
Decorative plaster Venetian plaster is applied according to proven technology and it is time-tested.
You just need to follow all the points in the right order:
- To work with Venetian plaster, it is preferable to use well-polished spatulas and trowels with rounded ends. This is done in order to avoid any mechanical damage to the layers of the mixture during their application. We must not forget that the pattern and texture of the coating will depend on the size and shape of the tools with which it was applied.
- When finished with the soil for leveling, wait until it dries completely. Then gently begin to apply the first coat of coating. Do everything in small strokes and, if necessary, carefully smooth out. Try to hold the tool at an angle of 15 °.
- Next, wait until the first layer dries and clean it of possible irregularities. Now you need to repeat the steps depending on the number of layers, constantly checking the accuracy of the coating. The final layer after complete drying must be cleaned with sandpaper.
How to give the mixture the right shade?
Paint decorative Venetian plaster can give the desired shade, then you can make a truly unique coating.
To create an iridescent coating for the walls, the instruction must be followed, which is as follows:

- The first layer, applied to the entire wall, will become the base of the coating. The color of the main layer will determine the background shade of the overflows on the finished wall. After application, you need to give the mixture a few hours to dry completely, and then remove bumps and dust from the surface of the layer.
- The second layer of "Venetian" should be applied in random strokes in all directions. It is necessary to monitor the condition of the tool, getting rid of the dried elements of the mixture on the spatula. Particles adhering to the second layer can noticeably spoil the final picture of the coating, so you need to carefully monitor and prevent them from appearing.
- The third layer defines the future texture. The shape and strokes of the plaster will form the basis for the pattern that will appear on the wall. In order to give the coating a spectacular gloss, you need to carefully sand the layer with a tool, applying pressure parallel to the wall surface. Next, you need to give the plaster about 24 hours to dry.
Attention: The reason for the appearance of gloss and gloss is the special composition of the first two layers of the coating. The technique of applying the top coat will determine the shape of the pattern. Do not be afraid to experiment with the final layer, simple strokes can give the wall a unique look.
It will be possible to cover the finished wall with a colorless varnish or wax only after a few weeks, when the work is completely dry. Sunlight reflecting off a waxed “Venetian” will be reflected in a thousand modulations, and the room will acquire a light shade of the coating.
Nuances and secrets
It is worth considering certain little things that should not be forgotten when working with decorative plaster:
- The more dye is added to the mixture, the more the final color may differ from that indicated by the manufacturer.
- To give Venetian plaster a certain shade, it is not necessary to use a factory dye, you can get by with ordinary paints.
- The wax used when applying to the “Venetian” layers cannot be diluted.
- Front decorative works it is better not only to level the walls, but also to cover them with paint for a better application of the mixture.
- All these subtleties refer to the standard technology for covering walls with Venetian plaster. Other types of coatings, the style of which is closer to artistic, have a lot of their own characteristics when applied.
Features of rare species of "Venetian"
Among the many varieties of Venetian plaster, very interesting view acquires a coating on which a mother-of-pearl glaze is applied. Such plaster can be applied to absolutely any surface, depending on the building materials.
- The main step in creating such a coating is the application of the third layer, which includes the glaze. Layering technique - small strokes that need to be leveled.
- It would not be superfluous to apply a colorless wax to the final layer, so that it would be possible to use the mother-of-pearl coating in bathrooms. There are at least 40 variations of shades for such a decorative mixture.
- An equally interesting type of Venetian wall covering is plaster applied using a stencil. This method will help you create a unique pattern for your wall without resorting to a master artist. The stencil used when applying the mixture is a dense film of polymer.
- The assortment of hardware stores offers many stencils for the "Venetian" with a variety of patterns and patterns. Working with such materials is simple, but has its own characteristics.
- The first step is to apply Venetian plaster in the classical way, without resorting to the use of a protective layer. After waiting for drying, attach the stencil to the wall surface and apply the mixture with a thin spatula into the space with the pattern.
Attention: Try to get rid of excess plaster remaining on the tool, which may stick to the main drawing.
- Next, carefully peel off the film and repeat the application process as many times as you think necessary. And when, upon drying, the surface acquires a light matte shade, proceed to the final part of the work - grinding and polishing the resulting pattern.
Decorative Venetian plaster video will help you take into account the features of applying the material. The most important thing is not to rush and do all the stages of work efficiently. Its price is not so big in relation to the original look that you can create.


History of sky lanterns
Job description: concept, purpose, structure, procedure for compiling and formalizing Purpose and content of job descriptions for managers
Interview questions What job are you going to work on?
What to do if the boss criticizes all the time If the boss does nothing
How to understand: will the kitten be fluffy?