During the construction of a residential building, many processes must be performed at a height, and therefore you cannot do without reliable scaffolding. The best solution is to make scaffolding with your own hands, then you do not have to pay rent and spend time transporting the structure. They are wooden and metal, and depending on the material, the assembly technology has certain differences.
Both wooden and metal scaffolding have the same elements:
- support posts;
- stairs;
- decking and lintels for it;
- enclosing railings;
- stops;
- horizontal and diagonal braces.
Wooden structures are easier to assemble - they are smaller in size, and all the details are knocked together with nails. At the same time, such scaffolds are not designed for heavy loads, their dismantling takes time, and reassembly will be less durable, since nail holes remain in the beams. Forests of metal pipes much stronger, they can be easily extended if necessary, and the reliability of the connections remains high no matter how many times the structure is disassembled and reassembled.

Wedge scaffolding
Depending on the methods of fastening, there are 4 main types of scaffolding.
Table. Forest types
| Forest types | Description |
|---|---|
| frame | metal structures from vertical frames fastened together by diagonal and horizontal struts. These scaffolds are lightweight and easy to install. |
| wedge | very reliable and durable structures, all elements of which are fixed with special holders |
| pin | rarely used scaffolding, which is light and easy to assemble, withstands very high loads, but is too expensive and puts a lot of pressure on the ground |
| clamp | these are universal scaffoldings, perfect for buildings with complex geometric shapes. The assembly process is quite laborious, but if necessary, the shape of the structure can be easily changed horizontally and vertically |

How to assemble wooden scaffolding
To make it convenient to work on the scaffolding, there should be a distance of 2 to 2.5 meters between the racks, the width of the flooring should be at least 1 m, and the total height of the scaffolding should be a maximum of 6 m. Based on these parameters, an approximate design drawing is made.

For work you will need:
- timber 100x100 mm;
- boards 30 mm thick;
- boards with a section of 100x50 mm;
- nails;
- hammer;
- level;
- roulette;
- Circular Saw.
The wood must be dense and dry, without cracks. Raw wood will make the structure heavier, besides, after drying it can be deformed. Since scaffolding is required only during the construction or finishing of a house, it is necessary to process them antiseptic formulations and no need to sand.
Step 1. Making the frame

4 beams are cut to the height of the scaffolding and laid on a flat area. Now they take 2 beams of 4 m each and 2 of 3.6 m each, and nail them with inside to the support beams: smaller ones along the upper edge, 4-meter - along the lower. You should get two identical trapezoids, which should be additionally reinforced with diagonal braces.
Step 2. Frame assembly
The frames are lifted, set vertically one opposite the other and temporarily fastened with sidewalls: the distance between the lower edges of the racks should be 1.15 m, between the upper ones about 1 m. Check the location of the sidewalls horizontally building level, and if everything is correct, firmly knock down the frame with nails. The finished structure should have a pyramidal shape and strictly horizontal sidewalls made of timber.
Step 3. Installing the flooring
Floor boards must be nailed to the upper transverse bars. It is best to stuff them along the width of the frame; boards are laid close, without gaps at the joints. Additional crossbars are attached to the sides of the frame, which can be used as stairs.


Assembly of metal scaffolding
In private construction, it is most convenient to use frame metal scaffolding with wooden decking. They consist of several sections, the number of which depends on the length of the building and its height. For the manufacture of sections, steel and aluminum racks are suitable; if heavy loads are expected, it is better to choose steel elements. The standard section is 1.5 m high, 1 m wide and 1.65 to 2 m long.
For work you will need:

Step 1. Prepare the spacers
Blanks for spacers are cut from pipes with a diameter of 15 mm: the length of the horizontal is 96 cm, the diagonal is 2 m. After that, cuts 6 cm long are made at the ends of the two-meter tubes and flattened. This will make it easier to attach the struts to the supporting posts.


Step 2. Making adapters
To build scaffolding, you will need connecting elements - adapters. They are made from shaped pipes: pipes 25x25 mm are cut into pieces 30 cm long, and blanks 8 cm long are cut from 30x30 mm pipes. Short blanks are put on long ones and welded in the middle to prevent shifts.

Step 3. Frame assembly

Two vertical racks are interconnected by horizontal struts, welding them every 30 cm. It turns out a frame in the form. The second frame is assembled in the same way. Square plates 70x70 mm are cut out of sheet metal and welded flat to the lower ends of the support posts. Thanks to this, the racks of the section will not fall into the ground, although on soft soils, dense wooden planks are additionally laid under the metal plates.
Step 4 Mounting the section

Two frames are installed vertically one opposite the other and try on diagonal braces. The attachment points are marked with a marker, then holes for the bolts are drilled in the racks and spacers. Connect all the parts together and check the horizontal level of the upper crossbars with a level. If the design is skewed, you will have to additionally adjust all the elements, otherwise it will be difficult to stand on the scaffolding.
Step 5. Making the deck

Boards for flooring can be laid in two ways - along the length of the section and across. For transverse decking, horizontal pipes are bolted to the sides of the structure at the level of the upper struts. For longitudinal flooring, boards are taken at least 2 m long, knocked down along the width of the section, strengthened from below with transverse bars from deflection.
So that the flooring does not move during operation, a metal U-shaped profile should be fixed at its ends along the thickness of the spacer. To do this, lay the finished shield on the scaffolding and mark the line below with a marker where the horizontal spacer touches the boards. In the same way, markup is made from the other end of the shield. Next, they take a profile with a width of 17-20 mm, cut it to the width of the flooring and screw it with screws to the boards on the marked lines. Now that the decking is laid on the scaffolding, the spacers will be inside the profile, which will not allow the boards to move.
Step 5: Painting the Scaffolding

Metal scaffolding is designed for reusable, which means they need protective treatment. Since scaffolding is more often used for outdoor work, the frame becomes corroded from dampness, especially at the attachment points. Therefore, after manufacturing and checking the scaffolding, each element should be sanded, wiped from dust, primed and painted. Wood flooring is also treated and painted to resist moisture and rot.

Video - Do-it-yourself scaffolding
In the middle of the 20th century, rickety scaffolding was used in construction, and workers were afraid and often refused to work on high altitudes, since not a single construction of a multi-storey building was complete without accidents, often fatal. Today, the work of a high-rise builder has become safer and largely due to modern types of scaffolding, which, in terms of constructability, are a frame system that is made of standard metal and wooden elements.
In order to use forests for one's own purposes, it is not necessary to acquire ownership of them. It is possible to contact specialized organizations in your region that rent scaffolding. They will provide you with collapsible scaffolding as they are reusable.
- Wood scaffolding
- Pin scaffolding
- tower tour
- Wedge scaffolding
- Clamp scaffolding
What is scaffolding
Scaffolding is an auxiliary structure of a temporary nature, and which is built to carry out construction and installation work. Scaffolding is needed to accommodate workers, builders, as well as building materials at the construction site. They are used both outside and inside the facility under construction. Scaffolding is like a web that wraps around a new building or a building that is being restored. Thanks to modern scaffolding, workers and builders work in more safe environment, with minimal risk to health and life.
Types of scaffolding
Depending on what they are made of structural elements scaffolding, they are wooden and metal, and based on the method of attaching functional elements to each other, scaffolding can be:
Wedge scaffolding, in which the constituent elements are connected by means of a wedge fixation. Scaffolding of this type is quite reliable and can withstand heavy loads, but at the same time, they can be dismantled very quickly. Wedge-type scaffolding is recommended for such construction work during which it is planned to use heavy components and materials.
Frame scaffolding, here the main component is a rigid frame. Such scaffolding is intended for plastering or painting construction work. In frame scaffolding, the frame is connected to horizontal posts and to diagonal braces by means of nodal connections. The production of forests of this type will cost you quite cheaply.
Pin scaffolding. In these forests, a pin serves as a connection node. They can be mounted or dismantled very quickly, which is why they are very popular among builders.
Clamp scaffolding, on the contrary, are designed to perform work on objects with a very complex configuration. Scaffolding of this method of fastening are professional equipment, for the manufacture of which all significant parameters: dimensions and height working area and the distance between the tiers, as well as the pitch of the racks, must be selected in accordance with the individual characteristics of the object.
Is it possible to make scaffolding yourself? To do this, let's take a closer look at the installation methods for each type of scaffolding.
Wood scaffolding
Wood, as you know, is one of the oldest building materials, and it is quite possible to build good quality scaffolding from it. However, they are more suitable for finishing works, not higher than a three-story private house.
Wooden scaffolds are made from scraps of a 50 cm board measuring 1.50x5 cm, pieces of a thinner board (for example, 2.5x10 cm), and boards of the desired length for horizontal flooring. For the supports, you will need two long boards, like a beam, all the components of the scaffold can be attached to them. From scraps of a 50-centimeter board, you need to put together triangular supports for this design, then sheathe them with a thinner board.
What size should the triangular supports be? They must provide enough space for the builder standing on them and prevent the possibility of breaking away from the wall/support. Therefore, the length of the scaffold should be between 40 and 50 cm, so that the feet should never sag outside the scaffold. The supports will be attached to the supports, of course, at an acute angle. The upper part (called the sleg) must be cut at such an angle that it can be inserted inside the triangular support. But the lower part should be pointed for a strong fixation in the ground.
When the scaffolding is raised to the required level, using nails or self-tapping screws, it will be necessary to attach the vertical side of the triangular supports to the wall, while (if using nails) without driving them in to the very head, because after the installation work is completed, they will have to be removed and dismantle scaffolding. Putting a ladder, we lift, install one after another, and then nail the appropriate flooring boards to the supports, in this case the nails must be driven in all the way, your safety may depend on this.
Before proceeding with construction and finishing works, it is necessary to make sure that the scaffolding is stable. They can be erected to a height not exceeding seven meters, if you build a structure above the specified distance, then you can forget about your safety. Scaffolding of this design can also be built from bamboo. It is customary to do this in Asian countries, since there this plant is more common than wood. At the same time, the strength of bamboo products is an order of magnitude higher than wood products.
metal scaffolding
V modern construction, especially multi-storey buildings, use scaffolding made of steel and aluminum pipes. They are manufactured industrially. Frame scaffolding includes scaffold towers, flag and pin scaffolding, while modular scaffolding includes suspension, wedge, modular system and clamp scaffolding.
Before proceeding with the installation of metal scaffolding, it is necessary to prepare the site on which the scaffolding will be built, it must be well compacted for greater structural stability. It is also necessary to organize the drainage of rainwater, otherwise the water may wash away the supporting racks, and the structure may collapse or tip over.

Frame (flag) scaffolding
Frame (flag) forests have a standard load of 200 kg/m2.

Their construction consists of steel frames, posts for (horizontal and vertical) fastenings, side frames and so-called “shoes” for ground support.
As mentioned above, this type of scaffolding is quite popular among builders due to its low price and ease of installation. Such scaffolding is intended for buildings with straight facades, where masonry and finishing works are carried out. The maximum assembly height of such scaffolding is 50m.
Before proceeding with the installation of frame scaffolding, you need to properly consider the plan for their construction and the arrangement of tiers with stairs, find out the types and required number of structural elements of scaffolding.
The frame scaffolding is assembled as follows:
On the prepared site, lengths of 3 m are measured and support boards are laid out - beds, and steel shoes are installed on top of them. Frames are installed in them, which form the first tier of scaffolding. They are connected by braces and screeds, then a second tier is installed. For laying the flooring, crossbars are exposed. From the first to the last tier, diagonal ties must be installed in a checkerboard pattern. And ladder structures must be placed at an angle so that workers can climb both vertical ladders built into the frames themselves and inclined ladders, which is much more convenient.
Pin scaffolding
Pin scaffolding has a standard load of 200 kg/m2.

Their installation is also quite simple, like that of frame scaffolding. In them, horizontal elements are attached by inserting pins into hollow tube-eyes. Each level is collected in stages. The braces are installed diagonally here, which gives them greater rigidity.
The maximum height of the pin scaffolding can be 40 meters. They are also used in the production of masonry work, and for finishing.
tower tour
The tour tower has a standard load of 200 kg/m2.
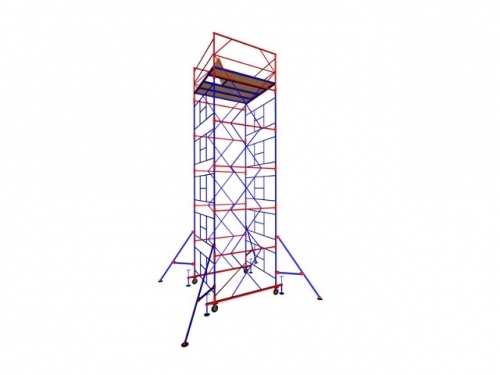
These designs are designed for periodic repair work of varying complexity. The tower tour is assembled from ready-made frames, which are equipped with a ladder. Their base is on wheels. The tour tower has two, three horizontal platforms. At the top there is a folding hatch for ascent and descent. The height of the tour towers is from 4 to 21 meters, depending on the number of tiers. Each tier has a height of about 2 meters. They can be attributed to mobile scaffolding. Thanks to the wheels, they can be moved to another place without dismantling, provided that the surface of movement must be even.
Wedge scaffolding
Wedge scaffolding has a standard load of 200-300 kg/m2.

These are more complex devices. The constituent elements of these scaffolds can be fixed with steel wedges, which are driven in with a hammer. These are fairly reliable scaffolding compared to frame and pin ones. The maximum height of the construction wedge scaffolding is about 40 m.
Clamp scaffolding

Clamp scaffolding is perhaps one of the first types of scaffolding. All their structural elements are connected using rotary and deaf clamps. However, they are quite difficult to assemble.
Based on the foregoing, it becomes clear that the only type of scaffolding that you can prepare with your own hands is wooden scaffolding. Regardless of which scaffolding you choose, do not forget to take care of your safety, the facade mesh will come in handy. Made of high-strength polyethylene, it will not only make the scaffolding safer, but also improve its appearance.
Vadim Burovoy

In any construction and installation work, foremen must take care of the correct and safe placement of workers on construction sites. It is important to follow safety precautions when working at heights.
For the production of construction and finishing works, scaffolding and towers - tours are used. They provide efficient work construction teams and convenient supply necessary materials and tools to the place of work.
What is convenient tower - tour?
One of the main auxiliary devices at any construction site is a tower - round vyshka-tura.com.ua. It is mobile, it is easy to move it as work is being done in individual areas. Such towers can be assembled and dismantled in literally 20 minutes by several workers. The towers have a fairly rigid structure, which ensures their reliability and stability.
The technical characteristics of the tower allow you to work at high altitude and quickly move to another site. Often the tower - the tour becomes necessary fixture in the construction business. However, it is not always possible to purchase or rent it. Advice suggests itself - you can make a tower right size from improvised means.
What materials can be used to make a tower?
The tour, made in a handicraft way, can have the form of a collapsible and non-collapsible structure. Of course, the collapsible version is more convenient to use. When disassembled, it can be easily and compactly transported to different construction sites. Disassembly and assembly will not take much time. And the failed structural elements and fasteners are easy to replace.
Do you know that it is not difficult to make such a tower yourself from the remains of metal elements at a construction site and not spend money on buying a tower - factory-made tours.
For the manufacture of the tower will require the following materials:
- For tower racks, profile pipes with a diameter of at least 30 mm are applicable.
- For stiffening jibs, a pipe with a diameter of 15 mm is required. or a corner with a shelf width of 30 mm.
- For jumpers you can use steel pipe 25 mm in diameter.
- On the one hand, you can adjust the wheels, they will ensure the convenience of moving the tower.
The order of manufacturing the tower - tours
First, from a pipe with a diameter of 15 mm. it is necessary to make segments of 2 meters according to the number of planned sectional platforms of the tower. Each section will need four such segments. The ends of these pipes are flattened for ease of attachment to the main pillars of the tower.
The next step will be the preparation of tower racks. For this profile 30 mm. the pipe is cut into segments of 1.5 and 0.75 m. Small segments will be used to make the legs of the structure, and pipes one and a half meters long will be steps.
In the manufacture of a non-separable structure, all elements are reliably welded by electric welding with a thorough check of the quality of the seams. The distance between the pipes of the steps should not exceed 30 cm. As a result, wheels are mounted to the main racks.
The manufacture of a collapsible tower is a more complicated process and will require special fasteners (clamps or bolts). In addition, to fasten structural elements with bolts, it is necessary to drill many holes in the pipes.
The need for scaffolding often arises both during construction and during repairs, whether it is sheathing or painting the facade or other work at a height of more than three meters. Use of ladders or ladders during work at such a height it is inconvenient and unsafe, and performing some types of work from a stepladder is completely impossible.
The purchase of scaffolding, the installation of which is carried out at the place of work, will require additional costs; upon completion of the work, a place for their storage will be needed. The final cost of transporting, renting, installing and dismantling such scaffolding may be more than the cost of the work that required the installation of such a structure. It should also be remembered that the minimum rental period for scaffolding will be a week - and it is quite possible that the duration of the work will take a much shorter period of time.
Quite possible make scaffolding with your own hands. To do this, you can use boards, the thickness of which should be from 25 to 50 mm. After completing the work, the scaffolding can be dismantled, and all materials can be used for their intended purpose.
Since the work will be carried out at height, do-it-yourself scaffolding require a serious approach to ensure the safety of people working on them. Old, rotten boards should not be used. The consequences can be dire.
If scaffolding is needed for high altitudes, but you have a small budget, then as an option to replace scaffolding with a mobile tower tour or rent scaffolding, not everything can be saved.
Work procedure
For racks, a 50x100 board is used, the distance between the racks cannot exceed 2.5 meters, the width of the scaffolding must be at least one meter, otherwise it will be inconvenient to work.

Racks are fastened with thinner boards, 25-30 mm thick, crosswise. For fastening it is required to use nails not less than 100 mm. Self-tapping screws are less resistant to fracture, their use is undesirable.

At the required level, jumpers are fastened from 50 mm boards, flooring is made from the same boards. From the outside, a board for fencing is nailed.
To increase the stability of scaffolding, it is necessary to arrange inclined stops from the outside or attach racks to the walls of the building.

With your own hands you can make not only scaffolding, it can also be made do-it-yourself tour tower.
If attention is paid to the strength of the structure, work at height can be carried out calmly and without worrying about safety. And the savings can be significant.
This is a truly universal building structure designed for high-altitude work. The main difference between the tower tour and other forests is its high mobility and fairly compact size. All this allows not only to work at high altitudes, but also to move it from one workplace to another in a short time. Sometimes a tour tower is almost indispensable, but what if there is no opportunity to buy it at the moment? In this case, there is only one way out, to make it yourself.
What materials will be needed for the manufacture of tower tours?
Homemade tour can be made in two versions: collapsible and non-collapsible. The collapsible version is better both in terms of transportation and storage. After all, it is much easier to disassemble the tour and bring it into the room when it is not needed, and then reassemble it when it is needed than to store it on the street. For the manufacture of a collapsible tower, you will need the following materials:
Profile pipe with a diameter of 30 mm - tower racks will subsequently be made from this pipe;
A pipe with a regular diameter of 15mm - this pipe will act as oblique couplers for the tower, which will give it higher strength and reliability;
Profile pipe with a diameter of 25mm - this pipe will need quite a bit and all of it will go to create jumpers;
Wheels for tower tours - in fact, they will give the tour high mobility;
Where to start making a tower?
The first step is to cut a 15mm pipe into 2m segments, the number of these segments will depend on the number of tower sections being built. One section will take 4 such segments. Then these segments need to be flattened at the ends, this is necessary in order to make it more convenient to attach them to the tower. In order for them to crumple better, you can make small longitudinal cuts.
The next step is to make racks for the tower, for this you need to cut 30mm profile pipe for segments of 1.5m and 0.74m. Cuts 1.5m long (2 per post) will be the legs of the post, and 0.74m long (4 per post) will be the steps. Then all this must be welded into a single structure so that the distance between the steps does not exceed 30 cm. Also at this stage, the wheels should be welded to the racks.
The next step will be the manufacture of jumpers for the tower, for this we cut a profiled pipe with a diameter of 25mm into segments of 20-25cm, as well as a profiled pipe with a diameter of 30mm into pieces of 4-6cm. Then we thread 25mm pieces of 30mm approximately to the middle and fasten them by welding. The final touch before assembling the tower is to drill a hole for the anchor bolt, which will fasten the ties and racks together.
It is also worth noting that a homemade tour tower is a rather poor alternative to a factory one. It is heavier and less durable and reliable. Homemade towers do not allow you to work at significant heights and this is rather a temporary short-lived tool on which you can work only at your own peril and risk. Therefore, if possible, it is still worth buying a factory-made tour, since they are already not as expensive as before.


Mixed Personality Disorder: Causes, Symptoms, Types and Treatments
GTA 4 control settings
FAQ on Smuggling in GTA Online
LSPDFR - welcome to the police
The huge map of Grand Theft Auto San Andreas and its secrets