6 168 237
Beautiful decorative pillows are able to enliven even the most restrained interior. They bring an atmosphere of comfort, home warmth and allow you to relax. You don’t have to spend a lot of money to decorate your home with them, because you can create these cute decorative elements yourself.
We have selected thematic master classes for you, from which you will learn how to sew the pillow of your dreams. Thanks to step-by-step photographs and detailed description Even a beginner can cope with this.
Volumetric heart made of roses
A handmade pillow can be a wonderful gift. Armed with imagination and a thread and a needle, you can even turn it into a unique Valentine’s card. We are offering to you step-by-step master class making an unusual pillow with a voluminous heart.
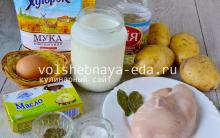
To work you will need:
- ready-made pillow of the desired size;
- fabric for roses, which does not require overcasting the cut;
- scissors;
- needle and thread.
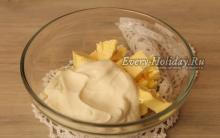
Take the circle of fabric by the middle, gather it, forming folds as in the photo. Secure the workpiece in the desired position with a couple of stitches.
Sew another circle of fabric from the bottom, forming a voluminous bud.

Continue sewing circles onto the rose until you get the desired size flower.

Prepare the remaining roses using the same scheme. Their number depends on the size of the flower heart.

Sew the flowers to the pillow starting with the outline of the heart.

Place the pieces tightly together so that there are no gaps between them. A magnificent heart is ready to conquer and conquer hearts.

This designer pillow will decorate the room of a capricious fashionista or become the highlight of your living room. And she will lift your spirits just by looking at her.

Fluffy pillow
An original pillow with fringe will fit well into any interior. Pleasant to the touch fleece will make it a favorite thing not only in the children's room.
To work you will need:
- fleece for the base of the pillow and fringe;
- filler;
- scissors;
- threads;
- pins;
- sewing machine.

It is better to choose a fabric for fringe several colors of the same range- you will get a stylish transition between them. In our case, we use 10 strips of 37*10 cm in three shades of brown.

Fold each strip in half and cut the fringe.
Sew the first strip to the base of the pillow, 1 cm from the edges. This is the result you should get.

Next, bend the fringe to one side.

Sew a second strip next to it at a distance of approximately 1.5 cm from the first.

Continue sewing the fringe in the same way. Alternate dark stripes with light ones through several rows, achieving a beautiful and smooth transition of colors.

Place a second square on top of the fringed piece and pin along the edges. Sew the pillow around the perimeter, leaving a small hole for stuffing.

Turn the pillow inside out and stuff it with filling. It is better to use padding polyester or holofiber. Natural materials, such as cotton wool and fluff, can clump over time and the product will lose its neat appearance.
Sew the opening with a blind stitch.

It turns out to be a very beautiful sofa cushion that will create an atmosphere of warmth and comfort in your home.

Pillow "Butterfly Wings"
We present to you detailed photo lesson on decorating interior pillows. Even if sewing is not your thing, you can easily master it: you will need a ready-made pillow for the job. Guided by step by step instructions, you will turn an ordinary pillowcase into a masterpiece of art design.Pillow-toy “Owl”
A funny and bright owl is a win-win gift option for both adults and children. When such a cute bird settles in your baby’s bedroom, he will be happy not only to sleep with it, but also to play with it.
To work you will need:
- cotton in two colors;
- felt for eyes and beak;
- black buttons or beads for the pupils;
- ribbon for bow;
- chalk;
- threads;
- needle and pins for sewing;
- scissors;
- lace;
- filler.

Attach the pattern to the fabric and cut out the necessary parts; make an allowance of 1 centimeter for the body and wings.

To decorate the toy, lace, bows and a wooden flower button are used. If you are using a life-size pattern, then cut out a rectangle of 8*16 cm and a square with a side of 4.5 cm for the bow, or change the size of these parts in proportion to the owl.
Sew the beak and lace using a zigzag stitch. The lace is placed in the center of the body, between the wings.

Using the same seam, sew on the wings and eyes. Hand attach the black pupil buttons.

Fold the owl's body parts front side inside, secure with pins and sew. Leave a hole at the bottom between the wings for further manipulation.

Turn the toy inside out, iron it and fill it with stuffing. If you used ordinary scissors to cut out the parts, before turning them inside out, make neat notches near the ears and in all convex places so that the fabric does not tighten.

Sew the hole closed with a blind stitch.
You can do some decorating. Fold the square for the bow into a strip and iron it.
Fold the rectangle in half with the right side facing inward and sew, leaving a 1 cm seam allowance.

Turn it inside out, gather it in the middle and sew on the prepared strip, forming a bow. Sew it to the owl's ear.

Tie a bow from a small piece of ribbon, sew it and a wooden button to the body of the toy.
Such a cute owl will reliably guard your sleep.
Another idea to implement is to sew a respectable eagle owl according to this pattern. It’s enough just to show your imagination and choose the appropriate toy color scheme and design.
Pillow with applique “Cat in Love”
An elegant pillow with a cool applique is a wonderful gift for any occasion. With its help, you can confess your feelings or simply cheer up your loved one.
To work you will need:
- thick white pillowcase 35*35cm;
- cotton shreds in 4 colors;
- white interlining;
- iron;
- 3 green beads for eyes;
- threads to match the fabric;
- decorative braid.

Cut out two rectangles 17*13 cm- clouds around the cat and fish. In our case, they are white with orange polka dots. You can choose the color to suit your taste.
The cat's body is a rectangle 16*12 cm, orange with small white polka dots.
Cut a rectangle from white fabric 20*11 cm. From it you will get the eyes and thoughts of a cat.
Cut out a rectangle 10*5 cm made of green fabric for the body of the fish.
Fold the non-woven fabric with the adhesive side to the wrong side of the rectangles and iron them so that they stick together. This will make it easier to cut out small parts and they will not crumble.

Cut out the blanks for the applique. You can use cardboard templates or immediately cut out parts from fabric.

Arrange the elements on the pillowcase and achieve the desired image. Mark the ground line using decorative tape. Choose the expression of the cat's loving eyes.

When you have decided on the location of all the elements of the application, you can proceed to the last stage. All that remains is to sew them to the pillowcase.
Using a small white zigzag stitch, stitch the outline of the white cloud to the polka dot cloud.

Using a green zigzag, sew the outline of the fish to the prepared two-layer cloud. Embroider the fish's fins and the outline of the head. Attach an eye bead.

Sew the parts of the cat with a fine zigzag using threads to match the fabric. Lastly, attach the eyes and embroider his mustache.

Embroidered paws will add even more charm to the animal. You can complement the applique with small flowers to make the composition more expressive.

The finished pillow will definitely take the crown place on the sofa in the living room and will become the star of your interior.
Scops owl pillow “Sleeping kitten”
Want even more cats? We are offering to you interesting idea for creativity: sew a charming kitten, which by its very appearance will evoke slumber and peace.
To work you will need:
- cotton fabric 3 colors;
- fleece;
- interlining;
- scissors;
- iron;
- filler;
- chalk or special marker for fabric;
- floss threads;
- 2 buttons;
- pins;
- pattern.

Place the body pattern on the fabric, trace and cut it out with a 1 cm allowance. Place the part with the wrong side on the adhesive side of the interlining, secure with pins and cut out. Prepare the second piece of the fleece body in the same way.

Cut out the kitten's paws, ears and tail.

Remove the pins and iron the two-layer body parts so that the cotton adheres to the interlining.

Fold the parts of the ears, legs and tail in pairs with the right sides inward and sew them on a machine, leaving holes for turning them inside out. Cut the stitched blanks with curly scissors or make regular notches.

Turn the parts inside out and iron them, stuff them with filler. Sew the holes with a zigzag. Use pins to attach the resulting pieces to the front side of the cat's front. Sew them to the kitten's body using a zigzag.

Draw the cat's face with chalk.

Place the fleece piece (back) on top and secure it with pins. Sew the pieces together, leaving a small hole at the bottom for turning inside out. Trim the seam allowances with curly scissors or make regular notches.

Turn the workpiece right side out and iron it. Fill the toy with filler and sew up the hole left earlier with a hidden seam.
Sew the upper legs and buttons for decoration to the body.

Embroider the nose and closed eyes with floss threads.

A soft scops owl cat is looking for his loving owner. Everyone will be happy with such a pet. He will happily settle in both a child’s crib and a cozy living room.

Do you feel the strength and desire to create, but still consider yourself a beginner? We bring to your attention an educational video from which you will learn how to sew a funny one yourself cat pillow from a regular pillowcase. An original pattern, a minimum of active actions, a little decor and imagination - and you will get an elegant cat or a mischievous cat.
Using the same principle, you will get a cheerful hare; you just need to make the ears longer.

Download even more funny cat patterns to bring your wildest dreams to life creative ideas. Such cute little animals will be a wonderful decoration for your home or cottage, as well as an original gift for your loved ones.


Dog sofa cushion
Do you think that animals have no place in the house? But you are wrong. You can always have an adorable pillow dog. A cheerful dachshund will happily take its place on the sofa and will not cause you any trouble.A detailed description is presented in our step-by-step master class.
According to this scheme, you will get both a small toy puppy and a respectable adult dog. It all depends on the amount of available materials and your desire.
And if you have a lot of unclaimed pieces and scraps of fabric left, then you can sew a bright dog pillow from them. A patchwork toy with a cute face made using the patchwork technique will become a favorite character in a child’s room.

You can make this toy with your children and have a fun and useful time. And your child will receive his first cutting and sewing lessons.
A collection of pillow workshops + interesting ideas
Heart Valentine's Pillow:Original circles:


Checkered Dog:
Romantic option:
Star shaped:
A few more original pillows for inspiration:


Pillows for children: cats, bunnies, owls, dogs, bears:


Decorate pillowcases with plant prints
An original way to decorate a pillowcase with a floral design is to transfer prints of living fresh grass and leaves onto it. A product with this design will be unique and one of a kind. It will also warm you up on winter evenings with thoughts of warm summer.
To work you will need:
- natural light fabric;
- freshly picked plants;
- hammer;
- scissors;
- parchment, preferably siliconized for baking.

Fern, plantain, and clover are perfect for prints. Pick the plant you need, spread it on the fabric and cover with parchment. Beat it very hard with a hammer so that the juice comes out of the leaves, which is absorbed into the fabric and forms an imprint. Remember: Plants need to be picked on a hard, flat surface.

Experiment with different leaves, stems, and placement to get the look you want.
Review of needlewoman Evgeniya Glovatskaya about the “Fox” pillow embroidery kit from LUCA-S
Article: Article: PB111
Another interim report for Gel
I continue to work on the kit from the Luka-S company, provided to me for testing by the Gela company.
I have embroidered one sheet of the pattern out of six, and I have accumulated a number of observations and comments on this work.
Firstly, the feeling of working with the uniform from the set (it is not indicated on the set itself, but on the Internet it is written that the set includes Fein Floba). It’s slightly prickly to the touch, you can see some inclusions in the fabric, that’s why they might be prickly. And also the weave threads themselves are loose, and sometimes the needle splits them, which affects the evenness and beauty of the embroidered crosses.
Secondly, I again have comments on the diagram. I have already written that the diagram is not very conveniently executed - there are no clear boundaries of the squares that are familiar to me, I had to draw them myself according to the diagram. And also during work, such a feature of the scheme as single crosses was discovered. Those. all the time you have to thread and fasten the thread, embroidering three or four crosses of the same color. Of course, in this scheme such a frequent change of colors is justified; I really like what I’m getting now. But I had to rebuild my usual embroidery style, because neither color-based embroidery nor the parking method are suitable here.
As a result, I now embroider in this way - within a vertical row of 10 crosses, I take the first color in the row, embroider all the nearest crosses with this color (as a rule, these are only a few pieces), then take the next color in the row, etc. Sometimes I climb out of the row if there are crosses of the same color nearby, so it turns out to be a kind of lazy parking with color spots or semantic pieces. Yes, I try to cut the thread so that it is completely enough for the required number of crosses, because... I don’t want to wrap the leftovers around the organizer; it’s not very convenient for leftovers.
And so, I’m finishing the first sheet, I decide to back up right away, so as not to leave a large amount of back up for later, and here a very big complaint about drawing up the diagram is revealed. Judge for yourself, judging by the icons on the organizer, there are two back colors in the scheme. And in the organizer they are marked with different lines. But we look at the diagram - and what do we see? The entire backing is marked with exactly the same simple line and now, in order to embroider it correctly, I will have to check the photo of the stitching on the cover, and this, you see, is not very convenient.
However, I still like this kit, I am still amazed by the colors, the quality of the threads, and the uniformity too, so I really enjoy working on this beautiful fox, looking forward to the process of sewing the pillow. I'll just need more time to work than I planned.


For children fun games, and also for home decoration, do-it-yourself pillow toy patterns will be useful. Such pillows will delight both children and adults, and in addition, they can be a good gift, for example, for a housewarming.
Most often, such pillows are sewn in the shape of cats. Cats are warm pets that bring comfort and peace to the home. They know how to curl up and take a sweet nap on sofas or armchairs, and perhaps that is why soft pillows are associated with these pets.


Pillows in the form of owls and turtles are also popular, but there are also other animals - dogs, hippos, whales, sheep, elephants, ladybugs and even frogs. You can figure out for yourself how to “adapt” your favorite animal under the pillow and make a pattern yourself.


Sewing such pillows with your own hands is not difficult even for a beginner, but skilled and knowledgeable craftswomen only need to “spot” the idea from a photo of finished pillows.


Let's get started
The master class on creating a pillow toy is basically the same for any model. The most important thing is to choose the pattern you like and purchase everything necessary materials. Usually the pillow is stuffed with padding polyester or holofiber.
Tools and materials you may need:
- textile;
- pattern;
- pencil or piece of soap;
- pins;
- threads to match the fabric;
- needle;
- scissors;
- sewing machine;
- additional elements (inserts, patches, stripes, beads).
The fabric can be of any color and texture, the main thing is that it matches the interior and the general mood. It is worth paying attention to its durability: satin and silk pillows are beautiful, but short-lived, especially when playing. Pillows made of cotton and fleece fabric are more durable and comfortable.
You also need to consider how much the fabric collects lint and dust. This may be important for those who have a beloved pet in the house.
You can make a pattern yourself or use an existing one. Usually a figure of the desired shape is drawn (the main part of the pillow) and individual details are added if desired (paws, tail, ears).


A pattern can be made without additional details, the main thing is that the shape resembles the body of an animal. Here, for example, is a slightly modified square pillow, decorated to look like a fox:


Or a pattern in the shape of a bird:

A toy pillow can also be made using simple patterns: a square pillow, decorated to look like some kind of animal. You can “update” an existing pillow with fabric appliqués (muzzle, eyes, antennae) and additional elements (paws, tail), making it a toy.
These pillows have their standard square shape, but look like dogs:


Animal faces are simply sewn onto these square pillows, and now they can turn into toys (using buttons or Velcro):


Of course, you don’t have to limit yourself to just animals. To really turn a pillow into an entertaining toy, just make it in the form of a puzzle. If you fold several well suitable friend to a friend of pillows, you will get a cozy and original mattress on which you can happily lie or sit on the floor.

The pattern and sewing are quite simple.
It is necessary to take into account that if you are using a voluminous, high pillow, then you need to sew all the sides (strip) with a separate fabric. But you can also sew a simple double-sided pillow.


When creating any pattern, of course, you should take into account seam allowances to ensure the pillow is the desired size.
How to sew:
- We make a pattern, taking into account all the details, and cut it out;

- We transfer the pattern to the fabric: pin the parts to the wrong side of the fabric and trace with a pencil or a piece of soap (depending on the color and texture of the fabric);

- We cut out the parts from the fabric, taking into account allowances (1-1.5 cm);
- We sweep the parts along the edge and sew them on a machine (you can do it by hand), leaving a small unsewn space (usually at the bottom);

- We turn the parts right side out through the unstitched area and fill them evenly with filler (usually padding polyester) to the required volume;

- We sew up the hole with a hidden seam;
- We sew the necessary elements on top or embroider them (nose, eyes, mouth).
The toy pillow is ready!

It is worth paying attention to how to sew additional parts to the pillow. There are two ways:
- on top of the finished pillow with a hidden or regular seam;
- sweep along with the main seam from the wrong side.
Here, for example, are the owl’s paws sewn on top:

And here are the pillows with muzzles sewn into the outer seam:

Additional details do not need to be stuffed like a pillow. You can leave them without padding at all or add some volume with a small amount of padding polyester.
To make it more convenient to sew parts on top (appliqués), you can do this in advance - after cutting. It is better to sew buttons, beads and sequins last on the finished pillow.

Video on the topic of the article
A selection of videos on how to make pillow toys.
Interior pillow "Fox" (MK)
I offer a master class on making a Chanterelle pillow using a simplified patchwork technique.
For this we need:
1. Pattern of the front part of the pillow in full size. In the master class, it is given on 4 A4 sheets; the dimensions can be varied at your discretion, increasing or decreasing the image scale using a computer program convenient for you.


PATTERN DETAILS:
1. Right ear - 2 parts made of black fleece.
1a. Eyelet pad - 1 piece made of orange fleece.
2. Left ear - 2 parts made of black fleece.
2a. Eyelet pad - 1 piece made of orange fleece.
3. The middle part of the muzzle is 1 piece made of orange fleece.
4. The right side of the muzzle - 1 piece made of white fleece.
5. The left side of the muzzle is 1 piece made of white fleece.
6. Blouse - 1 piece made of cotton with leaves.
7. Pants - 1 piece made of plain cotton or flannel.
8. Upper part of the tail - 1 piece made of orange fleece.
9. Tail tip - 1 piece made of white fleece.
10. The wrong side of the pillow is 1 piece of knitted fabric with polka dots.

There is a simplified version here, but you can make both sides of the pillow “foxy”. To do this, you will need to cut out all the details (except for the ears) in a mirror image.
2. Small scraps of different fabrics. In our case, white and orange fleece for the head, ears, and tail. Pieces of American cotton or flannel for a blouse and pants, scraps of felt or pieces of black fleece for the ears, a button for the nose.
Suitable fabric for the back of the pillow. In our case, it is cotton jersey.
Options are possible - the pillow can be made entirely of felt, for “clothes” you can use a variety of fabrics or knitwear, the nose can also be made of felt, a piece of leather, or simply embroidered with thick black threads.
So there is room for your imagination here - everyone can get their own, unique Chanterelle.
3. Any adhesive seal, since the pillow is still made of cotton, and fleece is not very dense. If you sew a pillow from felt or woolen fabrics, you don’t need a seal.
4. Any filler to your taste.
5. Sewing machine, needles, pins, threads, scissors, iron - of course.

So let's get started.
Let's copy the pattern onto tracing paper. Let's cut out the details.

From orange fleece we cut out a muzzle, part of a tail and a couple of “overlays” for the ears. Every detail is in one copy!

We leave seam allowances around each piece - 1 cm around the entire perimeter of the pieces.

Both cheeks and the tip of the tail were cut out of white fleece, 4 pieces in pairs for the ears were cut out of black fleece, a blouse was made from fabric with leaves, and pants were made from plain fabric.
This is the set of cut parts you should get. You can now put the parts in the right order and admire the intermediate result a little.

Now we will glue all the parts with non-woven fabric from the wrong side.

And we'll cut them out.

Let's start assembling - our parts are mostly curved, so we can't do without a mark. We sweep away the details of the tail.

And faces.

After marking the parts of the tail and muzzle, we grind them together on a machine.

We align the orange fleece ear pieces onto one black fleece ear piece. Then we fold both parts of the black fleece ear with the right sides facing each other, grind, turn inside out and iron the finished parts of the tail, muzzle and ears.
We smooth out the seam allowances “in a spread” so that there is no excess thickness.


We do the same with the details of the blouse and panties.

And we get this “picture” from semi-finished products.

Now we sweep away the parts of the pillow and grind them together.


Our ears will be a “flyaway” part, so we baste them to the head part with the front side (with orange adjustment) facing the front side, the sections of the ears pointing up.

At the same time, we embroider the eyes with a “forward needle” stitch. This photo clearly shows what position the ears will take after finishing the work.

So, the details of the front side are assembled together, the seam allowances are pressed. Place the front side of the pillow on the back side and pin along the edges. Don't forget to put your ears inside!


Dua for Sadness Anxiety and Depression
Buddhism: the basics of religion, how many Buddhists are there in the world
Obligatory prayers: features and order of performance by men
Druid horoscope by date of birth: interpretation and features
What is oregano: all about the amazingly healthy seasoning!