Currently, any user of the World Wide Web can get himself an email account, because it is very simple to do this. It is quite another matter which resource to choose for this. Most Russians use services from or, but foreign users are increasingly registering on Gmail.com. For those who are not in the know, this is an email service owned by the most famous search engine in the world, Google.
It is worth noting that mail from Gmail is very convenient and thoughtful. However, in our opinion, the greatest charm of this service lies in the fact that there is a so-called two-step identification, which allows you to link your email account to your mobile phone. Therefore, no one but you will be able to read your letters, since in order to enter mailbox, you must first enter the code that came to the cell. For those who keep valuable information in the mail, this is a very important service.
Free mailbox registration
Now let's move on to registration. Go to gmail.com and click "Create an account". It either looks like this:

Either like this:


What is your name. It is easy to guess that here you must indicate your first and last name. Whether they should be real or fictitious is up to you, however, we believe that it is better to indicate real data, as this is not only more convenient for your interlocutors, but will also help restore mail in case of loss of access to it.
Come up with a username. You have to come up with a nickname (), which you will use for authorization in the mail. It's worth noting that most "simple" logins are already taken by users, so you'll probably have to come up with something special. We hope this won't be a problem.
Create a password. The password must be complex. Do not try to use simple qwerty or 123456 types - attackers pick them up very quickly. You can create a complex password in this way: take Russian word, for example, "Mowgli". Write it in the English layout - you get Vfeukb. Amazing. Now add some numbers and symbols here, something like this: %?Vfeukb1975. We received a password of 12 characters, which is very difficult to guess. And if you use dual authorization, then it will be simply impossible to get into the mailbox.
Confirm the password. Enter the password above again in the field.
Date of birth, Gender. Whether or not to include this information is up to you.
Mobile phone. At this stage, adding a cell number is optional.
Alternate address Email . If you have another mailbox, you can specify it. In case of loss of access, all the necessary information will be sent to it.
Prove you are not a robot. Proving this is easy - you just need to enter a captcha, which, however, is not so simple. However, after a couple of attempts, you will probably be able to enter incomprehensible characters.
The country. Here you need to specify the country of residence, although it is usually automatically set for your region.
NECESSARILY check the box next to "I accept the Terms of Use ...", because without this it is impossible to continue registration.
After all the information is filled in, click on the "Next" button. Congratulations, registration is complete!
In the next step, you will be asked to add your photo, but you can choose not to do this - as you wish.
In order to enter the mail, at the top of the page of the same Google, click on the icon in the form of dots, and then select the mail service.

Dual Authorization
And now we got to the most interesting. Now we will tell you about how to enable dual authorization so that no one but you, of course, can get into your mailbox.
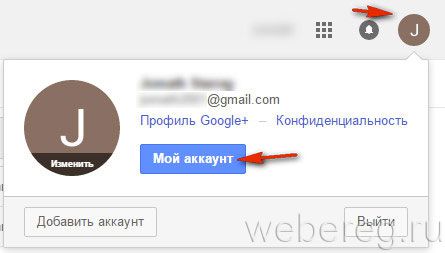
On the right side of the screen, you can see the avatar. Click on it and select "My Account" from the drop-down menu.


Enter your phone number and follow the instructions.

Finally, I would like to remind you that it is highly desirable to use only the one that is issued in your name as a phone number. If you lose this phone, you are unlikely to be able to regain access to your account. Be careful!
Google Mail (mail.google.com, gmail.com) - free e-mail from the leader of IT technologies, Google (Google). Thanks to high level security of personal data and friendly interface is very popular with users from all over the world.
In the fall of 2012, Gmail.com managed to surpass its main competitor, Hotmail (Microsoft), in terms of the number of users. At that time, more than 420 million people created their account in Gmail.
Google Mail service (gmail.com) supports two-step authentication, which reduces the risk of account hacking, and a block for 24 hours in case of detecting unusual activity in the profile. Blocks spam messages. Creates backups correspondence with other users. Transmits data through a secure (encrypted) channel using common protocols (IMAP, POP3, SMTP).
To register with gmail.com, follow the instructions below.
Attention! The mail account can be used for authorization on other Google services (Photos, Drive, Maps, News, YouTube, etc.).
Registration
1. Type in the address bar of the browser - gmail.com, and then follow the link "Create an account". Or go to the page - www.google.com/intl/ru/mail/help/about.html.
Advice! If you are using the Google Chrome browser, on its home page, click on the "Mail" icon (located at the top right). Next, to register, fill out a special form.

2. "What is your name": your first and last name.
3. "Come up with a username": login to log in. When compiling it, for convenience and quick memorization, you can use your last name, initials, date of birth or registration.

Advice! If the service reports that the login you created is already in use by another user, use one of the generated character combinations in the "Free" line to speed up the registration procedure. Click on it with the mouse to move it to the field.
4. Make a complex password, at least 12-15 characters long, consisting of lowercase, uppercase English letters, numbers and special characters (&, #, @, $, etc.). Enter the password in the lines "Think up ..." and "Confirm ...".
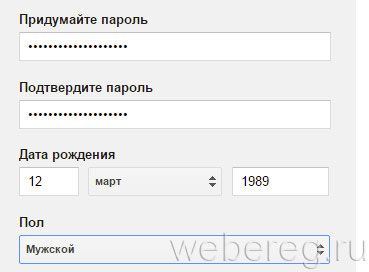
5. Date of birth: type the date and year manually, and select the month from the drop-down list.
6. Gender: open the menu, set the appropriate option (male, female).
7. Mobile phone: in the list, click on the country in which you live to display its international code. Then enter your mobile number.

8. Specify the address of the alternate email (if any). It may be needed to restore access to the mail service profile in case of password loss.
9. Prove that you are a person, not a bot (a program that performs registration without user intervention): type the symbol combination shown in the picture. If it is hard to see, click the Refresh button next to it (the closed arrow icon).

10. Check the box in the add-on "I accept the Terms ...".
Verification
1. On the "Confirm account" page, click the mouse to select the method of receiving the verification code: SMS or voice call.

2. Click Continue.

3. Dial the received verification code and click "Continue".
If all the steps in the instructions are completed correctly, a page with your mailbox profile will open in the browser.
Gmail settings
1. To open global options, left-click on the account avatar in the upper right panel (by default, it displays the first letter of the email address). And then go to the "My Account" section.
2. Mailbox management (viewing letters, spam filter, sending messages, trash, etc.) is carried out in the vertical menu located on the right side of the profile.

Advice! To send an email, click the "Submit" button. Click "More" in the list of options to learn more about gmail's additional features.
Authorization
1. Open the page - www.google.com/intl/ru/mail/help/about.html, click "Login".
2. Enter the mailbox address in @gmail.com format, click "Next".


Enjoy using the Gmail mail service!
By registering and logging into Google mail (Google), it becomes possible to synchronize all services search engine: Youtube, Play market, Google Plus etc.
Google mail itself is one of the best among electronic Internet services. All the technical capabilities of the company were built into its functionality as basic and additional tools. By registering and creating your own mailbox in Google, you can combine mail correspondence with the service Documentation, upload files to Disk, with dedicated 10 GB disk space and more.
Google email is one of the most secure email accounts. All correspondence undergoes continuous checks for the presence of virus programs and identification of participants who produce spam mailings. The most advanced technologies for encrypting transmitted information are also used here.
It should also be noted the high technological support for the protection and recovery of accounts. Faced with the problem of losing a password, you can easily resume access to personal mail, through the automatic recovery mechanisms created for this, taking into account all available additional means of user communication.
To enter your Google mailbox, you can use the link:
After entering the login and password from the mail, it should be noted " Remain in the system" if you want to perform subsequent automatic login to Google mail.

After that, the account will be displayed in the right corner on the Google search engine page. 
When entering a username and password, you should pay attention to the included language keyboard layout and "Caps Lock" (uppercase or uppercase letters). You can also try entering the password in notepad, for example, so that it is clearly visible and just copy and paste its line.
Registration in Google mail (Google)
To register Google mail in Russian and create your own email account, you must follow the link:

Password recovery from Google mail (Google)
Having all the most advanced technologies for protecting personal data and user accounts, this mail service provides all the possibilities for recovering a password from Google mail in automatic mode:
- To do this, follow the link " Forgot your password" on the login page;

- A page will open with a selection of the current problem, where you need to select " I do not remember the password", enter your email address and click " Proceed";

- here you need to enter the password that you managed to remember and click " Proceed". The system recognizes the similarity of the entered password with the valid one and the course of further actions will depend on this.

If during registration an additional mail address or number was entered mobile phone, then the problem of recovering the password for Google mail will be immediately solved by sending the activation code. In this case, the system recognized that the access was from a mobile device and offers to send a confirmation to it.  If you didn't use a mobile device and didn't enter your phone number or secondary email, you'll be prompted for a step-by-step recovery by entering your personal information.
Having returned access to your Google mail (google), it is better to play it safe and save a strong login password on a non-system drive (except drive C), since in the event of an emergency system reinstall, the file can be deleted.
It is most reliable to enter additional means of communication: mobile number, additional e-mail address. This will greatly simplify the recovery process. Opportunities for additional account protection through phone notifications will be offered. If suddenly there are suspicious login attempts from an IP address that has not been used before, then a warning will come up about this. Also, the account may be subject to temporary blocking if the system suspects mail hacking attempts.
Notifications of received emails without logging into Google mail (Google)
There are special add-ons that are installed in the Google Chrome browser in order to receive notifications of sent correspondence without entering Google mail (google).
These add-ons include, for example, Checker Plus for Gmail. After installing it in the browser, in the right corner of the panel, the mail icon and signals of events that have occurred in Google mail will be displayed. 
Features of this application:
- detailed information about the received correspondence, messages or calls in the chat;
- notification without turning on the browser. There is simultaneous support for multiple mailboxes;
- connecting an additional notification, as well as managing your Google mailbox using your voice. Also, in its settings there are many additional options that are customizable for personal needs.
Google is expanding widely on an impressive scale, to a greater extent - abroad. There, most of the services are already very popular and simply necessary. Many interesting developments were bought by this Internet giant, for example, YouTube video hosting and the Android operating system. All available sections and services of this search engine require synchronization. Therefore, entering and registering in Google mail (Google) are very popular not only abroad, but also in the CIS countries.
The opening of Gmail email from Google was initially perceived by many people on the Internet as an April Fool's joke. After all, the launch date of the service fell on April 1, 2004. Rumors about the appearance of the second serious project of Google after the creation of the search engine alarmed the Internet community just a day before. But despite the "motley" opinions, this event heralded the era of a new generation of online mail. Today, more than 1 billion people from all over the world, when establishing communications with friends, comrades, business partners, say: “Send a letter to my Gmail, here is the address… ".
The development of the electronic service was carried out for three years. Paul Buckheit, the author of the project, began work in August 2001 at the behest of Google's management. However, according to Backheit, he made the first developments of online mail without a system application back in 1996.
In the process of creation, the Google mail service was given the name Cariobu. So it was named after the utility created by Backheit to search for letters in his own mail. Actually, at that time this function was a proprietary feature of Gmail (now there are much more of them).
For the first two months, Paul pored over the mail code on his own. And then with assistants. By 2004, the team of creators of the Google mail service had grown to 10 people.
Throughout its history, Gmail has undergone various metamorphoses - both in code and in external design. Now he wears honorary title one of the best emails on the web.
From this article, dear reader, you will learn how to log in to Google mail on a computer and mobile devices based on Android and iOS operating systems, how to use additional applications for monitoring emails.
Gmail on desktop
1. To log into your account, open the page in your browser - https://mail.google.com/mail/.
Note. If you're using Google Chrome, open a new tab and click on the block squares button. And then select Gmail from the tiled menu that opens.


3. To enter your account, type your login (email address) - "name"@gmail.com. Click next.

Enter your password and click Login.

Monitoring of incoming messages
If you use e-mail throughout your workday, turn on the desktop notification feature. As soon as a new email arrives in your account, a Gmail.com pop-up alert will appear on the display.
This setup is done like this:
Note. First of all, you need to log in to your account (login).
1. In the top panel, on the right, click the "Gear" button.

2. Select Settings.
3. On the "General" tab, in the "Desktop Notifications" section, click on the radio button next to the "Turn on new mail notifications" setting.


Working with your account offline
(manual for Google Chrome)
This option is indispensable when you need to read received messages in a mailbox on gmail.com in the absence of an Internet connection. It is configured as follows:
1. You need to open in your account: the "Gear" icon (the "Menu" button in the upper right corner) → Settings.

2. Click the "Offline" tab and click the "Launch Gmail Offline" link.

3. On the tab that opens, click the "Install" button to connect the add-on for viewing letters offline to the browser.
4. In the modal window, confirm the command: select "Install Application".

5. To view received emails without an internet connection:

- in the panel, click "Services";
- in the tab that opens, select "Gmail Offline";
- click on the "Enable offline mail" option;
- to login to your profile [email protected]) through the addon, click "Continue".


7. To manage correspondence, click on the “arrow” icon next to the “gear” at the top right. And then click the mouse to select the desired function (for example, enter "Unread").

Browser addon Checker Plus for Gmail
(for Google Chrome)
Allows you to read new emails from gmail.com without opening profile tabs. Supports managing multiple accounts. Uses only the required data. Does not send confidential information to third parties. Gives the user the option to enable voice or sound notification when a new email arrives.
Displays photos of contacts (plus, you can attach your photo to the selected contact). Perfectly controls messages by tags. Able to work in the background: even when the browser window is closed, the notification system will still work. Has a page zoom setting. Additionally, it can be used as a widget for the "Awesome New Tab Page" extension.
To set up an addon checker for your gmail.com profile, do the following:
1. Press the Menu button (three bars) in the browser bar.
2. Go to: section "Settings" → "Extensions".
3. At the bottom of the list of connected addons, click the "More extensions" link.
4. In the online store, in the "Search ..." line, type Checker Plus for Gmail.
5. Go to the application page and click "Install".

6. After connecting, a checker icon will appear in the right corner of the browser. Click her.

9. Click the addon icon again and start working with email.

Gmail on Android devices
To work in a mail account Google service Android mobile devices use dedicated apps. Let's get to know them better.
gmail
"Native" messenger service - created by Google Inc. Simple, reliable. Instantly notifies you of incoming emails. In it, you can not only read messages, but also send them. Supports offline work. Equipped with internal search (by address, word). Automatically sorts mail by addressee (advertising letters, social media). Reliably protects against spam emails: filtered messages are automatically transferred to the Spam folder. Can work with multiple accounts. Including with profiles of third-party services that support the POP / IMAP protocol - Mail.ru, Outlook.com, etc.
1. From the home screen of the device, go to the market mobile applications Google play.
2. In the search line, enter a query - Gmail.
3. Go to the messenger page. Tap "Install".

4. Allow the application to access device data (identity data, contacts, files and photos): in the window that opens, click "Accept".

5. When the download and installation is complete, tap "Open".
6. In the messenger window, launch the "Go to Gmail" command.

7. Use the vertical menu and top button bar to manage messages.

inbox
A worthy alternative to Gmail. Also developed by Google. Designed to eliminate user stress from a huge flow of emails. Keeps important messages in plain sight and gets rid of information junk. Analyzes correspondence using "smart" algorithms. Informs everyone important events: without opening the profile, the user can find out about the status of the parcel delivery, transaction confirmation, flight delay.
Automatically groups emails by tags and thus supports perfect order correspondence. It has a reminder function and postponing the reading of letters until a specified time. Supports instant email search on request: very useful when you need to retrieve ticket details, find a friend's email. 100% integrated with Gmail: same user-friendly interface and powerful spam filter.
1. Search the Google Play store for the Inbox by Gmail app.

2. Tap "Install", and then "Open".
3. Click the "three bars" (button on the left side of the top panel) to open the application control panel (message categories, Spam folder, options).

4. Tap "Settings" to change the options of the messenger (notifications, deletion, shortcuts, etc.).

Set up Gmail on iOS (iPad, iPhone)
In the iOS operating system, connection and authorization in the account of the Gmail mail service is carried out by regular means:
1. Click the "Settings" icon on the gadget's desktop.

2. In the panel, select the "Mail, Contacts, Calendars" section.

3. By touching your finger, launch the command "Add account ..." (Add Account).
4. Select Gmail from the list of services.


7. In the panel that opens, if necessary, you can enable the options "Calendars" (Calendar) and "Notes" (Notepad).

9. Go to the home screen. Click the "Mail" icon.

10. In the window that opens, tap Gmail to go to your mail service account.

Enjoy using Gmail!
Hello. Today I will tell you what is Gmail.com mail login. If authorization on Google mail is unsuccessful, it will not be superfluous to try to recover the password. To get started, go to the site - accounts.google.com (preferably do this from the device from which you last successfully logged into your account). Authorization pages offer their users the opportunity to change the language, choose the most comfortable for you and get started!
Then you need to find the link: "Can't access your own account?", And, after going through it, enter exactly the email address that caused problems with authorization. Here you will also need to confirm that you are not a robot by entering a verification code.
Very often, the solution to the problem is a simple password recovery. How to do this, read the next article.
The resulting page offers a list of different options for restoring access. If you have one more email address in the settings, or a phone number, then the recovery procedure is greatly simplified.
Check if cookies are enabled for this site
Cookies are files that help the web browser remember the client's settings on a specific resource, while saving its configuration and collecting statistics. Now virtually all sites require these files. For this reason, in order to check their availability for Google Mail, you need to open your browser settings and enable them. We invite you to consider the process of enabling them in three popular browsers, such as: IE, Firefox, Google Chrome.
- Enabling cookies in Internet Explorer. First you need to go to the "Control Panel", in the same place find "Internet Options". Click on the "Privacy" tab, then "Advanced". In the resulting window, you will need to check the "Override auto-processing of cookies" checkbox, and set the "Accept" markers on both the main and third-party files.
- Enabling Cookies in Mozilla Firefox. First of all, open the browser, go to the settings. There, find the "Privacy" tab. Find the block with the history, where you will need to click on the last item from the drop-down list "will apply the settings to save the history." On top of that, check the "Accept cookies from sites" box. Close the settings window by clicking the "OK" button.
- Enable cookies in Google Chrome. Open the browser, then follow the "Settings" (in the upper right corner there is an icon with three stripes, after clicking on it, a window appears in which you can find the same settings).
At the bottom of this window is the subsection "Additional settings", go into them and click on "Personal data", and then - "Content settings". In the resulting window, check the box under the item “Allow saving local data”. Finally, confirm the configuration by clicking on the "OK" button.
Once you've cleared cookies, you can also clear your browser history and cache. As a rule, the history of visits becomes so large that performance is significantly reduced, and certain functions stop working altogether. We suggest you take a closer look at deleting history in popular browsers.
Clearing browsing history in IE
First you need to go to the "Service", then hold down the "Alt" button. As a result of this, a menu will appear, in the list of proposed items, select "Delete browsing history". In the resulting window, you will need to mark the items that you need to delete. It remains only to confirm your actions by clicking on the appropriate button. Made!
Clearing browsing history in Mozilla Firefox.
With this browser, it will be somewhat easier: you just need to hold down the key combination "Ctrl + Shift + Delete", in the resulting window, select the items that you need to delete. It is important to systematically clear the cache and browser history. By the way, at the end of the removal procedure, you will need to go back to your profiles on the sites.
Clearing browsing history in Google Chrome.
The removal process in in general terms the same as with other browsers, but there is one caveat: upon completion of this procedure on one of the devices, the history is deleted on absolutely all devices from which authorization was made to the Chrome account. So, open the web browser menu, go to the "Tools" tab. On the resulting page, select "Clear browsing data". In the window that appears, select the items you want to delete.
Along with this, it will not be superfluous to see what extensions are installed in the browser. If you find extensions that are unfamiliar and unnecessary, it is better to remove them, as they (to some extent) reduce the performance of the browser.
Following our advice, you can easily solve the problem with authorization on any site.
Gmail.com mail entrance to the mail
If you were not registered with Gmail, you can fix this on the site - mail.google.com. On the right side, click on the "Create an account" button.
You can create your own profile in this system in 3 steps.
The first step involves filling out a questionnaire.
- Write your first and last name. An electronic mailbox, as a rule, is created for a long time. Moreover, it activates mobile devices running operating system Android. If you need an additional email address, it is better to use the services of mail.ru.
- Choose a login name. This step is not the easiest, as choosing a name takes users a lot of time. For example, such names as artem, andrey, etc. are already in the database. It's good that the system is fully automated, so you only need to substitute your option, and it will tell you whether you can use it or not.
- . Its length must not be less than eight characters. Try to make it different from those that you have installed on other portals.
- Confirm the password. The site needs to make sure that you really remember the password you set. Important: the password must include Latin characters. Due to the wrong keyboard layout, errors often occur, so be careful.
- Enter your date of birth.
- Choose a gender.
- You can write your phone number for security purposes account. If it will store an important confidential message history, then you can set up a two-step authorization by entering an SMS message. Along with this, if you forget your password, you can easily restore it using your mobile phone.
- The reliability of the protection system will increase significantly if . Let's say your primary mailbox is hacked into doing their nefarious deeds, and notifications are sent to your secondary email address.
- You can check the box next to Make Google My home page y" if you want this search engine to be displayed on the main page when the browser is opened.
- After that, you need to pass a check that distinguishes spam robots from real users. This is an absolutely simple task, and it is completed quickly.
- Item "Country": select the place of residence.
- Check the box to sign agreement with the rules for using this system.
- If in the future you intend to actively use Google+, then it will not be superfluous to check the box “I want to see what is recommended by ..”. Thanks to this, you can see what your friends recommend to you.
This is all that is needed for the survey. Click on the "Next" button and proceed to the next stage of registration.
At the second stage, if you wish, you can choose an avatar.
That's all for me!


Sun skirt: types and how to wear it Black sun skirt with a T-shirt how to wear
Ground bird cherry Ground bird cherry cook
Own business: production of chips
How to care for your skin in spring Face masks in spring
Seizures in the corners of the mouth: causes and treatment in adults and children