The best way to protect your photos, messages, and other data from deletion is to back up your iPhone and iPad.
Your iPhone or iPad stores photos, messages, health information, documents, settings, and more. To put it another way: all of life. All this is important and very expensive, so they should be treated accordingly.
Before updating the firmware, be sure to back up all device data. You should also update your backup regularly, just in case your device gets stolen or you .
What is a backup?
Backup iPhone or iPad- contains device settings, application data, iMessages and SMS messages, ringtones, health data, all entries from the phone book, as well as the configuration of the Smart Home function. Photos and videos are only saved if iCloud Photo Library is turned on on your iPhone, iPad, and computer.
What to use for iCloud backup or save a copy on computer via iTunes. You decide! The main difference between these methods is where the backups are stored. With iCloud, your backups are stored in Apple cloud storage, while iTunes stores them locally on your Windows or Mac computer.
If you store an iPhone or iPad backup in iCloud, then you will always have access to it using Wi-Fi. To back up your device with iTunes, you need to connect it to your computer regularly. Both have pros and cons.
Backing Up Your iPhone to iCloud
How to enable backup in iTunes
If you don't want to store device backups in iCloud, you can store them locally on your computer.
- Connect your device to your computer.
- open iTunes.
- Press device icon next to the category drop-down menu on the left side of the iTunes window.
- In the sidebar select " Overview«.
- Select " This computer” in the “Make copies automatically” section.
- Check the box " Encrypt local copy“, passwords, health data and Smart Home settings are saved only in encrypted form.
You will need to come up with a password to protect the encrypted backup. The password is automatically saved to the keychain.
7. Click " Ready«.

How to Manually Back Up iPhone or iPad to iTunes
If the backup feature in iTunes is turned on, the program will automatically create backups when you connect devices to your computer. You can also manually back up your iPhone or iPad whenever you want, as long as it's connected to your computer.
- Connect device to the computer.
- open iTunes.
- Press device icon next to the category dropdown menu, on the left side of the iTunes window.
- In the sidebar select " Overview«.
- Select " Create a copy now” in the “Manual Backup and Restore” section.
- Click " Ready«.

Questions left
If you still have questions about how to back up to iCloud or iTunes? Ask them in the comments and we will help.
Updated October 2018: Updated content to reflect changes in iOS 12. Answering a popular question from my readers: "What data does iCloud backup include?".
Have you ever had a situation in your life when, after losing your phone, you suffered for a long time trying to restore the phone numbers of your friends and acquaintances? Yes-ah-ah ... There was a time when this procedure took a lot of time and effort.
Personally, I additionally kept a paper notebook where I added new contacts. It was my personal wooden “backup storage”. But that was in the past... And today I'll tell you how to backup an iPhone and what it is.
Ever since Apple gave users iCloud service, creating an iPhone backup has become unbearably easy. Now data backup from your phone happens automatically and practically without your participation (you need to set everything up once, of course).
All important information from your iPhone can be stored both on your computer and in the cloud, and you can restore it with one click. Today we are going to take a look at the two most common ways to back up an iPhone.
Backing up iPhone to iTunes
The widest possibilities for creating an iPhone (iPad, iPod) backup are available in iTunes. You can make a copy like this:
- STEP 1 - Connect your iOS device to your computer using a USB cable.
- STEP 2 - Select the connected device in the top line of the iTunes window.
- STEP 3 - In the right part of the window, select the location of the copy to be created: iCloud or This computer. Check the box next to it if necessary. Encrypt iPhone backup, but remember that if you forget your password, you will never be able to recover data from this copy.
- STEP 4 - Press the button “ Create a copy now“.
As you may have guessed, a copy can be stored both on a computer and in the iCloud cloud (5GB on Apple servers is provided for free). Which one you choose is up to you, but I personally keep a copy of my iPhone in both places.
Backup iPhone to iCloud
Make a copy if necessary iCloud storage only, you can not bother with connecting the phone to the computer. It is enough to enable the backup function in the menu Settings > iCloud > Storage & backups > Copy to iCloud.
After that, a copy will be created automatically daily, but only if your device:
- is in screen lock mode;
- connected to an Internet Wi-Fi connection;
- connected to a power source.
To create a backup copy manually, go to the menu Settings > iCloud > Storage & copies and choose the item Create a copy. Do not forget that for this we again need a Wi-Fi connection to the Internet.

What information is backed up
Your iOS device stores a lot of different information. Depending on the selected backup path (iTunes or iCloud), copies will be created slightly different in content.
When you back up your device to your computer using iTunes, you save:
- Pictures from the Camera Roll Album and Wallpapers
- Contacts and call history
- Messages (iMessage, SMS and MMS including images and videos)
- Notes
- Safari Bookmarks, Cookies, History, Offline Data, and Currently Open Pages
- Email accounts (messages will not be copied)
- Dictaphone recordings
- App Store app data (excluding the app itself and its temporary and cache folders)
- Program settings, settings, and data, including documents
- In-App Purchases
- Game Center account
- Installed profiles
- Calendar events
- Autocomplete for web pages
- Network settings (Wi-Fi hotspot passwords, VPN settings, network settings)
- Home Screen Location
- Keychain Access (email account passwords, Wi-Fi passwords, web and app passwords)
- Location service settings
- Maps bookmarks, search history, and current location shown in Maps
- Saved workouts and settings on Nike + iPod
- Paired Bluetooth devices
- Trusted hosts that have certificates that cannot be authenticated
Once again for those who did not read carefully. An iPhone backup (however you create it) will not contain the applications and programs you installed. Only the settings, options, and in-app purchases for each app taken will be saved. All apps will be redownloaded from your hard drive or the App Store as part of the device recovery process.
iPhone backup, saved to iCloud, contains less information and will be limited to data and settings stored on the device.
into her NOT INCLUDED data already stored in iCloud (contacts, calendars, bookmarks, emails, notes, photos, and documents saved to iCloud from Mac and iOS apps).
If you want to dig deeper and decide for yourself which app data to back up, you can do it here: Settings > iCloud > Storage & copies > Storage- choose a device.
You will see a list of all installed applications indicating the amount of information stored in the copy. Disable programs that are not afraid of losing data (at your discretion).


Where is the iPhone backup stored
When , Apple " generously endowed” Get you free 5GB of iCloud storage and backup. To be honest, this volume is still enough for me (iPhone 4S + iPad mini 2), despite the fact that I use my devices as an average person.
Most of the backup will consist of photos and videos you have taken. I do not have the habit of storing pictures taken 2-3 years ago in the iPhone's memory, but periodically. This frees up the phone's memory, and backups are very democratic in size.
If everything is somehow virtual with iCloud backup, then the copy created on the computer can really “feel and feel” on the hard drive. To access the backups stored on your computer, you need to iTunes settings select tab Devices.

Depending on the operating system you are using, backups are located in the following folders:
- Mac: ~/Library/Application Support/MobileSync/Backup/
The tilde character (~) corresponds to the user's folder. The default folder is " Library» is not visible. To display it, click on the top menu Transition and press the button Option– the Library link will appear in the menu that opens - Windows XP:\Documents and Settings\(username)\Application Data\Apple Computer\MobileSync\Backup\
- Windows Vista, Windows 7 and Windows 8: \Users\(username)\AppData\Roaming\Apple Computer\MobileSync\Backup\
How to restore data on iPhone from a backup
Since the iPhone backup can be stored in different locations, the iPhone restore process can be done in different ways. Actually below I also offer them.
Restoring from a backup using iTunes (the copy is stored on the computer):
1 Connect your iOS device to the computer where you created the backup
2 Click on the device icon (should appear at the top of the window)
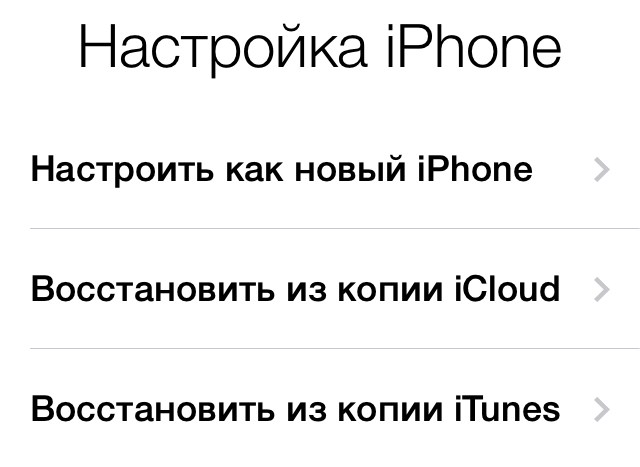
3 In the right part of the window, click the " Restore from copy"(See the screen at the beginning of the article)
Restoring from an iCloud backup (copy stored in the cloud):
Two situations are possible here:
1 Data is restored to a new device
. When you first start the device, you will be taken to the screen " iPhone (iPad, iPod) setup". Here you need to select " Restore from iCloud copy”, then select one of the last three backups and enter your Apple ID and password.
Backing up your iPhone and iPad is extremely important. Regularly creating a copy of all the data of a mobile device allows you to protect them as much as possible, as well as get the opportunity to restore the gadget in case of theft, loss, breakage or change. Most iPhone and iPad users are aware of this and make copies of their devices from time to time. However, recent surveys in our group "In contact with" showed that the percentage of those who know about the need to create backups (backup copies) is still far from 100. That is why we wrote this guide, which is extensive and covers various methods for creating iPhone and iPad backups, including non-standard ones.
Why Back Up Your iPhone
So what is a backup and why is it needed? In the simplest terms, a backup is all data from your iPhone stored on a computer or in cloud storage in encrypted form. A backup is needed in order to, if necessary, restore any data previously available on the iPhone. Recovery may be needed in a variety of cases, but most often with:
- Lost or broken iPhone. By having a backup of your device in advance, you can restore all your data to another iPhone.
- Having problems with iOS. Updating an iPhone doesn't always go smoothly. In rare, but, alas, occurring cases, after the update, the iPhone simply does not turn on, requiring recovery. By backing up ahead of time, the restore process will not only restore the functionality of your iPhone, but also all of its data.

- Buying a new iPhone. Thanks to the backup, you can very quickly apply all the settings of the old iPhone to the new one, as well as move all applications, photos and other content to it.
Obviously, if you value the data of your iPhone, even if it's not gigabytes of unique photos, but "only" a contact book, you must make a backup copy of the device without fail. You can create it in three main ways, which we described below. However, before moving on to them, let's clarify what exactly is backed up.
What is backed up
Both iTunes and iCloud are backed up with the following content:
- Device settings.
- Data about installed applications and their settings.
- Text message history including iMessage. Important! To successfully restore iMessage, SMS, and MMS messages, you need to have one that you use when creating a backup.
- Home screen layout and application order.
- Health app data.
- Media library (photo and video).
- Purchase history from the App Store, iTunes Store, and iBooks Store.
- Settings for HomeKit devices.
- Ringtones.
You most likely noticed that the copy does not include the applications themselves, but only information about them and their settings. For this approach, thanks should be said to Apple, because, otherwise, the backups would grow to indecent sizes. Now to the methods.
How to backup iPhone to iCloud
The first way is using the iCloud cloud service. It involves creating a backup copy of data from an iPhone or iPad without using wires. In this case, all information is stored on Apple's servers in a highly encrypted form, so you should not worry about the safety of data.
Backing up your iPhone or iPad to iCloud is not for everyone. The fact is that only 5 GB is available for free in iCloud. If the size of the data being backed up exceeds this amount, then iOS will issue a warning that the backup cannot be created.
Note that you need an active Wi-Fi connection to back up your iPhone or iPad to iCloud.
Settings» → iCloud → « Backup copy". On devices running iOS 10.3 or later, the iCloud section can be found by going to the account management page, which is located at the very top of the list of options (above " airplane mode»).
 Step 2. Activate the switch " iCloud backup". Enabling the feature will result in a message stating that the mobile device will no longer be backed up on the computer. Click " OK».
 Step 3: Wait for the backup feature to turn on.
 Step 4: Connect your iPhone or iPad to a power source, connect to Wi-Fi, and lock it. The backup will start automatically.
In this simple way, the function of creating an iPhone or iPad backup in iCloud is enabled. It is important to note that the process of creating a copy of iOS begins only if the gadget is charging, has a Wi-Fi connection and is locked. However, it is not necessary to fulfill all the requirements for creating a copy in iCloud, you can force the system to make a backup.
How to manually back up iPhone or iPad to iCloud
Step 1. On your iPhone or iPad, go to the " Settings» → iCloud → « Backup copy».
Step 2. Click " Create a backup" at the bottom of the page. The copy will start immediately.
 It is worth noting one point here. There will be no notification of successful backup of your iOS device. You can verify the success of the operation yourself by going to the menu " Settings» → iCloud → « Backup copy". There will also be displayed information about how much time is left before the end of the copy, if it is still being created.

How to backup iPhone to iTunes
The size of an iPhone or iPad backup to iTunes is only limited by the amount of storage on your computer. If your mobile device has a lot of data, for example, entire collections of photos and videos, then, of course, you should create a backup copy of it through iTunes.
Step 1. Connect your iPhone or iPad to your computer with a USB cable and launch iTunes. If iTunes is not installed on your computer, you can download the latest version from Apple official website .
Step 2. Select a device in the iTunes window.
 Step 3. On the tab " Overview” (opens by default) check the box “ This computer».
 Step 4. Click " Create a copy now» button to start backing up your iPhone or iPad. Before that, you can activate the option " Encrypt local copy» to set a password for the backup. The main thing after that is not to forget the specified password, because in this case, recovery from the copy will be impossible.
  Step 5. Wait for the backup to finish. The mobile device cannot be disconnected from the computer during the procedure. Please note that creating a copy can take quite a long time, especially if a lot of content is saved on your device.
As you can see, creating a backup in iTunes is also not difficult. In addition to iTunes, various third-party applications can help with creating a backup.
How to back up iPhone with a third party app
This feature is offered by most modern file managers for Apple mobile devices, but, unfortunately, almost all of them are paid. There are two free and tested options: iTools and iMazing .
Let's just say that in general, these programs are not ideal. The latest versions of iTools, although Russified, show an unpleasant window with a message in Chinese during installation. There is nothing dangerous in this, but it strongly scares away users. iMazing, in turn, reveals all its functionality only when you purchase the full version. However, the iPhone and iPad backup feature we are interested in is also available in the free version of iMazing.
Why do iPhone backups in third party apps at all? There is really no need to create them. However, many users want to keep important files, such as memorable photos and videos, extra secure. And for these purposes, alternative methods of creating backups just help.
The process of creating a backup in any of these tools is the same. Consider the operation using the example of a completely free iTools utility.
Step 1. Download iTools from official website of the program and unpack the archive with the utility.
Step 2. Launch iTools and connect your iPhone or iPad to your computer. iTunes must be installed on the computer, otherwise iTools will not be able to detect the device.
Step 3. After the iPhone or iPad shows up in iTools, go to the " Tools».  Step 4. Click " Backup».
 Step 5. In the window that opens, check the boxes for the types of content that should be backed up and click " Further».
 Step 6. Wait for the content to be identified and click " Run". Previously, you can select the folder in which the backup will be saved by clicking " Change».
 At the end of the backup process, you can check the result. You'll notice that unlike iCloud and iTunes, iTools doesn't encrypt files in a special way. This makes it possible to access the same photos from your iPhone or iPad without using additional utilities.
 How to restore backup data on iPhone
We figured out the creation of backups, now we will analyze the equally important process of restoring the iPhone and iPad from them. Restoring iOS devices from iCloud and iTunes is possible during their initial setup, or after a complete reset. The user is only required to follow the steps of the system start guide. The choice of recovery type (or settings, if the device is new) must be done on the screen " iPhone setup».
 It is quite obvious that if you previously created a backup in iCloud, then you should select the item “ Restore from iCloud copy". Everything is the same with a copy in iTunes, to restore from which you will have to choose " Restore from iTunes copy”, then connect the gadget to the computer and launch iTunes.
Backups can take up a lot of space, both in iCloud and on your computer. Backups that have become unnecessary, of course, need to be deleted, freeing up precious space. Fortunately, this is done very simply, both in iCloud and in iTunes.
How to delete iCloud backup
Step 1. Go to the menu " Settings» → iCloud.
 Step 2. Select " storage» → « Control».
 Step 3. In the section " Backups» select the copy of the device you want to delete.
 Step 4. Wait for the identification of the backup and click " Delete copy».
 Step 5. Confirm the deletion.
How to delete an iTunes backup
Step 1. Launch iTunes.
Step 2. Go to the menu " Edit» → « Settings».
 Step 3. Select the settings section " Devices».
Step 4. Select the backup you want to delete and click the " Delete backup».  Step 5. Confirm the deletion.
Note that on a Mac, the process for deleting backups is almost the same, with one exception. Select the menu in the program parameters iTunes → « Settings».
 We hope that the information provided in this material was useful to you. In one of the following articles, we will talk about advanced backup management methods that even many experienced users do not know about. Stay with us, it will be interesting!
Please rate 5 stars at the bottom of the article if you like this topic. follow us
If you have not yet lost personal data with your iPhone or when it breaks, you are lucky! It's time to get safe.
Many, including myself, at least once experienced the loss of personal data: notes, calendar and reminders - when the device fails, it is lost, or, most unpleasant,. Protecting yourself from such troubles is quite simple - using an iPhone / iPad backup.
There are several items on the agenda:
iPhone/iPad backup
An iPhone/iPad backup is a multi-file archive with encrypted user data stored in the device's memory.
The backup method determines:
- Content A: iTunes and iCloud backups are different. Looking ahead, I will say that it is more complete.
- Location: either , or in the cloud.
Unfortunately or partly, the backup does not include all the contents of the iOS device - imagine how long it would take to backup everyone and videos, and how much such a copy would weigh! Apple, as always, left us no choice and therefore the iPhone backup contains a fixed set of data.
iPhone/iPad Backup Content
- Camera Roll: photos, screenshots, saved images and captured videos;
- Notes;
- Settings ;
- Contacts and call history;
- Calendar events;
- Safari bookmarks, cookies, history, offline data and currently open pages;
- Autocomplete for web pages;
- Cache/offline database of web applications;
- iMessages, as well as SMS and MMS with attachments (images and videos);
- Audio recordings made with a voice recorder;
- Network settings: saved Wi-Fi hotspots, settings, network settings;
- Keychain Access: Email account passwords, Wi-Fi passwords, and passwords entered on websites and in some programs;
- Information about installed on the iPhone / iPad and programs from the App Store;
- Parameters, settings and data of programs, including documents;
- Built-in purchases;
- Game Center account;
- Wallpaper;
- Maps bookmarks, search history and current location;
- Paired Bluetooth devices (if this data is restored to the same phone that was used to create the backup).
The list of what is not included in the iPhone / iPad copy is shorter and depends on the type of backup: iTunes or iCloud.
iTunes backup not included
- from the iTunes Store;
- Games and programs and the App Store;
- Music, photos, videos and books, ;
- Previously saved photos in iCloud, such as files from the My Photo Stream album and iCloud Photo Library;
- Touch ID settings;
- Data from Activity, Health, and Keychain Access (you must use iTunes Backup Encryption to back up this data).
An iCloud backup isn't as complete as iTunes, but it has everything most of us need.
What's Not Included in iCloud Backup
- Data previously saved to the cloud (such as contacts, calendars, notes, files from the My Photo Stream album, and iCloud media library);
- Data stored in other cloud services (such as Gmail or Exchange);
- Apple Pay information and settings;
- Touch ID settings;
- Content downloaded from sources other than the iTunes Store, App Store, or iBooks Store (such as imported MP3s, videos, or CDs);
- Content downloaded using iTunes in the cloud and App Store content (if previously purchased content is still available from the iTunes Store, App Store, or iBooks Store, it can be redownloaded).
Ways to back up iPhone/iPad
I am sure that you know no more than 2 ways to back up an iPhone, but there are at least 3 of them:
- On a computer using iTunes.
- On iPhone/iPad using iCloud.
- On a computer using third-party software, for example, .
iTunes backup
- Created on a local Windows or Mac computer using iTunes.
- Can be encrypted with a password (data from the Activity, Health, and Keychain Access programs are stored in the encrypted copy).
- Created automatically when or updating iOS.
- Only one copy is created for each device within a single generation of iOS. For example, when creating a backup copy of an iPhone with iOS 9.3.1, the previous copy is replaced with a new one. The device name change focus no longer works.
- This requires the device to be connected to a computer.
- You can restore data from a copy at any time.
How to back up iPhone/iPad using iTunes?
As a reminder, this is a local backup (stored on the hard drive of your Windows or Mac computer).

iCloud backup
- Created directly on iPhone and iPad.
- Stored in cloud storage (on Apple servers).
- Created automatically or manually.
- Automatically generated daily if:
- with internet access,
- device screen.
- You don't need to connect your device to a computer to restore data from an iCloud backup.
- Restoring data from an iCloud copy is performed after restoring in iTunes and.
How to back up iCloud on iPhone/iPad?

The Back Up button is grayed out if your device is not connected to a Wi-Fi network with Internet access.
How to back up iPhone/iPad with iMazing and the like?
iTunes is not the only computer program with the iPhone / iPad backup function, in my work I use iMazing - almost a complete analogue of iTunes, only without the device restore and update function.

Interestingly, iMazing and iTunes backups are fully compatible: iTunes copy is recognized by iMazing and vice versa - iMazing copy is compatible with iTunes.
Also in iMazing, you can create a single-file iPhone / iPad backup, unlike iTunes, the backup in which is dozens of files encrypted using the cryptographic hashing algorithm (SHA-1) files. You can create as many such backups as you want for each version.
To back up iPhone/iPad using iMazing:
iPhone/iPad automatic backup
If your iPhone/iPad is connected to a power source and to a Wi-Fi network with Internet access, and its screen is locked, iCloud backups are automatically created daily without your participation.

On the one hand, this is great because it saves our time, on the other hand, it can lead to the loss of contacts, calendar events or Safari bookmarks. For example, your iPhone is charging and connected to a Wi-Fi network, you deleted a contact, and then locked the device by pressing the "Power" button (off button). iCloud automatically creates a new backup without the contact you deleted, which replaces the old backup you created BEFORE you deleted your data. As a result, you were left without contact, and if not, your data would have been irretrievably deleted. Fortunately, files in iCloud Drive, contacts, calendar and Safari bookmarks can be recovered.
How to manage iTunes and iCloud backups?
We already know where the iTunes backup is stored by default and how to transfer it to another hard drive partition. Let's take a closer look at setting up iCloud backup.
Let's assume that you already have an iCloud backup of your iOS device. Information about the latest copy is located in the menu "Settings -> iCloud -> Storage -> Manage -> "Backups" section -> Name of your device".

The iCloud backup properties contain the following information:
- The date and time the last copy was made.
- Size of the copy in megabytes.
- Backup options for apps installed on your device.

How to turn off app/game backup on iPhone/iPad?
If you change your mind and want to enable backing up your installed apps, turn on the corresponding switches in Settings -> iCloud -> Storage -> Manage -> Backup section -> Your device name -> Backup settings list.
Thus, you can flexibly configure data backup of individual programs and reduce the size of the iCloud copy.
How to delete an iTunes backup?
If you sold your iPhone / iPad, then its backup copy saved on your local computer is no longer necessary for you and you can.

- If the value of your personal data is many times greater than the cost of the device on which it is stored, or even priceless, you should set up a backup right after.
- If you forget to create manual backups, create conditions where iOS will create them automatically without your participation.
- An iTunes backup may be corrupted, for example, if the backup failed or failed.
- You can, and with it, a copy of iCloud.
Create 2 backups of the same device at once (if there is no money for iMazing): locally in iTunes and remotely in iCloud. Why?
According to the Theory of Probability, the probability of two events coinciding is always less than the probability of each of these events separately, which means that there is less chance of losing data when creating two copies.
Most happy iPhone owners have probably (and more than once) heard of such a thing as a “backup copy”. However, not all experienced users know what a backup is, do not realize its importance, and do not even have the slightest idea about how to create it.
This article is intended to answer a number of questions that shed light on the topic of iPhone backup from different angles: its meaning and importance; ways to create, restore, transfer, as well as completely delete.
What is a backup for? What data is included. What data is not saved?
An iPhone backup is, in a simple and accessible language, a copy of data from an Apple mobile device, which is stored encrypted on a personal computer or in iCloud cloud storage.
Creating a backup of your data is important because it is necessary to restore information in the event of:
- malfunction, theft or loss of iPhone;
- purchasing a new smartphone from Apple, since having an up-to-date backup copy of the old device will make it possible to quickly transfer data from the old device to the new one;
- the appearance of problems with the operating system (iOS), which may arise in an inappropriate way and bring a lot of inconvenience (for example, this concerns an unsuccessful attempt to update a mobile device to a new version of the operating system).
Backups, regardless of the method of creation and storage location, contain the following data:
- personal settings of the smartphone (calendar, mail settings, ringtones, the appearance of the main desktop and the location of icons);
- data of the Safari browser: data of automatic filling of forms, bookmarks, history of page views;
- data contained in the Health app;
- SMS / MMS, message history in iMessage (for correct recovery, you need a SIM card);
- ringtones;
- passwords to accounts and accounts;
- information about installed applications and data (but not the applications themselves);
- paired devices via Bluetooth protocol;
- history of purchases made in the AppStore, iBooks, as well as in the iTunes Store;
- HomeKit settings;
- notes, voice recordings, photos and videos (videos up to two gigabytes in size!), created with the camera.
As you can see, it does not contain the applications themselves and media content, but important information about them. This step is justified, because otherwise the backups would be obscenely large.
Does not contain:
- synced via iTunes: videos, photos, pictures and music from iPod;
- third party applications.
How to backup using iTunes?
Creating an iPhone backup using iTunes is the proven and most common way. In order to fully use this method, you must have a working iPhone - on the one hand, and on the other - a personal computer running Windows or MacOS. The latest version of iTunes must be installed first. You can download it on the official website of the manufacturer.
The procedure is as follows:
- To get started, launch iTunes, and then connect a pre-charged device (iPhone) to your computer via USB.
- After the program starts, you need to click on "Device" in the iTunes window that opens. And select a device from the list.
- After that, the program will open the "Overview" tab, where check the box next to "This PC".
- In the event that you want data from the Health and Activity applications to be included in the backup, you must create an encrypted one. To do this, check the box "Encrypt iPhone backup" and set a password. The password must be well remembered, because in case of loss, it will be impossible to restore the created backup copy.
- After that, click on the virtual button "Create a copy now".

- During the backup procedure, it is strictly forbidden to disconnect devices from the PC, so as not to disrupt the process. It is worth noting that depending on the size of the data, the backup process can take quite a long time.
- When the process comes to a logical conclusion, you can check its success. To do this, on the "Overview" tab, you need to pay attention to the item "Recent copies", which is located in the lower right corner of iTunes. It will show the time and date the copy was made.
What to do if an error occurs: “iTunes could not create a backup because the iPhone is disconnected”?
Unfortunately, when creating a backup copy, each user may encounter difficulties. Some of them are the lack of knowledge and experience, and the other is problems and malfunctions on the part of programs or equipment.
Sometimes users complain about the following error while backing up their smartphone: "iTunes could not back up because the iPhone is disconnected."
In this case, it occurs even when the iPhone is connected via USB and is correctly displayed in the program. Since there is no code in the error dialog box, we can assume that the problem is an interruption in the connection between the computer and the smartphone. Even if the disconnection between devices disappears for a fraction of a second, this will be enough to interrupt the backup operation.
The problem may be:
- using a non-original Lightning cable;
- cable wear;
- malfunction of the USB port on the computer, or problems with the Lightning connector.
There are many solutions to the problem. First you need to purchase a new original cable and try again. In the event that this does not help, you should use another computer or take your iPhone to a service center.
How to restore iPhone from a backup?
The algorithm of actions aimed at restoring an iPhone from a backup that was created using iTunes is similar to its creation and consists in:

What to do if an error occurs: “iTunes could not restore iPhone because the backup is corrupted”?
Some users who want to restore iPhone from a backup using iTunes may encounter an error: "iTunes could not restore iPhone because the backup is corrupt." Such a nuisance, although quite rare, is nevertheless capable of perplexing even the most advanced users.
There are a huge number of reasons why such an error became possible. Most often, these include incorrect backup creation, as well as software or hardware failure during the backup process.
You can solve the problem in the following ways:
- Make sure that iTunes is installed correctly and has the current (at the moment) version.
- Update the iOS version to the latest one.
- Use third-party programs to restore backup data.
If all of the above methods did not bring the desired effect, then in this case, you should use another (possibly earlier) backup, iCloud backup, or contact the service center.
Where does iTunes store iPhone and iPad backups on Windows and Mac computer?
Many users of mobile devices from Apple are seriously concerned about security, as well as the safety of personal data. The vast majority of these users try to regularly back up their iPhones and iPads.
Therefore, when buying a new, modern computer or forced to reinstall Windows, users are required to copy backups to external media. Without knowledge, this is not so easy to do, so you can often hear a question like: “In which directory does iTunes store iPhone and iPad backups on a personal computer running Windows or Mac OS X?”.
Finding the treasured backup folder is quite difficult, because for each version of Windows and Mac computers, the address of its location is significantly different.
Users of Microsoft systems (Windows 7,8,10) can find the necessary iPhone and iPad backups by going to this directory (the AppData folder is hidden to make it visible: 1. Open the control panel, then “Folder Options”, view, show hidden files and folders:
"\Users\(username)\AppData\Roaming\Apple Computer\MobileSync\Backup\".
Alternatively, you can do the following manipulations:
- To do this, you need to find the search system string. Owners of Windows 7 - click on the "Start" button; owners of Windows version 8/8.1 - click on the magnifying glass icon located in the upper right part of the desktop; in Windows 10 - just click on the search icon next to the "Start" button.
- In the search, enter the following text (without quotes): "% appdata%".
- Press the "Enter" key.
- Double click on the three folders: "Apple Computer -> MobileSync -> Backup".
- Ready.
Users of computers running Mac OS X need only three steps to find backup files:
- Click on the "Search (magnifying glass icon)" icon located in the menu bar.
- Enter the directory address (without quotes!): "~/Library/Application Support/MobileSync/Backup/".
- Press "Enter".
To find a specific copy, Mac users need to:
- Launch iTunes, go to settings.
- Select "Devices".
- Hold down the Ctrl key, click on the desired backup and select "Show in Finder".
With iCloud
Backing up your iPhone to iCloud is a simple and convenient method that is preferred by an increasing number of users. To do this, do the following:
- Charge your iPhone and then connect it with a stable WiFi connection.
- After that, you need to go to the section "Settings" -> [username], and then click on "iCloud". In the event that the iOS version is 10.2 or earlier, then you should go to the "Settings" item and, scrolling the page to the very end, select iCloud.
- After that, click on "Copy to iCloud". In the event that iOS 10.2 (or earlier) is installed, then you should click on "Backup", after making sure that the backup process in the iCloud cloud service is activated.
- Next, select "Create a backup" to start the process of the same name. It is important that the Wifi wireless network is turned on at all times.
To monitor the progress of the backup and make sure the process completed correctly, just go to "> iCloud> "Backup to iCloud" and find the item "Create a backup", under which the date and time will be displayed.
How to restore iPhone backup from iCloud storage?
Restoring a smartphone backup from iCloud is quite simple, if only because it does not require updating third-party software and connecting the phone to a personal computer.
To do this, you must perform the following manipulations:
- Turn on the iPhone, after which a window with a welcome to the developers should appear. In the event that the device was previously configured, you should erase its contents. After that, start performing actions starting from the second paragraph.
- Following the setup instructions, go to the "Programs and data" item, then click on "Restore from iCloud copy".
- After that, sign in to the cloud service by entering your Apple ID.
- Here you need to designate a suitable backup, focusing on the date of creation and size. After selection, the data copying process will take place. It may be that the system will ask you to upgrade to the current version of the OS, so you will have to agree and follow the instructions.
- If prompted, sign in to your Apple ID account. This is necessary to restore applications and purchased content. If you have difficulty entering your password, you can skip the step without any problems.
- The recovery period can take from several minutes to a couple of hours, as it depends on the speed of the Internet connection, and, most importantly, the size of the backup file. In this case, the device cannot be turned off.
- After the setup is completed, depending on the data transfer rate, photos, music and other multimedia content will be downloaded in the background.
How to determine for which iPhone or iPad a backup was created?
Multi-device users who frequently back up devices may encounter some difficulties. It's about confusion when choosing the right backup to restore.
To correctly set which iPhone or iPad a particular copy belongs to, follow these steps:

How to transfer iTunes backups to another drive in Windows and Mac OS X?
Storing files, including backups, on a local drive that is a system drive is risky and unreliable. In the event that the iTunes installation components are located on the system disk, then it should be moved to a safe place, which is a separate HDD or local disk.
Owners of Windows 7/8/8.1/10 must perform the following manipulations to correctly transfer the backup file:

We launch the iTunes program in order to carry out the check by going to the "Devices" tab in the settings section.
Mac OS X owners need:
- In the Dock, click Quit iTunes.
- Using the Finder, press the key combination "Shift + Cmd + G" and in the "Go to folder" field enter: "/Library/Application Support/MobileSync/" and then press "Enter".
- The "Backup" folder must be copied to the desired drive.
- Launch a terminal into which to copy the information (without quotes!): "ln -s /Volumes/my_disk/Backup /Library/Application\ Support/MobileSync/". Where instead of "my_disk" enter the desired disk with the copied backup.
- A shortcut will appear leading to the backup folder on another drive.
- Launch iTunes and check for copies.
How to install a backup on another iPhone?
Installing a backup on a completely different iPhone may be required when buying a new model of an "apple" smartphone. The procedure is completely similar to restoring from iCloud:
- First you need to turn on your iPhone.
- In the "Apps and data" option in the "Backup to iCloud" menu, you must select "Restore". After that, you need to go to iCloud by entering your Apple ID.
- We make a choice of the necessary file.
- We monitor the setup and installation.
How to delete old backups?
You can delete backup files in case of uselessness using iTunes, as follows:
- For Mac: Launch iTunes and go to Preferences. For PC (Windows): go to the "Edit" section and go to "Settings".
- Select the "Devices" option.
- Select the specific file to be deleted.
- Click on the "Delete Backup" button.
- Removal completed.


History of sky lanterns
Job description: concept, purpose, structure, procedure for compiling and formalizing Purpose and content of job descriptions for managers
Interview questions What job are you going to work on?
What to do if the boss criticizes all the time If the boss does nothing
How to understand: will the kitten be fluffy?