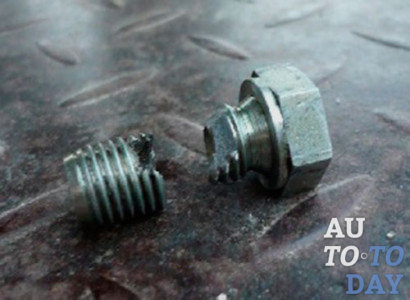
Since the market for used equipment from Japan and Europe is more developed in Russia, accordingly, old rubbish is brought to Russia that needs to be repaired. It often happens that the bolts on such scooters have never been unscrewed, and they simply stick to the thread. Unscrewing such bolts without breaking the heads or threads is very problematic (even if you use wd-40). In this article, I want to outline several ways to unscrew such bolts, screws with broken threads.
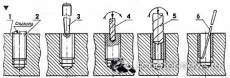
The easiest way (although some consider it a last resort, use the tips below) is drill out the bolt and cut a new thread with a suitable tap:
1.
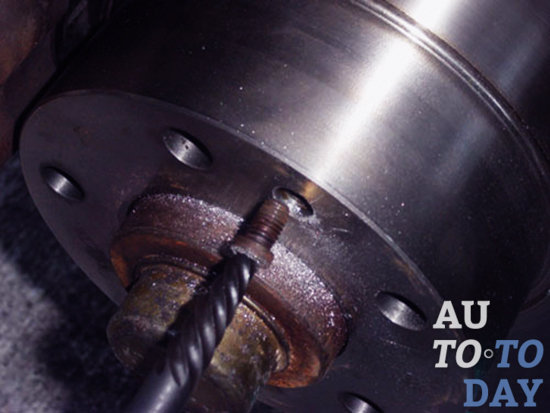
We take a drill, a drill suitable for the diameter of the bolt to be drilled. Drill out carefully.
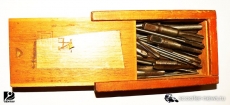
2. After we buy a set of taps or one tap (but you need to know the diameter exactly), we select it for the thread diameter.
3. We select and insert the tap into the thread, we begin to cut. For cutting (screwing) use a wrench. I used a wrench.
Do not forget to lubricate the bolts with graphite grease before tightening the bolts - in the future this will help to easily unscrew the bolt. To fix the bolts, use a bolt retainer (you can buy it at any auto store).
There are some other ways to unscrew a broken bolt
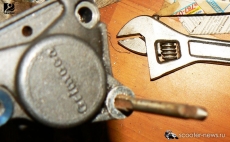
Method 1: the bolt broke off slightly above the surface of the part. You can try to take an adjustable wrench and hook on this part of the bolt. It's best to spray with WD-40 first.Method 2: if a break occurs exactly with the surface of the part, then you need to take a sharp chisel or a flat screwdriver or chisel and hit the left side (on the edge) of the bolt with a hammer at the right angle (to give rotational motion). This method is also great for loosening stuck flathead and Phillips bolts.
Method 3: again, the bolt broke off higher - we take a grinder and cut the bolt in the center. Next, take a flat screwdriver and unscrew the bolt.
Method 4: fairly reliable option. We fill the mark for the drill in the bolt (in the center), drill to a certain depth (about 15 mm, determine by eye - it doesn’t matter), but not to the end, the diameter of the hole is 15-30% less than the diameter of the nut. We screw in the tap with the left (reverse) thread to the end and as a result you unscrew the bolt.
Method 5: for welders, and those who know how to handle welding. The method is valid for bolts with a diameter of at least 10-15 mm and the bolt broke off close to the surface of the part. Here we simply weld a piece of metal to the surface of the bolt and gently rotate the welded piece counterclockwise (bolt with the correct thread).
Source: scooter-news.ru
A fastener (screw or stud) that is difficult to turn off (as well as hard to screw in) threatens with many troubles, both small and large. The latter can be safely attributed to a break in the body of a part of a part of a stud or screw, since removing the rest of the hardware from the threaded hole or socket of the part is a very “delicate” matter that requires great care.
There can be several reasons for breaks in fasteners: excessive tightening torque; use of low-grade threaded products; “sticking” of the threads of the part and hardware due to corrosion or high-temperature heating, and others.
Breaks of fasteners can be divided into three types: the first - when the part of the hardware remaining in the body of the part protrudes above its surface; the second - when the breakage of the fastener occurred flush with the surface of the part; and, finally, the third - when the breakage of the stud or screw occurred below the surface of the part. This distinction is made because each of these types of broken hardware requires its own approach to the issue of extracting residues.
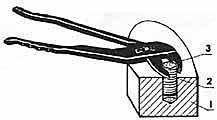
Breakage of hardware above the surface of the part:
1 - detail;
2 - the rest of the hardware;
3 - crimping pliers
If part of the shaft of a broken screw (stud) protrudes above the surface of the part (for example, one head of the hardware has come off), then after soaking the thread in the socket several times with a special liquid or, in extreme cases, with kerosene and waiting for time, you can still try to unscrew the rest of the hardware using appropriate special gripping tools: crimping pliers, pipe wrench, vise, etc. Another trick is to weld a rod-lever to the end of the protruding part and, after impregnating the thread with liquid, try to unscrew the rest of the hardware. Sometimes this can be done, but if not, then you will have to use the following method of extracting the rest of the hardware from the threaded hole or socket - drilling the body of the rod to the thread and picking out the threads of the hardware from the part. You can remove the threads with a hard wire hook. It is advisable to start the operation from the bottom, where it is easier to make the initial engagement. In addition, the upper turns of the hardware that have not yet been removed will protect the thread of the part from damage by the hook. With minor features, this method is also applicable in the following two most common cases of broken fasteners in practice.
Breakage of a hardware flush with the surface of the part:
1 - detail;
2 - the rest of the hardware;
3 - center punch;
4 - starting drill;
5 - finishing drill;
6 - hook
Perhaps this is the most serious case. If possible, it is necessary to saw down the end of the fastener so that it becomes even and, having determined its center more precisely, make a deep core here. Then, with a drill equal to the inner diameter of the hardware thread (or slightly less than it), drill a through axial hole in the remainder. On the hardware itself, measure inner diameter threads are very difficult, therefore, if there is access to the hole, it is better to measure its diameter “in the light”. When this is not possible, then you need to use the table below.
Fastener thread Finishing hole (drill) diameter
MZ 2.5
M4 3.3
M5 4.2
M6 5.0
M8 6.7
M10 8.5
M12 10.2
When the diameter of the hardware rod is large enough, then the operation of drilling its body is best done in several steps, over and over again increasing the diameter of the drill to the finish. If the threaded hole is also through in the part, then it is advisable to start drilling with reverse side details - the end of the fastener there, for sure, is flat, and often it already has a center hole, and then the task is made easier - in this case, there is no need to make a core.
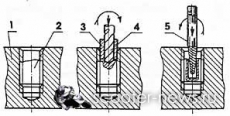
Breakage of the hardware below the surface of the part and removal of the rest of the hardware by the extractor:
1 - detail;
2 - the rest of the hardware;
3 - bushing;
4 - drill;
5 - extractor
For drilling, first of all, as in the previous case, it is necessary to make a deep core exactly along the axis of the fastener. This task is not easy, especially since the end is usually uneven, and filing it (making it flat) is not possible. But there is a way out: you need to select the appropriate bushing from a tube trim with an outer diameter according to the diameter of the socket and a drill with a diameter equal to the through hole of the bushing, drill a pilot hole in a piece of hardware. Then, with a drill equal to the inner diameter of the thread (or slightly smaller), ream this hole. The remains of the rod (turns of its thread), carefully, so as not to damage the thread of the part, are picked out of its grooves. If the hardware has broken off deeply and the threads of the hole (socket) are enough for the corresponding tap (finish) to “hook” on them, then the remnants can be cut out with it, at the same time calibrating the thread.
In all three cases of breakage of the fastener, but, most of all, in the second and third cases, a new device is useful, called an extractor in foreign reference books (probably from the Latin word extractum - extracted). It is sold in sets of several pieces for hardware with threads of a certain interval (for example, MZ - Mb; Mb - M8; M8 - M12, etc.) complete with appropriate drills, and sometimes with bushings. It is hardly advisable to buy a set with extractors for large threads, since it is very difficult to break off such hardware (if only with the help of a lever pipe), rather, the thread will break on them.
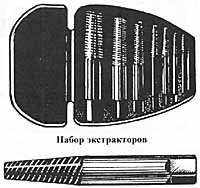
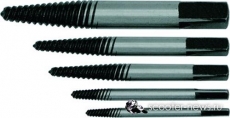
Extractor for extracting leftover fasteners with right-hand thread
The extractor itself resembles a tap in appearance, but without longitudinal grooves. Working part it is conical and has a left-hand screw thread. When the extractor is screwed into a hole drilled in the rest of the hardware (having a right-hand thread), the latter is everted. The beginning of the operation is the same as in the second and third cases: punching the center, drilling an axial hole with a diameter corresponding to the extractor, and then working with the extractor.
At the end of the operation, even if the rest of the screw or stud is successfully removed, the threaded hole of the part must be calibrated with a thread restorer or a fine tap.
If the operation to remove the residue was not entirely successful and the thread in the part turned out to be hopelessly damaged, you will have to drill a hole and cut a thread in it of a slightly larger (closest in a row) diameter, and use another appropriate hardware for fasteners. When such a way out is unacceptable and a fastener with the same thread is needed to connect the parts, then the following can be done. Having drilled a hole, as in the previous case (only 8–10 millimeters more), cut a thread in it and screw a futorka into it - a threaded sleeve from the previous internal thread and outer, corresponding to the hole.
If you, by virtue of your profession or hobby, are engaged in the repair of equipment, you often face the question: - how to unscrew a broken bolt, part of which is in your hands, and the other remains in the thread?
In this article we will do short review ways to solve this problem. The choice of the method is up to you, as the skills and "arsenal" at hand are different for everyone. Let's start?!
Consider how to pull a broken bolt out of a thread with an extractor
For those who don't know, there are external and internal extractors. If the bolt is broken in such a way that it cannot be "grabbed" to, then the internal extractor may be the only solution to the problem.
The internal extractor resembles a tap. The shank (non-working part) is made "under the square"" for tools.
According to the type of working part, the extractors are divided into wedge-shaped, rod and screw (spiral).
The working part of the wedge-shaped extractor has the form of a cone with faces, the section of the rod extractor is the same along the entire length.
The screw extractor is a cone with a left or right rotation thread.
The order of work is as follows:
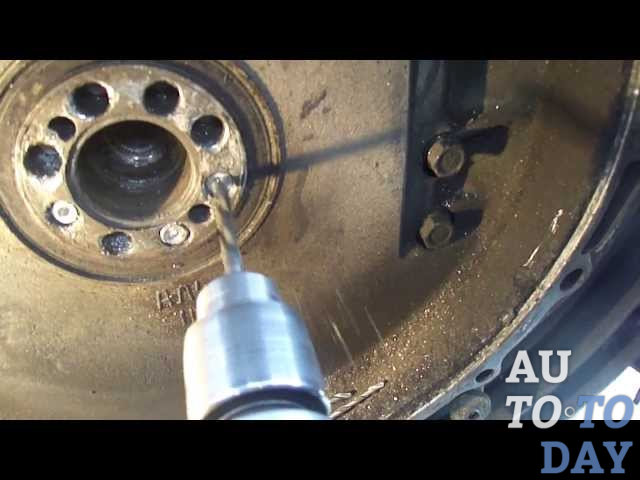
When starting work directly on the car, make sure that the repair site is accessible for a drill, screwdriver, etc. Well, if the question is how to get a broken bolt out of a wheel hub, the repair area is open. But if you can’t “reach” the part, don’t be lazy and do the necessary disassembly, that is, the dismantling of everything superfluous in this case.
If you do not know how to unscrew a broken aluminum bolt, using an extractor will be the best solution.

It is better to buy extractors in ""extended"" sets, ie. complete with drills and guide sleeves for them.
But, unfortunately, such a tool is not always available at the moment or it cannot be used due to the design of a particular node.
If you have problems with broken edges, we recommend choosing fasteners best quality: https://avselectro-msk.ru/catalog/4976-bolty - bolts of suitable quality that can be bought in any quantities.
Alternative ways to unscrew a bolt with torn edges
Welding a nut as a way to unscrew a bolt without edges
This old tried and tested method led many out of a dead end during repairs.
specific case. Broken front suspension arm bolt on an old Suzuki Ignis. Moreover, the distance between the lugs of the arm of the lever did not allow either to hammer or screw the extractor into the fragment. Welding in this case is the most effective tool unscrew the broken bolt.
The essence of the reception is as follows.
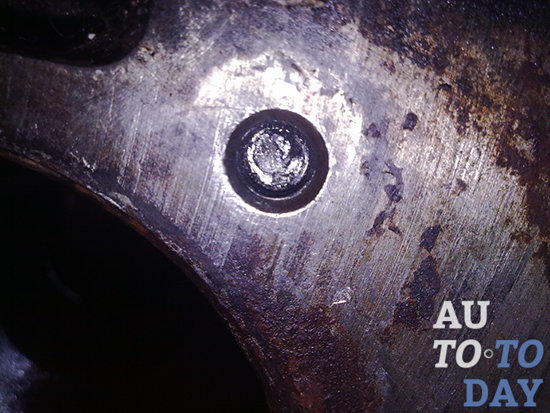
We select a nut of a suitable diameter, put it on a broken bolt and weld it. If the bolt broke flush with the surface of the part, we fix the nut as accurately as possible in the center of the bolt. We cook. Carefully, without jerking, we unscrew the broken bolt by the nut.
Disconnect the battery terminals! Ensure the safety of wiring, hoses, plastic products from melting and burning!
Let's say that the extractor and welding are not available to you. Then, if the bolt broke in the thread, we apply
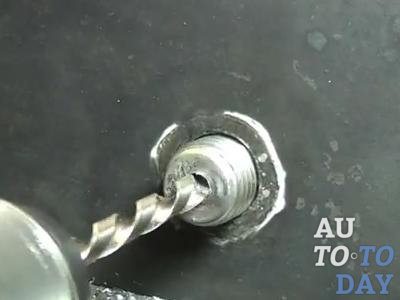
Drilling - a great opportunity to turn a bolt without edges
First of all, we calculate the diameter of the drill. The formula for a standard thread is simple - subtract the thread pitch from the diameter of the bolt (threaded part).
Next important point- how to avoid drift of the drill to the side? To prevent such trouble, there are conductors. The conductor (simplified) is a plate with holes. Guide bushings (sleeves) corresponding to the diameter of the drill are perpendicularly fixed in the holes. The conductor is fixed on the part, the sleeves are aligned with the holes with broken bolts. You can drill! It is the sleeve that will prevent the drill from deflecting.
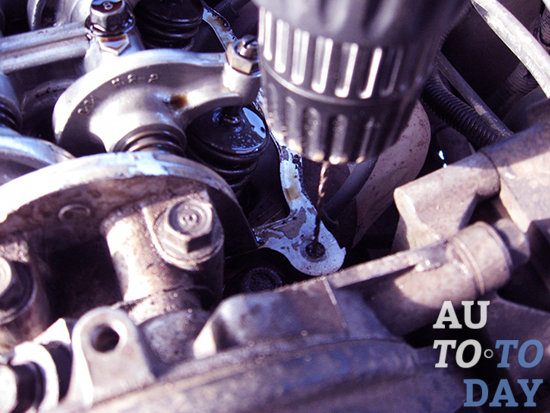
The jig is indispensable if you need to remove a broken bolt from an aluminum part. Especially if it is the engine cylinder head.
You can also combine drilling with knocking out the remains of a broken bolt with a drift.
This approach is used when threaded holes through. Starting with a drill of the smallest diameter, we drill a chip. When the ""wall"" of it is sufficiently weakened, we remove it with a punch. Then we clean the thread with a tap.
In this way, you can, for example, get rid of fragments of the studs for attaching the exhaust pipe to the exhaust manifold on the VAZ2114-15 without removing the latter from the engine.
Heating to unscrew a bolt with stripped edges
Consider this situation - there are no extractors, welding, a conductor and good drills. How to pull out a bolt if it is broken?
You can solve the problem (and sometimes very successfully) by heating the parts red-hot. After cooling, they will become more pliable and may well be unscrewed with a chisel, center punch, etc. The described methods of unscrewing broken bolts are not an exhaustive, universal answer to problems of this kind. For clarity, watch the material in the video.
Thank you for your attention!
Over time, the metal from which the fastener is made gets tired, becomes less durable, breaks easily, and the thread, accordingly, can be easily torn off.
In this case, it becomes more difficult to unscrew the bolt, but knowing a few ways, you can handle it.
What to do?.
How to remove a bolt
You will need
pliers;
Pliers;
wire cutters;
Nail puller;
Glue "Liquid nails";
Screwdriver;
Another hardware;
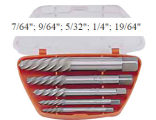
Extractor set;
Drill with a drill bit of smaller diameter.
Step 1. Try to pry the bolt with a puller or a nail puller and pull it out as far as the stripped thread will allow. Further, without removing the tool, unscrew it with a screwdriver or wrench, depending on the design of the bolt.
Step 2. If you do not have a nail puller, slip a flat screwdriver under the bolt head, rest it against something to form a lever, and gently tap on the screwdriver handle with a hammer - the bolt will gradually come out of the hole. At this time, try to tighten the bolt with a screwdriver counterclockwise.
Step 3. Try to pry out a small bolt with wire cutters. Just hold the cap between the jaws of the tool and pull it towards you with force. If the thread is completely broken, it will come out easily, and if not completely, turn the wire cutters together with the bolt counterclockwise.
Step 4 If the head of the bolt has slots for a screwdriver, the problem is that it is impossible to apply force in the right direction, as the bolt scrolls. To fix this, sharpen the head for an adjustable wrench, or simply make two cuts opposite each other for pliers. Grab the cap and unscrew, while pulling the bolt towards you.
Step 5 Buy a set of extractors - several taps with reverse thread. Drill a hole in the bolt with a depth of 3-15 mm with a drill bit smaller than the inner diameter of the hardware. Select the right size extractor and screw it in counterclockwise. At the moment when the cone, tapering at the bottom of the tap, reaches the end, the bolt will begin to rotate with it - at this moment, start unscrewing the stripped bolt in the desired direction.
Step 6 On a bolt with a stripped thread, located in hard to reach place, drip a little glue on metal, for example, Liquid Nails, and glue another hardware. Degrease surfaces first. After it is completely dry, try to pull both bolts together by pulling the glued one towards you and twisting it along the thread.
How to remove a bolt
Imagine a situation when, in the process of repairing equipment, you need to disassemble some assembly, but you cannot do this because one of the mounting bolts did not have a cap. The situation is well known, do not despair. There are few enough simple ways solutions to this problem.
Step 1. If, for example, the bolt break is located in close proximity to the surface of the part, then it is worth resorting to using a sharp core. Set it at an angle to the edge of the bolt and, by tapping lightly, try to give it a counter-clockwise rotation (for a right-handed bolt). Sometimes this is quite enough.
Step 2 Another option can be implemented using a grinder, provided that the upper part of the “headless” bolt protrudes at least a little above the surface of the part. Cut a groove in it for a screwdriver using a thin cutting wheel measuring 0.8-1.00 mm and you can proceed to remove the bolt.
Step 3. The next one is probably the most reliable way- using a tap with a left-hand thread. First, make a mark in the center of the bolt with a core and drill a hole with a diameter of 2-3 mm less than the bolt and a depth of 10-15 mm. Then start screwing the tap into the hole until the resistance of its rotation begins to exceed the friction force on the thread of the bolt, after which it begins to turn out.
Step 4 In the absence of a tap, you can try to remove the bolt with a screwdriver, the edges of which are sharpened into a cone so that it enters the hole. For a more secure fixation in the hole, the screwdriver should be lightly hit several times with a hammer.
Step 5 You can also use a right-hand tap to remove a broken bolt. As soon as the bolt starts to go deeper, start to turn it out. Next method involves the use of welding, but only under three conditions: a) if the bolt has a diameter of more than 10-12 mm; b) the welder is highly qualified; c) the break line is close to the surface (in this case, you can try to weld a piece of metal to the broken bolt and unscrew the bolt with it).
Step 6 In the most extreme case, when all of the above methods could not be implemented, it remains to drill the bolt with a drill, the diameter of which corresponds to or is close to the diameter of the bolt. After that, drill a hole for a new larger thread. For example, with an M8 thread, make M10 or M12.
When screwing in a bolt, many of us sometimes encounter the fact that the head of the bolt breaks off, even if we are dealing with a high-quality fastener. And when such a nuisance happens, not everyone knows how to unscrew a broken bolt without damaging the parts that it connects. There are several standard options for such a situation, and the algorithms for actions when they occur will also be standard.
Situation one: part of the thread sticks out above the surface
This is the easiest case. To solve this problem, we take an adjustable wrench and, after appropriate settings, carefully unscrew the bolt. To make the screwed piece of iron give in better, you can take a penetrating lubricant and apply it to the protruding part. Then make a few light blows on the fragment - this is so that the lubricant is better absorbed inside to the thread. After 5-10 minutes, the rod can be removed.
Situation two: the bolt broke at the same level with the surface or even below it
But here, too, the task of how to unscrew a broken bolt is quite doable. Solving it with a wrench is not worth it - there is simply nothing to grab onto. Therefore, be patient and try some of the action algorithms we offer. Ways to solve the problem are more complex and require patience, but it is possible to complete them.
You can make a groove for a screwdriver: if it is ordinary, then the slot should be deeper, and if it is cross-shaped, then the groove can not be too deep, because a Phillips screwdriver has a larger area of adhesion to the surface than a regular one. Most often, this method solves the problem of how to unscrew a broken bolt. But there are times when the iron rod is tightly jammed and the screwdriver can not cope with it. In such situations, you need to take drastic measures and drill a hole in the rod for a smaller bolt and make a thread in it.
Such an operation will require an electric drill and a set of different drill diameter and a marker. If you screw a small bolt into the chip, then it will be enough just to get it with the help of wrench. In such severe cases, this method usually works, but here you need to remember: there must be a reverse thread inside the rod.
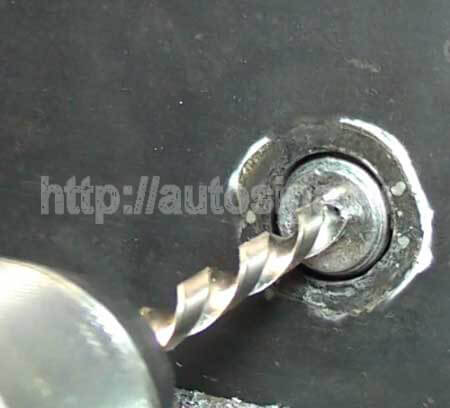
Drilling the bolt according to the rules
Not all home craftsmen know how to drill a broken bolt correctly. Meanwhile, certain recommendations must be followed so as not to worsen the situation. The hole is drilled very carefully and exactly in the center, otherwise you will strip the thread when unscrewing (note that broken screws, nails and studs are removed according to the same principle. If all the steps were performed correctly, any stuck fastener can be easily removed to the surface. In difficult cases the hole must be gradually expanded using drills of various diameters, moving from smaller to larger. When the walls of the rod become thinner, they can be broken and pulled out with tweezers.
A torn hat can be attached
This is a method from the category of "need for invention is cunning." We take a nut whose diameter is at least 1 millimeter larger than the diameter of the rod and simply weld it to the fragment. During welding, the metal should warm up properly and expand. We connect the rod and the nut, we get a knot that needs to be poured with water. When the knot has cooled, you can carefully unscrew the chip.
Thus, we learned what methods exist for extracting broken fasteners. We hope that they will help you solve this small but annoying problem that sometimes arises in the practice of home craftsmen. But it is better that you get strong and unbreakable bolts, studs and screws.
Note: Systems viega installations today are in great demand among consumers. In the online store santechshara.com.ua you can buy installations for advantageous offers. Hurry up to get your personal discount. Welcome!
Video: How to remove a broken bolt
Read more:
Soft roof is one of the most popular materials for protecting a home from rain and other "charms" of open space. Under this name, several ra
Every motorist knows that car repair is a rather laborious process. Due to constant stress on miscellaneous details, all sorts of little things often break, such as bolts. If a novice driver encounters such a problem, then he is unlikely to cope on his own without knowledge of special techniques. Even This kind of trouble can be dealt with quite easily and quickly.
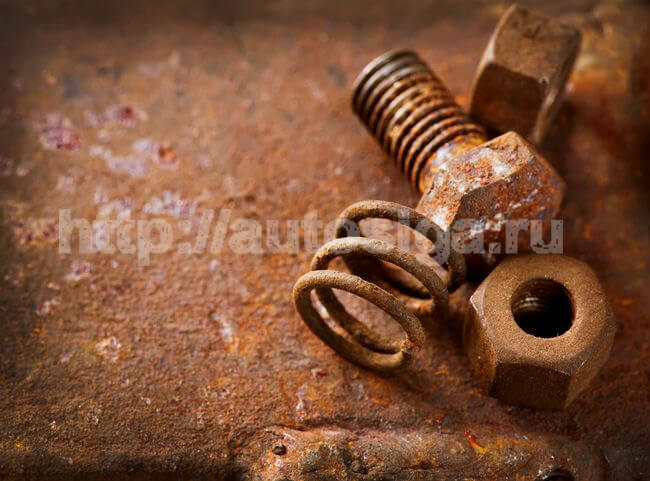
 Most often, a bolt breakage occurs due to exposure to excessive force, and due to rust, unscrew it the usual way does not exceed. Most often, threaded bolts break, which are constantly exposed to moisture.
How do bolts break?
 The worst option is a bolt that has been sheared off flush. Such a screw cannot be unscrewed just like that, without using special devices, such as a drill or welding. It is better if the breakage occurred already during unscrewing, that is, part of the "body" of the bolt is outside. In this case, the bolt is already considered "broken", since you have already begun to unscrew it. Removing such a bolt is a fairly simple procedure, since in this case you only need a screwdriver or pliers, maximum welding.
Effective ways to unscrew a broken bolt
 Before proceeding directly to the removal of a broken bot, you need to conduct a series preparatory activities. The most important thing before starting work is to clean the place where the broken bolt is located from oil, dirt, dust and other foreign contaminants. Then you should treat the junction where the thread is made with a special fluid for greater friction or engine oil. As one option, you can hit the remaining piece of bolt with a hammer several times. You can also try to heat it with a lamp or a soldering iron, but you need to do this only if you are sure that the “neighboring” parts will not suffer from heat.
How to unscrew a bolt if it broke above the threaded surface
Option number 1. If you were able to unscrew the bolt even for a short distance, that is, “break off” the thread, then pliers or an adjustable wrench will be enough to remove such a broken part.
 Option number 2. In this case, it will be necessary to use a grinder, a hacksaw or a chisel (it all depends on the size of the bolt). The main thing is not to make too much effort. The essence of this method of removal is to make a transverse hole according to the size of the screwdriver. After you make a hole, you need to try to unscrew the bolt with a screwdriver.
 Option number 3. You can use welding. To do this procedure, you can use a conventional apparatus for arc welding but best fit welding inverter. In order to pull out a broken bolt, you need to choose a nut that is suitable in size, weld it to the rest of the bolt with inside and unscrew it. The welding seam must be done from the inside of the nut, after which you can try to unscrew the bolt. During the use of arc welding, a lot of slag is formed, which fills part of the seam. It is because of this phenomenon that it is recommended to use an inverter. During the welding work be sure to take care of your own protection, as well as provide good ventilation so that the heat generated "leaves".
How to unscrew a broken bolt if it breaks off flush with the surface or below it.
 In such situations, more drastic measures will have to be taken. As a tool, you will need a drill with a thin drill. In the body of the bolt, you will need to do 2 - 3 thin holes, in order to later make one of them, into which it will be necessary to deepen the screwdriver, with which the fragments of the bolt will be removed. The other way is a little more difficult. If it was not possible to remove the bolt by any of the methods described above, then you need to act even more decisively. In this case, a drill and a tap will be needed.
As part of this method, a hole is drilled inside the bolt, in which a left-hand thread is made using a tap. After new thread is ready, the broken bolt can be removed using the smaller left bolt, which simply needs to be screwed into the new hole.
 If the bolt broke exactly at the surface level, then it can be drilled out. This option is the most cardinal, complex and unsafe, since drilling can easily damage the thread pattern. As part of this method used investment principle: first, a hole is made in the center of the bolt with a thin drill. Then you need to take a thicker drill, which must be screwed into the bolt exactly in the center. And you need to repeat this action until the walls of the broken bolt become so thin that they can simply be broken with tweezers.
The most important thing in this business is not to get excited if you don’t get to remove the broken bolt the first time. If nothing comes out, then it is better to give this job to someone who already has experience in eliminating such defects. So you can save not only the work of your car, but also your own nerves. I wish you success.
Subscribe to our feeds


How to understand: will the kitten be fluffy?
What kind of light alcohol can be drunk for pregnant women: the consequences of drinking
Why do the legs swell in the ankles and ankles of the feet in pregnant women: causes and methods of treatment
The wedding of Prince Harry and Meghan Markle: scandalous and secret details of the marriage (photo) The future marriage of Prince Harry year NTV
How to close white plums for the winter