Quite often in practice one has to face the need to cut a thread of the desired diameter in a hole. With the seeming simplicity of this process, it is necessary to follow certain certain rules and a sequence of actions.
It should be remembered that the through hole for threading should be slightly smaller in diameter than the diameter of the thread itself. There are special tables containing the relationship between hole and thread diameters. For example, for an M3 thread, a through hole with a diameter of 2.5 mm is required, and for an M5 thread, 4.2 m. If the hole is larger in diameter, the thread will turn out to be “loosened” and the fastener will not be strong. If the hole diameter is less than the tabular one, then more force will be applied to the tap and there is a risk of its breakage. It should also be remembered that in order to form a thread in blind holes, it is required to drill it to a greater depth than the intended thread length. The shape of the tap makes it impossible to cut threads to the full depth of the hole. Threading is carried out in several passes, usually three. Taps are divided into rough, medium and fine. Threading should start with a rough tap, then a medium pass is made and finished with a finish one. If you make a thread with any one tap, then the thread will turn out to be rough and there is a risk of breaking the tool in the hole. It should be remembered that after one full turn of the tap, you need to make half a turn in reverse side. This makes it easier for the chips to break away from the surface of the bore and facilitate their exit from the thread. And always use a serviceable, not worn out tool. Then the probability of sending important detail into marriage.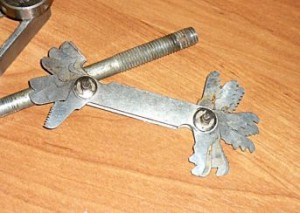
A demonstration of the tools should be included in the instructions. Because this requires a work table with a vise, the instructor should check local conditions beforehand so as not to interrupt the instructions with a time-consuming change of location. This demonstration must be carefully prepared.
Trainees should stand around the workbench in such a way that they can observe the process. None of them should stand behind the instructor. The trainees should keep a close eye on the process and not distract each other from focusing on the demonstration. Subsequently, the instructor demonstrates threading technology on internal threads.

The instructor should demonstrate careful placement of the tool, sensitive rotation before the cut begins, and subsequent continuous forward and backward movements, which must be accompanied by a constant supply of lubrication and coolant. Having finished this demonstration, the instructor must decide whether he will demonstrate the work external thread now or later.
The next step is to discuss the main action points contained in the Trainee Lessons Guide to recap what the trainees saw during the demonstration. Special hints for thread identification. To test the knowledge of the students, they must answer the questions contained in the "Practical Lesson Aids".

That's basically it. We hope that these brief recommendations will soon make you feel like a real professional.
How to cut an internal groove
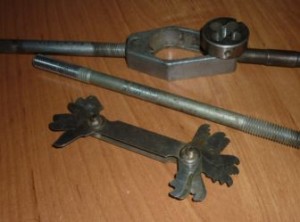
At home, often when repairing a car or plumbing, it becomes necessary to cut the thread or extend it if the bolt has a short thread. Often threaded into metal pipes. All work is more convenient to perform on a workbench. To cut internal threads on nuts and pipes, you can use a set of tools consisting of taps and dies. Taps are designed for cutting internal thread, and dies for cutting external threads on rods, bolts and pipes. Taps can be purchased in sets of three or two. They start cutting first, then continue with the second and complete the threading with the third tap. If the set consists of two taps, then the first tap starts and the second tap ends cutting. Taps all have numbers marked with marks on the tail.
Internal threading technology. The "Practical Lesson Guide" "Pupils" contains a very detailed description of individual operations. Optically this can be supported using transparency no. These tables contain data and information that can be used in numerical examples. Table no. one Technological process production of internal threads.
Table no. 2 Depth of foot and lugs with metric coarse threads. Table no. 3 Formulas for calculating tool values. Table no. 1 gives a clear and comprehensive description of the workflow. Numerical examples will help illustrate the individual steps.
The threaded connection is one of the most reliable connections, which is used, among other things, for connecting .
To obtain the correct thread, it is necessary to determine the diameter of the drilled hole. To measure the thread, a pedometer device is used, with a set of thin plates. Plates numbered by pitch size, inserting them into the thread, you can determine the thread pitch, for example, 0.75, 1.25, etc. if there is already a thread on the workpiece and it needs to be extended, then you use a pedometer, having died out the pitch of the previous thread take the appropriate tap and cut the thread.
Based on tables no. 2 and 3 and in figures 4-6 the necessary calculations can be made. Internal thread sizes. It is recommended that the trainees do some calculations on the board where they have to enter the calculated values in the formulas. In case of errors, the instructor can correct them immediately. The corresponding question contained in the “Practical Lesson Guide” should be answered by the participants themselves. Practical exercises should not begin before the trainees have a good knowledge of the workflow.
external thread technology. The instruction should be based on the main points contained in the "Practical lesson guides" and complemented by transparency. Now you need to turn on the demo. This demonstration is similar to the first one, i.e. all actions require a detailed explanation.
The diameter should be slightly larger than the inner and smaller than outside diameter the thread itself. House master can calculate the diameter of the hole using the formula: having measured the outer diameter of the thread, using a caliper or micrometer, which are in the set of plumbing tools, you must subtract the pitch from it. If the outer diameter of the thread is 6mm, the pitch is 0.5mm, then we subtract 0.5 from 6, we get the hole diameter of 5.5mm. This formula can be used if the work is done on parts and blanks made of steel and brass.
After this process is completed, each of the listeners should hold such a cut thread in their hand and look for flaws. In addition to this "optical inspection", the tips contained in the "Practical Lesson Aids" can serve as a teaching aid.
If it was not possible in the instructions to include a demonstration of the operation of the external and internal thread cutting tools, this should be done right now, before classes begin. If the trainees use only a little practical skill, they should do some preliminary exercises on any steel parts.
If the parts for threading are cast iron or bronze, more complex calculations are made. In this case, the value of the thread pitch must be multiplied by a factor of 1.1 and subtract the resulting number from the value of the outer diameter of the thread. Consider, for example: the step size is 0.5 mm, multiply it by 1.1 (constant coefficient) we get 0.55. Then subtract 0.55 from the 6mm diameter of the outer hole of the thread and get 5.45mm. Received the diameter of the hole for threading in increments of 0.5 mm.
However, you can also start from the first simple exercises immediately - on the basis of "examples of instructions for practical vocational training". But you need to prepare each individual exercise with brief instructions a work-related activity in which participants are shown a completed worksheet to demonstrate the goals and highlights of this activity.
Thus, the instructor may mention critical moments evaluation, as well as difficult areas for the manufacture of such a workpiece. During these instructions, the sequences of operations and working drawings of example instructions should be placed on the tables so that trainees can write them down.
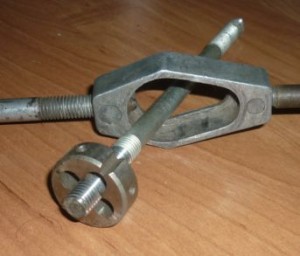
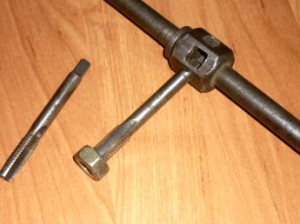 Having calculated and prepared the hole, the part must be fixed in a vise mounted on workbench, it is very difficult to hold it in your hands when cutting threads. We insert the first tap into it, on the other end of the tap we need to put on a holder, or a collar. We hold the tap collar right hand and rotate it until it hits the metal surface. When it is stable on the workpiece, the knob must be taken with both hands and quickly changing the position of the hands, rotate it, every 2-3 turns in the direction of the thread, return the tap half a turn back.
The instructor should check whether trainees have been provided with such instructions in live drilling machines. If this is not the case, then such instruction should be given now. During the exercise, the instructor must constantly supervise the trainees - there is no unsupervised practice! Particular attention should be paid to well production. The instructor is advised to check the clamping tools for secure clamping.
It is advisable that the instructor again demonstrate the operation of the machine with work clamps and the proper drilling process. Since each trainee will not be provided with drilling equipment, the instructor must determine correct sequence, in which students will work with machines during this tutorial.
This action breaks the metal chips under the tap, making it easier to turn and tap. When the first tap is driven over the workpiece, you need to take tap number two and repeat the operation, then take tap number 3 and drive the thread clean.
The taps must be lubricated with machine oil before work, and periodically removed and cleaned from metal chips during threading. If you need to cut an external thread, take a die in your hands.
If there is a waiting time during exercise caused by the use of machines, this time must be covered by performing some other tasks related to the items. In this case, trainees can prepare workpieces for the subsequent external thread cutting process.
Examples of recapitulation and testing. This section contains questions that should consolidate and test previously acquired knowledge and skills. Each question is given a corresponding answer. Questions that are also contained in the Trainee Lesson Guide are labeled A.
How to cut an external thread
 In the household, there is often a need to repair and manufacture simple assemblies and parts, even when repairing a house, when tiling walls, it may be necessary to move pipes, or extend them, and this will require squeezing and cornering devices. To do this, you can’t do without threading if there are no ready-made spurs or pipe blanks, in addition, not only nuts are cut to fasten various parts, but also bolts, which are often needed when repairing a car. To cut an external thread, you will need not only one tool - a die, but also a die holder and a pedometer, or as it is simply called a probe. The feeler gauge measures the size of the thread or pitch. Especially if the thread has already been cut, and it needs to be continued, with a probe having several thin plates, with a pitch marking, measure the existing thread and select the necessary die according to this size.
What is the purpose of screw connections? What types of thread are cut by hand? What tools are used to cut internal and external threads by hand? How do applications of serial and nuts differ? How do the applications of threading dies and dies differ?
What movement is associated with the thread trimming process? Why do we always have to move the taps or respectively the dies or dies back? Why should we use lubricating and cooling agents? What operations are involved in the production of internal threads?
How can we calculate the small inner thread diameter? How should we consider the chamfer of a crane when determining the depth of a well? How should the threaded holes be sized? What testing tools are used to test a fully threaded hole?
Short blanks are cut, securing them in a vice, and long ones are held by assistants with adjustable wrenches. When cutting an external thread, it is important to set the diameter of the rod (pipe, workpiece, bolt). You can do this at home using the diameter data and step sizes shown in the table.
| Thread diameter mm | Pitch in mm | Bar diameter mm in the range from to |
| 6 | 1,00 | 5,80 — 5,92 |
| 8 | 1,25 | 7,80 – 7,90 |
| 10 | 1,50 | 9,75 – 9,85 |
| 12 | 1,75 | 11,76 – 11,88 |
| 14 | 2,00 | 13,70 – 13,82 |
| 16 | 2,00 | 15,70 – 15,82 |
| 18 | 2,25 | 17,70 – 16,82 |
| 20 | 2,25 | 19,72 – 19,86 |
| 22 | 2,25 | 21,72 – 21,86 |
| 24 | 3,00 | 23,65 – 23,79 |
| 27 | 3,00 | 26,65 – 26,79 |
| 30 | 3,50 | 29,60 – 29,74 |
Having picked up a rod (a pipe, a bolt, a rod, and often electrodes are used to make a bolt of small diameter) of the required diameter, it is necessary to clamp it in a vise at the desired end to make a notch - a chamfer with a file so that the die can catch on and then moving to apply the thread.
What operations are required to create an external thread? How do we fix the bolts in a vise? Why does the bolt have to be chamfered? What faults on external flows can be detected with the help of vision? Thread milling has become quite popular in recent years as an alternative to threading or other forms of threading.
Windmill threads are similar to faucets, but they work in a completely different way. The taps are fed into the part at the thread feed rate, using the chamfer and the first full thread after the chamfer to be cut and increasing the length of the thread to the finished size. On the other hand, the thread mill does not have a bevel. The thread mill is inserted into the hole along the axis of the spindle, deep enough to provide the required thread depth. The controller moves the thread mill up to the diameter of the hole until the threads are cut into the sidewall of the hole.
 Insert the plate into the holder and tighten the screws. Direct the die to the end of the rod and begin to make rotational movements in the direction of the thread, rotate with one hand, and press the die against the workpiece with the other so that it rests against the chamfer. When the die begins to cut the metal, we make rotations, intercepting the hands 2-3 times in the direction of the thread and half a turn back.
The thread mill is then moved in a 360° circular motion until it returns to its original position. This lifting motion combined with circular motion is called helical interpolation. Machines must be able to use the helical interpolation program to use the thread mill.
After a 360° turn, the tool returns to the center of the hole and is removed from the part. Thread mills are most commonly found in hard carbide with straight or helical grooves. They are also available in indexed style with carbide inserts or high quality helical grooved high speed steel.
The die must be on the workpiece strictly horizontally, otherwise the thread will go skewed and you will have to do everything all over again. When the thread reaches the required length, it must be checked by running a nut of the desired diameter along it. If the nut turns well without delay, then the pitch and diameter are chosen correctly and the thread is cut correctly, well and evenly. The connection will be strong.
When should I choose a faucet carving mill? However, when producing a wide range of parts, filaments and materials on the same machine, the mill mill is much more versatile. They will produce right or left hand, internal or external thread, single or multiple output from No. 2-56 with the same mill. Materials range from soft, non-ferrous alloys to heat treated steels or hard alloys such as inconel and titanium where faucet breakage often occurs.
Are pipe threads easy to make without leaving normal stop lines? and creating nasty string chips, usually created by taps. In addition, thread mills can produce full threads within one pitch of the bottom of a drilled hole.


What to do with a girl on a first date?
Grams or grams - which is correct?
How to solve motion problems IV
Winter landscapes of outstanding artists How to draw a light landscape in winter with a pencil for beginners
Solving logarithmic and exponential inequalities by the rationalization method