Usual air compressor do-it-yourself for painting a car body is a high-pressure supercharger assembled on the basis of a car chamber that has served its time. It will play the role of a receiver (a vessel containing a certain gas). In our case, there will be air inside the receiver. Homemade receiver from a car camera - a good option to do a small amount of work.
Materials and tools
To assemble a compressor for painting a car, you will need the following things:
- automobile pump and pressure gauge;
- car camera;
- a set of elements for rubber repair;
- nipple from an unnecessary camera;
- set of tools.
First you need to find an unnecessary car camera that will replace the receiver. It is important that it be without punctures, since there is always pressure in the receiver. Be sure to take care of the supercharger. A simple homemade paint compressor can be equipped with a conventional car pump with a pressure gauge, which will act as a supercharger.
Homemade air compressor from a car engine
If you want to make more serious car painting equipment based on an automated supercharger, read on. It should be noted that this homemade semi-professional compressor will cost more in terms of materials, so first figure out what you will use it for, and whether you need it at all.
What to make an automated supercharger?
To do this, you will need the following set of materials:
Preparatory work
Any electric motor can act as a power unit, but such that the pressure switch produces the necessary results. Before operation, it is better to thoroughly clean the supercharger with an anti-corrosion agent. If any filter is clogged, replace it. It is also useful to change the oil.
The supercharger should have three tube outlets:
- for air inlet;
- for oil change;
- for air outlet.
You can determine where the outlet is and where the air supply is by turning on the engine for a short time. One tube must be soldered - for changing the oil. When opening it, make sure that sawdust does not get inside. We will need an oil separator, as some of the oil can get into the air streams issued by the supercharger. The filter should be screwed onto the air supply pipe, and clamps are better suited for fastening.
As for the receiver, a cylinder can act as its role - from a fire extinguisher or gas. The main thing is that it can withstand high pressure.
Let's start assembling
The receiver must be securely fixed to the shield. The main plane of the shield or stand can have mini rollers from old furniture. Check that a filter is installed on all the necessary elements of the autocompressor. In addition to the fact that the autocompressor must have a coarse filter and an oil separator, it is important to take care of the presence of an air intake. You can make it yourself.
How to make an air intake
You need to take a tube through which the paint compressor will take water, and install a coarse filter in its place. After that, the filter should be connected to the gearbox. Without it, the pressure will not normalize. The outputs should also be connected to the receiver crosspiece. There will be two more crosses that can be used for a pressure gauge or for connecting to an airbrush. In words, this all seems too complicated, but if you know the principle of operation, you can assemble a compressor for painting with a blower motor and receiver.
For safety reasons, the compressor must be switched on periodically to avoid broken connections. This is done with a relay. Best Views the pressure switch today is PM5 and RDM5. They are the simplest switches, adjustable by springs. The supercharger is connected to the zero phase. It is better to install a toggle switch on the main phase wire, as it may be necessary to turn off the device.
If you like to service the car with your own hands, without once again contacting car service specialists, you should get the appropriate equipment. Among other useful things, you will need a system for painting a car - a compressor-spray gun.
If you look more broadly, you will need a compressor for more than just painting a car. It is also used for other operations, such as sandblasting, inflating wheels and blowing various elements of a car. However, unlike other works, the specificity of painting lies in the fact that it is necessary to ensure stable air pressure. Otherwise, streaks will appear on the treated surface, and the coating itself will be inhomogeneous and littered.
Air compressor for car painting
Therefore, the compressor used for car painting has special requirements for air pressure stability. In addition, the air flow when painting a car must not contain any foreign particles. This is necessary so that the surface of the car painting is clean and even, without air bubbles and foreign debris.
The simplest solution: if the need arises, simply purchase a suitable model in the store. , will not be difficult, but this thing is quite expensive, and not everyone has the financial ability to buy it. In this case, there is another solution - you can do it yourself.
This process is quite time-consuming, requiring certain skills and patience. But if you want to do homemade compressor any car enthusiast can paint a car. The main thing is that there is a desire and time.
How does a compressor for painting a car work?
First you need to understand the principle of operation of such a device. Both serial factory products and a self-made assembly for a car, assembled with your own hands, will have the same principle of operation. With the help of a means for injection, air is supplied to the receiver, where it is in a compressed form and from there it enters with a given intensity to the spray gun, from which the material is sprayed. Pressure control is carried out using a manometer. For the stepwise operation of the entire mechanism, a starting relay is used, which closes and opens the circuit at certain levels of air pressure in the receiver.
 Compressor device
 We collect the necessary materials
The first stage of work is the accumulation of the necessary base of parts and materials. So, to make a do-it-yourself compressor for painting a car. You will need the following:
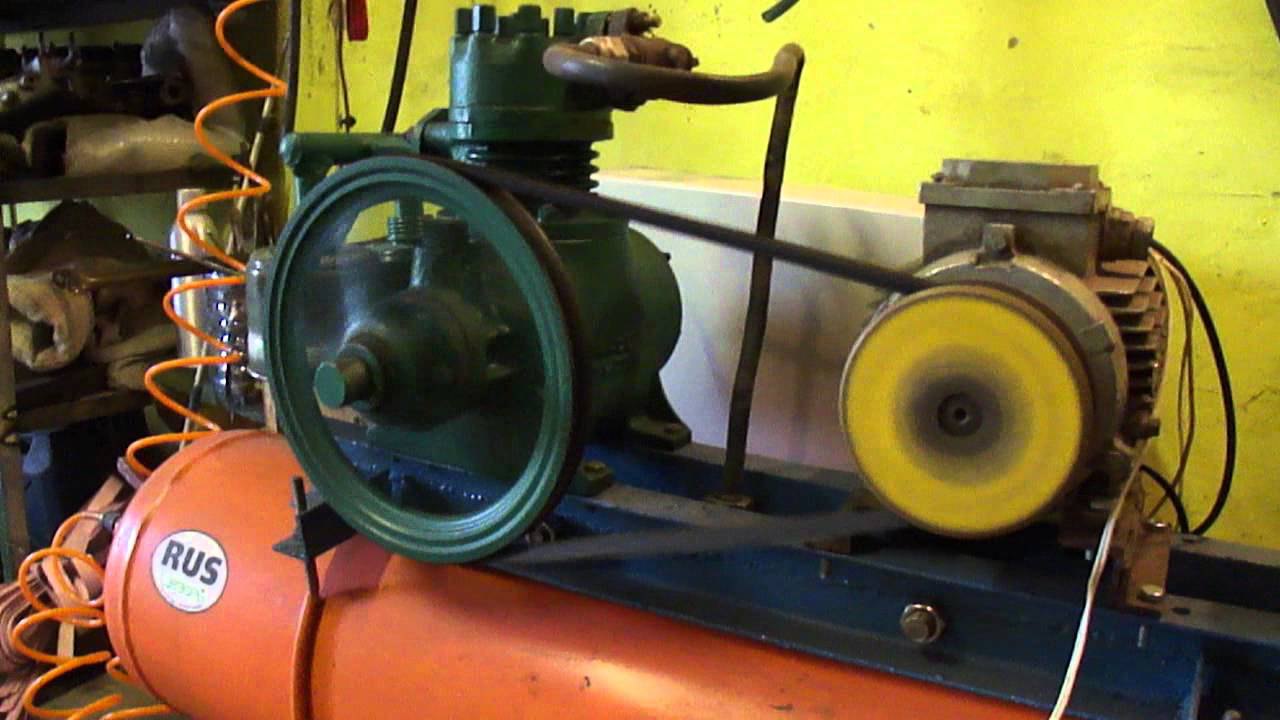
- motor from an old domestic refrigerator;
- cylinders from used ten-liter fire extinguishers;
- thick wooden board;
- motor oil (semi-synthetic);
- medical syringe;
- file for cutting metal;
- manometer;
- electric toggle switch;
- filter for gasoline engines;
- filter for diesel engines;
- gearbox with oil and moisture filter;
- water cross;
- brass tubes;
 Materials needed to assemble the compressor
 - oil hoses;
- clamps with screws;
- sealant tape;
- rust remover;
- 3 sheets of plywood;
- toggle switch for 220 volts;
- enamel for metal painting;
- furniture wheels.
After we have collected everything we need, we can get to work.
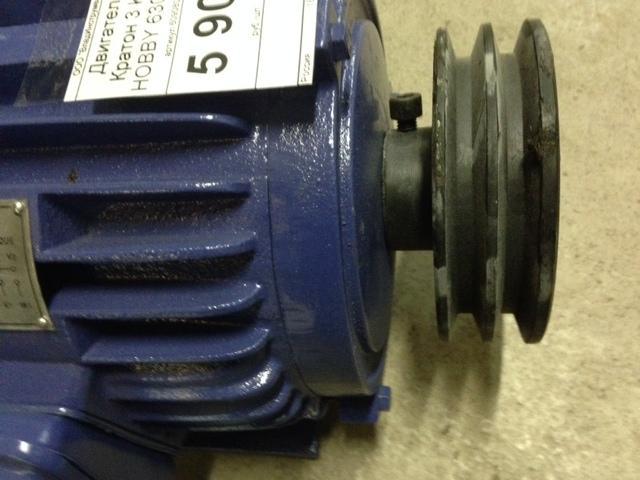
What to do with the motor
As a mechanism for forcing air into homemade apparatus it is best to put a compressor from an old Soviet refrigerator. You ask why from the Soviet?
Because the motors in them are designed for heavy loads, they do an excellent job with emergency situations and have a fairly large resource in terms of durability. In addition, they have a start relay, which we will need for the stepped operation of our unit.
After we remove the motor from the refrigerator, we must improve it with our own hands. Since the oil tends to thicken over time, we are better off changing it. In the compressor for this we find 3 metal tubes. 2 open - these are the inlet and outlet channels for air. The 3rd tube has a sealed end - this is a channel for changing engine oil.
 We use the motor from the refrigerator for our compressor
 First you need to decide on the air channels: which one is the input and which is the output. We briefly apply voltage to the motor and observe where the air enters and where it comes from. We make appropriate notes on the channels.
Now we can start changing the oil - doing it yourself is quite simple. Using a metal file, we make an incision in a circle, and then carefully break off the soldered end, making sure that sawdust and debris do not get into the channel. We get rid of the old oil, after which we fill the semi-synthetics with an ordinary medical syringe. To seal the channel, we select a screw with a section of the appropriate size, wrap it with hermetic tape and screw it into the channel.
 We change the oil in the refrigerator motor
 How to make a receiver with your own hands
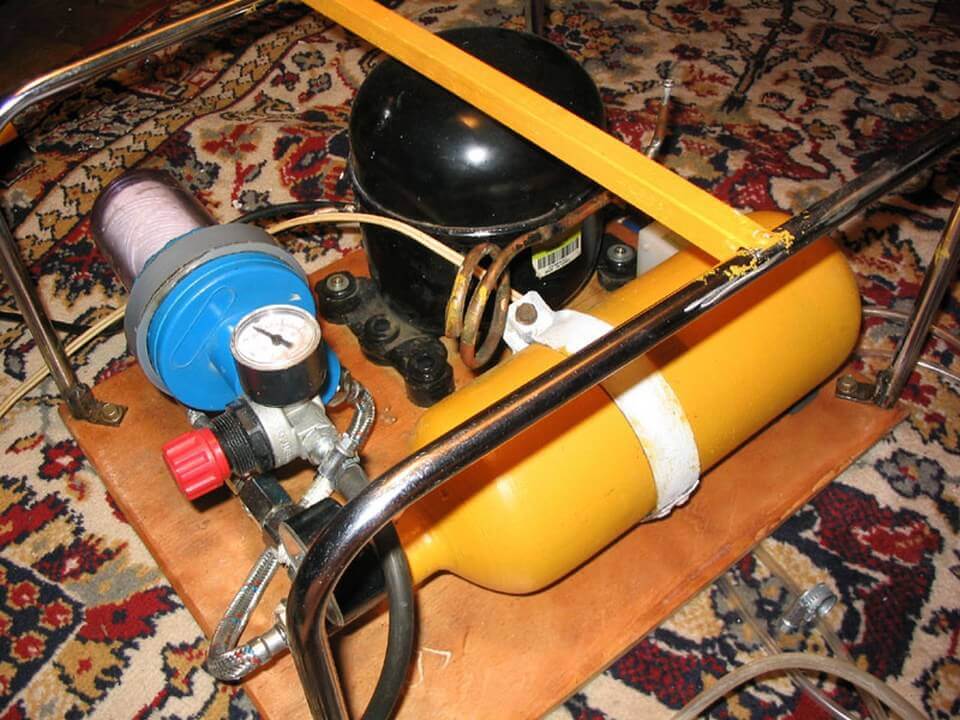
Now we need to make a container for compressed air. In a lot of useful things that we stocked up ahead of time, we find a cylinder of a used ten-liter fire extinguisher from a car. It is perfect for our purposes. We clean off all the dirt from it, grind the centers of corrosion. We remove the shut-off and start-up valve and pour the rust-fighting agent inside, shake well, wait for the right time and drain. We screw a water cross into the neck - we can assume that the receiver for the compressor for painting the car is ready.
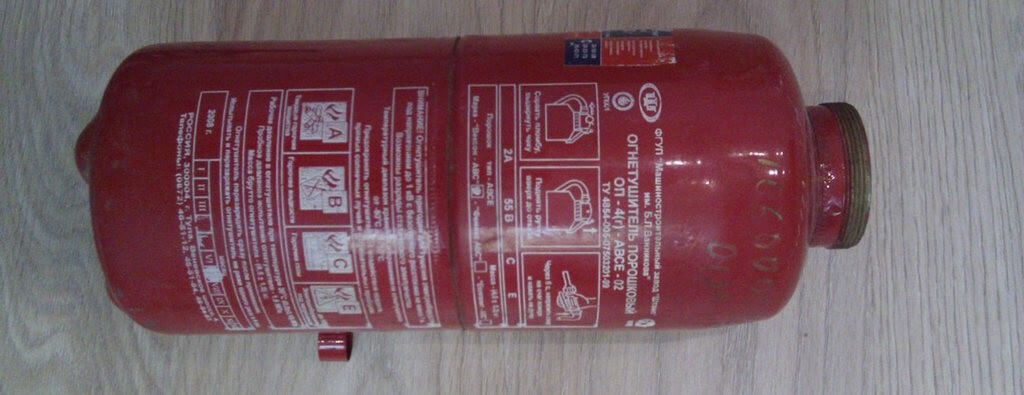 Old fire extinguisher instead of receiver
 We assemble the structure with our own hands
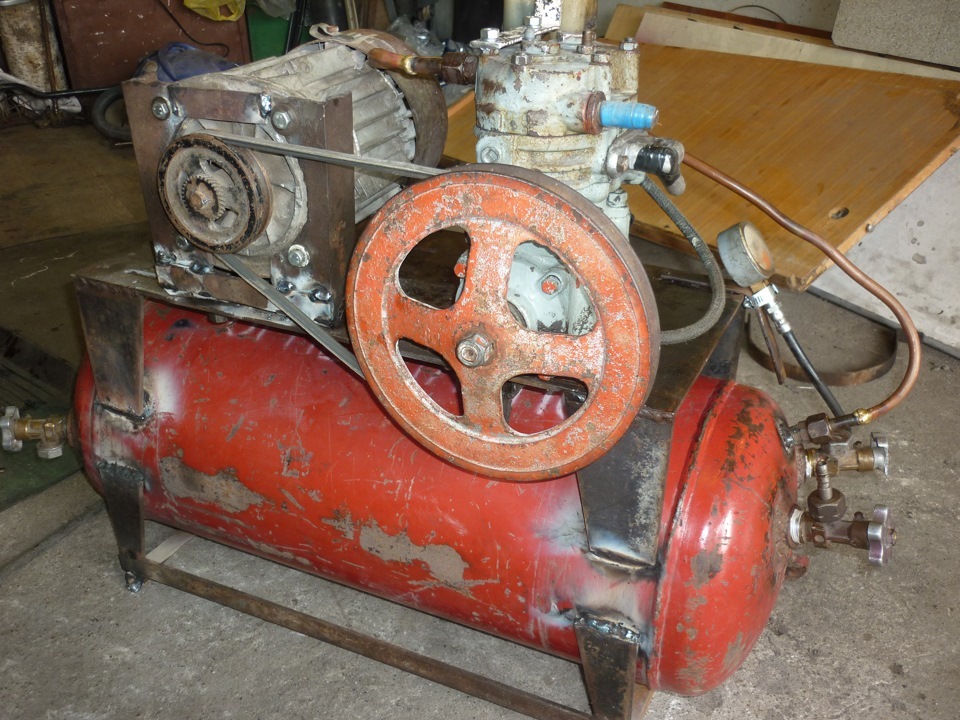
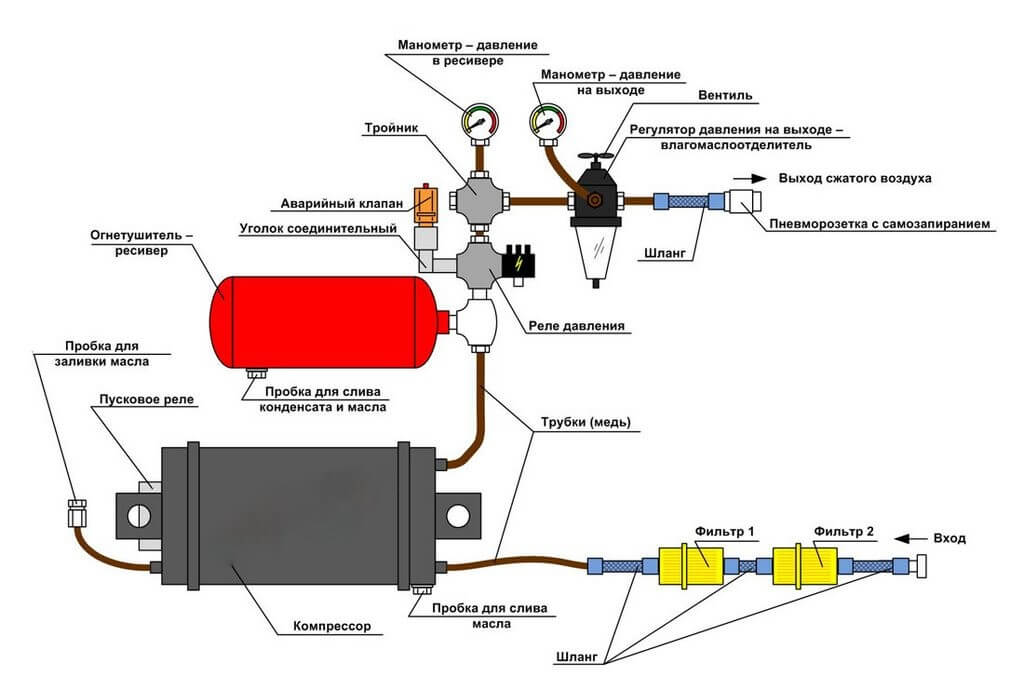
After the two main elements are ready, we can begin installation. The above diagram shows the general arrangement of a car painting unit. To begin with, you should study it well.
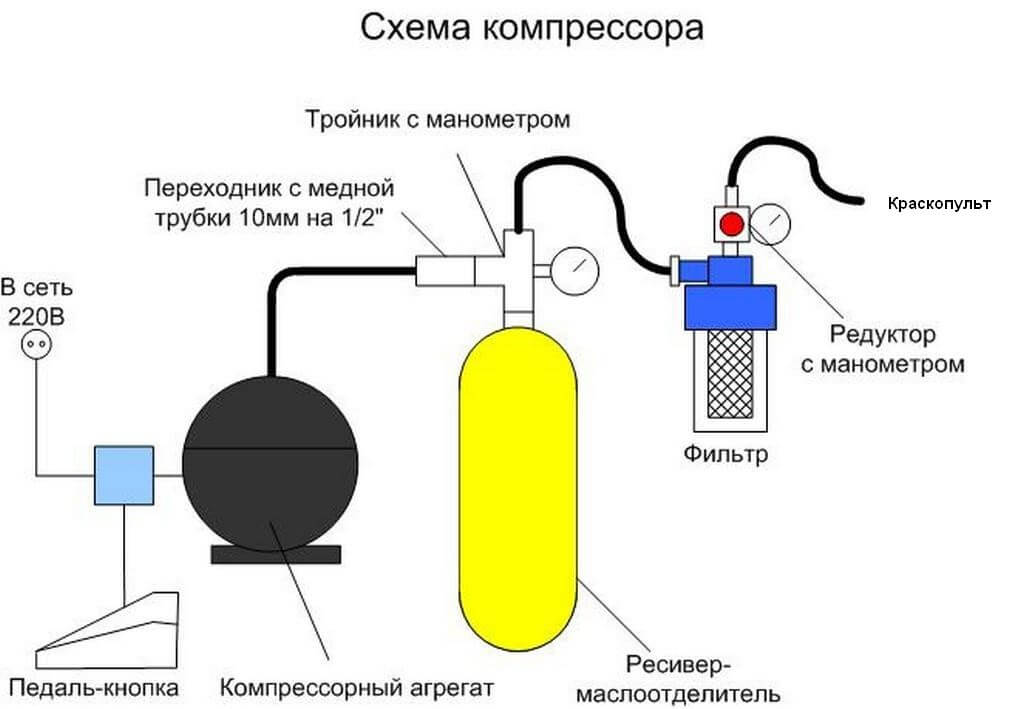 Scheme of a compressor for painting a car
 All work is carried out according to the following algorithm:
- As a basis, we take a thick wooden board, we mount the motor on it. You should pay attention to how it will be located - it depends on how stable and correct the starting relay will work. You must choose the same position in which the mechanism was in the refrigerator. Most likely, the corresponding marking will be applied to the relay.
- Mount the receiver vertically. To do this, we make a hole of the appropriate diameter in one of the plywood sheets, put it on the balloon, and fix it on the sides with two other sheets of plywood, fastening them with one edge to the base, and with the other - to the worn plywood sheet. Fastening is carried out with screws and glue.
- We put a rubber hose with a filter for a gasoline engine on the inlet air channel of the supercharger. There is not much effort expected here, so there is no need for additional fasteners.
- We put a hose and an oil-moisture filter from a diesel engine on the outlet air channel of the supercharger. As mentioned above, the air jet should not contain any impurities - otherwise it will negatively affect the quality of car painting. Since the air flow here will be quite strong, it is necessary to ensure additional mount using special screw clamps.
 Assembling a compressor for painting a car with your own hands
 - We connect the filter to the gearbox and in a chain - to one of the side channels of the receiver crosspiece. The reducer will provide stable pressure, which is very important in the process of painting a car.
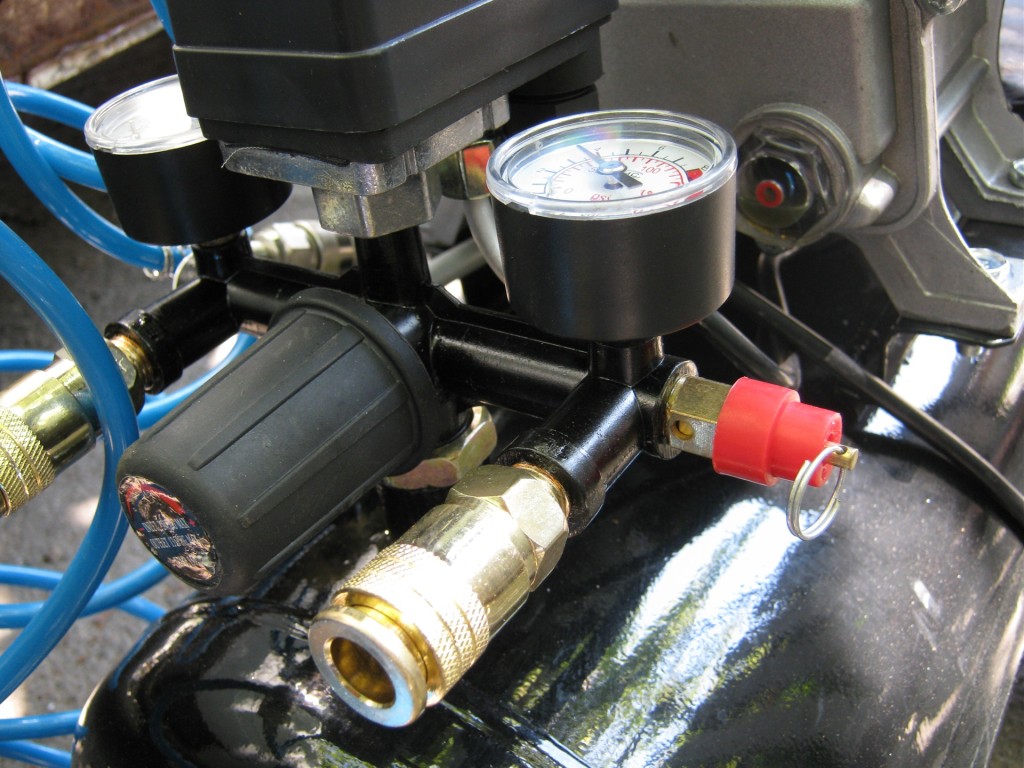
- On the other hand, we include a pressure gauge in the chain to control pressure.
- From above we wind crosswise with the help of a relay fitting for adjustment. It will control the level of air pressure in the receiver and turn the motor on and off at the right time.
- We solder all electrical contacts and carefully isolate them. We solder into wiring diagram toggle switch on / off the device, so that there is no need to constantly use the power plug.
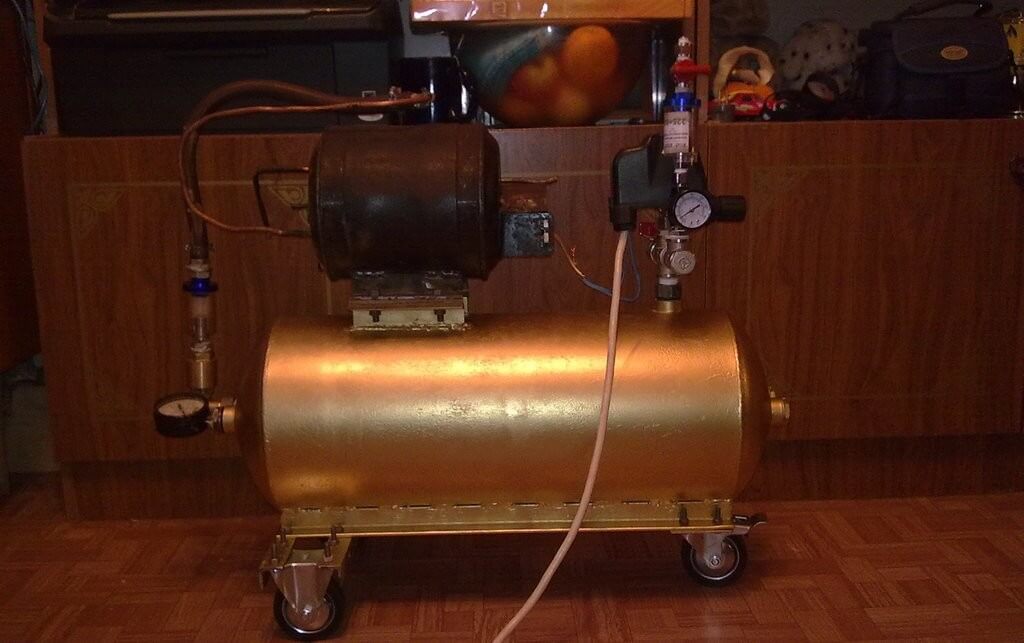
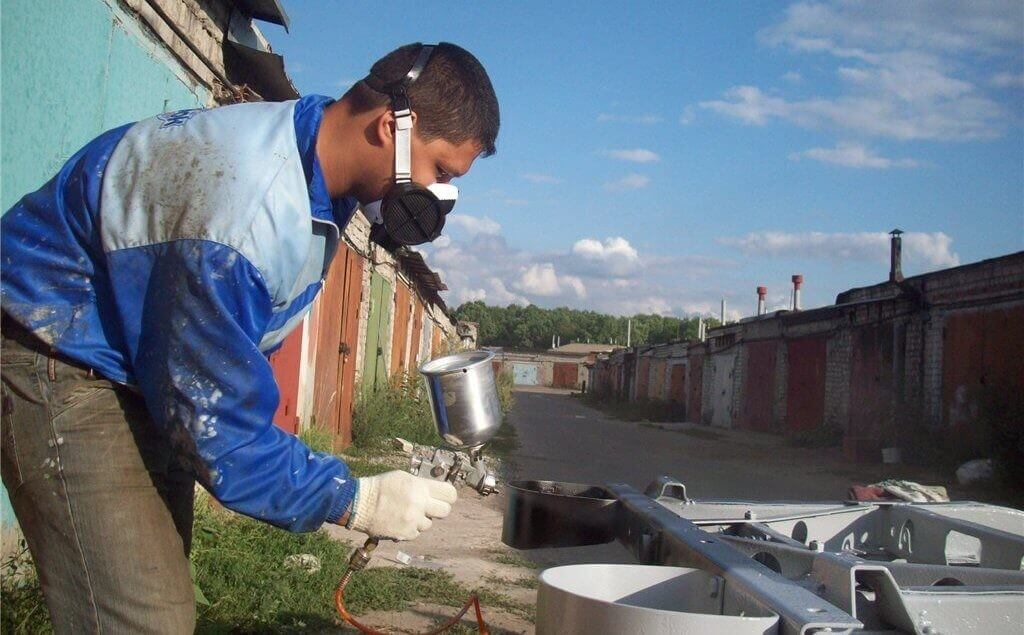
- Let's start testing. We set the relay regulator to the minimum pressure and turn on the device. We look at its work, try different positions of the regulator, make sure that the relay turns the motor on and off properly at the appropriate air pressure values. Using a molar solution, we check the tightness of all air ducts. If we are satisfied with the inspection and testing, we perform a control staining of some prototype.
 Testing the compressor
 Conclusion
The compressor is a necessary piece of equipment in your garage. With it, you can apply a paint layer on a car body, as well as different kinds varnishes and primers.
Since a serial product is quite expensive, many experts recommend making. This is a complex and laborious process. However, it allows you to save a substantial amount. To successfully complete the job, you will need certain tool skills, as well as patience and accuracy. Follow the described recommendations, conscientiously perform each operation - and the result of your efforts will be no worse than factory products.
Any car, both the oldest and brand new, needs valiant care and timely repairs. And this applies to both technical units and its appearance, inextricably linked with the state of the car body. If the finances are really bad or there is a desire to build something, the motorist will be able to personally assemble the compressor design for painting the car from improvised means and operate it on a par with the purchased unit.
Need
A device made by a car enthusiast, if done correctly, will work not only well, but even better than expensive equipment. It is because of the high price of a compressor for painting a car that users increasingly decide to make their own. In the virtual network, there are many descriptions of how to do this correctly. If you follow them exactly, then everything will work out.
Of course, you can try and buy a model of an inexpensive paint car compressor, but the quality of such devices leaves much to be desired, and they will last at best several times. We offer you to delve into the process of creating an air receiver with your own hands and find out its technological parameters.
Work principles
It is important for the future designer, as well as the painter rolled into one, to know how a home-made compressor works for painting a car:
- the engine forces air into the tank;
- in the receiver, the incoming air is under the influence of high pressure;
- through the relief valve, excess contents of the tank are introduced outside;
- when you press the trigger of the spray gun, air flows are thrown into the barrel of paint;
- when the pressure level inside the device falls below a certain value, the engine turns on again and the pressure begins to rise.

The presence of constant pressure inside the sprayer allows you to achieve a high painting result: the layer is even, the consumption of materials is moderate. It is important to properly adjust the pressure.
Nuances
More:
- The performance level of a paint compressor for a car depends on the volume of the tank. Therefore, when looking for a suitable device, it is worth giving preference to those that have a larger capacity.
- You don’t have to worry about looking for an engine: a gearbox from a refrigerator left over from Soviet times in a country house or in a garage is suitable.
- Ingress of liquid, dust into the receiver is unacceptable. If this happens, all the efforts of the painter will be in vain, and painting activities will have to start from scratch.
- Choosing an engine from refrigeration compressor, the master will receive a relay as a bonus, which will interrupt the air supply and resume it.
Problem of choice
You can choose devices for auto painting endlessly. Anyone who has such an opportunity, or there is a need to purchase branded devices to maintain the authority of the workshop, will choose a car compressor for painting in favor of a solid branded unit with excellent performance and an excellent reputation.
IMPORTANT! To understand the painter will help specialists who sell the goods and reviews of already held buyers. It is worth discussing this issue on the forums or chat with the masters at the service station.
Anyone who frequently uses these devices knows that a monotonous pressurized air supply is not enough for operation. After all, for each type of coatings ( paintwork materials) you need to set special parameters for the pressure of the paint. In addition, models manufactured by the company are able to turn off when a certain pressure level is reached and adapt to operating conditions.
However, these devices also have a lot in common: they adapt to the same parameters of the electrical network - 220 V, are installed on wheels and connected to the sprayer. The most typical parameters for receivers of domestic production.
How to make a decision
To find a device that is suitable for its characteristics, you need to study the catalogs of online stores, bypass local outlets with similar products. If you wish, you can fully inspect the device, feel it to the smallest detail, and then order the same unit from the manufacturer via the Internet.
It is worth delving into the classification of painting equipment so that there is a complete set of data for personal use. Technique released famous brands, has an extended warranty period, which is also important for the consumer. On the contrary, brands that few people have heard of are unworthy of the attention of serious buyers. For their production, components of the worst quality are used. As a result, system nodes break down, but for now, warranty repair, the painter has to lose precious time.
Do not rush to purchase an unexplored device. By carefully studying the characteristics, the device that is really needed will be found. Whoever failed to find it among thousands of items with a brand name and symbols in the lists of online portals or on forums, their own ingenuity and descriptions from craftsmen help out, how to assemble a compressor unit with your own hands. Do-it-yourself production can be more durable, although not as functional as modern conveyor production.


History of sky lanterns
Job description: concept, purpose, structure, procedure for compiling and formalizing Purpose and content of job descriptions for managers
Interview questions What job are you going to work on?
What to do if the boss criticizes all the time If the boss does nothing
How to understand: will the kitten be fluffy?