The veranda allows you to profitably expand the useful space of a residential building. In a properly constructed and well-equipped extension, you can comfortably spend time both in the warm and cold seasons.
It is best to build the extension so that it covers the entrance door to the main house. Therefore, you will not be able to build a veranda on any desired side of the already finished main building. Otherwise, the veranda will be separated from the main building and you will have to enter it from across the street.
The dimensions of the extension are selected individually. For a family of 3-6 people, a veranda measuring 3x4 m is enough. It is also important to take into account the general view from the street. For example, if you live in a large two- or even three-story house, and the veranda is very small, the overall architectural ensemble will turn out to be inharmonious. For compact houses, you can safely add verandas the width of the entire wall of the main building - it looks great.
Important note! Regardless of the chosen dimensions and the overall features of the extension, its construction must first be legalized. To do this, you must have a project on hand. You can find it in open sources or order it from a specialized company.
Take your project to your local architectural department. Department employees will study your project, make the necessary changes and issue a permit. Keep in mind that on average it takes about 2-3 months to review and approve a project, so it is best to resolve this issue in the winter, before the start of the construction season.
Construction site marking
We are starting to prepare our construction site.
First step. We remove about 150 mm of the top layer of soil from the perimeter of the future building and take it to the flower beds, vegetable garden or other place.
Second step. Align the resulting depression.
Third step. We carry out the markings. First, focusing on the project, we drive in metal or wooden pins at the corners of the site, then in the same way we drive in intermediate pegs every 1-1.5 m, and then we pull a rope between the pins. We will use it to guide us in the process of arranging the foundation.
Making the foundation
Most often, verandas are built on columnar or strip type foundations. The depth of the support is assumed to be equal to the depth of the foundation of the main house. It is strongly not recommended to connect the main support to the foundation of the extension, because these structures will have widely varying weights. Consequently, the degree of their shrinkage will also vary. To prevent a heavy house from dragging down a relatively light extension, the latter must be built on a separate foundation. To do this, leave approximately a 3-4 cm gap between the foundations.
Important point! When choosing the type of foundation, consider, first of all, the soil characteristics in your region and the total mass of the veranda. For the construction of heavy structures on heaving soils, monolithic ones are best suited. Lightweight structures, for example, made of wood, can be built on columnar supports.
Tape base
A strip-type foundation is optimally suited for the further construction of a veranda on it from building blocks or bricks. The thickness of the base, as already noted, is maintained equal to the thickness of the foundation of the house. If this is a new building, keep the thickness at 70-80 cm.
First step. We dig a trench around the perimeter of the walls of the extension.
Second step. We level the bottom and walls of the trench using wooden boards or panels to the height of the future concrete support.
Third step. We successively fill the bottom of the trench with a 10-centimeter layer of sand and the same layer of crushed stone, making sure to compact each ball of backfill.
Fourth step. We lay a reinforcing mesh of 10-12 mm bars. The recommended mesh size is 10x10 cm. This way the base will be as strong as possible.
Fifth step. We pour concrete prepared from a portion of cement, three portions of sand, 4-5 portions of crushed stone and water.
Carefully level the fill and leave it to dry and gain strength for 3-4 weeks. In hot weather, we pour concrete every day to prevent it from cracking.
Columnar base
Perfect for a veranda made of timber or polycarbonate. It is recommended to make holes for posts with a depth of 80-110 cm. If the veranda is small (up to about 3x4 m), it will be enough to install supports in the corners. However, professional builders recommend installing intermediate posts for any size veranda. We maintain the distance between supports within 0.8-1 m.
First step. We dig holes in the places where the pillars will be poured. The most convenient way to do this is with a drill.
Second step. We fill the bottom of each depression with a 15-20 cm layer of sand. Additionally, it is recommended to pour approximately 10 cm of crushed stone. We compact each layer.
Third step. Pour the concrete to the ground level and let it harden.
Fourth step. We coat the finished concrete supports with bitumen.
Fifth step. We fill the gaps between the ground and the supports with sand.
Sixth step. We erect the above-ground part of the pillars from brick. We make the height equal to the height of the foundation of the main house.
Making a subfloor
The floor can be wooden or concrete. For example, in a frame veranda made of wooden beams, a wooden floor would be more appropriate. Concrete pouring will best fit into a brick extension.
We make a wooden subfloor like this:
- We fix the beam of the lower trim on the foundation. We use suitable fasteners, for example, anchors. To connect the beams directly, we first make samples at the places of their joints and additionally fasten them with galvanized nails;
- We attach wooden logs to the bottom trim. We keep the step at 50 cm - this way the floor will definitely not fall through. We use the connection option described above;
- fill the space between the joists with expanded clay;
- We make the flooring from unedged boards or plywood about 50 mm thick. We attach the flooring elements to the joists with galvanized nails or self-tapping screws.
We make a concrete screed like this:
- fill the base with a 10-centimeter layer of sand;
- pour a layer on top;
- lay the reinforcing mesh. For the floor of the veranda, a mesh of rods with a diameter of 6-8 mm with cells of 25x25 cm is sufficient;
- pour concrete.
Important! The screed should be as even as possible. We carry out the work with the obligatory use of a level.
Building a wooden veranda
Basic properties of the material
Wood is one of the most popular and ancient building materials. Even after the appearance on the market of all kinds of blocks and other low-cost and easy-to-arrange elements, wood practically did not lose ground.
Almost anyone can handle the construction of a simple frame wooden veranda. You just need to properly mount the frame posts and cover them with shields, clapboard or other suitable material.
The undeniable advantages of wood are its environmental friendliness, beautiful appearance and relatively low weight. The latter property allows you to abandon the construction of expensive and difficult to construct foundations.
The main disadvantage of a wooden veranda is its fire hazard - installing a barbecue in such an extension or in close proximity to it is a very important undertaking that requires taking into account many nuances and details. Therefore, it is better to move the source of fire somewhere further outside the wooden veranda.
Another significant disadvantage of wood is its poor tolerance to high humidity, which is why the material requires serious pre-treatment with special ones. Without such preparation, the wood will rot very quickly.
Construction order
To build the frame, we use high-quality wooden beams with a cross-section of 100x100 mm. We already have the bottom trim and subfloor, so we continue to work, adhering to the instructions below.
First step. We cut grooves in the beam of the lower trim for installing vertical supports. We maintain a half-meter step.
Second step. We install vertical racks. To fasten the frame elements we use staples and screws or nails.
Important! The roof of our veranda, as noted, will be sloping. Therefore, we make the vertical beam installed at the bottom point of the slope 50 cm below the opposite posts.
Third step. We mount the beam of the upper trim. On higher racks no questions will arise - we perform the connections in exactly the same way as in the previous stages.
When installing the strapping of lower supports, we do the following: first we connect the pillars longitudinally with a strapping beam, and then we fix the transverse crossbars connecting the high and low posts at the height of the low posts. We fasten the crossbars to the high posts using pre-created samples and nails.
Fourth step. The top trim is ready. The resulting slope will allow us to lay the rafters for the roof. Additionally, we nail a girder near the roof slope. To fasten the beam to all supports, we use anchor bolts. For greater reliability, it is recommended to fasten the strapping beams with transverse boards or beams, if possible and necessary (we focus on the weight of the future roofing material). We will attach racks and struts to them for greater strength of the rafter system.
Fifth step. We install in increments of 50 cm. For this we use a wooden beam with a section of 100x200 mm. We connect structural elements using any of the previously discussed methods.
Sixth step. We cover the frame. Lining is perfect for interior cladding, and siding or other material for exterior cladding. We lay layers of hydro- and thermal insulation between the external and internal cladding materials. We attach the film to the frame. The position of the insulation is fixed by transverse slats. The finishing material is also attached to them. When covering, do not forget to leave openings for windows and doors.
Prices for various types of timber
Brick verandas
Basic information about building materials
Brick is excellent for constructing permanent verandas. A building made from this material will be cool in the summer and, provided the insulation is properly insulated, warm in the winter. Brickwork is durable, fireproof and easy to maintain.
The main disadvantage of a brick building is its heavy weight. Such structures are built exclusively on , which does not have the best effect on the total cost of construction.
The procedure for constructing a veranda
The foundation is ready and waterproofed, the screed is poured, the base is level and does not require any additional preparatory measures. Let's start laying out the walls.
We first select the appropriate type of masonry. The simplest options, perfect for constructing a veranda yourself, are as follows:
- spoon masonry. The final wall thickness will be 120 mm;
- bonded masonry. Wall thickness – 250 mm;
- chain laying. Allows you to obtain walls with a thickness of 380 mm.
First step. We attach a mooring cord to two opposite ends of the foundation with a tie. It should run along the edge of the base.
Second step. We place the corner bricks along the cord, and then fill the space between them in accordance with the chosen masonry method. To fasten building elements we use standard cement mortar.
Third step. We check the evenness of the first row and similarly lay out the walls to the required height, not forgetting to leave openings for doors and windows.
Important! will be inclined, so we make the wall at the bottom of the slope, as well as the side walls adjacent to it, a row lower compared to the wall supporting the top of the roof.
Having laid out the last row of walls, we arrange an armored belt. To do this, we fix formwork about 70 mm high on each wall along the upper surface of the walls, place anchor bolts in the corners, lay reinforcing bars and pour concrete.
We let the concrete harden, and then attach a strapping of wooden beams with a section of 10x10 cm to the anchor bolts. The further procedure for arranging the rafter system remains similar to the situation with
If the veranda is planned to be used throughout the year, the walls can be laid in two rows, filling the gap between the rows with thermal insulation material. With single masonry, insulation, moisture insulation and interior finishing are carried out by analogy with a wooden veranda. Exterior decoration is at your discretion. You can simply carefully unstitch the seams and call it a day.
| Masonry size | Length, L | Width, V | Height, N | Number of bricks excluding thickness mortar joint, PC. | Number of bricks taking into account thickness mortar joint 10 mm, PC. |
|---|---|---|---|---|---|
| 1 m3 single brick masonry | 250 | 120 | 65 | 512 | 394 |
| 1 m3 thickened brick masonry | 250 | 120 | 88 | 378 | 302 |
| 250 | 120 | 65 | 61 | 51 | |
| 1 sq. m of masonry in half a brick (masonry thickness 120 mm) | 250 | 120 | 88 | 45 | 39 |
| 1 sq. m of masonry in one brick (masonry thickness 250 mm) | 250 | 120 | 65 | 128 | 102 |
| 250 | 120 | 65 | 189 | 153 | |
| 1 sq. m of masonry of one and a half bricks (masonry thickness 380 mm) | 250 | 120 | 88 | 140 | 117 |
| 250 | 120 | 65 | 256 | 204 | |
| 1 sq. m of masonry in two bricks (masonry thickness 510 mm) | 250 | 120 | 88 | 190 | 156 |
| | 250 | 250 | 65 | 317 | 255 |
| 1 sq. m of masonry in two and a half bricks (masonry thickness 640 mm) | 250 | 250 | 88 | 235 | 195 |
Prices for construction and facing bricks
Construction and facing bricks
Making a veranda roof
And the rafters are installed. All that remains is to make the sheathing, install the insulating layers and lay the finishing roofing material.
The lathing can be solid (for rolled materials) and sparse (for sheet roofing). We make continuous sheathing from OSB boards. To do this, we attach them to the rafters with a 1-centimeter gap. We fasten the sparse sheathing beams at a pitch recommended by the manufacturer of the selected roofing material. On average, it is 30-35 cm. To attach the sheathing to the rafters, we use galvanized nails or self-tapping screws.
We fill the cells between the sheathing beams with mineral wool for thermal insulation. We lay a waterproofing film on top and attach it to the sheathing using a stapler with staples. In the case of arranging a continuous sheathing, we fix the thermal insulation from the inside of the room. We secure the insulation boards using transverse slats, nailing them to the sheathing.
Finally, all that remains is to mount. It is better that it matches the roof covering of the main house. For the rest, we focus on our preferences and available budget.
Finishing the floor
If the subfloor is wooden, we lay insulation in the space between them and fill the flooring from edged boards to the joists. We paint and varnish the boards.
You can also install a boardwalk on top of the concrete screed, similar to the previous method, or lay another material of your choice, for example, linoleum.
Finally, all that remains is the doors, furnishing at your discretion and connecting lighting if necessary. We won't pull the wiring. It is enough to remove the extension cord from the house and turn on the necessary lighting fixtures.
Good luck!
Video - DIY veranda
But the firm decision to attach it came only now; this article will allow you to become familiar with some of the nuances that need to be taken into account.
How to build a veranda with your own hands and from what material? What types of verandas are there? How to attach a veranda to the house, what options are there and is it even possible?
Construction of a veranda to the house with your own hands: types of projects, photos of the best works
If the construction of a residential building is only at the design stage, the best option would be to immediately develop a house with a veranda. In such a situation, this structure will be located on the same foundation as the house, have similar walls and possibly a common roof.
With this solution, an open veranda attached to the house can provide an individual style to each home, regardless of its style and shape.
If the house has already been built, there is no reason to be upset, since the veranda can be completed at any time without any damage to the structure of the main building. 
How can you attach a veranda to a residential building?
As in any other construction, the first steps should be to develop the design of the veranda for the house to build with your own hands (consider options for verandas). The presence of numerous photos on the Internet is direct confirmation that when creating projects it is necessary to calculate everything down to the smallest detail.
Due to the fact that the veranda itself is a kind of insulation for a residential building, if possible it is necessary to build it on the north side. But do not forget about one nuance: if the extension in the future will be intended as a recreation room, summer kitchen or sports room, it is better to build it in such a way that the windows have access to the garden, and not to the neighboring plot.
In a situation where the veranda is located at the entrance to the house, it is accordingly impossible to make a rest room out of it, since it initially already looks like a spacious summer hall. 
At the initial stage of designing a veranda for a house with your own hands, it is necessary to take into account such nuances as:

If the glazing of the veranda and terrace itself takes up a large area, it is imperative to design a ventilation system that will cope with preventing the greenhouse effect in the summer. It is quite possible to recreate windows with the ability to open them - in this case it will already have an open type. 
To create a comfortable temperature regime on a double-glazed veranda, the walls of the structure must be built from dense material, and the joints themselves must not have gaps or cracks.
Important to remember! In order for the extension to look like a single structure with the house, it is necessary to use in construction the same materials from which the walls of the main building are made. 
The walls of the summer veranda themselves must be independent of the house itself. For this reason, they must be built on a separate foundation. In most cases, the roof should include at least 1 small slope. At the same time, the floor is erected with a slight slope of 2 centimeters. 
The attached photos of verandas can be perfect as an example of building options.
If we talk about how much it costs, there cannot be specific figures here for one simple reason - the price depends on how much area will be used (this applies to verandas of any type and type).
A veranda attached to a brick building. Photos of excellent work
Answering the question of how to attach a veranda to a brick house, we can immediately say that many experts recommend using the same building materials from which the main building was built. But we hasten to console you, it is not necessary to adhere to these tips (the photo is proof of this) when it is necessary to attach a veranda to a brick house. 
Many of our compatriots use a wide variety of other materials (for example, wood) for verandas.
The main point here is to use exclusively those materials that can be combined with brick.

Of course, any type of brick (red, white, one-and-a-half, etc.) is perfect, but it is also possible to use wood.
At the same time, the most popular is still considered to be the addition of a veranda and terrace to the house made of brick, natural decorative stone, timber, boards using a metal frame.
If you want to use red brick, then you need to remember that it is considered fireproof, and therefore has all the necessary qualities for use in closed designs. The extension itself can be made to a façade wall with a size of 3 meters or more, and a width of up to 6 meters. 
In the process of constructing a summer extension, the best option would be to use half-brick masonry; in the case of a winter structure, thick walls would be used. 
In any of the options, it is necessary to waterproof the walls and the foundation itself. It must be remembered that the new building should not be rigidly tied to the main building, and therefore the seam is sealed with polyurethane foam.
In turn, roofing work for closed verandas involves laying thermal insulation, which must be installed under the roof.
Veranda to a wooden house. Photos of extension options
Here, the best option would be to add a veranda to a wooden house made of a similar material. Using another material will not be advisable, since the appearance will not be very attractive. 
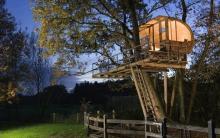
The extension to the country house itself can be done in the so-called mountain style. This style has the appearance of a massive frame that is fenced on all sides with small logs. 
When building an extension overlooking the garden, it is perfect for those who love a quiet holiday.
If logs do not suit someone, you can use forged metal figures in combination with green spaces.
You can look at the selected photos as samples.
To build a veranda on your own, you need to use your choice of a metal or timber frame in parallel with huge windows all the way to the floor.
As a material for the floor, you can use tiles, stone or cedar boards. To create a warm veranda floor, linoleum, laminate and similar materials are better suited. 
At the same time, do not forget that to create a zest in a wooden veranda, it is best to complement it with a fireplace, which is lined with decorative stone. After all, just imagine, it’s winter, it’s cold outside, and you’re sitting by the fireplace on the veranda and enjoying an excellent view. 
Closed verandas. Photo
Structures of this type are in most cases placed on the side of a residential building, which is inaccessible to prying eyes. But at the same time, it is necessary to remember that it is imperative to make sure that the maximum amount of sunlight passes through it. 
If this veranda will be used in winter, it is recommended to use thermal insulation -
From the photo you can see that most of these designs involve a variety of glazing options. 
Today, verandas that are made using polycarbonate are popular. Thanks to this material, you can build structures of any shape and implement a wide variety of design ideas.
Reminder! When constructing a structure made of polycarbonate (directly from sheets), the best option would be to leave small gaps to ensure its free expansion in the future.


Open verandas. Excellent selection of photos
The best option for an open-type structure is to use canopies. This construction option will allow its owner to be inside even in the summer heat or in the rain. 
To give maximum comfort, it is recommended to plant greenery around the perimeter. 
- possibility of creating a veranda with barbecue;
- spending an unlimited amount of time in clean air;
- the ability to equip with various furniture if desired by the owners;
- it is possible to use sun loungers, deck chairs, etc.;
- You can create any veranda that its potential owner can imagine.

Today, there are many ready-made projects that allow you to create such a structure with your own hands (the presented photos are an example of this). These verandas involve the arrangement of the floor at a slight slope. This is important to ensure the drainage of possible water after bad weather.
In this case, the floor should be at a level of about 20 centimeters from the ground. For this you can use brick, metal and so on.

If we talk about the form itself, it can be absolutely anything.
Every resident of our country who has a great desire to create the veranda of their dreams is recommended to look, in our opinion, at a good manual that can show the work from the inside, how it is actually carried out:
At the same time, citizens who still want to build not a veranda, but a terrace themselves, are recommended to watch an entertaining video on this topic:
Terrace and veranda - what is the difference?
Many people do not know the difference between a terrace and a veranda; photos and the arguments themselves will help you understand this in detail.
The veranda and terrace itself can be attached to the main residential building. However, there are still some differences.
In particular, we are talking about such differences as:
- the veranda design may have glazing, while the terrace looks like a regular open area;
- the veranda must necessarily include a roof in its design, and the terrace is recreated with this element;
- the veranda must be attached to the main residential building, the terrace in most cases is built separately and, as a rule, on a small hill;
- a veranda, especially a closed one, must have thermal insulation; the terrace, in turn, does not include these components.
In simple terms, the veranda includes some kind of railing and roof. If these elements are missing, such a structure can only be called a terrace.
Video “how to” or still “how not to”?
A very controversial video that gives an example of creating a terrace attached to a house, combining a lot of styles, textures, and surfaces. Is this a good option or not? The audience expressed extremely contradictory opinions, from unconditional delight to sincere horror. It’s all the more interesting to form your own opinion.
We will send the material to you by e-mail
Increases the comfort of living while simultaneously increasing the working area of the cottage; a veranda to the house with your own hands, projects, photos of which presented in this article, will help you choose a classic or exclusive option for any construction budget.
Veranda attached to the house
Types of verandas, features of extensions to different houses
Professional builders with specialized education are able to distinguish a veranda from terraces, loggias, bay windows, and other structural solutions of a building without any problems. For an individual developer who does not have such an education, the classification and design of these buildings are more relevant.
It is included in the housing project at the initial stage or a veranda is later added to the house with your own hands. Projects and photos of the best implementations of architectural and structural solutions are given below. This building differs from the terrace by the presence of a foundation, and from the gazebo by the common wall with the main building. In principle, any loggia on the first floor can be called a veranda.
Helpful information! Unlike other outbuildings, the veranda must be legalized by the relevant authorities and included in the project. Otherwise, the owner will not be able to donate/sell the property whose layout has been changed.
Classification of verandas
The owner of a country property is interested in a do-it-yourself veranda for a house, from the project to a photo of the finished extension of the completed project. Therefore, you should familiarize yourself with the classification of extensions according to their main characteristics. There are verandas of the following types:
- connection with the main dwelling - on a single or separate foundation, under a common or private roof;

- Lighting:
Panoramic or window blocks in combination with artificial light. In verandas, translucent door panels are often used, which enhance the aesthetics of the perception of facades.
- Sealing of wall junctions:
Similar to the foundations, the walls of the extension are not attached to the cottage; the technological seam is filled, treated with sealant, and decorated with facade and internal cladding.

Review of interesting extensions, diagrams, plans, pros, cons
If you are planning a veranda for your house with your own hands, the projects of implemented solutions will help you decide on the choice of layout, interior design, and exterior facades. The most popular extensions are the following types.
Attaching a warm veranda to the house will be more difficult, unlike the summer version. But a warm veranda can also be used as a living space and in this case it is more practical.
Today we will look at how to attach a warm veranda to your house, what materials can be used, and you will be able to make the right choice. The video in this article will also help you make a smart choice.
The veranda, in fact, is an integral part of a residential building, and therefore its style must correspond to the main style. But this does not mean at all that you cannot attach a brick veranda to a wooden house and vice versa (see). The main thing is that the final result is correct.
If the veranda is covered with the same roofing material as the main housing, then we can safely say that the style of construction has been preserved. Likewise, building it yourself will make the structure cheaper, and the price here is also important and can be quite high.
Planning and legalization of the project
It is so designed that the veranda is always built in the area of the main entrance to the house, and this is absolutely logical: what is the point, and why build it in another place. The purpose of the veranda is to protect the main entrance from precipitation and wind. It looks like you can relax in it, especially in the summer, when the heat outside subsides and all nature begins to revive.
So:
- What size the future veranda will have depends on the wishes of the owners. As a rule, a family is limited to building no more than the main wall of the house and this is quite enough for the average family. In any case, the size of the veranda should be proportional to the size of the main housing: if the house is small, then why do you need a large veranda, and if the house has two floors, then what is the point of building a one-story veranda.
- Whatever area the future veranda has, construction should be legalized. To do this, you will have to visit a special department that is developing relevant projects. After drawing up the project, you will have to visit the architectural department, where they will make changes to the house design and issue the appropriate building permit.
Attention: To avoid such red tape, it is better to plan the construction of a veranda at the planning stage of building a house. Even if there is not enough money to build it this year, you can safely build it next year. But it will take much less time to obtain permission and to draw a design for the veranda itself.
Marking and pouring the foundation
Once you have documents in hand indicating that construction is permitted, you can begin to prepare the site. To do this, they fence off the area according to the dimensions specified in the project, after which they remove the entire fertile layer of soil to a depth of 15 cm and transport it to the garden.
So:
- As a rule, either a strip or columnar type of foundation is chosen. If the construction of the veranda is carried out after the construction of the house, then you will have to prepare a separate foundation for the veranda.
- If at the stage of building a house, the project also includes the construction of verandas, then you can make one common foundation for the house and for the veranda, then unnecessary problems will not arise.
Attention: A separate foundation is built with a gap to the main one, equal to about 4 cm. When building a foundation for a veranda, you can use the old experience of building a foundation for a house. If you don’t have such experience, then you can hire builders.
Strip foundation
The strip type foundation is ideal for a veranda made of brick or foam blocks.

To obtain such a foundation, it is necessary to perform the following technological operations:
- Dig a trench along the entire perimeter of the future building, according to the specified dimensions.
- Formwork is installed from load-bearing wooden boards.
- Prepare a concrete solution by combining components such as 1 part cement, 3 parts sand and 6 parts crushed stone.
- The first layer of concrete is poured along the entire perimeter of the trench, after which it is reinforced with stones or broken bricks. You should get a layer of concrete about 10 cm thick.
- Such operations will be repeated until the concrete layer is level with the ground level.
- It is advisable to level the last layer with a trowel, after which the foundation is given time to set. This may take from 3 to 4 days.
- In hot weather, it is advisable to moisten the foundation surface with water to prevent it from cracking.
Columnar foundation
The columnar type of foundation can be used if the building is light in weight. These are mainly wooden frame structures with lightweight roofs.

To have such a foundation, you need to carry out the following work:
- Dig the required number of holes. There may be 4 or more of them, depending on the square footage of the building.
- A layer of sand up to 50 mm thick is poured onto the bottom of each pit.
- All holes are filled with concrete mortar at ground level.
- The ground part can be laid with bricks, but before that, waterproofing is laid on the posts. The base of the veranda is aligned with the base of the main building.
Installation of subfloors
A warm veranda should prevent dampness and cold from the ground. Therefore, it is necessary to make a subfloor.
Technological stages:
- The resulting underground space is filled with expanded clay or other material.
- Two layers of roofing material are laid on the foundation for waterproofing.
- Wooden logs treated with an antiseptic are laid on the foundation.
- A subfloor is laid from edged boards, 50 mm thick.
Attention: If the veranda is built of brick, then you can make concrete floors. They are more durable than wooden ones, especially if thermal insulation is provided.
Construction of a wooden veranda frame
Building a wooden veranda is not so difficult if you follow some recommendations:

- The lower frame, consisting of 100x100 mm beams, is laid on the subfloor and nailed. The beams are also fastened at the joints made in half a tree.
- Grooves are cut in the beams of the lower trim for installing vertical posts. The distance between the grooves may vary, but not less than 50 cm.
- Vertical posts are installed in the grooves and securely fixed with nails. Each rack must be aligned using a building level or plumb line.
- The upper trim bars are mounted on top of the racks. They are attached in the same way as the bars of the lower trim.
- A purlin beam is nailed to the wall of the house, intended for fastening the rafters. The purlin beam is attached to the wall of the house using anchor bolts, like all wooden elements adjacent to the house.
- The rafter system is installed and secured.
- All wooden products should be coated with an antiseptic.
Roof structure
Since this is essentially an extension to the main building, the roof will be pitched:
- The design of the rafter system resembles half of a gable roof, while the slope of such a roof will be slightly less. Since the veranda is not a living space, it makes no sense to insulate the ceiling and walls.
- If you plan to equip the veranda as part of the living space, then you will have to carry out all the thermal insulation measures, from floor insulation to roof insulation.
Wall cladding and installation of windows and doors
After the frame is mounted, you can proceed to the next stage, which is sewing up the frame structure.
- Considering the fact that the veranda can be glazed along the entire perimeter, a window sill board is installed wherever windows are installed. In the veranda it is simply necessary, for example, for installing trays of flowers or seedlings.
- After this, you can sew up the openings between the vertical posts with plywood, OSB sheets or planed boards no more than 20 mm thick. This operation is carried out both outside and inside the building.
- After all, you will end up with a room in which only window and door openings remain. Subsequently, they need to install window frames and a door leaf with a frame.
- According to modern technology for installing windows and doors, they are installed, positioned as expected, fixed, and the spaces between the frames are foamed with polyurethane foam. It provides a reliable and tight, and not rigid connection.
Features of building a veranda made of bricks or blocks
A brick veranda can suit any house, wooden or brick. The whole question is what and how such a veranda will be finished. In this case, it will be better if the same technologies are used.
When building this type of veranda, you should use the following tips:
- For such a building, it is better to pour a strip foundation.
- You can do the laying yourself, so the construction is not very responsible. As a last resort, you can hire a craftsman or a team.
- For such a building, half a brick will be enough.
- Subsequently, the veranda can be insulated, both outside and inside, and also lined with appropriate materials.
As a rule, the question is raised about whether it is worth insulating the veranda? It’s worth it if you want to make the veranda warm, but if you don’t have such a desire and the funds don’t allow it, then it’s not necessary. A warm veranda will cost much more than a cold one, especially since hardly anyone will live in it, although this option should not be discarded.
Floor insulation
Thermal insulation of the veranda from the floor is extremely important. After all, this is a rather large plane. As mentioned above, before you start insulating the floor in the veranda, you need to think carefully about whether it is worth spending additional money. The fact is that a warm or cold veranda is unlikely to affect the microclimate in the residential building as a whole.
- But if you plan to give the veranda to children so that they can organize a playroom there, or if there is a lack of living space, then it makes sense to install heating in such a veranda, which means that serious insulation measures will have to be carried out in the veranda, and you should start from the floor.
- In this case, the floor can contain at least three layers: a subfloor, a layer of insulation and a finished floor, and a facing layer consisting of laminate, linoleum, carpet, etc. is mounted on top of the finished floor.
How to insulate walls
The question of how and with what the veranda will be insulated from the inside must be resolved at the design stage, so as not to later break what has already been built. In this case, it all depends on what the veranda is built from: if the veranda is wooden, then one approach, and if it is brick or block, then a completely different one.
- If, then before sewing up the gaps between the vertical beams, a layer of insulation is laid between these same beams, with a thickness equal to the thickness of the beams. In this case, beams with a cross section of 100x100 mm were used. After covering the walls of the veranda, you get something like a sandwich: a wooden board or plywood, a layer of insulation and again a wooden board and plywood.
- If the veranda is brick or block, then a layer of insulation should be laid between the brick wall and the cladding layer, both from the inside and outside of the veranda.
- From the inside, such a veranda can be finished in several ways, using frame structures such as plasterboard, plastic lining or MDF lining.
- Frame structures make it possible to place the required layer of insulation between the brick wall and the facing material.
- As a material for insulation, you can use mineral wool or polystyrene foam boards, cut to the appropriate dimensions of the lathing cells.
Ceiling insulation on the veranda
If the veranda is warm, then special measures should be taken to insulate the ceiling:
- The hydrobarrier is installed first, then the surface is covered with beams with a cross-section of 27x27 mm. The beams are nailed at intervals of 0.8 meters. The seams obtained when laying the hydrobarrier are glued with metal tape.
- The gaps between the beams are filled with foam sheets. They are fixed in relation to the surface using self-tapping screws with a wide head. “Ecofol” is laid on top of the penoplex sheets and fixed with a stapler. Subsequently, this “pie” is pressed with a blockhouse, plywood or OSB sheets.
How to insulate a summer veranda
If the veranda is an extension to the house and it is decided to insulate it, then there is a high probability that it will have to be disassembled and then reassembled, but after carrying out comprehensive insulation measures. In any case, work should begin with the floor, namely with its disassembly.
- After this, the underground space will need to be filled with expanded clay, and then covered with a subfloor. The insulation layer in the veranda can reach 100 mm, after which the finished floor is laid. When laying insulation, it is advisable to ensure that the insulation is laid as tightly as possible.
- The ceiling is insulated with the same “pie”: a waterproofing barrier is laid on the rafters, a layer of insulation is attached, a vapor barrier is mounted, and decorative material is sewn on.
- Using this same technology, the walls of the veranda are also insulated. If the veranda was cold, then it is likely that the walls were covered with wooden shelving on only one side. The task is to add an insulating layer in the gaps between the wooden beams and sew it on one more side.
- If necessary, you will have to replace all wooden frames with glass with plastic windows with single glazing, otherwise the insulation effect will not work. This can also be said about entrance doors, which must have insulation.
Attention: If you approach the problem of insulation comprehensively, you can achieve the maximum effect.
Features of insulation from the outside
To get truly energy-efficient housing, it is necessary to insulate the veranda and the outside:
- As mentioned above, the veranda can be brick, block and wood. Each of these structures requires its own approach to installing insulation.
- A veranda made of bricks or blocks can be insulated in two widely used ways: by installing a ventilated facade or by lining it with foam plastic or polystyrene foam boards, followed by cladding with decorative plaster. Both methods are simple and therefore very popular.
- The ventilated facade is mounted as follows: lathing is installed on the walls of the veranda, in increments of about 40 cm. The lathing can be either horizontal or vertical. It all depends on the facing material used.
- If you plan to install siding, then the sheathing will be vertical; if it is plastic lining, then it will be either vertical or horizontal. The fact is that plastic lining can be mounted both vertically and horizontally.
- Any of the suitable insulation materials are installed in the spaces between the sheathing. This can be mineral wool or polystyrene foam boards. They should be well secured to the base.
- There must be a ventilated space between the insulation layer and the cladding. It will allow excess moisture to evaporate, which means that this border will always be dry.
- In conclusion, it should be recalled that work must be carried out only with working tools and in the presence of protective equipment, such as glasses, gloves, special shoes and a hat, not counting work clothes. Particular attention should be paid to working with power tools, without which no construction site can be completed. It is especially necessary to monitor the serviceability of plugs, sockets, and connecting cables.
Now you can imagine how to build a warm veranda for your home. First of all, you need to choose the right material. The interior of a warm veranda can be selected after construction from a photo. The main thing is to correctly determine the dimensions and components, and the instructions will help you in this matter.
A spacious and cozy veranda, or, as it is fashionable to say today, a terrace, is a great place for both secluded relaxation and fun, stormy parties with friends in the warm season. A well-designed veranda with an original design can immediately become a real decoration of the facade of any private home. Of course, it is best to include the construction of a veranda in the main house construction project. But don’t be upset if you didn’t do this prudently, because this type of room can be added at any time.
In this article we will tell you how to attach a veranda to your house with your own hands, consider options for a polycarbonate veranda, as well as an open veranda, and provide photo and video instructions.
Location
As a rule, a veranda is placed in front of the main facade, but it is not forbidden to place it in front of the side facade, if necessary. It is important that the veranda is clearly visible from the gate (the main entrance to the courtyard) and has a passage to the rooms of the house.
The determining role in calculating the length of the veranda is played by the length of the facade of the house along which it will be built. With the width, everything is much simpler; it is usually about two and a half meters.
Before starting construction, do not forget to prepare the workplace, i.e. clean the area, dismantle the porch and canopy over the entrance.
Foundation

For a frame or wooden veranda, a columnar foundation is well suited, i.e. foundation with the installation of brick masonry pillars under the corner posts.
For a lightweight, small-sized veranda, posts placed in the corners will be sufficient, but for a larger extension, intermediate posts with additional posts (50cm increments) should be installed.
Sequence of work on building the foundation:
- First, holes are dug at least one meter deep.
- The bottom of each of the pits is filled in layers: first, 20 cm of sand is poured, and then 10 cm of gravel.
- The concrete base is poured (approximately 15 cm) and some time is given for the concrete to set.
- Brick pillars are laid out. Their above-ground part is brought to the height of the main foundation or slightly lower. The height of the brick foundation pillars is usually made 30 cm below the finished floor level.
- Each finished post should be coated with hot bitumen.
- The cavities of the pillars are filled with brick fragments or fine gravel.
- The gaps between the pillars and the ground are filled with sand.
Frame

The frame of the veranda is usually made of wooden beams, the cross-sectional size of which is 120x80 or 100x200. For the same purposes, logs (diameter ≤ 12 cm) are sometimes used.
They usually begin to build a wooden frame from the bottom frame (preferably double). Connections between beams should be made using a direct lock. At the level of the second log, logs and vertical posts with spikes (50x50) are cut into the frame. The entire structure is fastened with nails, and for greater reliability, staples are used.
The most correct distance between the supporting posts is considered to be 50 cm, but, as practice shows, this value can be greater.
The roof truss system and the top trim are installed on racks. The racks can be either solid wooden beams or two boards connected (section 120x40) with a spacer between them. To fasten the rafters, use a horizontal beam passing under the slope of the roof of the house. The beam and racks should be fastened with anchor bolts. During the installation of the veranda frame, make sure that the veranda roof being erected fits well with the roof of the house.
Roof

Undoubtedly, the roof of the veranda should be a continuation of the roof of the house. It is recommended that it be made from the same roofing material, but other types can also be used. The roofing material is attached to the wooden sheathing. The sheathing is installed either at intervals or closely (depending on the type of roof).
- The boards are fastened closely when using rolled material. When attaching the flooring to the rafters, the nail heads should be recessed into the wooden surface (they should under no circumstances protrude). The rolled material is secured at the edges with nails, and for additional fixation, slats are nailed to the coating. The protruding edges of the roll should be folded inward and secured with nails.
- If steel roofing material is used for the roof, it is attached to the sheathing with nails and joined with a “seam” seam.
- Asbestos cement sheets are installed with an overlap. In this case, the top sheets overlap the bottom sheets by at least 14 cm. They are fastened into pre-drilled holes with nails or screws.
Floors and walls

Usually the floor is made of wood, using wooden boards as the material, pre-coated with an antiseptic.
The veranda can be left open, or you can erect walls, constructing them from wooden panels or clapboards. In the second option, do not forget to take care of the windows.
You should not over-insulate the walls of the veranda, because it is considered a summer recreation room.

After the floor, frame and roof of the veranda have been made, you can begin sheathing the structure with polycarbonate. So, you will have a bright and light veranda where you can have fun during the warm season.
Polycarbonate is a translucent material made from polyesters of carbonic acid. It is produced in the form of cellular or monolithic panels. Cellular polycarbonate has cavities between the stiffening ribs that connect two sheets to each other. They often replace glass when arranging verandas. This is due to a number of positive properties of the material.

Although polycarbonate appeared on the construction market not so long ago, it is very popular among consumers. Why? The reason for this is the unique properties of the material, which has no analogues on the market today:
- High strength. These figures for polycarbonate are 20 times higher than for glass. If polycarbonate is damaged, it will not crumble into small fragments like glass, but will break into fragments that do not have sharp corners. Thus, the risk of injury from polycarbonate is minimal.
- High light transmittance – reaches 86%. Due to the fact that part of the light is scattered, polycarbonate creates protection from direct sunlight. Partially absorbs ultraviolet radiation.
- Polymer panels are flexible, making it possible to design curved shapes. Polycarbonate can be bent without special equipment, right at the installation site.
- The temperature range is from –40 to +120ºС. And this means that polycarbonate is not afraid of either the scorching sun or severe frosts.

If you don't have much experience in construction, then don't worry. You can master and implement this technology. Initially, you should make a foundation and secure the frame elements in it. After the concrete has completely hardened, you can begin making the frame. How to make a foundation and frame from wood has already been described in the article.
In this case, a thin-walled galvanized sigma profile will be used to make a metal frame. Features of frame installation:
- There is no need for welding work, since all connections will be made using bolts. To do this you will need an adjustable wrench.
- The main fastening of beams is anchors laid in the base of the foundation. If they have not been installed, you will have to drill holes in the foundation and drive check bolts into them, and then secure the beams.
- Sigma profiles are fastened with standard shaped products.
If you made the frame from rolled steel, then it needs to be treated with a primer and then painted with metal paint. This way you will protect the frame from corrosion.

Now you need to cut the polycarbonate to fit it to the required size. This can be done with an electric jigsaw. It is important to take into account that the sheets must be pressed tightly to the surface.
If you cut polycarbonate too quickly with a jigsaw, it will begin to melt, and if this work is done too slowly, the material will burst.
To create a temperature play during the assembly of polycarbonate sheets, it is necessary to ensure that the screws are not clamped all the way. In addition, when installing polycarbonate, gaskets must be placed under the washers. This will protect the material from damage and leaks. The holes in the polycarbonate should be slightly larger than the diameter of the legs of the screws. So, with temperature changes, polycarbonate will contract and expand without deforming.

The roof is installed according to the scheme already described in this article. If you wish, you can also make it from polycarbonate. In this case, your building will be very light. Polycarbonate is laid on the roof according to the same principle as on the walls.

An open veranda is a frame building without walls, and the roof is mounted on beams. This design has a number of advantages and disadvantages.

Among the undeniable advantages of an open veranda, it is worth noting the following:
- Easy to install. Its construction requires a minimum of materials and time. It is not difficult to erect it.
- Easy care. Such a veranda is more of a part of the street than of a house. Therefore, to keep it clean, it is enough to sweep the floor regularly.
- An open veranda will allow you to enjoy the view and breathe clean air while on it.

Like all man-made works, open-type construction also has disadvantages:
- Not suitable for use in the cold season.
- It is impossible to install upholstered furniture on an open veranda, since it will be impossible to care for it, and, therefore, staying here will be deprived of a certain home comfort.
- Difficulties may arise with the choice of finishing materials, as they will be subject to negative environmental influences.
The open veranda is not glazed and no walls are erected on it. It is often used as a gazebo. It is built using a frame method.

For construction you will need:
- Concrete pillars for the foundation.
- Beam for the frame with a section of 150×150 mm.
- Cement and sand.
- Beam for strengthening the frame with a section of 120 × 120 mm.
- Bracket for connecting timber.
- Lathing for the lower part of the veranda. This can be OSB, forging or slats in the form of slabs or balusters.
- Wood screws 100 mm and 25 mm for fastening OSB or wooden lining.
- Wooden lining.
- Beams for roof installation 150×150 mm.
- Anchors 150–200 mm.
- Krokva 60×120 mm.
- Roofing material, for example, metal tiles or ondulin.
- Boards for making roof sheathing.
- Logs 100×100 mm.
- Wind board.
- Floor board 30–40 mm.
- Paint and varnish products for wood processing.
- Rolled waterproofing for foundations.
- Drill and saw.
- Level.
You have already become familiar with the method of making a foundation, so we will skip this point in our description of the construction of an open-type building. Let’s immediately move on to the features of flooring.

To carry out high-quality installation of the floor, you must first prepare the base. To do this, first of all, the earth is leveled and compacted. Adjustable supports can serve as supports for the joists. Moreover, their number will directly depend on the planned loads on the floor. This idea is great for open verandas.
Then install the joists on the adjustable supports and fasten them. Thanks to these supports, you can adjust the slope of the floor and level it. Installation of boards begins from the edge of the veranda parallel to the joists. The boards must be level and dry. They should be placed closely. The boards are fastened to the joists using nails or wood screws.
Wooden floors are short-lived because they cannot withstand prolonged exposure to an aggressive external environment. If you want to make a more durable floor on the veranda, then you can replace the boards with decking or, as it is also called, deck board.
The structure of the frame and roof does not differ from the technology described in this article.

In order for the wooden elements of an open veranda to last longer, they should be impregnated with special antiseptics and covered with paints and varnishes. Among other things, these actions will highlight the structure of the tree and help make the extension more attractive.
The lower part of the veranda also needs finishing. To do this, you can use slats that are fixed at an angle of 45º, forged elements or balusters. If you use a wooden or plastic lining for this, then you will need to make a frame of beams under it.
To finish the ceiling and pediment you need to use the same material. This can be wooden lining or OSB boards. At this stage, it is important to run electrical cables for lighting the veranda and make corresponding holes in the ceiling lining.
Veranda in high-tech style


Electronic homemade products for radio amateurs and novice electricians
Making a kite from paper: drawings with dimensions How to make a kite diagram
DIY double bed made of wood
DIY wooden bed
How to choose a charger for a screwdriver and can you make it yourself?